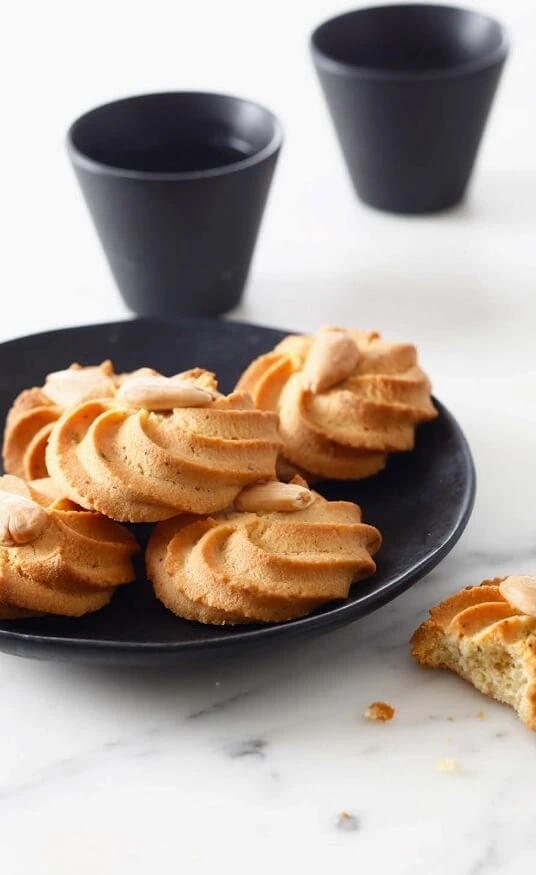
Delicately golden, finely textured, and elegantly shaped, piped shortbread cookies are a timeless treat that blend artisanal beauty with classic indulgence. Their graceful ridges—formed using a fluted piping tip—are not just visually appealing but also a testament to refined pastry technique. These elegant little biscuits embody both precision and poetry in every swirl.
Crumbly yet tender, rich yet light, they melt in the mouth with a subtle buttery finish that lingers just long enough to delight the senses. Often enhanced with a touch of chocolate drizzle or a jewel-like center of jam, they never lose their understated sophistication. Behind their simple charm lies a carefully executed method where texture, piping consistency, and baking finesse come together to create a biscuit that’s as satisfying to look at as it is to eat.
Perfect for afternoon tea, holiday platters, or simply as a homemade gift, piped shortbread cookies offer a moment of calm luxury—a pause filled with sweetness and tradition. Every bite is an invitation to slow down, savor the moment, and celebrate the art of fine baking.
Piped Shortbread Cookies (Sablés Pochés)
Delicate, buttery, and artfully piped—these classic French cookies are a study in finesse.
Yield
Makes approximately 15 cookies
Preparation Time
30 minutes (excluding resting time)
Resting Time
2 to 3 hours in the refrigerator
Baking Time
10 minutes in a preheated oven
Storage
Keeps for up to 2 weeks in an airtight container, stored in a cool, dry place.
Required Equipment
- Fine-mesh sieve (for aerating dry ingredients)
- Piping bag fitted with a fluted/star tip (18 mm diameter recommended)
- Silicone baking mat (or parchment paper)
- Mixing bowls, rubber spatula, zester, and optionally, a stand mixer or hand mixer
Ingredients
- 125 g unsalted butter, softened to pommade consistency (smooth and spreadable, but not melted)
- 100 g icing sugar, sifted
- 50 g whole egg (approximately one medium egg, beaten and weighed)
- ½ vanilla bean, seeds scraped (or substitute with quality vanilla paste)
- Zest of ½ lime (finely grated, untreated fruit preferred)
- 250 g all-purpose flour, sifted
- 5 g baking powder, sifted with the flour
- 15 whole blanched almonds, to top each cookie before baking
Step-by-Step Instructions
1. Prepare the Butter Mixture
In a large bowl (or the bowl of a stand mixer fitted with the paddle attachment), work the softened butter until smooth and creamy. It should resemble a pomade texture—supple, but not oily or melted.
Add the sifted icing sugar and beat gently until the mixture becomes pale and fluffy. Take care not to incorporate too much air if using a stand mixer; a low to medium speed is ideal.
2. Incorporate the Flavors
Add the seeds from half a vanilla pod (or a small amount of vanilla paste), followed by the finely grated zest of half a lime. Mix gently to distribute the aromas evenly throughout the buttercream base. The citrus zest will bring a bright, subtle note to the final cookie.
3. Emulsify with Egg
Gradually add the beaten egg in a thin stream, mixing thoroughly between additions. This step helps create a smooth, cohesive dough. If the mixture begins to separate slightly, continue mixing slowly until it returns to a uniform consistency.
4. Fold in the Dry Ingredients
In a separate bowl, sift together the flour and baking powder. Add the dry mixture to the butter base in several additions, mixing with a spatula or on low speed until just combined. Do not overwork the dough—stop as soon as it comes together. The dough should be soft but not sticky, and able to hold its shape when piped.
5. Rest the Dough
Transfer the dough into a piping bag fitted with an 18 mm fluted/star tip. Pipe the dough directly onto a silicone mat or baking sheet in the desired shape—typically a horseshoe, S-curve, or circle. Make sure the cookies are evenly sized and spaced at least 3 cm apart.
Once piped, place the tray in the refrigerator and let the cookies rest for 2 to 3 hours. This step is essential: it allows the dough to firm up, prevents spreading during baking, and improves flavor and texture.
6. Preheat the Oven
About 15 minutes before baking, preheat your oven to 170°C (340°F), fan off. A conventional oven is best for even browning.
7. Add the Final Touch
Just before baking, gently press one blanched almond into the center of each cookie. The almond adds a subtle crunch and a beautiful visual contrast once baked.
8. Bake to Perfection
Bake the cookies on the middle rack for approximately 10 minutes, or until the edges begin to turn a light golden brown. The goal is a gentle bake—don’t let them darken too much, or you’ll lose the delicate melt-in-the-mouth texture.
Remove from the oven and allow the cookies to cool on the tray for a few minutes before transferring them to a wire rack to cool completely.
Storage Tips
Once completely cooled, store the cookies in an airtight container. They will stay fresh and crisp for up to 2 weeks. For added elegance, you can partially dip them in tempered chocolate or drizzle with glaze just before serving.
In a mixing bowl, work the butter until it reaches a soft, creamy consistency—what the French call pommade. Add the icing sugar and mix until smooth. Incorporate the beaten egg and vanilla, mixing gently until fully combined.
Next, add the lime zest, then sift in the flour and baking powder. Fold everything together just until the dough is smooth—avoid overmixing or aerating the dough.
Transfer the dough into a piping bag fitted with a fluted tip. Pipe small rosettes, about 3 cm in diameter, onto a baking tray lined with a silicone mat. Gently place one whole blanched almond at the center of each rosette.
Allow the cookies to rest and form a light crust (croûter) at room temperature for 2 to 3 hours. This step helps preserve their shape during baking.
Preheat the oven to 220°C (about 430°F, gas mark 7/8). Bake for approximately 10 minutes, or until the edges are lightly golden. Let cool completely before serving or storing.
These piped shortbread cookies are more than just a sweet indulgence—they are a celebration of precision, patience, and the quiet pleasure of handmade baking. From the moment you begin creaming the butter to the final golden turn in the oven, every step is infused with care and craft. The crisp edges, the soft center, the fragrance of citrus and vanilla, and the delicate presence of a single almond on top—each detail speaks of tradition and elegance.
Letting the cookies rest before baking may seem like a simple step, but it’s this pause that allows the dough to settle, the shapes to hold, and the flavors to deepen. It’s a reminder that some of the most rewarding results in baking come not from rushing, but from respecting the process.
Whether you serve them with tea, gift them in a ribbon-tied box, or enjoy them quietly with your morning coffee, these sablés bring a touch of French pâtisserie into the everyday. They are proof that beauty and flavor often lie in the simplest things—so long as they are made with intention.
So go ahead: take the time, savor the ritual, and let these little rosettes become a cherished part of your baking repertoire.
Frequently Asked Questions
Can I skip the resting time before baking?
It’s not recommended. Resting the cookies for 2 to 3 hours helps them form a slight crust, which preserves their piped shape during baking and enhances texture. Skipping this step may result in flatter or misshapen cookies.
My dough is too stiff to pipe. What should I do?
If the dough is difficult to pipe, it may be too cold or overworked. Let it sit at room temperature for 10–15 minutes to soften slightly, and try again. You can also check that your butter was properly softened before mixing.
Can I make the dough in advance?
Yes. You can prepare the dough a day in advance and refrigerate it, already piped onto the tray. Just cover it loosely with plastic wrap and bake the next day.
Is it possible to freeze the cookies?
Yes, both the raw piped dough and the baked cookies freeze well. Freeze the unbaked piped cookies on a tray, then transfer to a container once firm. Bake from frozen, adding 1–2 minutes to the baking time. Baked cookies can be frozen for up to a month.
Can I use other flavors instead of lime and vanilla?
Absolutely! Lemon zest, orange zest, tonka bean, or even a hint of almond extract work beautifully. Just be sure not to overpower the delicate butter base.
What if I don’t have a piping bag or a fluted tip?
For a more rustic version, you can roll the dough into small balls and press them gently with a fork. The texture will differ slightly, but the flavor will remain delicious.