Kouign-Amann: 2 Secret to Perfectly Caramelized Pastry Revealed!

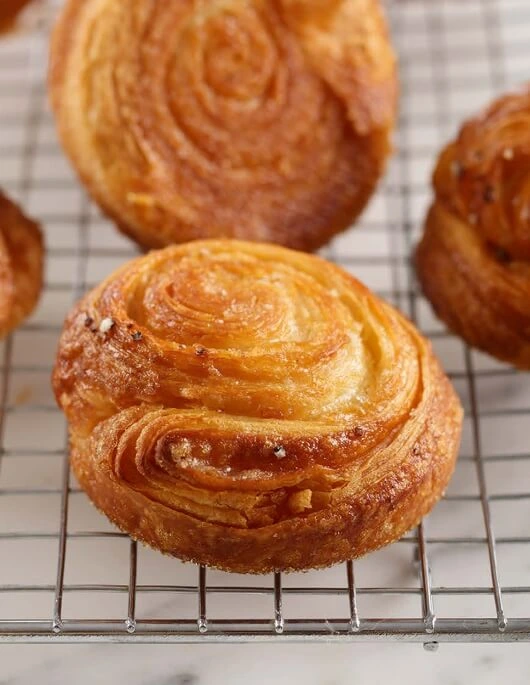
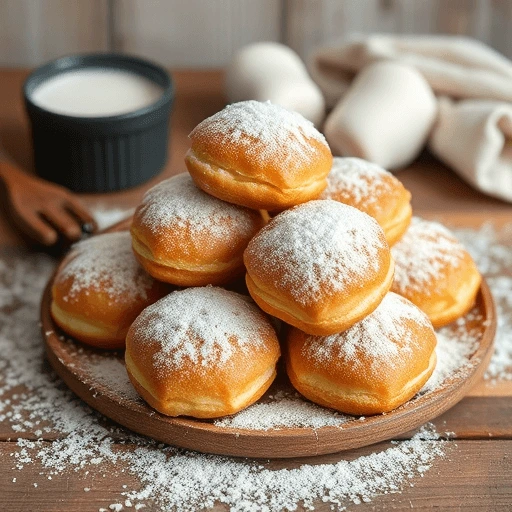
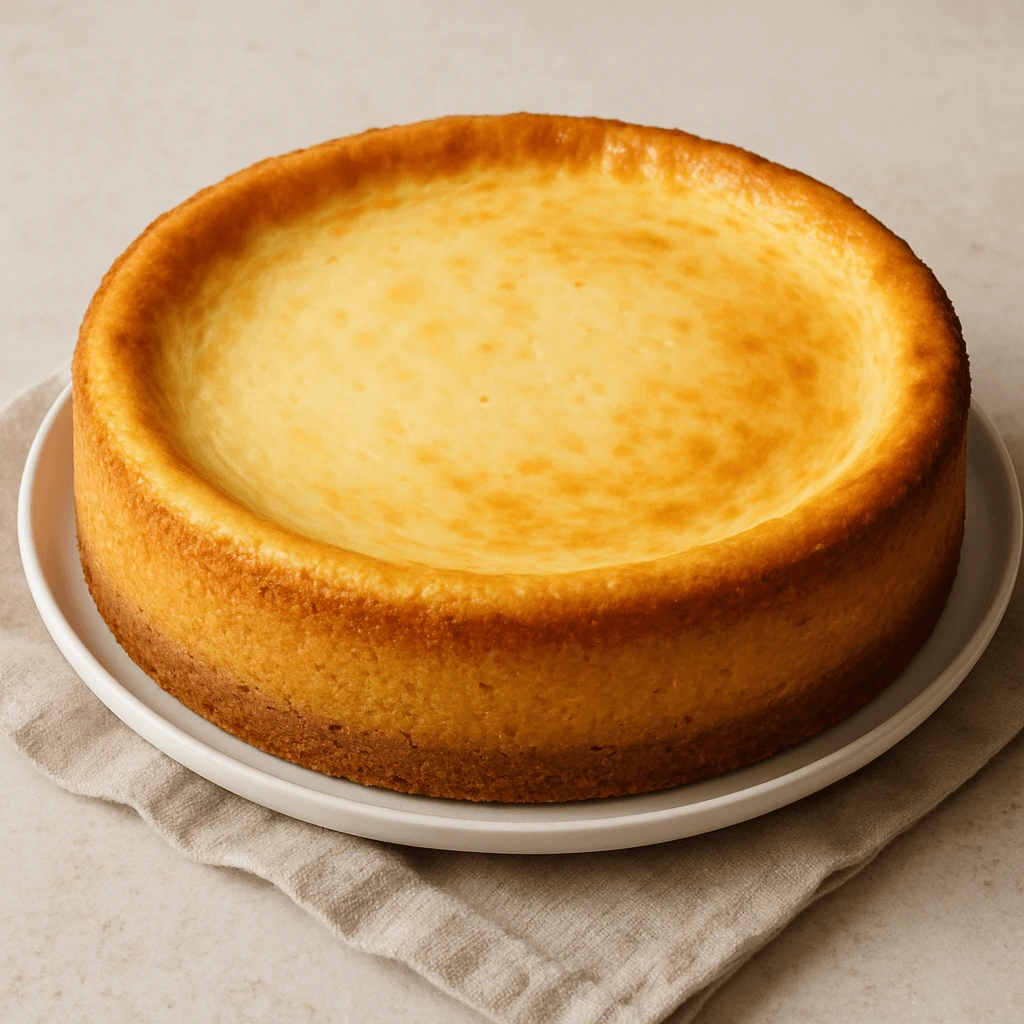
Kouign-Amann breton caramélisé, croustillant à l’extérieur et fondant à l’intérieur

Kouign-Amann is a traditional Breton pastry that has gained international acclaim for its unique combination of buttery richness and satisfying sweetness. Its name, derived from the Breton words “kouign” meaning cake and “amann” meaning butter, gives a hint of what to expect: a pastry that is unapologetically indulgent.

This delightful treat hails from the town of Douarnenez in Brittany, a coastal region in the northwest of France, where it was originally created in the 19th century. The concept behind Kouign-Amann is simple yet brilliant—layering dough with a generous amount of butter and sugar, then folding it into a compact shape before baking it to perfection.

What results is a pastry with a golden, crisp exterior and a tender, almost caramelized interior.

The magic of Kouign-Amann lies in its balance

As it bakes, the butter and sugar melt and caramelize, creating a slightly crunchy, sweet coating while the inside remains soft and layered. The outer layers puff up, almost like a croissant, while the caramelization provides a wonderful contrast to the richness of the butter.

Each bite is an experience, with the crispy outer crust giving way to a sweet, soft interior that melts in your mouth.

Kouign-Amann is a pastry that thrives on simplicity.

While it may seem like a decadent indulgence, its flavor profile is refined, not overwhelming. It is not just sweet, but also has a savory depth from the butter and the slight saltiness of the dough

Many variations of the Kouign-Amann exist, with some incorporating fruit or chocolate, but the traditional version stays true to its roots, allowing the butter and sugar to shine through

Often enjoyed

with a cup of coffee or tea, Kouign-Amann can be served as a breakfast treat, a mid-afternoon snack, or even as a special dessert. Its versatility, however, doesn’t end with its taste; it is also a perfect example of French culinary craftsmanship—an art of creating something deceptively simple, yet deeply satisfying.

Whether you’re lucky enough to enjoy it in the quaint bakeries of Brittany or decide to bake it yourself at home, Kouign-Amann remains a beloved symbol of French pastry tradition, adored for its texture, flavor, and the unmistakable joy it brings with each bite

Preparation Time:

3 hours
This includes the time to prepare the dough, the layering process, and the initial rising.

Pointage (First Rise):

1 hour
Allow the dough to rest and rise at room temperature for about an hour. This helps to activate the yeast and creates a fluffy texture.

Freezing Time:

30 minutes
Place the dough in the freezer for 30 minutes. This step helps solidify the butter layers, which is crucial for achieving the flaky, caramelized texture of the Kouign-Amann.

Refrigeration Time:

30 minutes
Refrigerating the dough allows it to firm up, making it easier to handle during shaping and baking.

Second Rise (Pousse):

1 hour 30 minutes
After shaping the dough into individual Kouign-Amann portions, let them rise again for 1 hour and 30 minutes. This ensures a soft, airy texture inside the pastry once baked.

Baking Time:

12 to 15 minutes
Bake at a high temperature, and keep a close eye on the pastries. They should be golden-brown and slightly crispy on the edges, with a caramelized surface from the butter and sugar.

Storage:

48 hours
Kouign-Amann is best enjoyed fresh, but it can be stored at room temperature for up to 48 hours. To preserve its texture, reheat in the oven for a few minutes before serving.

Ingredients:

  • 250 g of flour
  • 10 g of fresh yeast
  • 190 g of sugar
  • 5 g of salt
  • 20 g of butter
  • 125 g of eggs
  • 150 g of semi-salted butter
  • For the Egg Wash:
    • 50 g of whole egg
    • 50 g of egg yolks
    • 50 g of whole milk
  • For the Finishing:
    • Sufficient quantity of sugar pearls (for sprinkling on top)

Equipment:

  • Stand mixer (robot pâtissier)
  • Rolling pin (rouleau à pâtisserie)
  • Non-stick molds (moules antiadhésifs)
  • Pastry brush (pinceau)

Here’s the detailed step-by-step ,method for preparing Kouign-Amann:

  • Prepare the Dough:
    • In the bowl of a stand mixer fitted with a dough hook, add 250 g of flour, 10 g of fresh yeast, 40 g of sugar, 5 g of salt, 20 g of butter, and 125 g of eggs.
    • Mix on low speed for 10 minutes, then increase to medium speed and knead for an additional 2 minutes.
  • Rest and Cool:
    • Cover the dough with plastic wrap and let it rest for 1 hour at room temperature for the first rise (pointage).
    • Once rested, place the dough flat in the freezer for 30 minutes to chill. This will help the butter layers stay firm for the next steps.
  • Laminate the Dough:
    • After the dough has chilled, add 150 g of semi-salted butter and perform 2 simple folds (turns) to create layers in the dough.
    • Let the dough rest for 30 minutes in the refrigerator.
Tourage de la pâte sur un plan fariné, repliée en trois pour créer des couches feuilletées
L’étape de tourage : on replie la pâte avec du beurre pour obtenir un feuilletage léger et bien structuré.
Add Sugar Layers:
  • After the rest, spread 150 g of sugar evenly on the dough and fold it in once more, ensuring that the sugar is fully incorporated into the dough.
  • Shape the Kouign-Amann:
    • Roll out the dough to 4 mm thickness and cut it into 13 cm x 4 cm strips.
    • Roll each strip into a snail shape (escargot-style) and place them in non-stick molds.
  • Proofing (Pousse):
    • Let the Kouign-Amann rise in a warm area (20°C max) for about 1 hour and 30 minutes. Ensure the temperature does not exceed 20°C, as the butter and sugar will melt otherwise.
  • Egg Wash and Sugar:
    • In the meantime, prepare the egg wash by mixing 50 g of whole egg, 50 g of egg yolks, and 50 g of whole milk.
    • Use a pastry brush to regularly brush the pastries with the egg wash and sprinkle with sugar pearls.
  • Baking:
    • Preheat your oven to 180°C (th. 6).
    • Bake the Kouign-Amann for 12 to 15 minutes, until golden and slightly crispy.
    • Flip the pastries over and continue baking for 2 more minutes for an even golden color on both sides.
  • Cool and Serve:
    • Remove from the molds and transfer to a cooling rack to cool down completely.

Conclusion:

Kouign-Amann is not just a pastry; it’s an experience. The rich history behind this buttery, caramelized delight, combined with the technique and precision required to perfect it, makes it a true testament to the art of pastry making. Originating in the coastal region of Brittany, France, this sweet treat combines the best elements of French baking:

buttery layers, sugar, and an unmistakable crispy texture. While it may seem like a simple concept—dough, butter, sugar—Kouign-Amann requires patience and careful attention to detail to master. The reward is a pastry that is both indulgent and balanced, with every bite revealing layers of flavor and texture..

Making Kouign-Amann at home

can be an intimidating task for some, especially for those who are new to laminated doughs.

However, with patience and the right techniques, anyone can recreate this French classic. The process of layering butter and sugar into the dough, resting it, folding it, and baking it to perfection is a gratifying journey that allows you to appreciate the complexities behind one of the world’s most beloved pastries.

The final result—crispy, golden, and beautifully caramelized on the outside, with a soft, sweet, and buttery interior—is nothing short of a triumph. It is the kind of pastry that will impress anyone who tastes it, whether at a special occasion or as a personal indulgence with a cup of coffee.

Making Kouign-Amann is more than just following a recipe; it’s about understanding the delicate balance between dough and butter, between patience and passion. The results speak for themselves.According to the New York Times, Kouign-Amann is one of the most beloved caramelized pastries in Brittany.http://What Is Kouign-Amann? – The New York Times Cooking.


Q&A:

Q1: How long can I store Kouign-Amann?

  • Kouign-Amann is best eaten fresh to enjoy its crispy texture, but it can be stored for up to 48 hours at room temperature. To maintain its flakiness, reheat it in the oven for a few minutes before serving.

Q2: What should I do if I don’t have semi-salted butter?

  • If you don’t have semi-salted butter, you can use unsalted butter and simply add a pinch of salt to the dough during the mixing process. The salt plays a key role in balancing the sweetness of the sugar, so be sure to compensate for the lack of salt in the butter.

Q3: Can I make Kouign-Amann without a stand mixer?

  • While a stand mixer certainly makes the process easier, especially when kneading the dough and incorporating butter, it is possible to make Kouign-Amann by hand. Just be sure to knead the dough until it’s smooth and elastic and take care during the butter laminating process. The key is in the folding and chilling phases.

Q4: What if my dough doesn’t rise properly?

  • If your dough isn’t rising as expected, make sure that the yeast is fresh and active. If you’re unsure, try proofing it in warm water with a bit of sugar before adding it to your dough. Additionally, ensure the dough is kept in a warm, draft-free spot during the rise. If the environment is too cold, the dough may take longer to rise.
Q5: Can I add fillings or change the flavor?
  • Absolutely! While the traditional Kouign-Amann is a classic, you can experiment with different fillings. Adding fruits like apples or berries, or even chocolate, can give the pastry a twist. Just be careful not to overfill, as it may affect the texture and crispiness of the final product.

Q6: Is it possible to make Kouign-Amann in advance?

  • Yes, you can prepare the dough in advance and store it in the fridge or freezer. If freezing, make sure to thaw the dough completely and allow it to rise properly before shaping and baking. However, the best results come from baking and serving them fresh for the ultimate flaky texture.

Q7: How can I get the perfect caramelization on the top?

  • The key to perfect caramelization is in both the sugar used and the temperature of the oven. Make sure to coat the pastries evenly with sugar pearls before baking. If you want extra caramelization, you can increase the oven temperature slightly for the last few minutes of baking, but be careful not to burn the sugar.

check out our guide to layering butter like a pro:https://briochechic.com/ultimate-waffle-recipe-secrets/

4 Secret Recipe Files: The Golden Walnut Tart Revealed

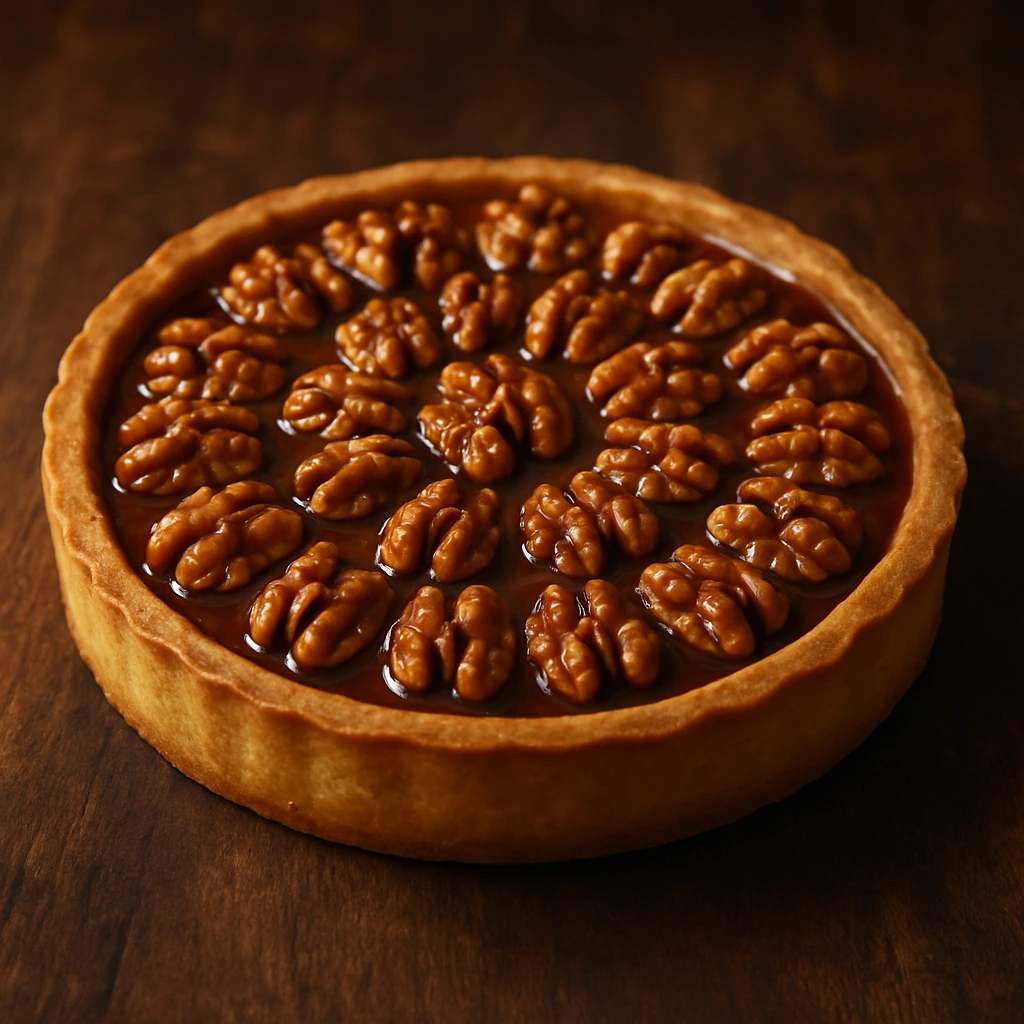
A deliciously rich nut tart with a golden, flaky crust and a glossy, nut-filled filling

Golden Walnut Tart

The tarte aux noix is one of those understated jewels of French pâtisserie—rustic in its origin, yet refined in its final form. Hailing from the storied regions of southwestern France, especially the Périgord, where walnut groves stretch across the countryside, this tart is a true celebration of terroir and time-honored technique. With each slice, it offers a symphony of textures and flavors: the rich, buttery crust cradles a lusciously sweet filling that strikes a delicate balance between deep, nutty intensity and the comforting warmth of caramel or honeyed syrup.

Visually, the tart is both charming and indulgent. Often adorned with an elegant layer of glossy, golden walnuts nestled in a glistening glaze, it catches the light in a way that evokes both the golden tones of autumn and the refinement of a Parisian dessert table. While it may seem modest compared to more flamboyant French pastries, the walnut tart holds its own through sheer character—every bite tells a story of craftsmanship, patience, and respect for high-quality, seasonal produce.

What makes the tarte aux noix particularly unique is its dual identity: it’s just as much at home in a countryside inn as it is in a fine patisserie window. Served warm with a spoonful of crème fraîche or cold with a crisp coffee, it can be a rustic comfort or a sophisticated finish to a formal meal. It’s the kind of dessert that speaks not only to the palate but also to memory—invoking childhood visits to the bakery, long Sunday lunches, and the quiet joy of slicing into something made with care.

Making this tart at home is a joyful pursuit. It rewards attention to detail and invites the baker to work closely with texture and time, whether blind-baking a perfectly crisp crust or gently toasting walnuts to bring out their natural oils. Each step is part of a ritual that connects the baker to generations of French culinary tradition. And once it’s on the table—golden, fragrant, and irresistible—the walnut tart becomes more than a dessert. It becomes an experience, one rooted in history, shaped by the seasons, and meant to be shared.

Walnut Tart – Technical Sheet Golden Walnut Tart

Serves: 6


Timing

  • Active Preparation: 35 minutes
  • Chilling Time: 2 hours
  • Freezing (tart shell): 20 minutes
  • Baking Time: 30 minutes
  • Storage: Keeps for up to 48 hours in the refrigerator

Recommended Equipment

  • Stand mixer with paddle attachment
  • Fine mesh sieve
  • Rolling pin
  • 22 cm (8.6 in) tart ring
  • Perforated baking tray
  • Baking parchment or Silpat mat

Ingredients

Sweet Pastry (Pâte Sucrée)
  • 50 g unsalted butter
  • 50 g icing sugar (confectioners’ sugar)
  • 30 g egg (lightly beaten)
  • 1 g fine sea salt
  • 1 g liquid vanilla extract
  • 125 g all-purpose flour

Walnut Caramel Filling

  • 250 g walnut halves
  • 50 g glucose syrup
  • 250 g granulated sugar
  • 175 g heavy cream (35% fat)

Method

Sweet Pastry

In the bowl of a stand mixer fitted with the paddle attachment, place the butter (cut into small cubes). Add the sifted icing sugar and mix on low speed until the mixture becomes pale and creamy.

In a separate bowl, whisk the salt and vanilla into the room-temperature egg until fully dissolved. Gradually add this mixture to the creamed butter, mixing until smooth and homogeneous.

Sift the flour, then add it to the bowl. Mix just until combined—avoid overworking the dough.

Transfer the dough to your work surface and perform a frasage (a gentle smearing motion using the palm of your hand) to finish bringing the dough together without developing gluten.

Shape into a flat disc, wrap in plastic wrap, and refrigerate for 1 hour.

Once chilled, roll out the dough and line a 22 cm tart ring. Freeze for 20 minutes before baking.

Blind bake in a preheated oven at 180°C (356°F / gas mark 4) for 15 to 20 minutes, or until the crust is lightly golden brown.


Walnut Caramel Filling

Spread the walnut halves evenly over a non-stick baking tray and toast them in the oven at 140–150°C (285–300°F / gas mark 5) for about 10 minutes, until fragrant and lightly colored.

In a saucepan, gently heat the glucose, then add the sugar. Cook without stirring until you achieve a deep amber caramel.

Carefully pour in the warm cream to deglaze the caramel (watch for steam and bubbling), then stir in the toasted walnuts. Mix well to coat the nuts evenly.


Assembly

Once the tart shell has fully cooled, fill it with the warm walnut caramel mixture, smoothing it gently into an even layer.

Refrigerate for at least 1 hour to allow the filling to set before serving.

A golden-brown nut tart with a delicate, buttery crust and a glossy, caramelized nut filling.
Indulge in a slice of this golden nut tart, with its rich, caramelized nut filling and buttery, crisp crust.

Chef’s Tip

For a deeper, more complex flavor, lightly crush a small portion of the toasted walnuts before incorporating them into the caramel. This releases their natural oils and enhances the aromatic richness of the filling. You can also add a pinch of fleur de sel to the finished caramel while it’s still warm—this touch of salt beautifully balances the sweetness and intensifies the nuttiness.

Conclusion

There is something undeniably comforting—and quietly luxurious—about the classic French walnut tart. From its delicate sweet crust to its glossy, golden filling, this dessert speaks of time, care, and a respect for ingredients that have long held their place in French culinary heritage. It’s not a flashy dessert, but that is precisely its strength: it doesn’t need to impress with complexity. Instead, it seduces with balance—between crunch and creaminess, between sweet and savory, between rustic tradition and refined execution.

Baking a tarte aux noix at home is more than just following a recipe; it’s a ritual that invites you to slow down, toast the nuts with intention, watch the sugar darken into caramel, and build a dessert that tells a story. Whether you serve it at the end of a festive dinner, bring it to a gathering of friends, or simply enjoy a slice with your afternoon coffee, it brings with it a touch of French elegance and the quiet joy of handmade things.

So, as you let the caramel set and prepare to slice into that golden tart, know that you’re part of something timeless—a dessert that’s both humble and noble, made to be shared, savored, and remembered.


Q&A – All About Walnut Tart

Q: Can I make the tart shell in advance?
A: Absolutely. The sweet pastry can be prepared and refrigerated up to 48 hours in advance. You can also freeze the lined tart shell before baking to save time on the day of assembly.

Q: What can I use instead of glucose syrup?
A: While glucose gives the caramel extra shine and prevents crystallization, you can substitute it with light corn syrup or a small amount of honey. Just note that the flavor and texture may vary slightly.

Q: How do I prevent my caramel from becoming grainy?
A: Avoid stirring once the sugar begins to melt. If needed, gently swirl the pan. Adding glucose helps prevent crystallization. Also, always pour in the warm cream slowly to avoid shocking the caramel.

Q: Is it necessary to toast the walnuts?
A: Yes, it’s highly recommended. Toasting intensifies the flavor and ensures the nuts stay crunchy in the caramel. Ten minutes in the oven at a moderate temperature is all it takes.

Q: How should I serve this tart?
A: Serve chilled or at room temperature with a spoonful of crème fraîche or a dollop of lightly sweetened whipped cream. For a more decadent option, a scoop of vanilla ice cream makes a beautiful pairing.

Q: Can I freeze the finished tart?
A: It’s not ideal, as caramel can change texture when frozen. If you must, freeze the tart shell and prepare the filling fresh before serving.Traditional French Walnut Tart Inspiration (Saveur)http://Traditional French Walnut Tart Inspiration (Saveur)Link to your Tools of the Trad section (for tart pans, mixing tips)

A Chef’s Secret: The Perfect Brioche Revealed in 10 Minutes

Step-by-step guide to creating the perfect brioche in just 10 minutes, showcasing golden, fluffy results

perfect brioche

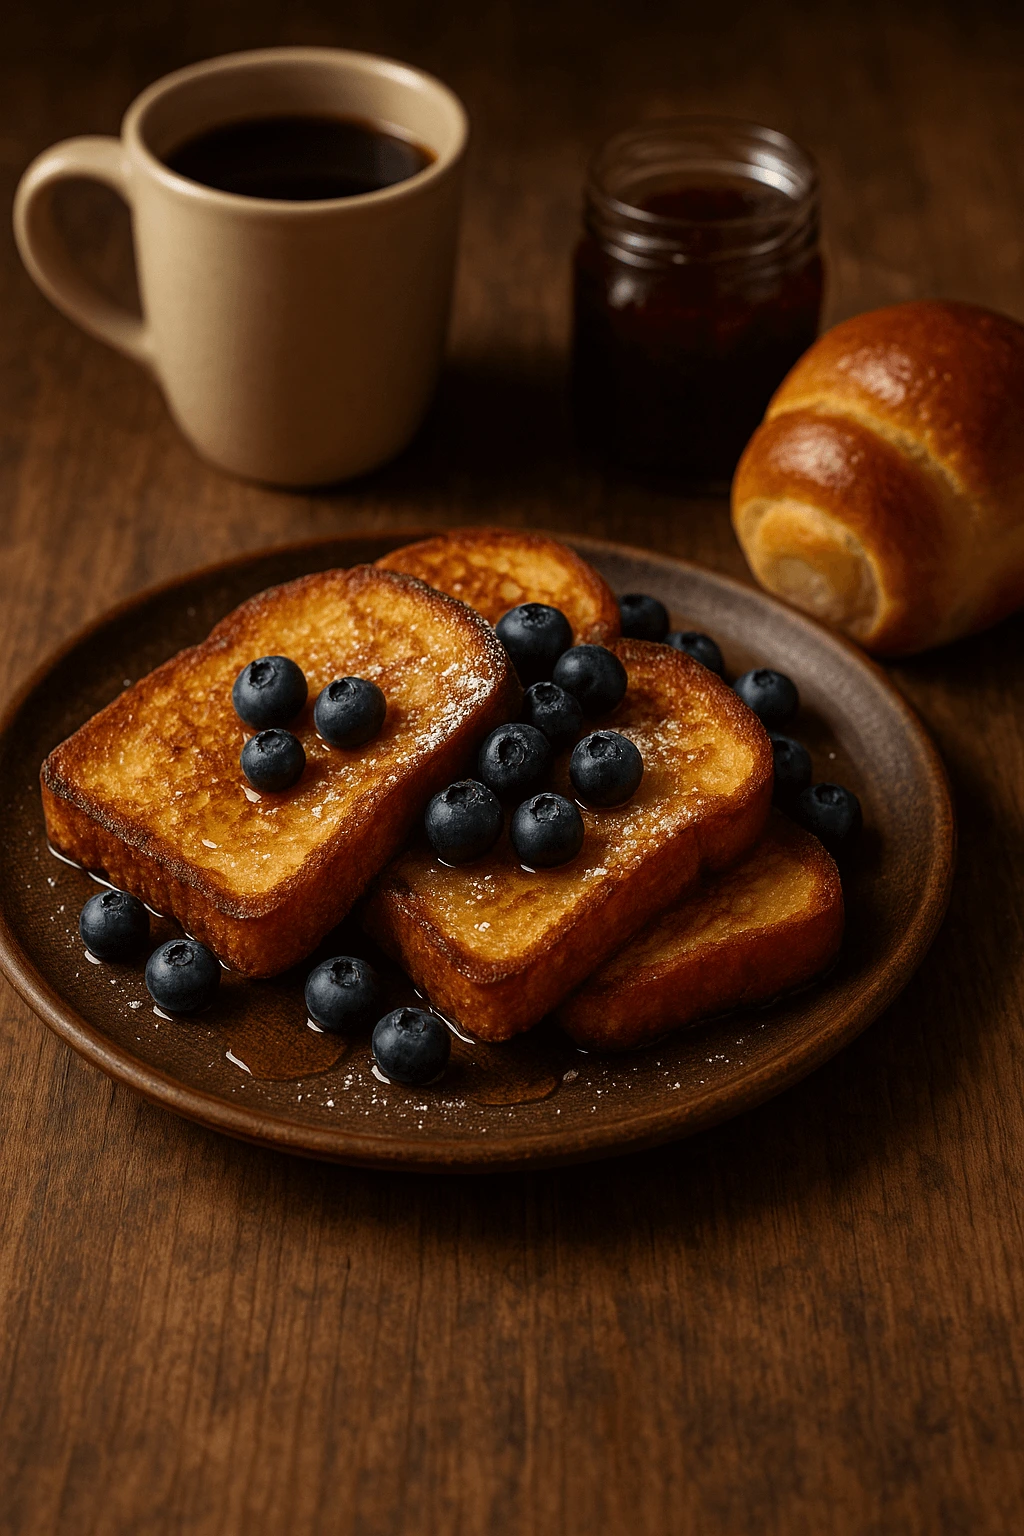
Let it rest Pain perdu, or “French toast” in English, is a beloved and timeless dish that holds a special place in many cultures.

French cooks first created this dish in ancient times to repurpose stale bread, turning leftovers into a smart and resourceful meal

“Pain perdu” means “lost bread.” It refers to saving bread that would have been thrown away and transforming it into something delightful and satisfying.

6 Secrets to Making Perfectly Flaky and Irresistible Raisin Buns at Home
Anchor: learn more about enriched doughs

The preparation of pain perdu

is simple yet versatile, allowing for various adaptations depending on personal tastes and regional preferences. With its rich history and broad appeal, Pain Perdu can be made with many types of bread. From classic white bread to brioche or even gingerbread, each brings a unique twist to the dish..

before being cooked to golden perfection in a skillet.

The result is a soft, custard-like interior with a crispy, caramelized exterior.

This dish can be enjoyed in multiple ways, either as a sweet treat or a savory dish. Sweet variations often feature toppings such as fresh fruits, whipped cream, honey, or a dusting of powdered sugar.

On the savory side, pain perdu can be paired with ingredients like cheese, ham, or even herbs, transforming .

it into a more substantial meal.

Pain perdu

is not just a comforting breakfast or brunch option; it also serves as a nostalgic reminder of home cooking.

with each bite evoking warmth and a sense of indulgence.

Its simplicity in ingredients and method of preparation .make it a versatile dish, perfect for any time of day.

Though many countries have their version of this dish, pain perdu stands out for its rich French history and the elegance.

with which it elevates a humble slice of bread into a decadent experience.

Whether served as a special treat on a weekend morning or a satisfying dessert after a meal.

pain perdu continues to delight palates around the world, offering a delicious taste of both history and innovation in each bite.

French Toast (Pain Perdu)perfect brioche:


For 6 servings
Preparation Time: 30 minutes
Cooking Time: 15 minutes
Storage: To be consumed immediately

Equipment:

Silicone mat

Serrated knife or bread knife

Ingredients for 6 servings:

  • 6 slices of bread, about 1.5 cm thick
  • 200 g whole milk
  • 60 g eggs (approximately 2 eggs)
  • 20 g butter
  • 30 g sugar

Instructions for French Toast (Pain Perdu):

  • Prepare the bread:
    Slice 6 pieces of bread about 1.5 cm thick using a serrated or bread knife. Opt for slightly stale bread, as it will absorb the custard mixture better without becoming too soggy.

  • Make the egg mixture:
    In a large bowl, whisk together 200 g whole milk, 60 g eggs (approximately 2 eggs), and 30 g sugar.
  • You can add a little vanilla or salt for extra flavor, but this is optional.
A smooth, well-mixed egg mixture, ready to be used in your recipe.
Learn the technique for creating a smooth, creamy egg mixture that will elevate your dish
  • Heat the pan:
    Melt 20 g of butter in a pan over medium heat, making sure it evenly coats the bottom.
  • The butter will give the bread slices a nice golden color.

  • Dip the bread:
    Dip each slice of bread into the egg mixture, soaking both sides thoroughly but avoiding making it too soggy.

  • Cook the bread slices:
    Place the soaked bread slices in the hot pan and cook for about 3-4 minutes on each side, or until golden and slightly crispy.
Golden-brown slices of bread toasted to perfection, ready for a delicious topping
Master the art of toasting bread slices to golden-brown perfection with this simple technique
  • Serve:
    Serve immediately while the slices are warm and golden. You can top them with fresh fruit, a dusting of powdered sugar, or even maple syrup for a sweet touch.
"Golden, fluffy brioche made in 10 minutes using a chef's secret technique."
Discover the chef’s time-saving technique for making a soft and golden brioche in just 10 minutes!

Tips:

  • Generously sprinkle For a richer taste. add a pinch of cinnamon or nutmeg to the milk and egg mixture.
  • Feel free to experiment with different types of bread, such as brioche or white bread, for an even more indulgent result.

  • You can add vanilla beans or vanilla extract. to your custard mixture and dip the bread into a vanilla custard or another flavored custard before cooking for an extra flavor boost.

  • You can replace the bread with brioche or gingerbread (nothing goes to waste!). but be mindful of the sugar already present in these types of bread.

  • You can toast the bread, brioche, or other types of bread before preparing the French toast for a different texture and flavor.

Conclusion:

Gradually add Pain Perdu, or French Toast, is a versatile and timeless. dish that combines simple ingredients to create a comforting and indulgent treat.

Whether served as a sweet breakfast or a savory brunch option, this dish can be easily adapted to suit various tastes and preferences.

The magic of French toast lies in its ability to transform stale or leftover bread into something luxurious. with its golden exterior and soft, custardy interior.

With its rich history and broad appeal, Pain Perdu can be made with many types of bread. From classic white bread to brioche or even gingerbread, each brings a unique twist to the dish.

The addition of flavorful ingredients like vanilla. cinnamon, or nutmeg enhances the richness, making each bite an experience to savor. Whether you enjoy it with fresh fruits, syrup, powdered sugar, or a savory touch, there are endless possibilities to customize this dish.

King Arthur Baking: What Makes Brioche Different
Anchor: brioche dough explained

Questions & Answers:

1. Can I use any type of bread for Pain Perdu?
Yes, you can use various types of bread for Pain Perdu. While the classic choice is white bread, other options like brioche, whole grain, or even stale baguettes work wonderfully. Brioche, with its soft and rich texture, will create an even more decadent version.

You can also use gingerbread, which adds a lovely spiced flavor. Just remember to adjust the sugar amount because the bread is already sweet.

2. How can I make my Pain Perdu more flavorful?
There are several ways to boost the flavor of your Pain Perdu. Adding vanilla extract or using a vanilla bean in the custard mixture will bring a lovely aromatic depth. You can also incorporate spices like cinnamon or nutmeg for warmth and a touch of complexity.

Another option is to infuse your milk with other flavors. such as orange zest or almond extract, before adding it to the egg mixture.

3. Can I prepare Pain Perdu in advance?
While Pain Perdu is best enjoyed right after cooking, you can prepare the custard mixture ahead and keep it refrigerated for a few hours.

However, the bread should be dipped and cooked right before serving to maintain its crispy. golden exterior and soft, custard-filled interior.

4. Can I make Pain Perdu savory instead of sweet?
Absolutely! To make a savory version of Pain Perdu.

you can skip the sugar in the custard and add savory ingredients like herbs, cheese, or even cooked ham.

This makes for a delicious brunch or lunch option and can be topped with things like poached eggs or sautéed vegetables.

5. How do I achieve the perfect texture for my Pain Perdu?


The key to perfect French toast lies. in the balance between soaking the bread and cooking it to golden perfection. Be sure not to soak the bread too long, or it will become soggy. The custard should be absorbed.but the bread should still hold its shape. Cooking on medium heat allows for a crisp outside while keeping the inside soft and custardy.

6. Can I make a healthier version of Pain Perdu?
Yes, you can easily make a lighter version ,of Pain Perdu by using whole-grain or gluten-free bread.as well as swapping whole milk for a lighter option like almond milk or oat milk.

You can reduce the sugar, content or substitute it with natural sweeteners like honey or maple syrup

. To reduce the fat, you can use a non-stick pan with less butter or opt for cooking the French toast on a griddle.

In conclusion, Pain Perdu is a delightful dish that offers endless customization options.

whether you prefer it sweet or savory, rich or lighter. It’s a dish that showcases the beauty of simplicity in cooking.with the ability to create something extraordinary from the most basic ingredients. So, the next time you have leftover bread, why not give Pain Perdu a try? The possibilities are endless, and the result is always a crowd-pleaser.

Secret Cake with Pistachio and Raspberry: The Perfect Balance of Sweetness and Freshness

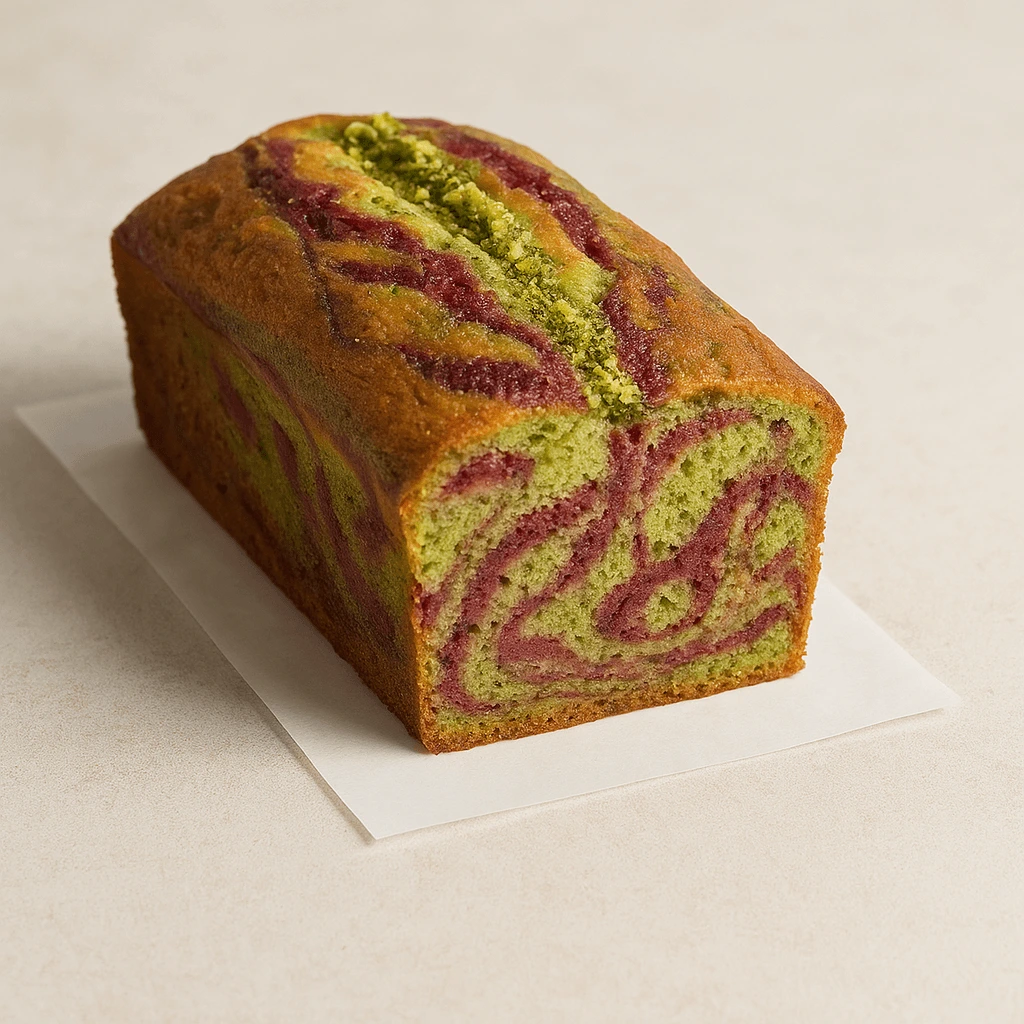
A high-resolution photo of a marbled pistachio and raspberry loaf cake, sliced to reveal vibrant green and pink swirls inside a golden-brown crust. The cake sits on a parchment-lined wooden board, garnished with crushed pistachios and fresh raspberries.

pistachio raspberry cake

raspberry loaf cake is a refined treat that speaks of both elegance and comfort. Each slice reveals a harmonious marriage of flavors—soft, buttery crumb infused with the subtly sweet, almost creamy flavor of ground pistachios, contrasted by juicy bursts of raspberry that lend a gentle tartness and vibrant color.

The texture is tender yet satisfying, with a moistness that lingers on the palate thanks to carefully balanced proportions and expert baking technique. What elevates this cake from everyday to exceptional is its versatility: equally fitting for an afternoon tea as it is for a festive dessert platter. Served plain, with a light dusting of powdered sugar, or crowned with a glaze or cream, it adapts beautifully to the occasion without losing its sophisticated character.

Beyond its flavor, the visual appeal is undeniable. As you slice through, the cake reveals little specks of green from the pistachios and ruby-red pockets where raspberries have melted into the crumb. It’s rustic and artisanal in spirit, yet refined enough for the most discerning dessert table.

Whether enjoyed slightly warm on a quiet morning or served chilled alongside a scoop of crème fraîche, this pistachio and raspberry cake offers a sensory experience that lingers—soft, nutty, fruity, and unforgettable.

Pistachio and Raspberry Cake

A refined composition for 4 to 6 guests


General Information

  • Serves: 4 to 6
  • Prep time: 2 hours
  • Bake time: 40 to 45 minutes
  • Storage: Up to 3 days, well wrapped in plastic film, stored in a dry place

Equipment Needed

  • Whisk
  • Sieve
  • Loaf pan (14 × 7.3 × 7 cm)
  • Small piping cone

Ingredients

Raspberry Concentrate
  • 250 g fresh raspberries
Pistachio Cake
  • 80 g egg yolks
  • 120 g sugar
  • 60 g heavy cream (35% fat)
  • 95 g flour
  • 2 g baking powder
  • 2 g lime zest
  • 40 g butter
  • 15 g pistachio paste
  • 2 g softened butter (for the baking line)

Step-by-Step Instructions

1. Make the Raspberry Concentrate

Place the raspberries in a saucepan and let them cook gently over low heat. Stir occasionally and allow the fruit to reduce slowly until it forms a thick purée. Once you obtain about 100 g of concentrated pulp, remove from the heat and set aside to cool completely.

2. Prepare the Base Batter

In a mixing bowl, whisk the egg yolks with the sugar until the mixture turns pale and slightly fluffy. Incorporate the cream, followed by the sifted flour and baking powder. Add the lime zest and finish by stirring in the melted butter. Mix until smooth and homogeneous.

3. Divide and Color the Batter

Split the batter into two portions: one third and two thirds.

  • To the smaller portion (1/3), add the raspberry concentrate to tint the batter a deep pink-red.
  • To the larger portion (2/3), blend in the pistachio paste to achieve a light green color and nutty aroma.
4. Layer and Marble

Line your loaf pan with parchment paper. Pour the pistachio batter and raspberry batter in alternating layers to create visual contrast. Using the tip of a knife, gently draw zigzag patterns through the mixture to produce elegant marbled swirls.

Close-up of a dessert showcasing beautifully layered and marbled patterns, highlighting the smooth transition between colors and textures.
Explore the delicate technique of layering and marbling to create stunning desserts with intricate patterns +
5. Add the Signature Butter Line

Fill a small piping cone with softened butter and pipe a thin line across the surface of the batter. This “cordon” of butter will help control the crack on top of the cake as it bakes, giving it that classic pâtisserie look.

Close-up of a dessert with a signature butter line added, creating a smooth, golden finish that enhances the texture and flavor of the cake
Master the technique of adding a signature butter line to your creations, infusing them with rich flavor and a luxurious finish.
6. Baking

Preheat the oven.

  • Bake the cake at 155°C (310°F) for about 15 minutes.
  • Lower the temperature to 145°C (290°F) and continue baking for 25 to 30 minutes, or until a skewer inserted in the center comes out clean or with moist crumbs.

Let the cake cool in the mold for 10 minutes before unmolding. Finish cooling on a wire rack.

A baker carefully working on a dessert, highlighting the process of mixing, kneading, or shaping the dough to create a perfectly baked masterpiece
Master the art of baking with techniques that elevate your creations, bringing out the perfect balance of flavor and texture.

Chef’s Tip — For an Even More Moist and Aromatic Cake

Once the cake has cooled slightly but is still warm, brush the surface with a light syrup made by simmering equal parts water and sugar, infused with a few drops of raspberry purée or lime juice. This not only adds moisture but intensifies the fruity notes, giving each bite a delicate shine and enhanced flavor.

Bonus : Pour une finition chic digne d’une pâtisserie, saupoudre le dessus de quelques éclats de pistaches torréfiées juste avant de servir.

Conclusion

This pistachio and raspberry loaf cake is far more than a simple tea-time treat—it’s a meeting point between texture, color, and refined taste. The richness of pistachio pairs beautifully with the bright, tart burst of raspberry, while the marbled design gives the cake a pâtisserie-worthy appearance. Every step, from the precision of the butter cord to the delicate swirl of the batters, reflects an attention to detail that elevates home baking into an art form.

Whether you serve it as part of an elegant brunch, a refined dessert, or a quiet moment of indulgence with tea, this cake offers a perfect balance of comfort and sophistication. And with just a few key techniques, like the chef’s syrup tip or the zigzag marbling, you can bring a touch of the professional kitchen right into your own.

So tie your apron, warm up the oven, and let the sweet scent of pistachio and raspberry fill the air—you’re not just baking a cake, you’re crafting an experience.


Q&A – Your Questions Answered

Q: Can I use frozen raspberries instead of fresh?
A: Absolutely! Just be sure to thaw and drain them well before reducing them into a concentrate. You may need to cook them slightly longer to evaporate excess water.

Q: My cake didn’t crack evenly—what went wrong?
A: The butter line (cordon) helps guide the crack. Make sure it’s well centered and use softened, not melted butter. Also, avoid overfilling the pan.

Q: How can I enhance the pistachio flavor?
A: Lightly toast the pistachio paste before adding it to the batter, or mix in a touch of pistachio oil. You can also sprinkle chopped pistachios on top before baking for extra aroma and crunch.

Q: Can I make this cake in advance?
A: Yes, it keeps beautifully for up to 3 days when well wrapped and stored in a cool, dry place. In fact, the flavors often deepen after a day of rest.

http://Pistachio in Pastry – Valrhona Link to another fruity recipe like Lemon Poppy Seed Cake or Classic Raspberry Tarthttps://briochechic.com/crispy-caramelized-bliss6-secret-to-perfect-palmiers-revealed/#more-390

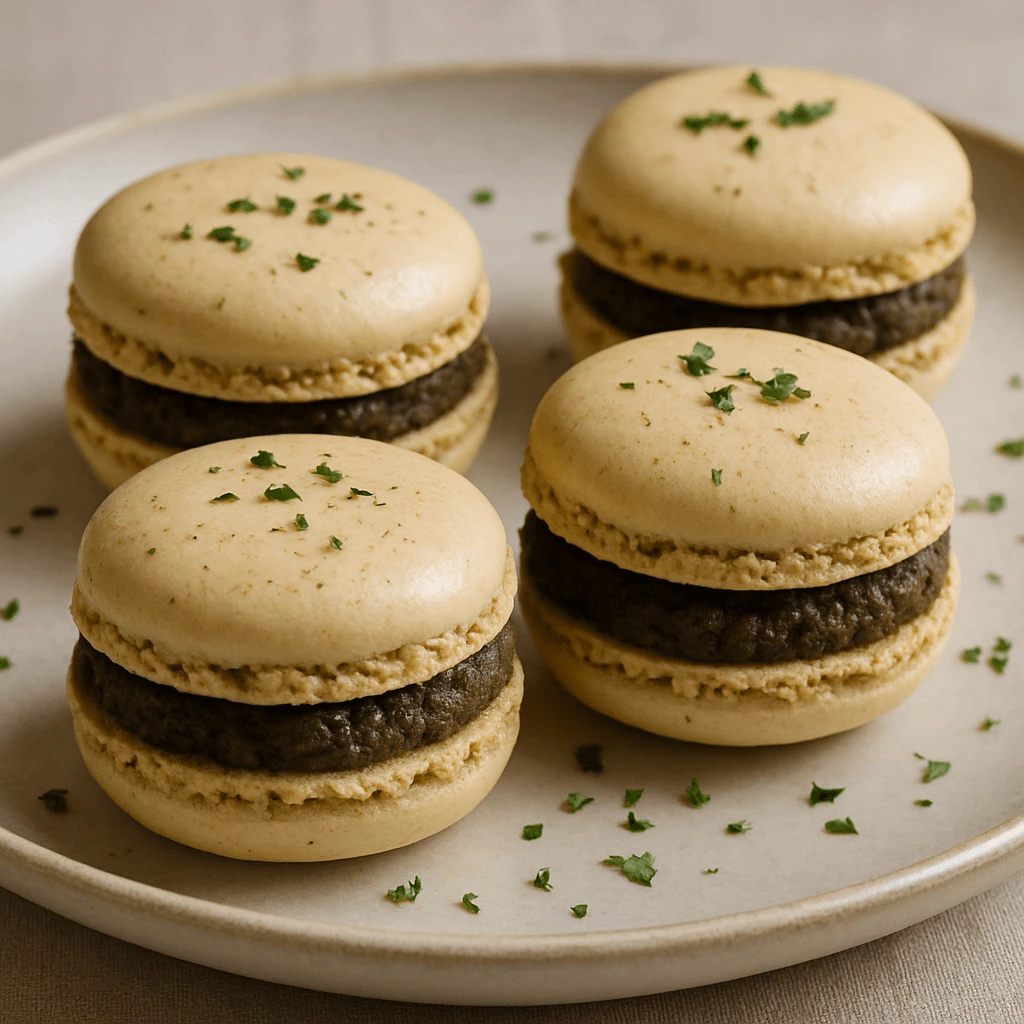
2 Secret Macaron: Unveiling the Bold Flavors of Tapenade in a Perfectly Crafted Shell

Four savory macarons filled with black olive tapenade and cheese, elegantly plated with fresh herbs and lemon zest.

savory macarons recipe

At first glance, the macaron is the epitome of Parisian pâtisserie—refined, colorful, sweet, and delicate. But in this savory variation, the macaron takes on a daring transformation, leaving behind the realm of dessert to embrace the bold, briny flavors of Provence. The Macaron à la Tapenade is not a simple twist on tradition—it’s a reinvention that bridges the gap between pastry artistry and gourmet hors d’œuvre.

These savory macarons feature the same almond-based meringue shells you’d expect in the classic sweet version—light, crisp on the outside, and chewy within. However, instead of being tinted in pastels or filled with ganache, they are subtly seasoned with herbs or even a hint of black pepper, and colored in earthier tones—olive green, charcoal grey, or soft gold. This sets the stage for the hero of the composition: a luscious, umami-rich tapenade filling, crafted from finely blended black olives, capers, garlic, and a whisper of anchovy, emulsified with quality olive oil.

The result is a macaron that delivers an unexpected yet exquisite balance of texture and taste. The almond shell offers a gentle sweetness and crunch that complements the savory intensity of the tapenade—salty, pungent, slightly bitter, and deeply aromatic. Together, they create a play of contrast and harmony that is nothing short of sophisticated.

Perfect as an apéritif, amuse-bouche, or part of a modern tasting menu, the macaron à la tapenade adds intrigue to any culinary experience. It defies expectations, inviting guests to reimagine what a macaron can be. It pairs beautifully with a dry white wine, sparkling crémant, or even a chilled rosé from Provence.

More than a novelty, the savory macaron is a chef’s playground—a chance to express creativity, balance complex flavors, and challenge the conventions of pastry. It’s a bold statement wrapped in an elegant shell.

Savory Macarons with Black Olive Tapenade & Cheese

Yield: Approx. 80–100 macarons (40–50 assembled)
Prep Time: 1 hour + resting
Cooking Time: 12–15 minutes
Resting Time: 20–30 minutes before baking


Ingredients

Macaron Shells (Italian Meringue Method)

Tant pour Tant (Dry Mix):

  • 220 g egg whites (aged)
  • 600 g icing sugar
  • 600 g almond flour (finely ground)
  • 5 g ground cumin
  • 5 g ground black pepper
  • 10 g fine salt
  • Zest of 1 lemon

Italian Meringue:

  • 230 g egg whites (aged)
  • 600 g granulated sugar
  • 150 g water

Tapenade & Cheese Filling

  • 300 g pitted black olives
  • 3 anchovy fillets
  • 1 garlic clove
  • Fresh basil (a few leaves)
  • Zest and juice of 1 lemon
  • Freshly ground black pepper
  • Salt, to taste
  • 50 g cream cheese or goat cheese
  • 30–50 g good-quality olive oil
  • 3 g sheet gelatin (or equivalent powdered), soaked and melted

Method

1. Prepare the Macaron Shells

A. Mix the dry base:
Sift together almond flour, icing sugar, cumin, pepper, salt, and lemon zest in a large bowl. Add 220 g egg whites and mix to form a thick almond paste (macaronnage base). Set aside.

B. Cook the syrup:
In a saucepan, combine granulated sugar and water. Cook over medium heat until the syrup reaches 118–119°C (245–246°F).

C. Whip the meringue:
When the syrup reaches 110°C, start whipping the 230 g egg whites in a stand mixer on medium speed. Slowly pour the hot syrup into the whipping whites once it reaches temperature. Continue beating until the bowl feels just warm, and stiff glossy peaks form.

D. Macaronage:
Gently fold the Italian meringue into the almond paste in several additions, using a spatula. The batter should flow like lava: smooth and shiny but not runny.

E. Pipe & rest:
Pipe rounds onto a baking tray lined with silicone mat or parchment. Tap the tray gently to release air bubbles. Let rest at room temperature for 20–30 minutes, or until the surface is dry to the touch.

F. Bake:
Bake in a preheated oven at 150°C (300°F) for 12–15 minutes. Let cool completely before removing from the tray.


2. Prepare the Tapenade Filling

  1. In a blender or food processor, combine olives, anchovies, garlic, basil, lemon zest and juice, pepper, and salt. Blend until smooth.
  2. Add the cheese and olive oil, blend again until creamy.
  3. Incorporate the melted gelatin mass (still warm but not hot) and pulse to combine.
  4. Chill until firm enough to pipe.

3. Assemble the Macarons

  • Match macaron shells by size.
  • Pipe a generous dollop of tapenade filling on one shell and sandwich with another.
  • Chill for 12–24 hours before serving to allow the flavors to mature.

Storage

  • Store assembled macarons in an airtight container in the fridge for up to 3 days.
  • Unfilled shells can be frozen for up to 1 month.

Conclusion: A Macaron That Breaks the Mold

The macaron à la tapenade is a bold, elegant departure from the classic sweet meringue treat. It challenges the norms of pâtisserie while showcasing the same finesse and technical precision as its sugary counterpart. With its crisp-yet-chewy almond shell and a silky filling infused with the salty depth of black olives, herbs, and aged cheese, this savory macaron is not just a novelty—it’s a revelation.

Whether served as an amuse-bouche at a fine dining table, an unexpected delight on a cocktail platter, or a conversation starter at your next soirée, these savory bites will intrigue even the most traditional palates. They blend the artistry of French pastry with the rustic soul of Provençal cuisine, proving that the macaron has no limits—only possibilities.

For chefs and enthusiasts alike, this recipe is an invitation to experiment, to surprise, and to master a form where precision meets bold creativity. Once you’ve made these, the door is wide open for future savory variations: think smoked salmon, beetroot & chèvre, or even curry and coconut.Looking for a sweet-salty bite? Try these blue cheese & pear canapés.”
A Chef’s Secret: Blue Cheese & Pear Canapés


Frequently Asked Questions (FAQ)

Can I prepare the macaron shells in advance?

Yes! The unfilled macaron shells can be made up to a week ahead and stored in an airtight container at room temperature, or frozen for up to a month. Just be sure they are completely cool and dry before storing.

How long can I keep the filled macarons?

Once filled, savory macarons should be refrigerated and consumed within 48–72 hours. After this time, the filling may soften the shells too much and alter the texture.

Can I replace the gelatin in the filling?

Yes. If you prefer a vegetarian option or don’t have gelatin on hand, you can omit it, but the texture may be slightly looser. A small amount of cream cheese or agar-agar can help stabilize the mixture.

What’s the best size for savory macarons?

For savory versions, slightly smaller shells (about 2.5–3 cm in diameter) make the perfect bite-size appetizers. You want the flavor to be intense but not overwhelming in one bite.

Can I serve them warm?

No—savory macarons are best served chilled or at room temperature. Heating them will affect the structure of the filling and the delicate shell.

What wines pair well with this macaron?

A dry white wine, like a Sauvignon Blanc or a mineral-rich Vermentino, works beautifully. For something more festive, try a chilled Crémant or Brut Champagne to balance the saltiness of the tapenade.

More than Professional Macaron Sheet Pans (De Buyer)
https://www.debuyer.com/en/macaron-baking-sheet

Crêpes Like a Chef:4 Secrets, Technique & the Perfect Golden Finish

Golden, paper-thin French crêpes stacked on a plate with a crisp lacy edge, served with fresh fruit and a drizzle of syrup.

perfect crêpe technique

Crêpes are a timeless French delicacy that embodies simplicity and elegance in every bite. Originating from Brittany in northwest France, they have become a global favorite, appreciated for their versatility and deliciousness. Thin, golden, and perfectly delicate, crêpes can be enjoyed in countless ways, from sweet to savory, and from breakfast to dinner.

Serious Eats – How to Make Perfect Crêpes
Anchor: crêpe troubleshooting and tips

The key to a perfect crêpe

lies in its batter, which should be smooth, light, and slightly runny, allowing it to spread evenly across the pan, creating a uniform texture. The cooking technique is just as important: crêpes should be cooked on a moderately hot surface, giving them just enough time to form a soft, lacy edge without overcooking the center. The result is a delicate pancake, thin enough to roll, fold, or stack, and full of possibilities for fillings and toppings.

When it comes to sweet crêpes, they are often paired with classic fillings such as lemon and sugar, Nutella, or fruit preserves. For a more indulgent treat, whipped cream, melted chocolate, or a dusting of powdered sugar adds a rich finish. For savory crêpes, think about fillings like ham and cheese, spinach and mushroom, or even smoked salmon and crème fraîche. The beauty of crêpes is that they can be adapted to suit any flavor profile, making them a perfect dish for any occasion.

Whether prepared for a casual breakfast,

perfect crêpe technique a luxurious brunch, or a charming dinner party, crêpes offer endless opportunities for creativity. Their thin texture and slightly crispy edges provide the ideal balance to any filling, ensuring that each bite is a harmonious combination of flavors.

In France, crêpes are often enjoyed during the celebration of La Chandeleur, also known as Crêpe Day, where the tradition is to flip the crêpe with a flourish while holding a coin in the other hand for good luck. This playful and festive aspect of crêpe-making adds a charming touch to the experience.

Overall, crêpes are more than just a dish; they are a part of French culinary tradition, bringing people together to enjoy food that is simple yet refined. Whether served with a cup of coffee in the morning or as a satisfying dessert in the evening, crêpes remain a beloved treat that continues to delight people around the world.

For 10 crêpes


Preparation Time: 45 minutes
Resting Time: 2 hours
Cooking Time: 3 minutes per crêpe
Storage: Best enjoyed immediately

Equipment Needed:

  • Whisk
  • Sieve
  • Microplane Grater
  • Crêpe Pan
  • Ladle

Ingredients:

  • 100 g eggs
  • 30 g granulated sugar
  • 170 g T45 flour
  • 500 g whole milk
  • Zest of 1 orange
  • 50 g butter
  • 30 g alcohol of your choice (such as rum or Grand Marnier)
  • 30 g oil

Instructions:

  • Prepare the Batter: In a large bowl, whisk the eggs and sugar together until well combined. Gradually add the flour, sifting it in to ensure a smooth mixture. Slowly pour in the milk while whisking continuously to prevent lumps. Add the zest of the orange for a fresh citrus note. Finally, incorporate the alcohol and oil into the batter, giving it a silky, slightly runny consistency.
  • Rest the Batter: Cover the bowl with a clean cloth or plastic wrap and let the batter rest for 2 hours at room temperature. This resting time allows the flour to absorb the liquids fully, resulting in a smooth and elastic batter that yields perfect crêpes.
A glass bowl of crêpe batter resting on a countertop, lightly covered with plastic wrap, beside a whisk and a folded kitchen towel.
Letting your crêpe batter rest helps develop texture and prevents lumps—an essential step for thin, tender crêpes.
  • Cook the Crêpes: Heat a crêpe pan over medium-high heat. Lightly grease the pan with butter or oil. Pour a ladle of batter into the hot pan, swirling it to coat the bottom evenly. Cook each crêpe for about 1-2 minutes on one side, or until the edges lift and turn golden. Flip the crêpe and cook for another minute or so, until golden brown on both sides.
A golden crêpe cooking in a non-stick pan with crisp edges, just about to be flipped with a spatula.
The moment of truth: cook your crêpes over medium heat until golden, flip gently, and repeat for a flawless finish.
  • Serve Immediately: Serve your crêpes right away while they’re still warm. You can enjoy them plain, or fill them with sweet or savory ingredients of your choice.
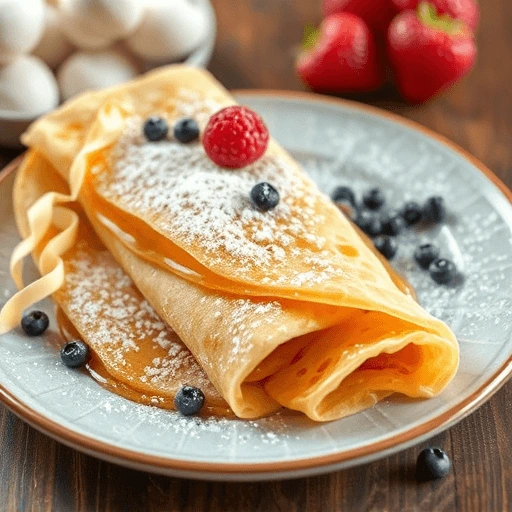
Freshly cooked crêpes folded on a serving plate, topped with powdered sugar and garnished with berries, steaming gently.
Crêpes are best enjoyed fresh and warm—delicate, flavorful, and ready for your favorite filling.

Chef’s Tips and Tricks:

  • Prepare perfect crêpe technique the Day Before: For the best results, it’s ideal to prepare the crêpe batter the night before. This allows the ingredients to fully meld together, enhancing the flavor and achieving a smoother consistency. Additionally, the rest period ensures the batter becomes thicker and easier to work with, leading to more delicate crêpes when cooked.
  • “Culotter” the Pan: This French technique, known as culotter, involves heating a thin layer of oil (about half a centimeter) in the pan before you start cooking. Once the oil is hot, carefully remove it and wipe the pan with a paper towel. This technique helps to create a perfect, golden-brown color on your crêpes without drying them out. The result is a beautifully crisp edge with a soft, tender center, ensuring your crêpes cook evenly and don’t stick to the pan.

Conclusion:

Crêpes are much more than just a simple French dish; they embody the art of comfort food, blending tradition with endless possibilities for innovation. The batter itself is a blank canvas, where the delicate balance of eggs, flour, and milk creates the perfect texture—light, smooth, and airy—yet strong enough to hold a variety of fillings, both sweet and savory. With just a few basic ingredients, you can create something elegant enough for a special occasion or casual enough for a Sunday brunch.

The addition of orange zest and alcohol in the batter elevates this classic recipe, giving the crêpes an extra layer of flavor that transports the dish beyond ordinary pancakes. These subtle hints of citrus and richness are part of what makes crêpes such a versatile treat. Whether you are indulging in a sweet filling like Nutella and strawberries or savoring a savory combination like ham, cheese, and a drizzle of béchamel, the crêpe serves as the perfect vessel for whatever culinary direction you choose.

Cooking crêpes

perfect crêpe technique may seem intimidating at first, especially when it comes to achieving that golden, lacy edge and perfectly soft center, but with practice and patience, anyone can master this dish. The key lies in a smooth batter, proper heat management, and the right technique when flipping the crêpes. It’s a technique that, once mastered, offers infinite variations to explore, making it a rewarding recipe for anyone who enjoys cooking or hosting.

In France, perfect crêpe technique are often associated with celebrations like La Chandeleur (Crêpe Day), where the tradition of flipping crêpes symbolizes good fortune for the year ahead. In addition to their symbolic nature, crêpes have a joyful, fun aspect to them, whether you’re tossing them in the pan or experimenting with new fillings and toppings. As a shared dish, crêpes bring people together, creating moments of enjoyment around the table. Whether served at a family breakfast, a festive gathering, or as a simple dessert, they never fail to charm.

So, the next time you make crêpes, remember that you’re not just cooking a meal—you’re embracing a piece of French culinary heritage, one delicious crêpe at a time. Enjoy the process, experiment with fillings, and most of all, savor the result. There’s truly nothing like a freshly made crêpe to bring joy to your day.

Link to other French classics like:
https://briochechic.com/the-cherry-clafoutis-secret-mastering-the-perfect-tart/#more-705
Anchor: master more French pastry recipes


Question and Answer Section:

Q: Why is resting the batter so important when making crêpes?
A: Resting the batter is essential because it allows the flour to fully absorb the liquids, which helps to avoid a grainy texture in the crêpes. The resting time also gives the gluten in the flour a chance to relax, resulting in crêpes that are tender and less likely to tear during cooking. Additionally, it allows any air bubbles to settle, leading to a smoother, more even batter. This step ensures that your crêpes will have a delicate, thin texture that’s perfect for folding or filling.

Q: Can I use different types of flour in my crêpe batter?
A: Yes, you can use different types of flour, but it’s important to note that the texture and consistency of your crêpes may change depending on the flour you use. For example, T45 flour (a soft, finely milled flour) is commonly used for crêpes because it creates a soft, tender texture. However, you can experiment with other flours, such as whole wheat or buckwheat (for savory crêpes), but these will give a different flavor and texture. Just keep in mind that substitutions might require small adjustments to the liquid content of the batter to achieve the right consistency.

Q: How can I ensure my crêpes don’t stick to the pan?


A: The key to preventing perfect crêpe technique from sticking is to use a non-stick crêpe pan or skillet, and to lightly grease the pan with butter or oil. It’s important to only grease the pan once before you start cooking, and not in between crêpes. If you add too much oil or butter, the crêpes may become greasy. The pan should be at the right temperature—hot enough that the batter sizzles gently when poured in, but not so hot that it burns the crêpes.

Q: Can I make the crêpe batter ahead of time?
A: Absolutely! You can make the batter the night before and refrigerate it overnight. This actually allows the flavors to develop more fully, and the batter will have an even smoother consistency the next day. Just give it a good stir before using it the next morning. If the batter thickens too much during refrigeration, you can add a small amount of milk to thin it out to the desired consistency.

Q: What are some creative ways to fill or top my crêpes?
A: The possibilities are endless when it comes to crêpe fillings and toppings! For sweet crêpes, classic options include Nutella, fresh fruit (like strawberries or bananas), whipped cream, or a simple dusting of powdered sugar. For savory crêpes, try fillings like ham and cheese, smoked salmon and crème fraîche, or even a savory spinach and ricotta mixture. You can also drizzle crêpes with sauces like chocolate, caramel, or lemon juice for an added burst of flavor. The beauty of crêpes is their versatility—they can be made to suit any flavor preference!

3 Secrets of the Perfect Moelleux au Chocolat – A Melt-in-the-Middle Masterpiece

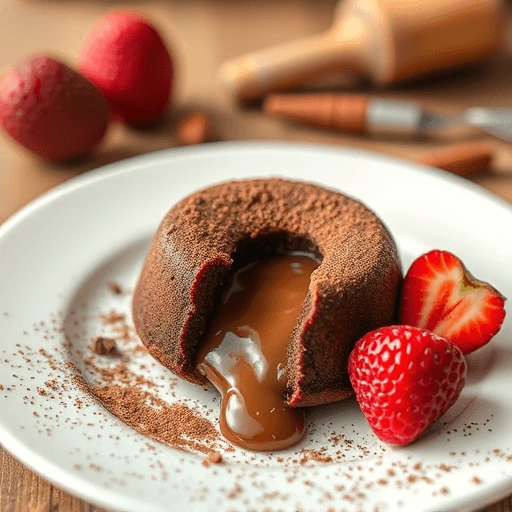
Close-up of a freshly baked French moelleux au chocolat with a soft, molten chocolate center and a crisp exterior, served on a white plate.

moelleux au chocolat

Among the pantheon of French desserts, the moelleux au chocolat stands as a true icon—a dessert that epitomizes indulgence, simplicity, and sophistication all at once. Often confused with its close cousins, the fondant or lava cake, the moelleux has carved its own niche in the world of patisserie thanks to its unique texture: delicately crisp on the outside and divinely soft and tender at its core.

This chocolate marvel is the embodiment of contrast. When baked to perfection, it reveals a melt-in-the-mouth center that oozes with rich, velvety chocolate. It’s not just a dessert—it’s a sensory experience. The warmth of the cake, the luxurious aroma of deep cocoa, and the moist, almost pudding-like interior make every bite unforgettable.

The magic of the moelleux au chocolat lies in its delicate balance between technique and timing. Too short in the oven, and it collapses into a puddle. Too long, and the molten center solidifies, stripping it of its trademark decadence. But when done right, it’s a showstopper—especially when served warm, perhaps alongside a scoop of vanilla ice cream, a drizzle of crème anglaise, or a scattering of red berries for a touch of acidity.

Though its origins are often debated, with some tracing it back to the kitchens of Michelin-starred chefs and others to comforting family recipes passed down through generations, what remains undisputed is its universal appeal. Whether served in a bistro or a grand restaurant, the moelleux au chocolat captures hearts with its humble appearance and luxurious taste.

Elegant yet comforting, refined yet approachable, this dessert is a testament to the beauty of simplicity done well. It celebrates chocolate in its purest, most indulgent form—and never fails to impress.

Molten Chocolate Cakes (Moelleux au Chocolat) – Serves 6 to 8

Servings: 6 to 8 people

Preparation time: 15 minutes

Freezing time: 1 hour

Baking time: 7 to 10 minutes

Storage: Best enjoyed immediately after baking


Equipment Needed

  • Whisk
  • Piping bag (no tip needed)
  • 7 cm / 2.75-inch metal pastry rings

Ingredients

  • 100 g dark chocolate (65% semi-bitter)
  • 100 g softened butter
  • 240 g whole eggs
  • 130 g egg yolks
  • 55 g sugar
  • 75 g flour

Step-by-Step Instructions: Molten Chocolate Cakes (Moelleux au Chocolat)

1. Prepare the chocolate mixture

Gently melt the dark chocolate and softened butter together over a bain-marie or in short bursts in the microwave, stirring regularly until smooth.
Chef’s tip: Avoid overheating the chocolate to preserve its smooth texture and shine. Let the mixture cool slightly before combining with the eggs.


2. Emulsify the eggs and sugar

In a large bowl, whisk together the whole eggs, egg yolks, and sugar until pale and slightly thickened.
Chef’s tip: This step helps incorporate air, giving the cakes a delicate structure around the molten center.


3. Combine and sift

Pour the cooled chocolate mixture into the egg mixture and whisk until fully combined. Sift the flour over the batter and fold gently with a spatula to avoid deflating the mixture.
Chef’s tip: Sifting the flour ensures a smooth, lump-free batter and prevents overmixing, which could toughen the cakes.

Close-up of a hand folding sifted flour into a glossy chocolate batter using a spatula, showing the texture of the moelleux au chocolat mixture during preparation.
Flour is gently folded into the rich chocolate and egg mixture to keep the batter light and airy—an essential step for perfect moelleux au chocolat.

4. Pipe and freeze

Transfer the batter into a piping bag (no tip needed) and fill the metal rings lined with parchment or placed on a silicone mat, about ¾ full. Place the filled molds in the freezer for at least 1 hour.
Chef’s tip: Freezing the batter creates a temperature contrast during baking, allowing the outside to set while the center remains soft and molten.


5. Bake to perfection

Preheat the oven to 200°C (392°F). Bake the frozen moelleux for 7 to 10 minutes, depending on your oven and desired gooeyness. The edges should be set while the center remains slightly undercooked.
Chef’s tip: The perfect baking point is when the top is just set and begins to crack slightly—don’t overbake, or you’ll lose the lava effect.

A freshly baked moelleux au chocolat showing a golden, slightly cracked top with a gooey, molten chocolate center beginning to peek through.
Carefully baking the moelleux au chocolat for the perfect balance of a crisp exterior and a molten center—just the right moment when the cake is golden but still soft inside.

6. Serve immediately

Let the cakes sit for 1 minute, then gently unmold and serve while hot. Pair with vanilla ice cream, crème anglaise, or fresh berries for an elevated dessert.
Chef’s tip: For clean unmolding, run a thin knife around the edge of the ring if needed.

A plated moelleux au chocolat just out of the oven, with a molten chocolate center gently oozing out, garnished with ice cream and fresh berries.
Served straight from the oven, this moelleux au chocolat reveals its molten heart—best enjoyed warm with a scoop of vanilla ice cream or fresh berries.

Conclusion: A Dessert Worth Mastering

Moelleux au chocolat is more than just a chocolate dessert—it’s a testament to the delicate balance between texture, flavor, and timing. Its power lies in its simplicity, yet its execution demands precision and care. When done correctly, it transforms into a moment of pure indulgence: a warm, barely set shell that gives way to a luscious, flowing heart of chocolate.

This dessert seduces both the palate and the eye. Whether served at the end of an elegant dinner party or as a cozy treat on a quiet evening, it always delivers a moment of awe. What makes the moelleux truly timeless is its ability to feel both refined and nostalgic. It invites the home baker to channel their inner chef, and the professional to perfect a classic that never goes out of style.

So whether you’re preparing it for guests or simply for yourself, embrace the ritual of crafting this chocolate masterpiece. With each warm spoonful, you’ll be reminded of why French patisserie continues to enchant dessert lovers the world over.


Q&A: Everything You Need to Know About Moelleux au Chocolat

Is Moelleux au Chocolat the same as Lava Cake?

Not exactly. While both feature a molten center, the moelleux is typically lighter and more egg-based, creating a more soufflé-like texture around the soft core. Lava cakes often rely on underbaking to achieve a runny middle, whereas moelleux can include freezing for more precision.


Can I prepare moelleux au chocolat in advance?

Yes! One of the beauties of this recipe is that you can freeze the batter in molds ahead of time—up to several days in advance. When ready to serve, just bake directly from frozen. It’s a perfect make-ahead dessert for entertaining.


Why does my moelleux collapse or stick to the mold?

This can happen if the cakes are underbaked or if the molds weren’t properly greased or lined. Using metal rings with parchment at the base or silicone molds helps. Allowing the cake to rest 1 minute before unmolding also helps it hold shape.


What kind of chocolate should I use?

Use high-quality dark chocolate with about 65% cocoa content. Too bitter (70%+) may overpower the balance, while too mild results in a lackluster flavor. The chocolate is the star of this dessert, so choose something you’d enjoy eating on its own.


Can I add a filling inside for extra effect?

Absolutely. A frozen ganache, raspberry coulis, or salted caramel cube placed in the center before baking adds a beautiful surprise. Make sure the insert is frozen solid before adding it to the batter so it stays distinct during baking.


Can this recipe be made gluten-free?

Yes. You can substitute the flour with almond flour or a gluten-free baking mix. Note that this may slightly affect the structure, but the result will still be delicious and molten.

What is Moelleux au Chocolat? http://What is Moelleux au Chocolat? – Wikipedia

https://briochechic.com/why-professional-bakers-never-share-these-5-viennoiserie-success-secrets/#more-229

4 Secret Lemon Macaron You’ll Only Serve to Your Best Guests

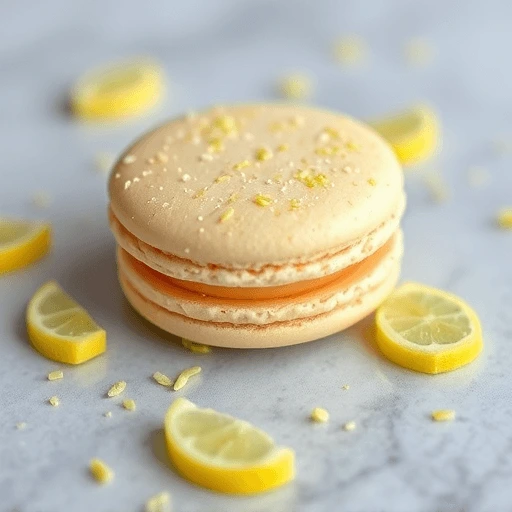
A refined display of savory lemon macarons with hints of pepper and lemon zest, their smooth creamy filling ready to surprise the palate with a balance of citrus and savory richness.

lemon macaron recipe

If you’re on the lookout for new culinary experiences, the savory lemon macaron offers an unforgettable flavor journey. Far from the ordinary, this macaron strikes the perfect balance between a delicately crisp shell and a soft, citrusy center infused with subtle freshness.

Reimagined for lovers of bold and surprising tastes, this savory version adds a touch of sophistication to any appetizer spread or light meal. Its crisp-yet-melting texture will surprise your guests, who are sure to appreciate the harmony between sweet and savory in every bite.

Its lemony flavor—both bright and smooth—is elevated by a hint of seasonal ingredients that bring surprising depth. These macarons pair beautifully with fresh herbs and savory notes, lending a modern twist to the classic French treat.

With their elegant shape and refined aromas, savory lemon macarons are a true delight fit for any occasion—from chic starters to cocktail hour nibbles. In short, it’s a gourmet experience not to be missed.


📝 Ingredients

For the macaron shells:
  • 220 g egg whites
  • 600 g icing sugar
  • 600 g almond flour
  • 5 g camon (a mildly spicy aromatic spice – perfect if you love originality)
  • 5 g black pepper
  • 10 g salt
  • Zest and juice of 1 lemon
For the lemon filling:
  • 230 g egg whites
  • 600 g granulated sugar
  • 150 g water
  • 500 g lemon (juice and zest)
  • 100 g flour
  • 100 g butter
  • Sugar, salt, pepper to taste
  • Philadelphia cream cheese (to bind and enrich)

Instructions

1. Prepare the macaron shells:
  • In a mixing bowl, whip the egg whites until stiff peaks form.
  • Gently fold in the icing sugar, almond flour, camon, pepper, and salt. Mix on low speed until you get a smooth batter.
  • Add the lemon zest for a touch of freshness.
  • Using a piping bag, form small, uniform rounds on a baking sheet lined with parchment paper.
  • Bake at 150°C (300°F) for 12–15 minutes, keeping a close eye to prevent browning.
2. Make the lemon filling:
  • In a saucepan, combine lemon juice, water, flour, and butter. Bring to a gentle boil.
  • Once the mixture thickens, add sugar, pepper, and salt to adjust the flavor.
  • Remove from heat and stir in the Philadelphia cream cheese until smooth and creamy.
  • Let cool slightly before assembling.
3. Assemble the macarons:
  • Generously fill one shell with the lemon cream mixture.
  • Top with another shell to form a complete macaron.
  • Repeat until all shells are used.
4. Finishing & storage:
  • Refrigerate the macarons for several hours to allow the flavors to meld and the texture to soften slightly.

Chef’s Tip: For an extra refined touch, grate a bit of fresh lemon zest over the top before serving or add a sprinkle of fleur de sel to enhance the savory notes.

Conclusion: The Boldness of Lemon, Reinvented in a Savory Macaron

This savory lemon macaron dares to defy tradition—and the result is utterly captivating. With its crisp yet tender shell and vibrant citrus filling, it invites us into a new world where patisserie meets gourmet appetizers. Elegant, surprising, and bursting with character, it transforms the sweet icon of French pastry into a refined savory bite.

More than just a novelty, this recipe showcases how technique and creativity can merge to elevate even the most unexpected flavor pairings. The delicate almond shells, lightly spiced with pepper and camon, provide the perfect contrast to the bright and creamy lemon-based filling. A subtle tang from fresh lemon balances beautifully with the smoothness of cream cheese, creating a harmony that lingers on the palate.

Yes, the process demands precision—macarons are famously finicky—but the satisfaction of presenting something so original and sophisticated is well worth the effort. These savory macarons aren’t just eye-catching; they’re conversation starters, ideal for aperitifs, brunches, or even a gourmet amuse-bouche.

Whether you’re an adventurous home baker or a chef in search of a unique hors d’oeuvre, these savory lemon macarons offer a bold, elegant twist. Once you try them, you may find they steal the spotlight from even your most beloved classics.“Perfect your shells with these 3 secrets for religieuses.”
→ Link to: 6 Secrets to Making Perfectly Flaky and Irresistible Raisin Buns at Home


FAQ – Savory Lemon Macarons

1. Can I use bottled lemon juice instead of fresh?
➡️ Fresh lemon is highly recommended. The zest adds essential aromatic oils, and fresh juice gives a brighter, more natural acidity that bottled juice just can’t match.

2. Is it possible to substitute the Philadelphia cream cheese?
➡️ Yes! You can use mascarpone for a creamier, milder taste or fresh goat cheese for a tangier, more assertive flavor. Just keep the texture smooth and spreadable.

3. How should I store the filled macarons?
➡️ Keep them in an airtight container in the refrigerator for 24 to 48 hours. Letting them rest improves both texture and flavor.

4. Can the macaron shells be frozen?
➡️ Definitely. Freeze the plain shells, layered with parchment paper, for up to 1 month. Fill them only after defrosting to maintain texture.

5. Are these suitable for cocktail parties or receptions?
➡️ Absolutely. They’re perfect for chic appetizers. You can even make them bite-sized for a more elegant, finger-food presentation.

6. What beverage pairs best with these savory macarons?
➡️ A dry sparkling wine like Champagne or a crisp white wine (Sauvignon Blanc or Albariño) complements the acidity of the lemon and the richness of the filling beautifully.The Science of Macaron Aging (Serious Eats)
https://www.seriouseats.com/french-macarons-guide

What If You Could Make Perfect Donuts at Home?

Golden donuts dusted with powdered sugar on a rustic wooden table, with a warm and inviting atmosphere

perfect homemade donuts

La pâte à frire est l’une des techniques les plus importantes en cuisine, en particulier pour ceux qui cherchent à obtenir une texture légère et croustillante pour leurs plats frits. Que ce soit pour des légumes, des fruits de mer, des viandes ou même des desserts, la pâte à frire transforme des ingrédients simples en mets irrésistibles. Pourtant, maîtriser cette pâte demande une compréhension fine du processus, car sa légèreté et sa croquant dépendent de détails subtils.

L’Essence de la Pâte à Frire

La pâte à frire est avant tout un moyen de créer une fine couche dorée et croustillante autour de la nourriture, tout en préservant la tendreté et la saveur du cœur de l’aliment. Contrairement aux autres types de panures, la pâte à frire est conçue pour être légère et aérée, évitant ainsi d’alourdir le plat. Le défi est de trouver l’équilibre parfait entre la croûte et l’intérieur, afin que le résultat soit à la fois croquant et délicat.Link to a brioche or dough-making post :https://briochechic.com/ultimate-waffle-recipe-secrets/

Les Étapes Clés de la Préparation de la Pâte à Frire

Mélanger sans Excès

Lorsque l’on prépare la pâte à frire, l’un des aspects les plus importants est de ne pas trop mélanger. La pâte doit être homogène, mais il est normal de laisser quelques grumeaux. Cela peut sembler contre-intuitif, mais ces petites irrégularités contribuent à une texture plus aérée après la friture. Un mélange trop homogène pourrait rendre la pâte trop dense, ce qui réduirait le croustillant.

Travailler Rapidement et à Température Basse

Une fois que la pâte est prête, il est crucial de l’utiliser immédiatement. Au fur et à mesure que la pâte repose, elle perd sa légèreté, ce qui peut altérer la texture finale. Il est donc conseillé de préparer la pâte juste avant de tremper les aliments à frire.

De plus, les ingrédients utilisés, en particulier les liquides, doivent être froids, voire glacés. Cela crée une différence de température importante entre la pâte et l’huile chaude, favorisant la formation d’une croûte légère et croquante.

L’Application de la Pâte : Une Fine Couche

L’application de la pâte à frire sur les aliments doit être légère et uniforme. Une couche trop épaisse risque de devenir lourde et grasse une fois frite, ce qui nuit à la texture. Il suffit de tremper les ingrédients dans la pâte et d’enlever l’excédent avant de les plonger dans l’huile. Une couverture fine est idéale pour obtenir ce croquant parfait.

Le Choix de l’Huile et de la Température

La température de l’huile est essentielle pour une friture réussie. Si l’huile est trop froide, la pâte absorbera trop de graisse, ce qui la rendra grasse et molle. Si elle est trop chaude, la pâte risque de brunir trop vite, sans permettre à l’intérieur de cuire correctement. L’huile doit être chauffée à une température stable, autour de 170°C à 180°C, et il est important de ne pas trop remplir la friteuse ou la poêle, afin de ne pas abaisser la température de l’huile.

Le Temps de Cuisson : Juste ce qu’il Faut

La friture doit être rapide, permettant à la pâte de se dorer en quelques minutes. Une fois que la pâte est dorée et croustillante, l’aliment doit être retiré de l’huile et posé sur du papier absorbant pour éliminer l’excédent de graisse.

Les Astuces pour un Résultat Parfait

  • Ne pas trop mélanger la pâte : Laisser quelques grumeaux dans la pâte peut contribuer à une meilleure texture une fois frite.
  • Utiliser des ingrédients froids : Cela favorise l’aération de la pâte et l’obtention d’une croûte plus légère.
  • Chauffer l’huile à la bonne température : Trop froide, elle rendra la pâte molle ; trop chaude, elle brûlera la pâte avant que l’aliment à l’intérieur ne soit cuit.
  • Ne pas surcharger la friteuse ou la poêle : Cela permet à l’huile de maintenir sa température et de frire chaque morceau uniformément.

La Pâte à Frire, un Incontournable en Cuisine

La pâte à frire est incroyablement versatile. Elle peut être utilisée pour une variété de préparations, des plus simples aux plus complexes :

  • Tempura : Un plat japonais classique, où des légumes ou des fruits de mer sont enrobés dans une pâte légère et croustillante.
  • Poissons et Fruits de Mer : Une fine couche de pâte, légère et dorée, accompagne parfaitement des filets de poisson ou des crevettes.
  • Légumes : Des légumes comme les courgettes, les champignons, ou les oignons sont excellents lorsqu’ils sont enrobés de pâte à frire et légèrement dorés.
  • Fritures sucrées : Certaines pâtisseries, comme les churros ou les beignets, bénéficient d’une pâte à frire qui leur donne une texture croustillante à l’extérieur et moelleuse à l’intérieur.

Light and Crispy Donuts Recipe

For: 20 donuts
Preparation time: 20 minutes
Cooking time: 2 minutes per batch
Storage: Best consumed immediately

Required Equipment:

  • Sifter
  • Whisk
  • Frying pan
  • Slotted spoon (or spider)

Ingredients:

  • 200 g all-purpose flour
  • 6 g baking powder
  • 20 g granulated sugar
  • 40 g egg yolks
  • 200 g semi-skimmed milk
  • 100 g egg whites
  • Fruits of choice (optional, for filling or garnishing)
  • Sufficient powdered sugar (for dusting)

Method:

  • Sift the flour with the baking powder. Place both in a large bowl along with the sugar, then add the egg yolks in the center. Pour in the milk and mix until the batter is smooth and homogeneous.
  • Whip the egg whites until frothy and gently fold them into the batter.
  • Pat the fruit dry or blot it with a paper towel. Dip each piece into the batter using a fork to coat it evenly.
Fruits trempés dans une pâte pour une préparation pâtissière
Assurez-vous que chaque fruit est bien enrobé de pâte pour une cuisson homogène et dorée.
  • Carefully place the coated fruit into hot oil at 170°C (340°F) and fry for about 40 seconds on each side, until golden.
  • Using a slotted spoon, remove the fritters and place them on paper towels to absorb any excess oil.
Beignets saupoudrés de sucre glace prêts à être servis
Un saupoudrage généreux de sucre glace pour une touche sucrée parfaite avant de servir
  • Dust the fritters generously with powdered sugar before serving.

Conclusion

Light, crisp, and golden – these homemade fruit fritters are the perfect indulgence for a weekend treat or a festive table. The batter is airy thanks to the whipped egg whites, creating a delicate texture that contrasts beautifully with the tender fruit inside. Whether you’re using apples, bananas, or more exotic choices like pineapple or figs, each piece becomes a small, warm delight straight out of the fryer.

This recipe is both simple and satisfying, requiring only a few pantry staples and basic utensils. The short frying time and fast prep make it ideal for impromptu dessert cravings or an interactive cooking moment with friends and family.

Don’t forget the final touch: a generous snowfall of powdered sugar, which adds not only sweetness but also a touch of elegance. Enjoy them fresh and warm – that’s when the magic happens. And remember, the secret to the perfect fritter is in the lightness of the batter and the care you take with the oil temperature.

Now that you know the method, let your creativity shine. Try different fruits, spice up your batter with cinnamon or lemon zest, or serve them with a dipping sauce like chocolate ganache or fruit coulis. There are countless ways to make this recipe your own.Learn more about

how to proof yeast dough properly from King Arthur Bakingt; http://King Arthur Baking: Yeast Dough Techniques


Frequently Asked Questions (FAQ)

Can I prepare the batter in advance?
Yes, you can make the batter a few hours ahead, but for the best texture, add the whipped egg whites just before frying.

What oil should I use for frying?
Use a neutral oil with a high smoke point, such as sunflower, canola, or grapeseed oil.

Can I bake the fritters instead of frying them?
This specific batter is designed for frying. Baking will not achieve the same crispy texture.

How do I know if my oil is at the right temperature?
Use a thermometer to check for 170°C (340°F). If you don’t have one, dip the tip of a wooden spoon into the oil – small bubbles should form around it.

What fruits work best for this recipe?
Apples, pears, bananas, and pineapple all work well. Softer fruits like strawberries are possible but must be handled delicately.

Can I make them gluten-free?
Yes – you can substitute the flour with a gluten-free mix that includes rice flour or potato starch, but you may need to adjust the liquid slightly.

Secret Pastry Chef’s Cheesecake: No Cracks, No Fuss, Just Perfection

A baked cheesecake in the oven with a golden top and slightly puffed texture."

cheesecake no cracks

Few desserts command the universal affection and reverence that cheesecake does. Rich, smooth, and endlessly versatile, this beloved treat has carved out a special place in the hearts of dessert lovers across cultures and continents. Whether served at a grand celebration or savored quietly with a cup of coffee, cheesecake is more than a sweet indulgence—it’s an experience.

At its heart, cheesecake is all about contrast and harmony. It combines a dense, creamy filling with a firm and often slightly crumbly base, offering a luxurious mouthfeel that lingers pleasantly on the palate. Each bite is a journey—from the initial sweetness that gently envelopes the taste buds to the subtle tang that cuts through, keeping the overall profile balanced and refined.

What truly sets cheesecake apart is its adaptability. From traditional New York-style versions to lighter, whipped variations and even no-bake renditions, it can shift its character with ease. Around the world, different regions put their own twist on the classic: the Japanese approach it with airy delicacy, while others emphasize richness or infuse local flavors to reflect cultural heritage.

Cheesecake also lends itself beautifully to artistic presentation. It can be rustic and charming, with visible swirls and a homestyle cut, or sleek and elegant, topped with gleaming glazes, fresh fruits, or ornamental touches. It suits every occasion—romantic dinners, family gatherings, festive tables, or afternoon teas.

Beyond its physical attributes, cheesecake evokes a sense of comfort and nostalgia. For many, it’s tied to family traditions, special milestones, or memories of a favorite bakery or loved one’s kitchen. Its preparation, though requiring patience and precision, is often a labor of love—an invitation to slow down and appreciate the art of dessert-making.

In the world of confections, cheesecake reigns as a true classic—timeless, indulgent, and endlessly reinterpreted. It speaks to the universal desire for a treat that is both familiar and special, simple yet sublime.

Classic Cheesecake

Serves: 6 to 8 people
Prep Time: 20 minutes
Baking Time: 35 minutes
Chilling Time: 2 hours
Storage: Keeps for 3 days in the refrigerator

Equipment Needed

  • Whisk
  • Sieve
  • Dough scraper
  • Rolling pin
  • 18 cm (7-inch) pastry ring, 4 cm high
  • Food processor
  • Pastry brush

Ingredients

Sweet Pastry (Pâte Sucrée)

  • 96 g butter
  • 80 g icing sugar
  • 40 g almond powder
  • 32 g egg
  • 2 g liquid vanilla
  • 160 g T65 flour (or all-purpose flour)

Cheesecake Cream

  • 500 g cream cheese (such as Kiri or Philadelphia)
  • 75 g sugar
  • 150 g egg yolks
  • 1.5 g salt
  • 1 vanilla bean
  • 180 g thick crème fraîche
  • 125 g heavy cream (35% fat)
  • 1.5 g lemon juice

Egg Wash

  • 50 g egg

Classic Cheesecake – Step-by-Step Instructions

1. Prepare the Sweet Pastry (Pâte Sucrée)

  • Cream the butter, icing sugar, almond powder, egg, and vanilla until smooth.
  • Add the flour and mix just until combined — do not overwork the dough.
  • Roll the dough out to a thickness of 1 to 2 mm, making sure it overhangs the pastry ring.

2. Line the Ring

  • Carefully line an 18 cm ring (4 cm high) with the pastry:
    Use your fingers to gently press the dough down into the base, then up the sides.
  • Run a rolling pin across the top to trim any excess dough.
  • Prick the base all over with a fork to prevent bubbling.
  • Chill in the refrigerator for 20 minutes.
Lining the cheesecake ring with parchment paper for a smooth, easy release.
Lining the ring to ensure a flawless cheesecake release after baking.”

3. Blind-Bake the Pastry

  • Preheat your oven to 180°C (356°F / Gas Mark 6).
  • Bake the chilled tart shell for 15 minutes to partially cook the base.

4. Prepare the Cheesecake Filling

  • In a food processor, blend the cream cheese, sugar, egg yolks, salt, and vanilla seeds (split and scraped from the pod).
  • Add the crème fraîche, heavy cream, and lemon juice, then blend again until smooth and creamy.
Preparing the smooth, creamy cheesecake filling before pouring into the crust.
Preparing the perfect cheesecake filling — rich, smooth, and creamy, ready for the oven.

5. Assemble and Bake

  • Pour the cheesecake filling into the pre-baked tart shell, filling to the top.
  • Lightly brush the surface with beaten egg to create a shiny finish.
  • Bake at 180°C (356°F) for 15 to 20 minutes, depending on your oven. The top should be just set but still slightly wobbly in the center.
Assembling and baking the cheesecake, with a golden-brown top and smooth surface.
Assemble, bake, and decorate! A cheesecake in the making, showing off its golden crust before the final touch.

6. Cooling and Unmolding

  • Let the cheesecake cool completely at room temperature.
  • Carefully unmold and refrigerate for at least 2 hours before serving.
Golden-brown baked cheesecake fresh out of the oven, with a smooth, slightly risen surface.
This golden-baked cheesecake is a promise of rich, creamy indulgence — just waiting to cool and set.

Chef’s Tip – For a Silky, Crack-Free Cheesecake

To avoid cracks and ensure a perfectly smooth texture, bake the cheesecake in a humid environment. Simply place a small ramekin of hot water on the bottom of the oven during baking. The steam helps the filling cook gently and evenly, preventing it from drying out or splitting on top.

Bonus: Let the cheesecake cool gradually in the turned-off oven with the door ajar for 10–15 minutes before bringing it to room temperature — this also helps prevent cracks.

Conclusion: A Cheesecake Worth Every Bite

Making a cheesecake from scratch is more than just following a recipe—it’s an act of care, patience, and precision. From the delicate texture of the sweet pastry shell to the luscious creaminess of the filling, every component contributes to a dessert that feels both luxurious and comforting. Whether you’re preparing it for a special occasion or simply to indulge a craving, this classic cheesecake brings timeless elegance to the table.

What makes it truly special is the balance: not too sweet, with a subtle tang, a tender bite, and a velvety finish. Once chilled and set, it’s a showstopper—simple in appearance but rich in flavor and craftsmanship. And with the added chef’s tip to perfect your technique, success is well within reach.

Serve it as is, or dress it up with fresh berries, a fruit compote, or a glossy glaze. No matter how you present it, the result is sure to delight your guests and leave them asking for a second slice.


Questions & Answers (FAQ)

Q: Can I prepare the cheesecake in advance?
A: Absolutely! Cheesecake actually improves in flavor and texture after a rest in the fridge. Prepare it the day before serving and store it in an airtight container for up to 3 days.


Q: Can I freeze this cheesecake?
A: Yes. Once fully cooled and set, wrap it tightly in plastic wrap and freeze for up to 1 month. Thaw overnight in the refrigerator before serving.


Q: Can I use another type of crust instead of sweet pastry?
A: Yes, a biscuit base (like graham crackers or speculoos) can work well, but it will create a different texture and slightly more rustic finish. The sweet pastry offers a more refined result and adds a unique bite.


Q: My cheesecake cracked during baking. What did I do wrong?
A: Cracks are often caused by overbaking or sudden temperature changes. Follow the chef’s tip: use steam in the oven and let the cheesecake cool slowly. This gentle treatment keeps the surface smooth and flawless.


Q: Can I flavor the filling differently?
A: Of course! Add a citrus zest, a swirl of fruit purée, or even a touch of espresso or cocoa powder to vary the flavor while keeping the texture intact.
http://King Arthur Baking – Cheesecake Tips. Link to Tools of the Trad page featuring springform pans or water bath tips