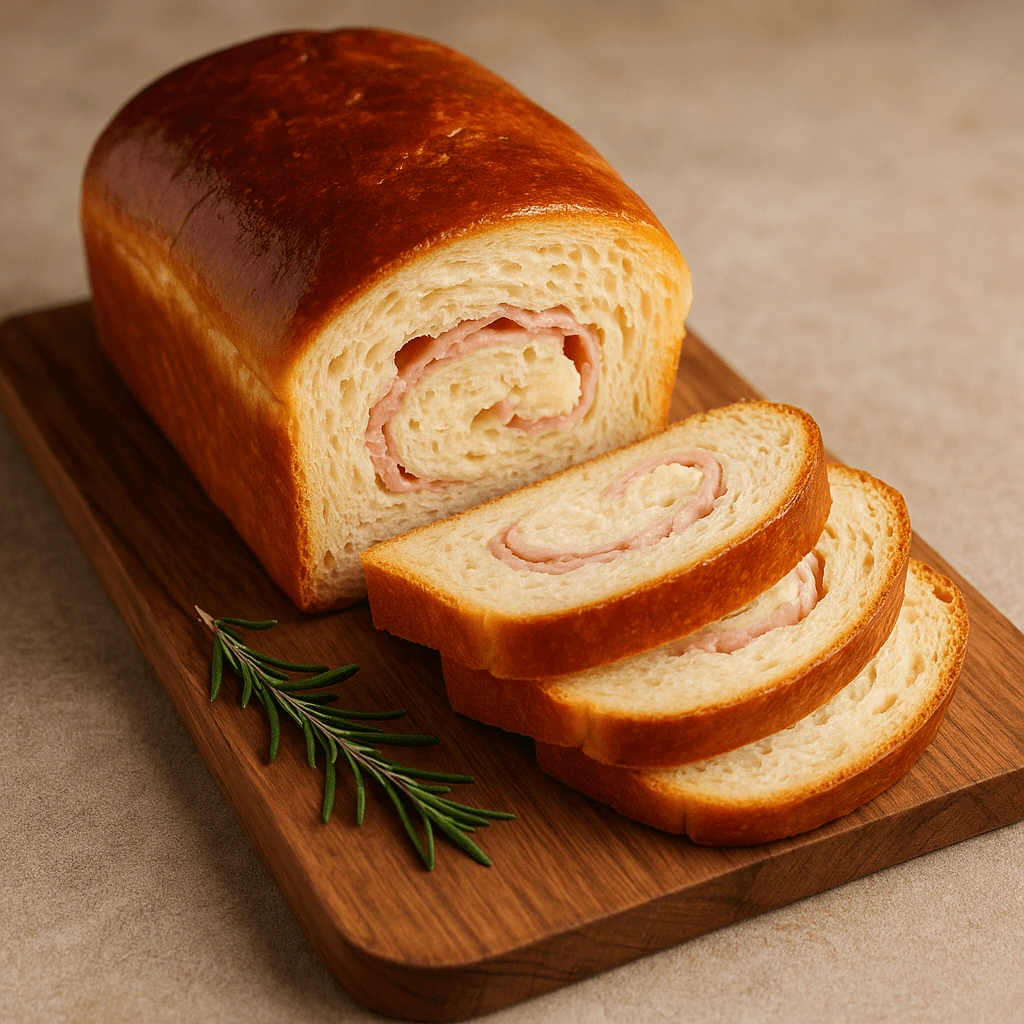
Title: Homemade Braided Brioche: 10 Minutes of Pure Delight

"Golden, fluffy homemade braided brioche, perfect for a quick and delightful treat.

braided brioche recipe
Braided brioche is more than just a pastry—it’s a true culinary tradition, a symbol of warmth, togetherness, and indulgence. Its soft, sweet flavor and light texture make it a beloved choice for breakfasts and afternoon snacks, but it’s also an elegant dish perfect for festive meals or brunches with friends. Braided brioche instantly evokes cozy memories of family gatherings, or lazy Sunday mornings when you indulge in a slice of brioche generously spread with butter.

However, despite its prestigious reputation, braided brioche shouldn’t be seen as an unattainable challenge. Contrary to what you might think, making it at home doesn’t require hours of work or advanced pastry skills! In fact, I’m here to show you a quick and efficient method that will allow you to create a beautiful braided brioche in just 10 minutes of active preparation. The secret lies in the right techniques and mastering the essential steps.

You don’t need professional baking equipment or rare ingredients to succeed with this recipe. All you need are a few simple ingredients you likely already have in your pantry and fridge, plus a little patience and attention. With this recipe, you’ll discover just how easy it is to make a golden, light, and airy brioche that smells divine and will surely delight your taste buds and those of your loved ones.

In this article, I will guide you step-by-step, providing you with all the tips and tricks necessary to make a braided brioche that’s worthy of a top-tier bakery. Whether you’re a beginner in baking or an experienced cook looking for simplicity, this braided brioche will become one of your go-to recipes to make at home, with minimal effort for maximum flavor.


Ingredients:

For this quick braided brioche, you will need the following ingredients, which can easily be found at your local grocery store:

  • 500 g of all-purpose flour (type 55)
  • 70 g of sugar (adjust based on your sweetness preference, but this amount is perfect for a balanced taste)
  • 10 g of salt
  • 10 g of dry yeast
  • 250 ml of lukewarm milk
  • 3 eggs
  • 120 g of unsalted butter, softened
  • 1 egg yolk (for glazing)
  • 1 tablespoon of milk (for glazing)

These quantities are for a generous-sized brioche that will feed the whole family or a few guests. You can adjust the sugar and butter according to your taste.


Step-by-Step Method:

1. Preparing the Dough

Start by activating the yeast. In a small bowl, pour the lukewarm milk (be careful not to overheat it, as too much heat can kill the yeast), then add the dry yeast and let it sit for about 10 minutes. You should see bubbles forming on the surface, indicating that the yeast is active.

In a large bowl, sift the flour, then add the sugar and salt. Mix the dry ingredients well. Create a well in the center and crack the eggs into it. Add the milk and yeast mixture once it’s ready.

Start mixing gently with a wooden spoon or by hand, then gradually incorporate the softened butter. You’ll end up with a sticky but smooth dough.

2. Kneading and First Rise

Transfer the dough to a lightly floured work surface. Knead it for about 10 minutes, until it becomes smooth and elastic. If the dough is too sticky, feel free to add a little more flour, but don’t add too much as it might make the brioche dense.

Once kneaded, form the dough into a ball and place it in a lightly oiled bowl. Cover it with a clean cloth and let it rise for 1 hour, or until it doubles in size.

3. Shaping the Brioche

Once the dough has risen, gently deflate it by pressing down with your hands to release any excess air. Divide the dough into three equal portions, then roll each portion into a long strand.

Take the three strands and braid them together gently, making sure to seal the ends well. It might seem tricky at first, but with a little patience, the braid will form easily. Place the braided dough on a baking sheet lined with parchment paper.

4. Second Rise and Glazing

Cover the braided dough with a clean cloth and let it rise again for 30 minutes. Meanwhile, preheat your oven to 180°C (350°F).

Before baking, prepare the egg wash by beating the egg yolk with a tablespoon of milk. Brush the mixture generously over the surface of the brioche to give it a beautiful golden color after baking.

5. Baking

Bake the braided brioche for 25 to 30 minutes, or until it’s golden brown. To check if it’s done, tap the bottom of the brioche gently—it should sound hollow. If not, leave it in the oven for a few more minutes.

6. Let it Cool and Enjoy

Once out of the oven, let the brioche cool on a wire rack for 10 minutes before slicing it. Patience is key, but you can already smell that delicious freshly baked brioche filling the room.

Golden, fluffy homemade braided brioche, perfect for a quick and delightful treat
“Whip up a soft and buttery braided brioche in just 10 minutes with this simple recipe.

Chef’s Tips:

  1. Butter Substitutes: If you prefer a lower-fat version, you can replace part of the butter with unsweetened applesauce. This will make the brioche even fluffier!
  2. Adding Flavors: For a more indulgent brioche, feel free to add chocolate chips, citrus zest, or even raisins to the dough before braiding it.
  3. The Secret to Perfect Texture: Don’t skimp on kneading. The more you knead the dough, the lighter and airier the brioche will be after baking.

Conclusion for “Homemade Braided Brioche: 10 Minutes of Pure Delight”

Making homemade braided brioche has never been easier or more rewarding. In just 10 minutes of preparation time, you can enjoy the irresistible aroma of freshly baked brioche wafting through your kitchen. This simple yet delightful recipe offers a shortcut to the traditional, buttery treat without compromising on flavor or texture. The braided design not only enhances the brioche’s visual appeal but also creates a wonderful layering of soft, fluffy dough that pulls apart beautifully with each bite.

While this recipe requires minimal time and effort, the result feels luxurious and indulgent, perfect for any occasion. Whether it’s a cozy weekend breakfast, a brunch gathering, or a sweet snack with tea or coffee, this homemade brioche will quickly become a beloved favorite in your baking repertoire.

Baking is all about joy, experimentation, and the satisfaction of seeing something so simple transform into something so extraordinary. With this quick brioche recipe, you’re not just baking—you’re creating a moment of delight for yourself and those you share it with. So, what are you waiting for? Grab your ingredients, braid that dough, and enjoy the magic of homemade brioche!Link to https://briochechic.com/why-professional-bakers-never-share-these-5-viennoiserie-success-secrets/#more-229

The Science Behind Enriched Dough – King Arthur Baking Blog


Question & Answer Section (Q&A)

Q1: Can I add fillings or toppings to this braided brioche recipe?
Absolutely! This braided brioche serves as a wonderful base for a variety of fillings or toppings. If you’re feeling adventurous, you can try adding chocolate chips, fruit preserves, or even a sprinkle of cinnamon sugar before braiding the dough. For a savory twist, think about adding grated cheese, herbs, or even ham to the center. The possibilities are endless! Just make sure to avoid overfilling, as it can affect the dough’s rise and texture.

Q2: Can I make this brioche ahead of time?
Yes, you can! While the recipe is designed to be made quickly, you can prepare the dough the night before and let it rise slowly in the fridge overnight. In the morning, you can shape, braid, and bake it as usual. This method works wonderfully for busy mornings or if you want to impress guests with a freshly baked brioche with minimal effort. Simply allow it to come to room temperature before baking if it’s been chilled overnight.

Q3: Is there a way to make the brioche even more indulgent?
If you want an extra indulgent brioche, you can enrich the dough by adding a bit more butter or even a touch of vanilla extract for a fragrant, sweet depth. You can also brush the finished brioche with a honey glaze or a light syrup after baking to give it a beautiful glossy finish and enhance the sweetness. For a truly decadent version, serve it with a dollop of whipped cream or a side of fruit compote.

Q4: Can I freeze the braided brioche?
Yes, you can! To freeze, simply bake the brioche as usual, let it cool completely, and then wrap it tightly in plastic wrap or foil before placing it in the freezer. When you’re ready to enjoy it, let it thaw at room temperature, or you can gently warm it in the oven for a few minutes to refresh the texture. This makes it perfect for preparing in advance and having it ready whenever you want a warm, homemade treat.

Q5: What’s the key to a fluffy, airy brioche?
The key to a light and fluffy brioche is a combination of good-quality ingredients and proper dough handling. Make sure your butter is soft enough to incorporate into the dough without being too melted, and allow the dough to rise properly before baking. Patience during the proofing process ensures that the dough has time to develop those airy, soft layers that make brioche so irresistible. A warm, humid environment for proofing also helps the dough rise to its fullest potential.

7 Timeless Soup Recipes That Will Make You Feel Like a Master Chef

Creamy leek and potato soup served in a white bowl, topped with fine julienned vegetables and fresh chervil.

7 Classic Soup Recipes

In the hushed world of grand dining and timeless recipes, certain soups glide through history with their elegance undisturbed.

Moreover, Above all,Julienne soup, with its finely cut strands of vegetables, reflects a culinary style that values visual harmony as much as delicate flavor.

Beside it stands Darblay soup, creamy and comforting — a nod to bourgeois tradition where soup was served with poise and pride.

Moreover ,also These two recipes, rooted in the heritage of French cuisine, are quiet witnesses to a time when soup was a refined entrée, presented in delicate porcelain with ceremony.

So,They also tell a story: one of craftsmanship, attention to detail, and a warm sense of shared simplicity.

In this article, I invite you to rediscover these classics through the Brioche Chic lens — where nostalgia meets elegance, and the everyday becomes quietly extraordinary. No need to reinvent the soup —

sometimes, all it takes is serving it with love.

A Portrait of Potage Julienne

Light, structured, and precise — Potage Julienne is the soup equivalent of a string quartet. Each vegetable, carefully julienned, plays its part in a graceful composition. This is a dish that elevates knife work to an art form and simplicity to sophistication.

Far from rustic, Julienne is clarity in a bowl: a clear broth where every element is visible, intentional, and harmonious. It’s a dish that whispers refinement, perfect for those who appreciate the quiet luxury of tradition.

Originally crafted in the 18th century and named after the culinary cut itself, this potage is less about invention and more about execution. It reminds us that elegance is often found in restraint — and in a perfectly timed ladle.

Potage Darblay – The French Velouté

Potage Darblay is warmth in its most noble form: a gentle velouté made with leeks and potatoes, enriched with a touch of cream for a satin-like texture. It’s a soup that comforts without being heavy, perfect for cool days or to be served in a soup tureen at an elegant dinner.

What makes Darblay truly magical is its finishing touch: a bouquet of vegetables cut into julienne, sweated in butter. Carrots, celery, turnips, and leeks — all carefully prepared to delicately dance in the creamy velouté. It’s a meeting of rustic and refined, of everyday cooking and formal service.

At the Table:

The soup is served in a tureen, as tradition dictates, or in a warm soup bowl. Moreover The julienne is placed in the center, topped with the velouté, and finished with a sprig of fresh chervil for a green, aniseed-like touch.

Light ,A hint of cream, if desired — and there you have it: a classic French dish in all its glory.

Technical Sheet – Darblay Soup with Julienne Garnish


Base Elements

IngredientQuantity
Butter100 g
Leek whites400 g
Potatoes1.4 kg

Finishing Touch

IngredientQuantity
Cream100 ml
Chervil¼ bunch

Julienne Garnish (vegetables sweated in butter)

IngredientQuantity
Carrots200 g
Turnips150 g
Leek whites100 g
Celery stalk100 g
Butter50 g

Seasoning

IngredientQuantity
Coarse salt / Fine saltTo taste
SugarTo taste

Preparation Technique

  1. Peel and wash all vegetables carefully.
  2. Cook the base: sauté the leek whites and potatoes in butter, cover with water, and cook until tender.
  3. Cut the julienne: slice carrots, turnips, celery, and leek into fine, even matchsticks.
  4. Sweat the julienne in butter over low heat without browning, until soft yet structured.
  5. Blend the soup base, then strain or purée until smooth. Add the cream and adjust seasoning.
  6. Plate up in a warm soup tureen or bowl, gently placing the julienned vegetables in the center. Finish with fresh chervil.
Creamy leek and potato soup served in a white bowl, topped with fine julienned vegetables and fresh chervil.
A classic Potage Darblay — silky, elegant, and crowned with a delicate julienne of buttered vegetables.

A Final Sip – Timelessness in a Bowl

In a world of fleeting food trends and rapid reinvention, there’s something deeply grounding about a potage that has stood the test of time. Moreover Julienne and Darblay are not just soups — they’re quiet declarations of a culinary heritage where precision, patience, and respect for ingredients reign.

They remind us that elegance doesn’t need extravagance. Moreover That comfort can come in the form of a perfectly cut vegetable or a well-balanced velouté. And that sometimes, the most beautiful things are served warm, in silence, with a simple spoon.

Not only sometimes ,So whether you’re ladling into porcelain for guests or sipping solo on a quiet afternoon, know that you’re partaking in a legacy — one bowl at a time .

Link to Secrets Behind French Bistro Cooking at Home

Everything You Wanted to Know About Potage Darblay (But Were Afraid to Ask)

Q: What makes Potage Darblay different from a classic leek and potato soup?
A: Potage Darblay is a refined version of the traditional leek and potato soup. What elevates it is its smooth, velvety texture — achieved by passing the soup through a fine sieve or blender — and its final enrichment with cream. It’s a soup designed for elegance, not rusticity.


Q: Is the julienne garnish essential?
A: Yes — the julienne of butter-sweated vegetables is a key component. It brings texture, color, and a subtle crunch that contrasts beautifully with the creamy soup. Think of it as a whisper of tradition and technique in every spoonful.


Q: Can I prepare Potage Darblay ahead of time?
A. also The base can be made a day in advance and even frozen.

That’s why,Simply reheat gently and prepare the julienne fresh before serving for best texture and presentation.


Q: What’s the best way to serve it?
A: In a warm soup tureen or deep porcelain bowls.

also Garnish at the last moment with the julienne and a touch of fresh chervil.

For an extra touch of chic: add a drizzle of cream or a crack of white pepper.French Culinary Techniques: The Five Mother Sauces – Auguste Escoffier School of Culinary Arts

Which of these timeless soups will you try first? Tell us your go-to comfort bowl — and don’t forget to share your master-level results with us on Instagram! #BriocheChicSoups