Just In 2 Min : Sublimez Votre Apéro avec Nos Cubes d’Omelette Espagnole

Golden cubes of Spanish tortilla with visible layers of egg and tortilla, served on a wooden board with fresh herbs and toothpicks.

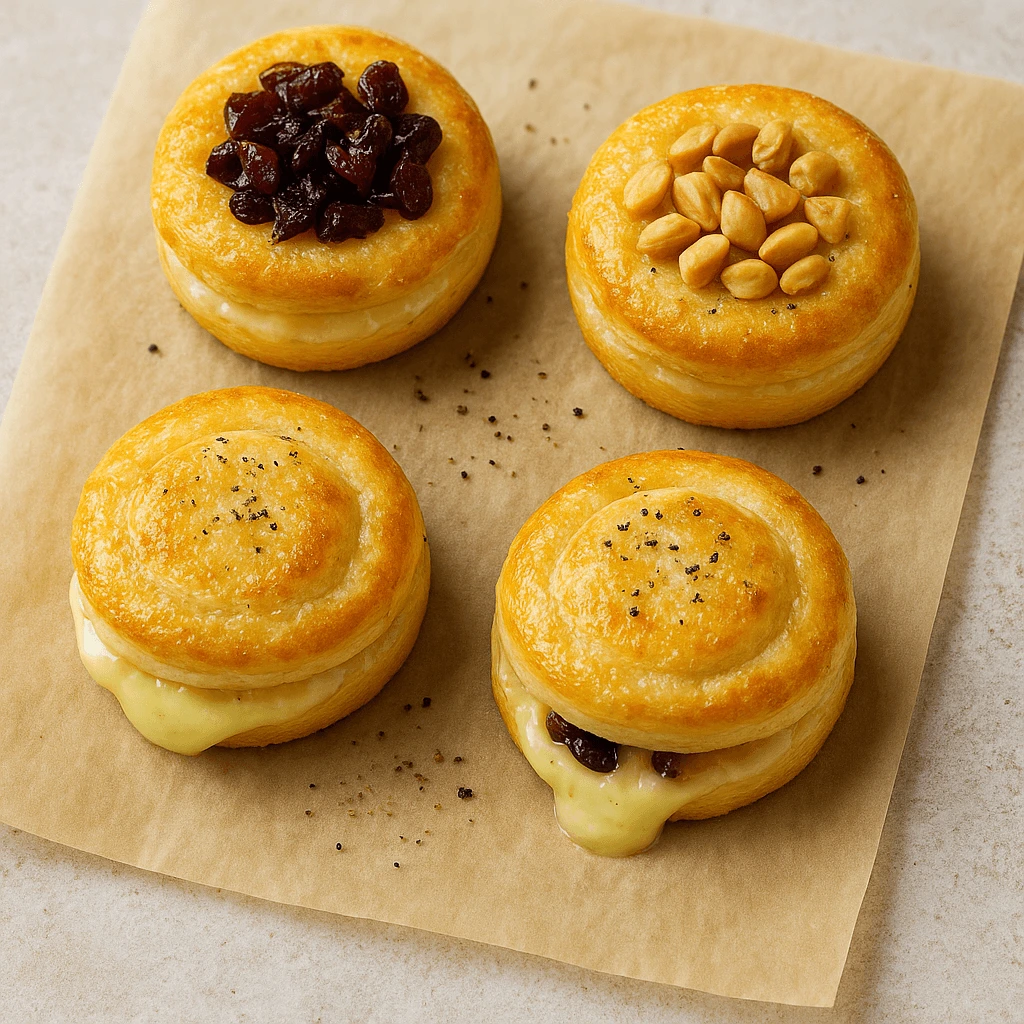
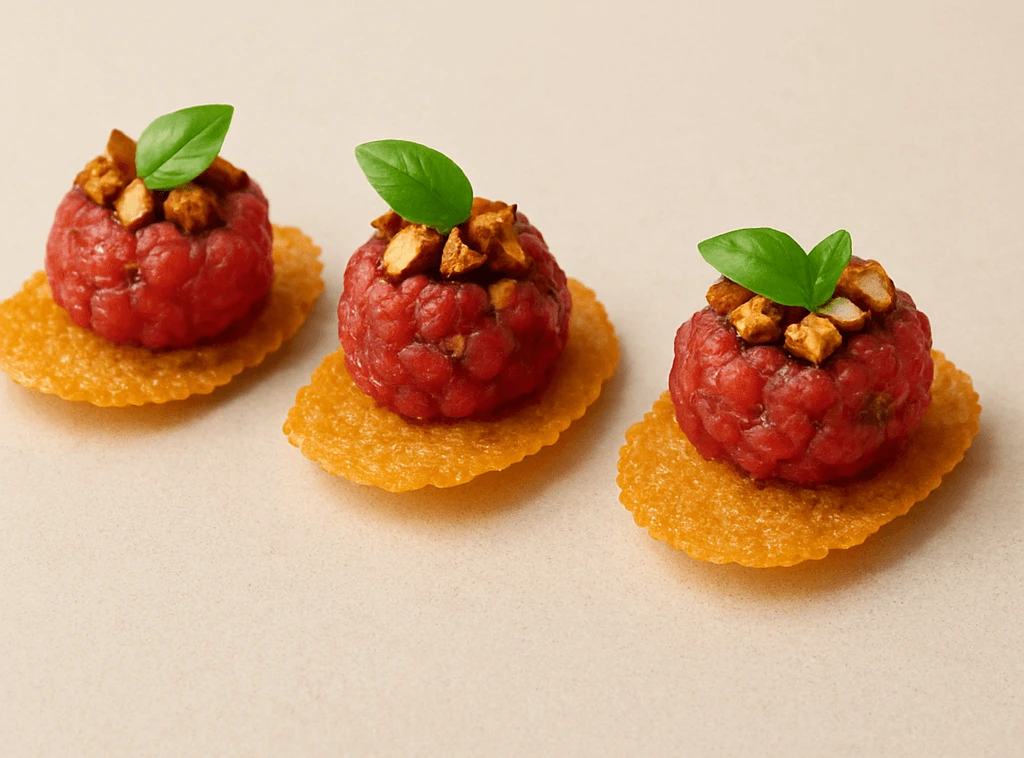
omelette espagnole apéro

Step into the sun-drenched kitchens of Spain with this refined take on one of the country’s most beloved dishes. These bite-sized cubes of Spanish tortilla omelette bring all the warmth and charm of a traditional tortilla de patatas, reinterpreted into elegant, portioned morsels perfect for sharing, entertaining, or savoring in quiet indulgence.

What makes these little cubes so special is the marriage of simplicity and sophistication. Traditionally prepared in rustic countryside homes and lively city tapas bars alike, the Spanish omelette is more than just comfort food—it’s a culinary symbol. Here, the familiar soft, layered textures and golden finish are preserved, but presented with a modern twist: neatly cut, visually striking cubes that are equally at home on a cocktail platter as they are in a picnic basket.

Each piece holds

the essence of slow-cooked tradition, where every slice reveals a mosaic of tender layers and a velvety interior. The taste? Rich and subtly complex, balanced between creamy softness and a satisfying, slightly crisped exterior. They can be enjoyed warm, at room temperature, or even cold—making them a versatile choice for any occasion.

Whether served as an appetizer, part of a brunch spread, or a midday snack, these Spanish tortilla cubes invite you to slow down and savor. They’re the kind of food that turns casual gatherings into cherished moments and brings a touch of Iberian flair to your table.

Rustic. Timeless. Irresistible. Let yourself be transported—one golden cube at a time.

Ingredients (Serves 6 to 8)

  • 1 packet of tortillas
    Preferably soft wheat or corn tortillas, medium size. These will be diced into small squares and provide the body and subtle chewiness to your omelette cubes.
  • 4 large eggs
    Fresh, organic eggs if possible, for a rich and creamy texture. They form the base of the omelette and bind all the elements together.
  • 1 tablespoon dried persillade
    A fragrant mix of parsley and garlic, traditionally used in French cuisine. It brings an aromatic depth and a herby lift to the preparation.
  • 1 tablespoon olive oil
    Extra-virgin if available. Used for cooking and enhancing flavor. It gives the omelette its golden edge and Mediterranean character.

Step-by-Step Preparation

  1. Prepare the Tortillas
    Begin by taking your tortillas out of their packaging. Using your hands, roughly tear them into irregular pieces—don’t worry about precision here. The goal is to create bite-sized fragments that will soak up the egg mixture while still offering a pleasant texture in the final dish. Once broken down, transfer the pieces into a large mixing bowl. The bowl should be spacious enough to allow for easy mixing later without any overflow.
  2. Beat the Eggs
    In a separate bowl, crack the four eggs. Using a fork or a whisk, beat them thoroughly until the yolks and whites are fully combined and slightly frothy. You’re aiming for a smooth, even mixture without visible streaks of egg white. This ensures that the omelette will cook uniformly and develop that signature velvety texture.
  3. Season and Combine
    Pour the beaten eggs over the torn tortilla pieces. Add the dried persillade directly into the bowl—this mix of parsley and garlic will infuse the omelette with a wonderfully fragrant Mediterranean aroma. At this point, grind some fresh black pepper over the mixture according to your taste; it adds a subtle kick and depth. There’s no need for additional salt if your tortillas are already seasoned, but you can adjust this to your preference. Gently mix everything together with a spatula or spoon, folding rather than stirring aggressively, so as not to crush the tortilla pieces too much. Let the mixture sit for about 5 minutes to allow the tortillas to absorb some of the egg and soften slightly.
  4. Cook the Omelette
    Heat a non-stick frying pan over medium heat and add the tablespoon of olive oil. Swirl it around the pan to coat the surface evenly. Once the oil is hot—but not smoking—carefully pour in the tortilla and egg mixture, spreading it out with the back of a spoon to form an even layer. Allow it to cook gently for about 2 minutes on the first side, or until the bottom is lightly golden and set enough to flip.
    Using a wide spatula—or by carefully sliding the omelette onto a plate and flipping it back into the pan—turn it over to cook the second side. Cook for another 2 minutes, ensuring that the omelette is fully cooked through but still moist and tender inside. Adjust the heat as needed to avoid burning.
  5. Cool and Cut into Cubes
    Once the omelette is cooked and both sides are beautifully golden, transfer it onto a cooling rack or a clean plate. Let it rest for at least 10 minutes. This cooling phase is essential: it allows the omelette to firm up slightly, which makes it much easier to cut cleanly.
    Using a sharp knife, trim the edges if desired, then slice the omelette into small, neat cubes. Each piece should be firm enough to hold its shape but still soft and moist inside, offering a delightful texture contrast.

Chef’s Tips

  • Customize the Flavor
    While the persillade gives a lovely garlic-herb aroma, feel free to adapt the seasoning to your taste. A pinch of smoked paprika or a touch of cumin can add a subtle Spanish flair, while a handful of finely chopped fresh herbs (parsley, chives, or cilantro) can boost freshness if using the cubes the same day.
  • Texture Matters
    For added richness, you can incorporate a small amount of grated cheese—like Manchego or mild cheddar—into the mixture before cooking. It melts into the egg and adds creaminess without overpowering the original recipe.
  • Perfect Flip
    If flipping the omelette feels risky, try this: once the bottom is cooked, slide the omelette onto a large plate, cover with a second plate or a flat lid, invert quickly, and then slide it back into the pan to cook the other side. This technique minimizes breakage and ensures even cooking.
  • For Entertaining
    Stick toothpicks into each cube and garnish with a tiny sprig of herb or a dot of spicy aioli for an elevated tapas experience. Serve them on a wooden board for rustic elegance or on a slate platter for modern chic.

Storage & Serving Suggestions

  • Storage
    Once the omelette has cooled completely and been cut into cubes, you can store them in an airtight container in the refrigerator for up to 3 days. Place parchment paper between layers to prevent sticking and retain the cubes’ shape.
  • Serving Temperature
    These cubes are extremely versatile. They can be served:
    • Warm – Reheat gently in a covered skillet or in the oven at low temperature (around 150°C / 300°F) for a few minutes.
    • Room Temperature – Ideal for picnics, brunch tables, or buffets.
    • Cold – Surprisingly delicious straight from the fridge, especially with a glass of chilled white wine or sparkling water with lemon.
  • Freezing
    While possible, freezing is not ideal due to the delicate texture of the eggs and tortillas. If you must freeze them, wrap each cube tightly in cling film, then place in a freezer-safe container. Thaw in the fridge overnight and reheat gently.

Conclusion

More than a simple reinterpretation of the classic Spanish tortilla, these savory omelette cubes offer a new way to enjoy timeless flavors—modern, elegant, and effortless. With just a few pantry staples and minimal equipment, you create a dish that feels at once comforting and sophisticated, humble yet refined.

Whether you’re preparing a casual apéro among friends, curating a brunch spread, or seeking a creative way to transform basic ingredients into something surprising, these cubes never fail to charm. Their versatility is key: they adapt to your rhythm, your table, your guests. Warm and golden for a cozy dinner, chilled and garnished for a chic cocktail hour—each version tells a different story.

Above all, this recipe celebrates the beauty of transformation. Taking something as ordinary as tortillas and eggs, and elevating them through technique and thoughtful presentation, is what home cooking at its best is all about. It’s not only about feeding—it’s about delighting.

So the next time you’re reaching for something quick, think of these tortilla omelette cubes. With just a little care, they become more than a recipe. They become an experience.


Frequently Asked Questions

Can I use fresh herbs instead of dried persillade?
Absolutely. Fresh chopped parsley and garlic make a wonderful substitution. Just be sure to finely mince the garlic and use about twice the quantity compared to dried herbs to match the intensity.

What type of tortillas work best?
Both wheat and corn tortillas are suitable, though they bring different textures. Wheat tortillas result in a softer bite, while corn tortillas add a bit of chew and a more rustic flavor. Choose according to your preference—or even combine both for a unique twist.

How can I prevent the omelette from falling apart when flipping?
Make sure the bottom side is fully set before flipping. If you’re not confident with flipping directly in the pan, use the two-plate method described above. This ensures a clean, intact flip every time.

Are these cubes suitable for children?
Yes, very much so. They’re soft, mild in flavor, and easy to eat with fingers. You can also add finely chopped vegetables or cheese to cater to younger palates.

Can I make these in advance?
Yes. These cubes are ideal for meal prep or entertaining. Make them the day before and refrigerate. Serve chilled or reheat briefly before serving—they hold their texture beautifully.

What can I serve alongside them?
They pair beautifully with a fresh green salad, roasted peppers, or a yogurt-based dip like tzatziki. For drinks, try a crisp white wine, sparkling lemonade, or a light sangria.

Besoin d’une idée rapide et stylée pour l’apéritif ? Ces cubes d’omelette espagnole prêts en 2 minutes sont votre nouvelle arme secrète. Servis tièdes ou froids, ils se marient parfaitement avec un bon vin blanc ou un vermouth sec.

Pour compléter votre apéro, découvrez aussi nos 5 idées d’amuse-bouches chic à préparer à l’avance.

🍷 Envie de bien les accompagner ? Jetez un œil au guide de l’accord tapas et vins sur La Revue du Vin de France.

Scallop Sophistication: A Gourmet Bite in Just 4 Minutes

Mini tartares de Saint-Jacques finement coupées, garnies de pistaches concassées, servis sur des tortillas croustillantes, prêts en quatre minutes.

4-minute gourmet scallops

There are appetizers, and then there are statements. These mini tartares fall into the latter category — sophisticated yet inviting, minimalist yet richly nuanced. Inspired by the elegance of French hors-d’œuvre and the vibrant generosity of Mediterranean tables, this creation captures the essence of refined entertaining in a single, exquisite bite.

At the heart of this dish lies the scallop — prized for its silky, almost ethereal texture and its naturally sweet, briny character. Carefully prepared in tartare form, it reveals a raw delicacy that needs no adornment, only the right companions. Here, it is elevated by a subtle contrast: a whisper of crunch that brings out its smoothness, and a layer of warmth beneath that supports without overpowering.

That foundation

— a delicate, golden tortilla crisped just so — is more than a vessel; it is a balancing act. Light and airy, yet sturdy enough to hold its crown, it provides a gentle counterpoint to the softness of the scallop. On top, a final flourish: a hint of vibrant green, a suggestion of earthiness, a pleasing resistance to the tooth — enough to awaken curiosity without distracting from the central star.

Each tartare is composed with intention, designed not only to taste exquisite but to look like a jewel on the plate. Their small size invites indulgence while encouraging slow appreciation. Perfect for a sophisticated cocktail hour, a refined canapé tray, or the opening course of a curated tasting menu, they offer a moment of luxury that lingers far beyond the last bite.

This is not just a recipe — it’s a sensory narrative. A celebration of texture, of contrast, of balance. A dish that speaks quietly but confidently of the sea, of craftsmanship, and of modern elegance on a miniature scale Serious Eats – How to Perfectly Sear Scallops

Ingredients (Serves 2)

  • 1 small pack of soft wheat tortillas
    Choose mini tortillas or cut standard ones into bite-sized rounds using a cookie cutter. They will serve as the crispy base for the tartare, so aim for a thin, even texture that crisps up nicely when lightly toasted or pan-fried.
  • 1 small pack of shelled, unsalted pistachios
    Preferably raw or lightly roasted. You’ll be chopping them finely or crushing them to sprinkle over the tartare, adding both a nutty aroma and a subtle crunch that contrasts beautifully with the scallops.
  • 5 fresh scallops (or high-quality frozen scallops, fully thawed)
    Use sashimi-grade or diver-caught scallops if possible. They should be firm, translucent, and smell faintly of the sea. If frozen, thaw them slowly in the refrigerator and pat dry before use. These will be finely diced for the tartare.
  • 1 teaspoon of finely snipped chives
    Adds a mild oniony note and a touch of color. Use fresh chives for the best flavor and a clean, aromatic finish.
  • 1 teaspoon of freshly squeezed lime juice
    Brings a bright, citrusy acidity that gently “cooks” the scallops and balances the richness of the nuts and oil. Use fresh limes only — bottled juice is too sharp and lacks complexity.
  • A small drizzle of toasted sesame oil
    Use sparingly — this fragrant oil adds depth and an elegant, slightly smoky finish. Just a few drops are enough to enhance the natural sweetness of the scallops.
  • Fine sea salt and freshly ground black pepper, to taste
    Season delicately. Salt enhances the sweetness of the scallops, while a twist of black pepper adds a faint warmth without overpowering the other flavors.

Preparation

Begin by preparing the pistachios: shell them if necessary, then place them on a clean cutting board. Using a chef’s knife, roughly crush them — you want small, irregular pieces that will provide a pleasant crunch, not a fine powder. Set them aside in a small bowl, reserving them for the final garnish.

Next, tend to the scallops, which must be handled with care. If they are fresh, rinse them gently under cold water and pat them completely dry with paper towels — excess moisture will dilute the flavor of the tartare. If using high-quality frozen scallops, ensure they are fully thawed in the refrigerator, then dried thoroughly. Once ready, place them on a chilled cutting board and, with a very sharp knife, finely dice them into small, even cubes, roughly 3–5 mm in size. This precise cut will ensure a refined texture and even seasoning throughout.

Transfer the diced scallops into a mixing bowl.

Season delicately with a small pinch of fine sea salt and a turn or two of freshly ground black pepper. Add the chopped chives, the fresh lime juice, and a thin drizzle of toasted sesame oil — just enough to perfume the preparation without masking the natural sweetness of the scallops. With a soft spatula or spoon, gently mix to combine all elements evenly, taking care not to mash the delicate scallop pieces.

Now, turn to the tortilla base.

If you are using standard-sized tortillas, use a cookie cutter or glass to cut out small discs, ideally 5–6 cm in diameter. Toast them lightly in a dry pan or oven until just golden and crisp around the edges — they should remain light and snappy without becoming too hard. Let them cool slightly before assembly.

To compose the tartares,

place a small spoonful of the scallop mixture onto each tortilla round. Spread or mound it carefully, respecting the circular shape for a visually appealing result. Top generously with the crushed pistachios, letting some pieces fall slightly off the sides for a natural, artisanal look.

Serve immediately, while the tortillas remain crisp and the tartare retains its delicate freshness. This dish is best enjoyed within minutes of preparation to preserve the contrast between the tender scallops, the crunchy nuts, and the crisp base.

Method – In the Style of a Chef de Cuisine

1. Preparing the Pistachios
Begin by selecting a small handful of shelled, unsalted pistachios. For optimal aroma and texture, lightly toast them in a dry pan over medium heat for 2 to 3 minutes, shaking occasionally to prevent scorching. This step is optional but will intensify their natural oils and enhance flavor. Allow them to cool slightly, then transfer them to a clean work surface. Using the side of a chef’s knife or a mortar and pestle, crush them coarsely — you want a mix of fine crumble and small shards, to introduce both flavor and crunch in the final bite. Reserve in a bowl.

2. Preparing the Scallops
Whether using extra-fresh or properly thawed frozen scallops, utmost care must be taken in handling. Rinse gently under cold water and dry meticulously with a paper towel. Any excess moisture will dull the precision of the tartare. Place the scallops on a chilled cutting board and, with a sharp knife, proceed to dice them finely and evenly, aiming for uniform cubes of approximately 4 mm. Work swiftly to preserve the chill and natural integrity of the flesh.

3. Seasoning the Tartare


Transfer the scallop dice into a cold stainless-steel mixing bowl. Season with a pinch of fine sea salt and a crack of fresh black pepper. Add 1 teaspoon of finely snipped chives — their mild sharpness offers a clean aromatic lift. Squeeze in 1 teaspoon of freshly pressed lime juice, avoiding any pulp or seeds, and add a delicate drizzle of toasted sesame oil — just enough to lend depth, not dominance.
Using a soft spatula or the back of a spoon, fold the mixture gently until fully combined. The scallops should remain intact, their surface lightly coated but never drenched. Taste, adjust seasoning delicately if needed, then refrigerate briefly while preparing the base.

4. Preparing the Tortilla Base
Using a round cutter (5–6 cm diameter), cut out small discs from soft wheat tortillas. These will act as your canapés’ crisp base. Warm a dry skillet or griddle over medium heat. Without adding oil, toast the tortilla rounds on each side until lightly golden and just crisp at the edges — about 1 to 2 minutes per side. Transfer to a cooling rack to maintain crispness.

5. Assembling the Tartares


Working quickly to preserve freshness, place the tortilla rounds on a serving tray. Using a small spoon or quenelle technique if desired, deposit a neat mound of scallop tartare onto each base. The layer should be generous but well-proportioned — about one heaping teaspoon per piece. Flatten gently into a dome or circle, keeping the edges clean and precise.

6. Garnishing and Final Touches
Top each tartare with a sprinkling of the crushed pistachios, ensuring every bite carries both visual contrast and textural intrigue. A final touch of micro herbs (optional) or a dot of citrus zest can elevate presentation.

7. Service
Serve immediately. These tartares are intended to be enjoyed fresh, where the crispness of the base contrasts with the supple texture of the scallops, and the pistachio offers a final, satisfying crunch. Do not delay service, as the tortilla will begin to soften under the tartare with time.

Conclusion – A Delicate Balance Between Simplicity and Sophistication

These mini scallop tartares with pistachios on crisp tortillas embody the elegance of minimalism elevated by thoughtful technique. At first glance, they appear simple — a small, elegant bite. But with each element meticulously prepared and purposefully combined, they reveal a deeper complexity: the soft sweetness of scallop, the subtle acidity of lime, the umami richness of sesame oil, and the pleasing crunch of roasted pistachios.

This is a dish that relies not on extravagance, but on precision. Every step — from the careful dicing of the scallops to the crisping of the tortilla base — contributes to a finished product that is both refined and approachable. It is equally at home in a chic cocktail reception as it is in an intimate dinner setting, where the cook seeks to impress without overwhelming.

The beauty of this preparation lies in its balance: between texture and temperature, delicacy and intensity, tradition and modern flair. It invites both the chef and the diner to pause — to observe, to taste, to appreciate the quiet luxury of a well-crafted bite. And in doing so, it reminds us that true elegance in cuisine is often found in restraint, in respect for the ingredients, and in the story a single mouthful can tell.The Ultimate Guide to Elegant Canapés


Chef’s Q&A – Frequently Asked Questions

Can I prepare the tartare in advance?
Yes — the scallops can be diced and seasoned up to 1 hour in advance. Keep the tartare covered in the refrigerator to preserve freshness. However, assembly should only be done at the last moment to ensure the tortilla base stays crisp.

What if I can’t find fresh scallops?
High-quality frozen scallops (preferably labeled sashimi-grade) are an excellent substitute. Defrost them slowly in the refrigerator and pat dry thoroughly before dicing.

Can I substitute the pistachios?
Absolutely. Toasted hazelnuts, pine nuts, or even crushed almonds can offer a different character. Choose something with a mild, buttery flavor and good texture. Avoid heavily salted or spiced nuts, which would overpower the dish.

Is there a vegetarian version of this recipe?
While scallops are the heart of this preparation, you can experiment with finely diced hearts of palm or king oyster mushrooms, marinated in lime juice and sesame oil, to create a similar texture and umami-rich flavor profile.

How can I make it more festive for a special occasion?
Top with microgreens, edible flowers, or a tiny dot of yuzu gel for added color and brightness. For a luxurious touch, a few grains of caviar or a shaving of truffle can transform this into a show-stopping canapé.

Can I use store-bought tostadas instead of tortillas?
Yes, provided they’re small and thin enough. Store-bought mini tostadas can save time, but homemade toasted tortilla rounds offer more control over texture and flavor.

How should these be served?
Ideally, serve on a chilled platter to preserve freshness. Provide small cocktail forks or serve as finger food. These tartares pair beautifully with a dry white wine (like Sancerre or Chablis) or a crisp sparkling wine.

5-Minute Crispy Smoked Salmon Maki: Ready in a Flash!

Close-up of crispy smoked salmon maki rolls garnished with Japanese seed mix, showing creamy filling and golden crunchy coating.

crispy smoked salmon maki

The crispy smoked salmon maki is a perfect harmony of textures and flavors that brings a refined touch to any meal or gathering.

The delicate smokiness of the salmon, paired with the satisfying crunch of the exterior, creates an irresistible contrast that delights the palate with every bite.

This dish is a testament to how simple ingredients, when prepared thoughtfully, can transform into an extraordinary culinary experience.

Whether served as an appetizer, a light lunch, or part of a sophisticated dinner spread, these maki rolls embody the elegance and freshness that sushi lovers cherish.

Their crispy shell adds a modern twist to a classic favorite, making them not only delicious but also visually captivating on the plate.

Preparing

these maki at home allows you to engage with the artistry of Japanese cuisine, bringing a restaurant-quality dish right to your kitchen.

The process invites creativity, encouraging you to perfect the balance between crispness and tenderness, smokiness and subtle seasoning.

In the end, the crispy smoked salmon maki isn’t just a dish; it’s a celebration of flavor, texture, and the joy of crafting something beautiful and delicious from scratch.

Sharing these maki with friends or family will surely elevate your dining experience and leave a lasting impression on everyone fortunate enough to taste them.

Quick Elegant Starters Under 10 Minutes

Ingredients for 2 servings:

  • 2 generous slices of smoked salmon
    Select high-quality smoked salmon with a silky texture and a delicate smoky aroma.
  • The slices should be thick enough to hold their shape but tender enough to melt in the mouth.
  • providing a luxurious foundation for the maki.
  • 100 grams of fresh cream cheese
    Opt for a smooth and creamy fresh cheese that will lend a rich, slightly tangy contrast to the smoky salmon.
  • The cheese acts as a luscious binder inside the roll, balancing the flavors with its gentle freshness.
  • 1 generous drizzle of extra virgin olive oil
    Use a fruity, aromatic extra virgin olive oil to add a subtle layer of richness and a fragrant finish.
  • This oil will enhance the overall mouthfeel without overpowering the delicate ingredients.
  • 25 grams of Japanese seed mix (furikake or toasted sesame blend)
    This mixture, often composed of toasted sesame seeds.
  • nori flakes, and sometimes poppy or flax seeds.
  • provides a nutty, umami-packed crunch that elevates the texture and visual appeal of the maki.
  • Freshly ground black pepper, to taste
    A few twists of freshly ground black pepper will add a gentle warmth and complexity, perfectly complementing.
  • the creaminess of the cheese and the smokiness of the salmon without overwhelming the palate.

METHODE

Start by placing the fresh cream cheese in a small bowl. Using the back of a spoon or a small whisk, gently crush and blend the cheese until it becomes smooth and creamy.

Gradually drizzle in the extra virgin olive oil while continuing to mix, allowing the oil to fully incorporate and create a silky, spreadable texture.

Season generously with freshly ground black pepper, adjusting to taste — this will bring a subtle warmth and depth to the mixture.

Lay out the slices of smoked salmon on a clean surface or cutting board.

With a small spoon or a butter knife, carefully spread a thin, even layer of the seasoned cream cheese mixture along one edge of each salmon slice.

Make sure to cover just enough to add flavor without overpowering the delicate salmon.

Starting from the edge with the cream cheese,

gently but firmly roll each slice of salmon into a tight cylinder, taking care to keep the filling inside.

The roll should be compact enough to hold its shape, yet delicate to preserve the texture of the salmon.

Using a sharp knife, slice each roll into bite-sized tronçons (pieces), ideally about 2 to 3 centimeters thick. For a cleaner cut, wipe the knife blade between each slice.

Finally, sprinkle the tops of the salmon rolls with the crushed Japanese seed mix, ensuring an even coating.

This adds a beautiful visual contrast and a delightful crunchy texture that complements the softness of the salmon and cream cheese.

Serve immediately to enjoy the perfect balance of creamy, smoky, and crunchy sensations.

Begin by placing the fresh cream cheese into a chilled mixing bowl. Using a small whisk or the back of a spoon, carefully work the cheese until it achieves a smooth, velvety consistency.

This step is crucial to ensure the cheese spreads effortlessly without clumping. Slowly incorporate the extra virgin olive oil in a steady, thin stream while continuously folding the mixture.

The oil not only enriches the texture but also imparts a subtle fruity aroma, elevating the overall flavor profile.

Season judiciously with freshly cracked black pepper, grinding it directly over the mixture to preserve its aromatic oils.

Taste as you go — the pepper should enhance the creaminess without dominating the delicate notes of the smoked salmon.

Next,

prepare your workstation by laying out the slices of smoked salmon flat on a clean surface, such as a bamboo sushi mat or a large cutting board.

Carefully spread a precise layer of the prepared cream cheese mixture along one edge of each salmon slice, approximately one centimeter thick.

Use an offset spatula or the back of a spoon to achieve an even distribution. This layering technique ensures each bite has a harmonious balance of creaminess and smoky richness.

To assemble, gently but firmly roll the salmon slices from the cheese-coated edge, maintaining a tight and consistent roll without compressing the fish excessively.

The roll should hold together with a slight resistance, preserving the tender texture of the salmon.

Use your fingers to gently shape and compact the roll as you go, taking care to avoid tearing the delicate slices.

Using a very sharp, preferably serrated knife, slice each roll into even tronçons measuring roughly two to three centimeters in thickness.

To achieve clean, precise cuts and prevent smearing, periodically wipe the knife blade with a damp cloth between each slice.

Finally,

garnish the tops of the sliced maki generously with the crushed Japanese seed mixture.

which provides a delightful textural contrast with its nutty, toasted notes.

Press the seeds lightly into the surface to ensure they adhere without overwhelming the salmon’s delicate flavor.

Serve these crispy smoked salmon maki immediately to preserve their freshness and textural integrity.

Present them elegantly on a chilled plate or slate board, accompanied optionally by pickled ginger.

a small dish of soy sauce, or a touch of wasabi for guests who desire an additional layer of flavor complexity

Conclusion

The crispy smoked salmon maki is a sublime example of how simplicity and sophistication can coexist harmoniously in one bite.

This dish celebrates the natural elegance of smoked salmon, enhanced by the creamy freshness of cheese and the satisfying crunch of toasted Japanese seeds.

The contrast of textures—from the tender, silky salmon to the crisp exterior—creates a sensory journey that captivates both the eye and the palate.

Preparing these maki at home

offers a rewarding experience, inviting you to explore the subtle art of balance in flavor and texture.

Each step, from the careful blending of the cheese to the precise rolling and slicing.

reflects a dedication to culinary craftsmanship that elevates a seemingly simple snack into a gourmet delight.

Moreover, this recipe’s versatility makes it suitable for various occasions—whether as an elegant appetizer for dinner parties.

a sophisticated bite for casual gatherings, or a refined treat to indulge in solo.

Its beauty lies in its adaptability and the opportunity it provides to personalize with different seed mixes, oils, or seasoning tweaks.

Ultimately, the crispy smoked salmon maki is not just a dish but a celebration of freshness, texture, and flavor synergy.

It invites both novice cooks and seasoned chefs to enjoy the pleasure of creating something visually stunning and deliciously satisfying

.Curious about the best nori for rolling? Check out The Kitchn’s guide to sushi-making essentials.


Frequently Asked Questions

Q: Can I substitute smoked salmon with another type of fish?
A: Absolutely.

While smoked salmon offers a distinctive smoky richness, you can experiment with other cured or smoked fish such as trout or mackerel.

Fresh sashimi-grade salmon can also be used but will yield a different flavor profile.

Q: How can I make the maki even crispier?


A: To enhance the crunch, consider lightly toasting the Japanese seed mix before applying it, or incorporate crushed tempura flakes for extra texture.

Additionally, chilling the rolls before slicing can help maintain their firmness.

Q: What variations of cream cheese can I use?
A: Traditional full-fat cream cheese works best for its creamy texture, but you can experiment with herbed cream cheese or mascarpone .

for a richer, more decadent taste. Just be mindful of added flavors to maintain balance.

Q: Can I prepare these maki in advance?
A: It’s best to serve them fresh to preserve the contrast between the creamy interior and the crispy topping.

However, you can prepare the rolls and slice them shortly before serving.

Store the assembled rolls tightly wrapped in the refrigerator for up to a few hours.

Q: Are there vegan alternatives for this recipe?
A: Yes! Smoked carrot or smoked tomato slices can substitute the salmon.

and vegan cream cheese alternatives can replace the fresh cheese. The seed mixture remains an excellent textural element.

Chef’s Secret: Gourmet Foie Gras & Pecan Crackers Ready in 2 Minutes!

Close-up of gourmet foie gras canapés topped with toasted pecans on crisp salted crackers.

foie gras pecan crackers

Indulge in an exquisite culinary experience where the rich, velvety essence of foie gras meets the crisp, delicate crunch of artisan crackers, elevated by the warm, subtle notes of toasted pecans.

These canapés embody the perfect harmony between tradition and innovation, inviting you on a refined journey of taste and texture.

Each bite offers a masterful balance: the smooth, luxurious foie gras melts effortlessly atop a beautifully crisp base.

accented by the satisfying crunch and gentle sweetness of pecans.

This contrast not only delights the palate but also creates a complex layering of flavors that is both elegant and unforgettable.

Ideal for sophisticated gatherings,

festive occasions, or an indulgent appetizer, these canapés marry simplicity with refinement.

The crispness of the crackers provides the perfect foundation, while the pecans introduce.

a distinctive character that enhances the overall depth and complexity of the bite.

The foie gras stands as the centerpiece of this creation—a product of careful craftsmanship and culinary tradition—

whose richness is beautifully tempered by the textures and subtleties that surround it.

Served chilled and paired with a complementary wine, these canapés promise to captivate and impress even the most discerning guests.

Experience a moment of pure gastronomic pleasure, where every mouthful reveals layers of flavor and elegance in perfect harmony.

Ingredients for 6 to 8 people

  • 1 pack of salted crackers
  • 150 g foie gras
  • 2 tablespoons onion jam
  • 50 g pecans
  • Freshly ground black pepper

Preparation Instructions

Begin by carefully slicing the foie gras into thin, delicate slices, ensuring each piece is even and smooth to enhance both texture and presentation.

Gently place a slice of foie gras atop each salted cracker, allowing the richness of the foie gras to complement the crisp, lightly salted base.

Next, take a moment to freshly grind a small amount of black pepper over each canapé.

The subtle peppery heat will perfectly balance the creamy foie gras, awakening the flavors without overpowering them.

Then, add a small dollop of onion jam atop the foie gras—just enough to introduce a touch of sweetness and a hint of savory depth.

The jam’s glossy texture and mild tang will contrast beautifully with the smoothness of the foie gras and the crunch of the cracker.

To finish,

delicately garnish each canapé with a single pecan half.

The toasted pecan adds an irresistible crunch and a warm, nutty aroma that elevates the entire bite to a new level of sophistication.

Arrange the canapés on a serving platter with care, and serve immediately to preserve the contrast of textures and the freshness of flavors.

These elegant bites pair wonderfully with a chilled glass of sweet white wine or Champagne, making them the perfect appetizer for any refined gathering.

Preparation Instructions

Begin by carefully slicing the foie gras into thin, delicate slices, ensuring each piece is even and smooth to enhance both texture and presentation.

Gently place a slice of foie gras atop each salted cracker, allowing the richness of the foie gras to complement the crisp, lightly salted base.

Next, take a moment to freshly grind a small amount of black pepper over each canapé.

The subtle peppery heat will perfectly balance the creamy foie gras, awakening the flavors without overpowering them.

Then,

add a small dollop of onion jam atop the foie gras—just enough to introduce a touch of sweetness and a hint of savory depth.

The jam’s glossy texture and mild tang will contrast beautifully with the smoothness of the foie gras and the crunch of the cracker.

To finish, delicately garnish each canapé with a single pecan half.

The toasted pecan adds an irresistible crunch and a warm, nutty aroma that elevates the entire bite to a new level of sophistication.

Arrange the canapés on a serving platter with care, and serve immediately?

to preserve the contrast of textures and the freshness of flavors.

These elegant bites pair wonderfully with a chilled glass of sweet white wine or Champagne.

making them the perfect appetizer for any refined gathering.

Chef-Style Preparation Method

Using a very sharp, chilled knife, slice the foie gras into thin, uniform slices about 3-4 mm.

thick to ensure a smooth texture and even melting on the palate.

Gently lay each slice onto individual salted crackers, taking care not to break the delicate foie gras.

Lightly season

each canapé with a few turns of freshly ground black pepper from the mill—

just enough to enhance the foie gras without overwhelming its subtle richness.

Spoon a small quenelle or dollop of onion jam atop each foie gras slice, applying it sparingly to maintain balance.

The jam should add a nuanced sweetness and slight acidity, complementing .

the creamy foie gras and the savory cracker base.

For the final touch, place a single toasted pecan half precisely in the center.

or slightly off-center on each canapé, adding texture and a fragrant, nutty contrast.

Arrange the canapés meticulously on a chilled serving platter, ensuring spacing to preserve their integrity.

Serve immediately, accompanied by a well-chilled glass of Sauternes or a fine Champagne to elevate the tasting experience.

Conclusion

These canapés represent more than just a simple appetizer—they are a refined expression of culinary artistry where tradition meets modern elegance.

The delicate balance between the rich, buttery foie gras and the crisp, subtly salted crackers creates.

a foundation of textures that instantly captivates the palate. The addition of freshly ground black pepper brings .

a gentle heat that awakens the senses without overpowering the foie gras’s luxurious flavor.

Meanwhile the sweet and savory onion jam introduces a layer of complexity.

cutting through the richness with just the right amount of acidity and sweetness to maintain harmony.

The toasted pecans crown each canapé with a satisfying crunch and a warm, aromatic note.

completing a sophisticated flavor profile that is both intricate and approachable.

This thoughtful combination showcases the importance of contrast and balance in haute cuisine.

elevating simple ingredients into a memorable tasting experience.

Serving

these canapés chilled ensures that every bite delivers the perfect interplay of textures and temperatures, preserving the foie gras’s delicate melt-in-the-mouth quality alongside the crispness of the cracker and the toasted notes of the nuts. When paired with a complementary wine, such as a luscious Sauternes or a refined Champagne, the tasting journey reaches its pinnacle, offering guests a moment of true indulgence.

Whether for an elegant dinner party, a festive celebration, or a gourmet tasting event, these canapés stand as a testament to the timeless appeal of classic French flavors elevated with a modern twist. Their sophistication and balance make them a perfect choice for impressing discerning palates and creating unforgettable culinary memories.Link: /2-minute-appetizers
“If you love quick bites like this, don’t miss our 2-minute appetizer collection — all chef-approved!”

Questions & Answers – Foie Gras & Pecan Crackers Canapés

Q1: Why use pecans instead of other nuts?
A: Pecans offer a mild, slightly sweet flavor and a delicate crunch that pairs beautifully with the rich, buttery texture of foie gras. Their warm, nutty notes also complement the sweetness of the onion jam perfectly.

Q2: What type of crackers work best?
A: Thin, salted crackers with a light, crisp texture are ideal. They provide a sturdy yet subtle base that supports the foie gras without overpowering its delicate flavors.

Q3: Can the onion jam be substituted with something else?
A: Absolutely. Alternatives like fig jam, fruit chutney, or even a dollop of sweet wine jelly can be used, depending on the flavor profile you want to highlight.

Q4: How should the canapés be stored before serving?


A: It’s best to prepare the components ahead of time but assemble the canapés just before serving. This keeps the foie gras fresh and the crackers crisp for optimal texture and taste.

Q5: What wine pairs best with these canapés?
A: A sweet white wine like Sauternes or Gewurztraminer, or even a dry Champagne, provides a refreshing contrast that balances the richness of the foie gras beautifully.

Q6: Is there a vegetarian version of this canapé?
A: For a vegetarian option, replace the foie gras with fresh goat cheese or a mushroom mousse paired with the pecans to maintain richness and texture.What is Foie Gras?
https://www.saveur.com/what-is-foie-gras/
“Learn more about the origins and culinary uses of foie gras.”

5-Minute Crispy Mini Camemberts – The Ultimate Chic & Easy Appetizer!”

"Mini camemberts fondants garnis de fruits secs et cacahuètes, servis chauds et croustillants pour un apéritif express."

easy 5-minute appetizer

These mini camemberts croustillants are the embodiment of indulgent simplicity — a refined appetizer or small plate that brings together the creamy luxury of French cheese with the playful crunch of an unexpected garnish. Encased in a golden, crisp shell, each mini camembert reveals a molten heart of rich, velvety goodness the moment you cut into it. The warmth accentuates its earthy, mushroomy aromas, making each bite melt effortlessly on the palate.

But the true twist comes with the contrast: a vibrant mix of dried fruits and peanuts, scattered thoughtfully to awaken the senses. The natural sweetness of the fruit offsets the richness of the cheese, while the roasted peanuts bring an irresistible nuttiness and crunch that elevates the experience from classic to unforgettable. It’s a game of textures and flavors — warm versus cool, creamy versus crisp, sweet against savory — and one that never fails to captivate.

Ideal for an elegant starter, a sophisticated sharing platter, or a wine-pairing evening, these mini camemberts offer more than just taste — they offer theater. From the first crackle of the crust to the last hint of salt and sweetness lingering on the tongue, they promise a culinary moment of comfort and flair. Whether served at a festive dinner or a casual gathering, they are sure to surprise and impress, turning a humble cheese into a centerpiece of creativity.

Mini Camemberts Croustillants with Dried Fruits and Peanuts

A Sophisticated Cheese Delight for Four

Ingredients (Serves 4):easy 5-minute appetizer

  • 8 mini Camemberts
  • 2 tablespoons mixed dried fruits (e.g., figs, apricots, raisins, cranberries)
  • 2 tablespoons dry-roasted peanuts
  • Freshly ground black pepper

A Refined Starter with French Flair

This recipe brings the charm of French bistro dining into your home, offering a warm, crunchy, and creamy experience in every bite. Each mini camembert is gently warmed until perfectly soft inside, while the exterior remains lightly crisp — an elegant contrast in texture.

The real magic lies in the topping: a rustic mix of sweet dried fruits and roasted peanuts, scattered over the warm cheese just before serving. The fruits lend a chewy, naturally sweet note that plays beautifully with the rich, earthy flavors of the camembert. Meanwhile, the peanuts provide a salty crunch and nutty depth that enhance the creamy heart of the cheese.

A touch of freshly ground black pepper is all it takes to tie the flavors together, adding a subtle heat that wakes up the palate.

Whether served as an appetizer, a part of a festive cheese board, or a luxurious snack with a glass of wine, these mini camemberts are effortless yet impressive. Elegant enough for entertaining, simple enough for a cozy night in — this is comfort food, elevated.

Preparation

Carefully slice each mini camembert in half horizontally, as you would a sandwich, to reveal the creamy interior. Give each open face a light twist of freshly ground black pepper to awaken the flavor.

Generously garnish one half of the mini camemberts with finely chopped dried fruits, letting the natural sweetness infuse the cheese. On the remaining halves, scatter coarsely crushed dry-roasted peanuts, adding a rustic crunch and nutty contrast.

Gently close each camembert like a filled sandwich, pressing slightly to let the fillings meld with the soft cheese. Serve immediately, slightly warmed if desired, to enhance the contrast between the creamy interior and the textured toppings.

Conclusion

These mini camemberts croustillants are a true celebration of contrasts — warmth and crunch, richness and lightness, indulgence and simplicity. They bring together the best of French cheesemaking tradition and contemporary culinary creativity in a single, elegant bite. Whether served at the start of a festive meal, offered as part of a cheese board, or simply shared over a glass of wine among friends, they never fail to spark curiosity and delight.

What makes this recipe so captivating is its balance: the creamy camembert, already luxurious on its own, becomes even more intriguing when paired with a medley of textures and flavors. The dried fruits introduce natural sweetness and chewiness, evoking a rustic charm that contrasts beautifully with the refined cheese. The peanuts, on the other hand, bring a savory, almost smoky depth and a satisfying crunch that surprises and satisfies in equal measure.

And yet, despite their sophisticated presentation, these mini camemberts are wonderfully approachable — quick to prepare, endlessly adaptable, and deeply comforting. They remind us that elegance in cooking doesn’t have to be complicated; it simply requires thoughtfulness, contrast, and attention to detail.

Ultimately, this dish is more than a recipe — it’s an invitation to slow down and savor. To appreciate the way flavors and textures play off one another. To create moments of pleasure and connection around something as humble, and as sublime, as cheese. So whether you’re cooking for guests or treating yourself to a quiet evening indulgence, these mini camemberts offer a little taste of luxury, wrapped in golden simplicity.“A Chef’s Secret: Irresistible Blue Cheese & Pear Canapés in 3 Steps
Link this under a “Try These Next” or “More Cheesy Delights” section.

Questions & Answers

1. Can I use a full-size camembert instead of mini ones?

Yes, you can! A whole camembert works beautifully as a shared appetizer. Simply follow the same preparation method, slicing it in half, filling it with dried fruits or peanuts, then warming gently before serving. It becomes a delicious centerpiece for a cheese platter.

2. Do I need to bake the camemberts after filling them?

You don’t have to, but gently warming them — either in a low oven for a few minutes or with a brief turn in a pan — enhances the creaminess and allows the flavors of the filling to meld into the cheese. Be careful not to overheat, as camembert melts quickly.

3. What types of dried fruits work best?

Fruits like figs, apricots, raisins, cranberries, or even dates work wonderfully. Choose a mix for variety in sweetness and texture. Just be sure to slice them finely so they integrate well with the creamy cheese.

4. Can I substitute the peanuts with other nuts?

Absolutely. Walnuts, almonds, pecans, or even hazelnuts are great alternatives. Toasting them lightly before crushing will enhance their aroma and add depth to the dish.

5. Is this dish better served warm or at room temperature?

While it’s delicious at room temperature, serving the mini camemberts slightly warm allows the cheese to soften beautifully and offers a more luxurious texture. If you prepare them ahead, just pop them in the oven for a few minutes before serving.

6. What wine pairs well with this recipe?

A light, fruity red wine like Pinot Noir complements the creaminess of the camembert and the sweetness of the dried fruits. If you prefer white, a slightly off-dry Chenin Blanc or a mellow Chardonnay also pairs beautifully.

7. Can this be made in advance?

Yes. You can prepare the camemberts with their fillings a few hours ahead and store them in the fridge. Warm them gently before serving to bring out the best in texture and flavor.

8. Is this recipe suitable for vegetarians?

Yes — as long as the camembert used is made with vegetarian rennet (check the label). The combination of cheese, fruit, and nuts makes this dish hearty and satisfying for vegetarians.Président Camembert Cheese – link to the product page or homepage:
https://www.presidentcheese.com/

Tomato and Cheese Waffle Skewers: A Flavorful Bite in Just 5 Minutes!

Colorful tomato and cheese waffle skewers arranged on a platter, ready to serve as an appetizer."

tomato and cheese appetizer

These delightful Tomato and Cheese Waffle Skewers bring together the perfect balance of flavors and textures,

transforming simple ingredients into a visually stunning and mouthwatering appetizer.

The idea behind this dish is simple yet sophisticated: fresh, juicy cherry tomatoes paired with crisp, golden waffle crisps and a creamy, savory cheese element.

The combination offers a dynamic interplay between.

the acidity of the tomatoes and the richness of the cheese, all held together by the crispy texture of the waffles.

Each skewer is a little work of art—visually vibrant and perfectly portioned for easy snacking or elegant presentation at any gathering.

The waffles, light and crunchy, are cut into bite-sized pieces that serve as the ideal foundation for the juicy tomatoes and savory cheese.

Together, they create a harmonious trio of taste that is fresh, rich, and completely satisfying.

The skewering technique not only elevates the aesthetic but also makes this dish perfect for serving at parties, picnics, or as an appetizer at a fine-dining event.

This dish

can be served warm or at room temperature, allowing the flavors to meld and develop.

It’s versatile enough to complement a variety of dipping sauces or even enjoyed on its own as a standalone appetizer. Whether it’s the crunch of the waffle.

the juiciness of the tomatoes, or the smooth, salty bite of the cheese, each skewer offers a balanced combination that will tantalize your taste buds.

Perfect for any occasion, the Tomato and Cheese Waffle Skewers.

are not only a visual treat but also an explosion of flavors and textures that will leave your guests wanting more.

With each bite, you’ll experience the joy of simple ingredients transformed into an extraordinary culinary creation.

Tomato and Cheese Waffle Skewers: A Perfect Fusion of Freshness and Crunch

For a creative and vibrant appetizer that’s easy to prepare and fun to serve,

the Tomato and Cheese Waffle Skewers offer an irresistible combination of textures and flavors.

With only a few ingredients, this dish elevates the humble cherry tomato, pairing it with crisp, cheesy waffles and presented on skewers for a delightful visual effect.

Ingredients for 4 Servings:

  • 16 cherry tomatoes: Choose ripe, firm tomatoes for their burst of juicy, tangy flavor.
  • The sweetness of the tomatoes complements the salty, crunchy waffle crisps and creates a beautiful balance.
  • 1 packet of cheese waffles: The waffles should be light and crisp, with just the right amount of cheese flavor. The cheese enhances the savory profile of the skewers, offering a satisfying crunch and depth to each bite.
  • 16 wooden skewers: These skewers hold the ingredients together and make the dish easy to eat in bite-sized portions.
  • The skewers should be long enough to hold the tomatoes and waffle crisps without overcrowding them.

Preparation:

The preparation for this appetizer is quick and straightforward, yet the results are impressive.

Start by washing and drying the cherry tomatoes, ensuring they are firm and ready for skewering.

Break the cheese waffles into small, bite-sized pieces—about the same size as the tomatoes.

Thread each skewer with a tomato, followed by a piece of waffle, and repeat until all 16 pieces of tomato and waffle are skewered.

The vibrant colors of the tomatoes and the golden waffles create an appealing visual contrast.

making them a perfect addition to any appetizer platter or a stylish finger food for parties.

Serving Suggestions:

These Tomato and Cheese Waffle Skewers can be served as a light appetizer, party snack, or even as a fun addition to a brunch spread.

For a more refined presentation, arrange the skewers in a decorative pattern on a platter, or serve them in individual small cups for a more elegant touch. You can pair .

them with a dipping sauce, such as a tangy herb dip, or a creamy dressing for added flavor.

Why This Dish Works:

The combination of fresh, juicy tomatoes with the crunchy, cheesy waffles is a fantastic contrast, making each bite a flavorful experience.

The slight saltiness from the cheese waffles is balanced by the natural sweetness of the tomatoes,

and the skewering makes them easy to serve in bite-sized portions.

The simplicity of the dish allows the freshness of the ingredients to shine, while the texture combination keeps each skewer exciting to eat.

Conclusion:

Tomato and Cheese Waffle Skewers are a perfect dish for any casual gathering or formal event. Their balance of textures.

ease of preparation, and the delicious flavor contrast between the fresh tomatoes and cheesy waffles make them a crowd-pleaser that is sure to be a hit with both children and adults alike.

With just a few ingredients, you can create an elegant and fun appetizer that adds a burst of color to any table.

In the world of appetizers, simplicity often leads to the most delightful and memorable dishes, and Tomato and Cheese Waffle Skewers exemplify this beautifully.

This dish brings together the best of both worlds: the natural sweetness of ripe cherry tomatoes and the savory, indulgent crunch of cheese waffles.

The result is a harmonious combination of textures and flavors that will captivate anyone who takes a bite.

The beauty of this appetizer lies not only in its flavor but also in its versatility.

Whether you’re hosting a casual get-together, a holiday party, or an elegant dinner party, these skewers are incredibly adaptable .

and can be paired with a wide range of sauces, dips, or even complementary dishes.

The skewered presentation makes them perfect for serving as finger food, and their bright colors instantly add vibrancy to any spread.

But beyond its aesthetic and taste appeal,

this dish has a certain charm in its simplicity. With just three key ingredients—cherry tomatoes, cheese waffles, and wooden skewers—you don’t need a long list of complicated components or elaborate preparation.

It’s a dish that celebrates fresh, quality ingredients in a way that allows them to shine.

The tomatoes offer a refreshing burst of juiciness, while the waffles provide a light, cheesy crunch that keeps each bite exciting and satisfying.

One of the standout qualities of these skewers is their balance.

The sharpness of the cheese is softened by the sweetness of the tomatoes, while the waffles add a crispiness that contrasts beautifully with the juicy tomatoes.

This makes the skewers a perfect dish to serve as a starter or snack because .

they appeal to a wide variety of taste preferences—satisfying both savory cravings and a love for fresh, vibrant produce.

Additionally, these Tomato and Cheese Waffle Skewers offer room for creativity.

You can easily adjust the flavors by experimenting with different types of cheeses or adding herbs and spices to the waffles to infuse a little more complexity.

The dish can be made vegetarian-friendly or paired with proteins like grilled chicken or shrimp for a more substantial bite.

The possibilities for customization are endless, allowing you to put your own signature twist on this delightful recipe.

In essence,

Tomato and Cheese Waffle Skewers are a fantastic example of how a simple combination of ingredients can create a dish that is much more than the sum of its parts.

They are quick to prepare, visually stunning, and absolutely delicious. They can elevate a gathering, provide guests with a moment of enjoyment, and be a conversation starter at any occasion.

Most importantly, they remind us that sometimes,

the most beautiful dishes are those that allow each ingredient to speak for itself in a perfect balance of flavors and textures.

In conclusion, whether you’re preparing them for a festive event or a cozy dinner at home, these skewers will certainly be a hit.

Their crisp, savory, and juicy components offer a truly satisfying experience for your taste buds,

and the delightful visual appeal ensures they will be the centerpiece of any appetizer table.

Don’t underestimate the power of simplicity—

these skewers are the perfect testament to how creativity in the kitchen can transform everyday ingredients into a memorable culinary experience.

Looking for more chic snack ideas?
→ Link to: “Just In 2 Min: Sublimez Votre Apéro avec Nos Cubes d’Omelette Espagnole”

Q1: Can I use any type of waffle for this recipe?

A1: While traditional waffles can work, it’s best to use cheese waffles specifically designed for this dish.

Cheese waffles bring a savory and crispy texture that pairs perfectly with the sweetness of the tomatoes. However, if cheese waffles aren’t available.

you could use savory waffle crisps or even homemade cheese crackers, though the texture may vary slightly.


Q2: How do I prevent the skewers from becoming soggy with the tomatoes?

A2: To keep the skewers from becoming soggy, make sure the tomatoes are not overly juicy.

When preparing the tomatoes, pat them dry with a paper towel to remove excess moisture before skewering.

Additionally, if you’re planning to prepare them in advance, keep the skewers in the refrigerator and assemble them just before serving to maintain their crisp texture.


Q3: Can I prepare these skewers in advance?

A3: Yes, you can prepare the skewers in advance! However, to maintain the best texture,

it’s recommended to assemble them up to a few hours before serving.

but not too far in advance, as the tomatoes might release juice and soften the waffles.

You can store them in the refrigerator in an airtight container, but for optimal taste and crunch, serve them as fresh as possible.


Q4: What can I serve these skewers with?

A4: These Tomato and Cheese Waffle Skewers are perfect on their own, but they can also be paired with a variety of dips or sauces.

A tangy herb dip, creamy garlic aioli, or even a balsamic glaze can complement the flavors.

If you want to serve them with other appetizers, consider pairing them with a light salad or even a charcuterie board to balance the textures and flavors.


Q5: Are these skewers vegetarian-friendly?

A5: Yes, Tomato and Cheese Waffle Skewers are entirely vegetarian!

The dish relies on the freshness of the tomatoes and the savory flavor of the cheese waffles, making it a delicious option for vegetarians.

You can also make them vegan by using dairy-free waffles and cheese alternatives, though the texture and flavor may change slightly.


Q6: Can I add extra flavors to the waffles?

A6: Absolutely! If you want to add more depth to the flavor, consider seasoning your waffles with herbs like oregano, thyme, or rosemary.

You can also experiment with garlic powder or paprika to give the waffles a unique twist.

The key is to balance these added flavors with the sweetness of the tomatoes and the creaminess of the cheese.


Q7: How do I ensure the skewers look neat and well-presented?

A7: For a neat and elegant presentation, make sure the tomatoes and waffle pieces are evenly sized.

Carefully thread each skewer with a tomato, followed by a piece of waffle

, and then repeat the process. Arrange the skewers neatly on a platter, making sure they’re aligned and visually appealing.

You can even garnish the platter with fresh herbs or a sprinkle of sea salt for an extra touch of elegance.


Q8: Can I serve these skewers warm or do they need to be cold?

A8: These skewers can be served either warm or at room temperature, depending on your preference.

If you choose to serve them warm, you can lightly heat ?the waffle pieces in the oven before assembling the skewers.

However, they are delicious and perfectly enjoyable when served at room temperature as well, especially during warmer weather.


Q9: How many skewers should I prepare per person?

A9: For a typical appetizer portion, 2 to 3 skewers per person should be sufficient, especially if you’re serving other appetizers alongside.

If you’re serving them as a main component of the meal, you can increase the number accordingly, offering 4-5 skewers per person for a heartier serving.


Q10: What drinks pair well with these skewers?

A10: For a refreshing pairing, consider serving these skewers with a crisp white wine like a Sauvignon Blanc or Chardonnay.

If you prefer a non-alcoholic drink, a lemon-infused sparkling water or a fresh cucumber and mint iced tea would complement .

the freshness of the tomatoes and the savory flavor of the waffles.

Mini Waffle Maker (Dash or Tefal)
https://www.bydash.com/products/mini-waffle-maker

2 Secret Chef’s Recipe: Bacon Soufflé-Stuffed Eggs with a Crunch

Delicious Bacon Soufflé-Stuffed Eggs served as an elegant appetizer with a fluffy texture and crispy bacon.

soufflé egg recipe

Hard-boiled eggs—humble, familiar, and often underestimated—take center stage in this refined reinterpretation that elevates them far beyond their everyday form. In this version, they are no longer just a convenient snack or a nostalgic appetizer.

Also,Instead, they become a canvas for elegance, texture, and deep flavor.

Moreover,Each egg half cradles a delicate, whipped filling, inspired by the airy richness of a soufflé.

In addition,On the other hand, The texture is light as a cloud, melting on the tongue with subtle warmth.

This softness is then contrasted by crisp, golden bacon, whose smoky intensity adds depth and a hint of indulgence.

Together, they strike a balance between comfort and sophistication, simplicity and innovation.

Visually, these eggs are a feast for the eyes: smooth whites supporting a beautifully domed filling, gently puffed and perhaps just kissed with a final flourish of oven heat.

Also, The scattered flecks of crisp bacon bring an inviting touch of rusticity, while the soufflé’s rise hints at technical finesse.

Thus, These are not your grandmother’s deviled eggs—they are something altogether more refined, yet just as comforting.

Therefore Perfect for elegant brunches, intimate gatherings,

or even served as a whimsical amuse-bouche, these stuffed eggs surprise and delight with each bite.

They invite conversation, linger on the palate, and prove that even the most unassuming ingredients can be transformed into something truly memorable.

Ingrédients – pour 4 personnes :soufflé egg recipe

  • 4 œufs
  • 1 cuillère à soupe de mayonnaise
  • 1 paquet de soufflés goût bacon (type chips soufflées)
  • 1 paquet de soufflés en forme de frites (pour la décoration)
  • 1 cuillère à café de ciboulette finement ciselée
  • Sel
  • Poivre du moulin

Chef’s Recipe: Hard-Boiled Eggs Filled with Whipped Bacon Soufflé and Crispy Garnish

An elegant reinterpretation of the classic deviled egg, with airy textures and bold contrasts.

Serves 4


Method:

  1. Cook the Eggs
    First,Gently place the eggs in a saucepan, cover with cold water, and bring to a boil over medium heat. Once boiling, reduce the heat slightly and simmer for exactly 8 minutes. This ensures firm, yet creamy yolks without overcooking.
    Transfer immediately to an ice bath to halt the cooking and make peeling easier. Once cool, peel the eggs with care to preserve the whites intact.
  2. Prepare the Filling
    Then,Slice each egg lengthwise. Delicately remove the yolks and place them in a mixing bowl. Using the back of a spoon or a fine mesh sieve, mash the yolks to a smooth purée.
    Incorporate a spoonful of mayonnaise, freshly chopped chives, and twelve crushed bacon-flavored soufflé chips.
  3. The chips bring not only flavor but a surprising aerated texture. Season lightly with fine sea salt and freshly ground black pepper.
    Blend until the mixture is smooth and cohesive — the goal is a creamy, mousse-like consistency with hints of crunch.
  4. Fill the Eggs
    Using a piping bag fitted with a star or plain tip, pipe the mixture elegantly into the hollowed whites. Each portion should form a slight dome, mimicking a miniature soufflé.
  5. Final Touches & Plating
    Next,Top each egg with a single whole bacon soufflé chip, standing slightly upright for visual drama.
  6. Finish with a few French fry–shaped soufflé crisps, either placed delicately atop the filling or scattered around the plate as an edible garnish.
    A light dusting of freshly cracked black pepper and a final sprinkle of chives complete the presentation.

Chef’s Note:soufflé egg recipe

This dish plays on contrasts—creamy vs. crisp, smoky vs. fresh. Serve slightly chilled, not cold, to allow the flavors to open. Ideal as a refined amuse-bouche, a standout brunch item, or part of a sophisticated hors d’œuvre selection.

Delicious Bacon Soufflé-Stuffed Eggs served as an elegant appetizer with a fluffy texture and crispy bacon.
Golden, fluffy soufflé filling meets crispy bacon in these indulgent stuffed eggs — a perfect blend of comfort and sophistication

Conclusion

First This reimagined take on stuffed hard-boiled eggs is a celebration of contrasts, craftsmanship, and creativity.

What begins as a familiar, even humble, ingredient—the egg—is transformed into a refined bite that surprises with every element.

Moreover;The silky smoothness of the yolk mixture, elevated by the richness of mayonnaise and the brightness of fresh chives, forms a delicate base.

Therefore But it is the addition of crushed bacon-flavored soufflé chips that introduces,

a bold and unexpected texture: airy, crisp, and savory, with just enough nostalgia to comfort and enough novelty to intrigue.

Then,The dish is playful in its composition, yet rooted in technique.

In other words ,The soufflé-like lightness of the filling paired with the crunch of the garnishes creates a refined mouthfeel that is both satisfying and sophisticated.

Therefore ,It’s a testament to how, with intention and precision, everyday components can be transformed into something worthy of the finest table.

The final flourish of the soufflé fry crisps brings a whimsical visual element, reminding us that elegance need not be austere—it can be joyful, expressive, and fun.

Next Served as part of a brunch menu, at a cocktail reception, or as an amuse-bouche to open a gourmet tasting, these eggs invite a moment of pause.

They encourage the diner to reconsider what an egg can be—not just a vehicle for nourishment, but for flavor, for texture, for beauty.

That is,Finally In the hands of a thoughtful cook or chef, even the simplest dishes can rise—light as a soufflé—to something extraordinary.“Love egg-based bites?”
→ Link to: Just In 2 Min: Sublimez Votre Apéro avec Nos Cubes d’Omelette Espagnole

Questions & Answers

Can these stuffed eggs be made in advance?


Yes. In other words,The eggs can be filled up to 6 hours ahead of time and stored in an airtight container in the refrigerator.

However, for optimal texture, add the soufflé garnishes just before serving to keep them crisp.

Can I substitute the bacon-flavored soufflé chips?
Absolutely. For a vegetarian variation or a change of flavor, you can use plain soufflé chips, cheese-flavored puffs, or even crushed crackers. The key is to maintain a light, airy texture that complements the filling.

What’s the best way to plate these elegantly?
Use a piping bag to fill the eggs cleanly and evenly. Arrange them on a flat serving platter, slate board, or porcelain tray. Garnish with a few fresh chive tips or microgreens and scatter the soufflé fries for a refined yet playful presentation.

Can this dish be served warm?


No, This preparation is designed to be enjoyed cold or at room temperature.

That is,On the other hand, Heating the filled eggs may cause the mayonnaise to separate and will soften the soufflé garnishes, compromising both texture and flavor.

What drink pairs well with this dish?
A crisp Brut Champagne or dry Crémant works beautifully, echoing the smoky and salty notes of the bacon. For a more creative option, consider a smoky cocktail—like a refined Bloody Mary or mezcal spritz—to enhance the dish’s savory depth.Quality Bacon Supplier (like D’Artagnan)
https://www.dartagnan.com/bacon/

Quick Gourmet 3min: Mini Beef Tartares with Smoked Almonds on a Crispy Tuile

Tartare de bœuf frais accompagné d’amandes croquantes, servi sur des tuiles légères et dorées.

mini beef tartare recipe

A modern tribute to the classic beef tartare, this miniature version redefines elegance in a single bite. Served delicately atop a crisp, golden tuile, each portion combines the richness of finely seasoned beef with the subtle crunch of toasted almonds—delivering contrast in both texture and flavor.

These canapés are not just a dish; they’re a conversation. The tuile, fragile yet precise, provides a refined stage for the meat’s delicate umami. Meanwhile, the almonds lend an unexpected nuttiness that elevates the tartare from traditional to contemporary. The result is a mouthful that’s fresh, sophisticated, and irresistibly moreish.

Ideal for cocktail parties, refined receptions, or any occasion where sophistication meets flavor, these mini tartares offer a chef’s touch in a deceptively simple presentation. Each piece is assembled just before serving to ensure maximum crunch and freshness, turning a timeless classic into an elevated amuse-bouche.

Ingredients for 6-8 Servings:

  • 1 pack of tuiles (crispy, thin wafers)
  • 1 pack of smoked almonds
  • 150g of fresh, quality minced beef (preferably from a butcher)
  • 1 teaspoon of pesto (preferably homemade or high-quality store-bought)
  • 1 small bunch of fresh basil
  • Salt, to taste
  • Freshly ground black pepper, to taste

Method:mini beef tartare recipe

  1. Prepare the Beef Tartare:
    • Begin by ensuring the beef is freshly minced. It’s essential to use top-quality meat for a tender, flavorful tartare. If the beef is not pre-minced, ask your butcher to mince it for you or do it yourself.
    • Place the minced beef into a mixing bowl. Add a pinch of salt and freshly ground black pepper to season the meat to taste.
    • Stir in a teaspoon of pesto to the beef mixture. This will provide a rich, herby flavor that will complement the freshness of the beef.
    • Finely chop the basil leaves and add them to the bowl. Mix gently to combine, being careful not to break up the delicate textures of the beef.
  2. Toast the Almonds:
    • Roughly chop the smoked almonds into small pieces. The smoky flavor will add an unexpected twist to the tartare.
    • In a dry skillet over medium heat, toast the almond pieces lightly for 2-3 minutes until they are golden brown and aromatic. Stir them constantly to prevent burning. Once toasted, set aside to cool.
  3. Prepare the Tuiles:
    • If you’re using store-bought tuiles, skip this step. Otherwise, if you’re making homemade tuiles, you’ll need to prepare a thin, crisp dough and bake it until golden and brittle.
    • Arrange the tuiles on a flat surface, and ensure they are completely cool before proceeding. These will serve as the base for your tartares.

Assemble the Mini Tartares:

  1. Take a small spoon or a small cookie cutter (about 1-inch in diameter) to portion out small rounds of the beef tartare mixture. Gently press down to compact the mixture into neat, even portions.
  2. Place each tartare round directly onto the center of each tuile. Be careful not to press too hard; the tuile should remain crisp.
  3. Garnish and Serve:
    • Sprinkle the toasted smoked almonds on top of each tartare, allowing the nuts to add texture and flavor to the dish.
    • For extra flair, you can add a few extra basil leaves as a garnish or a drizzle of high-quality olive oil for a finishing touch.
  4. Final Presentation:
    • Serve immediately, ensuring the tuiles remain crispy and the tartare is fresh. These bite-sized morsels make an ideal appetizer for a cocktail party or elegant gathering.

Conclusion:mini beef tartare recipe

Mini Beef Tartares with Almonds on a Tuile embody the essence of culinary sophistication, where simplicity meets elegance in a stunning bite-sized form.

This dish transforms a timeless classic into an elevated gourmet experience, combining the finest elements of fresh, high-quality beef with the surprising flavors of pesto, the smokiness of toasted almonds, and the delicate crunch of a crisp tuile.

From the first bite, your guests will be captivated by the interplay of textures—the softness of the perfectly seasoned beef.

the satisfying crunch of the almonds, and the fragile crispness of the tuile. The addition of basil infuses a burst of freshness, balancing the richness of the beef while enhancing the overall flavor profile.

The pesto, with its aromatic herbaceous notes, ties everything together beautifully, creating a symphony of tastes that will linger on the palate.

This dish is not just about flavor;

it’s about presentation. The delicate rounds of tartare atop each tuile create an elegant visual, making it an ideal choice for refined receptions or special occasions where style and taste must coexist. Whether you’re hosting an intimate dinner party or catering to a larger event, these mini tartares bring an air of sophistication to the table, impressing guests with both their visual appeal and remarkable flavor.

What makes this recipe truly special is its versatility—while it’s perfect for formal occasions, it can also be adapted to suit more casual gatherings with slight variations. The ingredients can be modified to suit your taste, and the method allows for easy adaptation, whether you’re adding different nuts or experimenting with herbs. The key, however, remains in the simplicity of the ingredients, allowing each component to shine on its own.

In the end, Mini Beef Tartares with Almonds on a Tuile are more than just an appetizer; they are a celebration of flavor, technique, and artistry in the kitchen. They remind us that the most refined dishes often come from the marriage of a few well-chosen ingredients, thoughtfully prepared and beautifully presented. So, whether you’re crafting these delicacies for an intimate gathering or an extravagant event, rest assured that they will leave a lasting impression on anyone fortunate enough to indulge.“For another 3-minute masterpiece, check out our Mini Camemberts.”
→ Link to: “5-Minute Crispy Mini Camemberts – The Ultimate Chic & Easy Appetizer!”

Q: Can I make the tuiles at home, or should I buy them?


A: You can definitely make the tuiles at home if you enjoy a bit of extra culinary crafting! Homemade tuiles are made with a thin, crisp dough that is baked until golden. However, buying high-quality store-bought tuiles is a convenient option, especially if you’re short on time.


Q: Can I use a different type of nut instead of smoked almonds?
A: Yes, you can experiment with other nuts, but smoked almonds provide a unique flavor that complements the tartare. If you prefer something milder, toasted hazelnuts or walnuts could work as well, though they may lack the smokiness that elevates the dish.


Q: What other herbs can I use instead of basil?
A: While basil pairs wonderfully with beef and pesto, you could also use parsley, chives, or tarragon for a different flavor profile. Just make sure the herb you choose complements the richness of the beef.


Q: How can I ensure the beef tartare is safe to eat raw?mini beef tartare recipe
A: To ensure food safety, make sure to use the freshest, highest-quality beef possible. Purchase it from a trusted butcher, and ask for it to be freshly minced. Additionally, keep the beef chilled until ready to serve, and consume it immediately to reduce the risk of contamination.


Q: Can I make this dish in advance?


A: While the tartare mixture should be prepared just before serving for the freshest taste and texture, you can prepare the tuiles and toasted almonds in advance. Store them in an airtight container until ready to assemble.


Q: Can I make this recipe vegetarian?
A: Absolutely! You can replace the beef with finely chopped mushrooms or other plant-based alternatives like tempeh or tofu for a vegetarian tartare. For the pesto, ensure it’s made without cheese if you want a fully vegan option.


Q: How do I serve this at a cocktail party or large event?
A: For large events, you can set up an elegant station where guests can pick up their mini tartares as they mingle. You can also place them on a beautifully arranged platter or serve them in individual portions for a more refined presentation.Guide to Choosing Beef for Tartare (Serious Eats)
https://www.seriouseats.com/how-to-make-steak-tartare

Snack Like a Chef: Pizza Crackers & Ricotta in Just 2 Minutes!

Close-up of mini cracker sandwiches filled with ricotta and sun-dried tomato spread, styled on a serving plate.

pizza-flavored appetizer

If you’re looking for a snack that effortlessly blends crunch, creaminess, and bold Mediterranean flavor, look no further than these cracker sandwiches inspired by the irresistible taste of pizza.

Layered with the richness of ricotta and infused with the familiar aromas of tomatoes, herbs, and cheese, this snack delivers a gourmet experience in a deceptively simple format.

These cracker sandwiches are far from ordinary.

They start with golden, crisp crackers that bring the perfect amount of bite and a satisfying snap with each mouthful.

The real magic happens in the filling: a smooth, luscious ricotta-based mixture that’s both light and indulgent, acting as the ideal canvas for vibrant, savory pizza notes.

Each bite transports you to an Italian trattoria, where sun-dried tomatoes, oregano, basil, and a hint of garlic come together in a symphony of flavor.

The pairing of the cool, creamy ricotta with the warm spices of classic pizza is both surprising and familiar, making these little sandwiches a hit with kids and adults alike.

Perfect for entertaining,

afternoon snacking, or adding a gourmet touch to a picnic, these cracker sandwiches are easy to assemble yet sophisticated in taste.

They can be made ahead of time and even tailored to your preferences, making them a versatile option for any occasion.

Whether served on a platter at a party or packed into a lunchbox for a midday treat,

these cracker sandwiches with pizza flavor and ricotta strike the perfect balance between comfort food and culinary creativity.

They’re proof that great taste doesn’t have to be complicated—it just needs the right combination of texture, richness, and imagination.

Ingredients (Serves 4):

  • 1 box of pizza-flavored crackers
    Choose a high-quality brand of crisp, savory crackers that are infused with classic pizza spices such as oregano, tomato, and a touch of cheese.
  • These will form the crunchy, flavorful base of your sandwich bites.
  • 100 grams of ricotta cheese
    Opt for a smooth, creamy ricotta—preferably whole milk—for the best texture and flavor. This will serve as the rich, mellow filling that balances the intensity of the pizza seasoning.
  • 2 tablespoons of sun-dried tomato spread (tomato caviar)
    This concentrated paste, made from sun-dried tomatoes blended with olive oil and herbs, adds depth and umami to the filling. If homemade, even better. It brings an intense, slightly sweet, and tangy note to the ricotta mixture.
  • Freshly ground black pepper, to taste
    A few turns of the pepper mill will enhance the ricotta’s mildness and bring out the layered flavors in the tomato spread, adding a subtle, spicy warmth.

Method:

  1. Prepare the filling:
    In a medium bowl, combine the ricotta cheese and the sun-dried tomato spread. Mix well until the texture is smooth and the ingredients are fully incorporated. The ricotta should take on a slightly reddish hue and a rich, savory aroma.
  2. Season to taste:
    Add freshly ground black pepper to the mixture, adjusting the quantity according to your preference. Stir again to distribute the seasoning evenly throughout the filling.
  3. Assemble the cracker sandwiches:
    Take one pizza-flavored cracker and place a small spoonful of the ricotta mixture on top—about a teaspoon is ideal. Gently press a second cracker over the filling to form a mini sandwich. Be careful not to overfill, as the mixture may spill out the sides.
  4. Serve and enjoy:
    Arrange the sandwiches on a serving plate or platter. They can be enjoyed immediately, or refrigerated for a short while if you prefer a slightly chilled snack. These are perfect as an appetizer, a cocktail bite, or a fun treat for a casual gathering.

Conclusion:

These pizza-flavored cracker sandwiches with ricotta and sun-dried tomato spread prove that a handful of simple ingredients can create a surprisingly refined and satisfying bite. The contrast of textures—creamy and velvety filling against the crisp crunch of the crackers—makes every mouthful a delight. Meanwhile, the marriage of classic Italian flavors in a convenient, playful form adds both sophistication and comfort to your table.

Whether you’re hosting a casual aperitivo, preparing a quick snack for friends, or just treating yourself to something delicious and different, these little sandwiches offer maximum flavor with minimal effort. Their versatility makes them ideal for any occasion: serve them as elegant finger food at your next gathering, pair them with a fresh salad for a light lunch, or include them in a picnic spread for a gourmet touch outdoors.

Best of all, this recipe invites creativity. You can tweak the filling with herbs, a touch of lemon zest, or even a hint of chili for extra personality. But even in their simplest form, these cracker sandwiches deliver a balanced, flavorful experience that’s sure to please the palate and impress your guests.

Sometimes, the best dishes are the ones that surprise us with their simplicity—and these bite-sized delights do just that. Effortless, flavorful, and utterly charming, they’re a reminder that elegance can come in the smallest of packages.“Pair this with our 3-Minute Mini Tartares for a full apéro tray.”
→ Link to: Quick Gourmet 3min: Mini Beef Tartares with Smoked Almonds

Questions & Answers

Q: Can I prepare these cracker sandwiches in advance?
A: Yes, you can prepare them a few hours ahead of time. However, for the best texture, it’s recommended to assemble them shortly before serving so the crackers remain crisp. If preparing ahead, store them in an airtight container in the fridge.

Q: What can I use instead of sun-dried tomato spread?
A: You can replace the sun-dried tomato caviar with a thick tomato paste mixed with olive oil, or even a tapenade for a different flavor profile. Roasted red pepper spread also works well if you’re looking for a sweeter twist.

Q: Can I use another type of cheese besides ricotta?
A: Absolutely! Cream cheese, whipped feta, or mascarpone can be used for a similar creamy texture. Just keep in mind that these may alter the overall flavor slightly.

Q: Are these suitable for children?


A: Yes, they’re generally kid-friendly thanks to the familiar pizza taste and soft filling. You can adjust the pepper or skip it entirely to make them more suitable for younger palates.

Q: What drink pairs well with these cracker sandwiches?
A: For adults, a light Italian white wine like Pinot Grigio or a sparkling rosé pairs beautifully. For a non-alcoholic option, try a tomato or basil-infused sparkling water, or a chilled herbal iced tea.

Q: Can I make these gluten-free?
A: Yes, simply use gluten-free crackers with a pizza flavor. Many specialty food stores now carry seasoned gluten-free cracker options.Italian Ricotta Cheese (Galbani)
https://www.galbani.com/products/ricotta

Tiny Pizzas, Big Flavor: Unlock 7 Secrets to Perfect Personal Pizzas!

A plate of mini pizzas with a variety of toppings like pepperoni, vegetables, and cheese.

mini pizza recipe

Mini pizzas, the bite-sized versions of the classic Italian pizza, combine practicality with taste. Whether it’s for a quick snack, a light lunch, or a fun appetizer at a party, these tiny flavor-packed pizzas fit any occasion. But what makes mini pizzas so irresistible and versatile? Let’s dive in.

A Brief History of Mini Pizzas

The origins of pizza date back to ancient times, but the modern version, as we know it today, was born in Naples in the 18th century. Mini pizzas, however, are a more recent creation, born out of the desire for a quicker, more accessible pizza option. These bite-sized versions quickly gained popularity for their fun, customizable nature and their ability to cater to all kinds of taste preferences.

Why Mini Pizzas Are a Fantastic Choice

1. Practicality and Customization
Mini pizzas are incredibly customizable. Each guest can create their own perfect pizza with their choice of toppings, from fresh vegetables and delicate meats to creamy cheeses. This makes them a fantastic option for all kinds of events, from casual gatherings to more formal dinners.

2. The Perfect Portion
Mini pizzas are ideal for those who want to enjoy a variety of flavors without overindulging. They offer the perfect portion size for a light meal, snack, or buffet-style dining, allowing everyone to sample different combinations.

3. Quick and Easy to Prepare
Unlike a traditional pizza that may take longer to prepare and cook, mini pizzas cook much faster—usually within 8 to 10 minutes at a high temperature. This makes them a go-to option when you’re craving pizza but don’t want to spend hours in the kitchen.

4. Adaptable to Any Diet
Whether you’re vegan, gluten-free, or lactose intolerant, mini pizzas can be easily adapted to suit dietary preferences. Just swap out the ingredients to cater to individual needs, making them a versatile choice for any group.

The Basics of Crafting the Perfect Mini Pizza

The foundation of a mini pizza is its dough. Here are the most common types of pizza dough:

  • Classic Dough: Thin, slightly airy, and perfect for a crispy base.
  • Thick Dough: For those who prefer a more substantial, chewy texture.
  • Semolina Dough: Adds a unique nutty flavor and slightly crunchy texture.
  • Gluten-Free Dough: A great option for those avoiding gluten.

Mini pizzas are typically baked at a high temperature (around 220°C / 425°F) for 8 to 10 minutes. This creates a golden, crispy crust while keeping the inside soft and delicious.

Classic and Creative Toppings for Mini Pizzas

The topping possibilities for mini pizzas are endless. Here are some classic and more inventive options:

  • Classic Toppings:
    • Margherita: Tomato sauce, mozzarella, fresh basil.
    • Pepperoni: Tomato sauce, mozzarella, pepperoni slices.
    • Four Cheese: Mozzarella, gorgonzola, parmesan, goat cheese.
    • Vegetarian: Tomatoes, bell peppers, onions, olives, artichokes.
  • Creative Toppings:
    • Salmon & Creme Fraiche: Creme fraiche, smoked salmon, arugula, lemon zest.
    • BBQ Chicken: BBQ sauce, roasted chicken, red onions, mozzarella.
    • Figs & Prosciutto: Fresh figs, prosciutto, arugula, honey drizzle.
    • Mushrooms & Truffle: Truffle cream sauce, mushrooms, arugula, shaved parmesan.

How to Make Your Mini Pizzas Even More Special

One of the greatest advantages of mini pizzas is the endless customization options. Here are some tips for elevating your mini pizzas:

  1. Switch Up the Sauce: Instead of traditional tomato sauce, try a creamy béchamel, pesto, or even a cheese-based sauce for a different flavor profile.
  2. Add Spices: Experiment with black pepper, chili flakes, or fresh rosemary to enhance the taste.
  3. Get Creative with the Base: For a unique twist, try a spiced pizza dough or a sweet potato crust for a touch of sweetness.

Mini Pizzas: A Fun and Social Dish to Share

The individual nature of mini pizzas makes them perfect for social occasions. They encourage sharing and can be enjoyed as part of a larger spread or buffet-style meal. For an interactive party experience, you could set up a mini pizza bar where guests can assemble their own pizzas with a variety of toppings.

The Perfect Drink Pairing for Mini Pizzas

Mini pizzas are perfect for pairing with refreshing beverages. Opt for a chilled lemonade or a light white wine for a simple and elegant pairing. For a more festive touch, try a cocktail made with prosecco and fresh fruit, adding a bubbly flair to your gathering.

Conclusion: The Charm of Mini Pizzas

In conclusion, mini pizzas are a delightful, versatile, and easy-to-make dish that suits every occasion. Whether you’re looking for a quick snack, an appetizer, or a fun activity for a party, mini pizzas are the perfect solution. With endless topping options and the ability to personalize each one, they’re a sure way to please everyone at the table. So get creative, fire up the oven, and enjoy the fun of making these bite-sized pizzas with friends and family!

Question: How can I make perfect mini-pizzas at home, catering to different dietary preferences and tips for customizing each pizza?

Answer:

Making perfect mini-pizzas at home may seem like a simple task, but there are several elements to consider to ensure your pizzas turn out just right, while also catering to various dietary preferences. Here’s a comprehensive guide on how to make mini pizzas, with plenty of options for customization.

1. Choosing the Right Dough

The dough is the foundation of any pizza, and mini pizzas are no exception. Here’s how to make sure your dough is perfect:

  • Classic Dough: A thin, slightly airy dough is ideal for crispy mini-pizzas.
  • Thick Dough: For those who prefer a chewier, more substantial base.
  • Semolina Dough: Adds a unique texture and a slightly nutty flavor.
  • Gluten-Free Dough: Perfect for those with celiac disease or gluten sensitivity.

If you’re short on time, you can also buy ready-made dough from specialty stores or supermarkets.

2. The Sauce: The Key to Flavor

The sauce is an essential element to achieve a great mini-pizza. You can experiment with different sauces to offer a variety of flavors:

  • Classic Tomato Sauce: A well-seasoned tomato sauce is a traditional choice, but you can enhance it by adding garlic, herbs, or basil.
  • Crème Fraîche or Béchamel: For a creamy base, go for crème fraîche or béchamel. This is great for toppings like salmon or mushrooms.
  • Pesto: For a fresh, bold flavor, pesto is an excellent alternative, especially paired with fresh tomatoes and mozzarella.
  • BBQ Sauce: For a sweet-savory twist, BBQ sauce is perfect, especially with chicken or bacon.

3. Toppings: Infinite Customization

One of the great advantages of mini pizzas is the ability to customize each one to suit personal tastes. Here are some topping ideas:

Classic Toppings:

  • Margherita: Tomato sauce, mozzarella, fresh basil.
  • Pepperoni: Tomato sauce, mozzarella, pepperoni slices.
  • Four Cheese: Mozzarella, gorgonzola, parmesan, goat cheese.
  • Vegetarian: Bell peppers, olives, artichokes, cherry tomatoes, onions.

Creative Toppings:

  • BBQ Chicken: Grilled chicken, BBQ sauce, red onions, shredded cheese.
  • Salmon & Creme Fraîche: Smoked salmon, arugula, crème fraîche, lemon zest.
  • Figs & Prosciutto: Fresh figs, prosciutto, arugula, honey drizzle.
  • Mushrooms & Truffle: Truffle cream sauce, mushrooms, arugula, shaved parmesan.

Options for Special Diets:

  • Vegan: Replace mozzarella with cashew cheese or tofu, and use grilled vegetables as toppings.
  • Gluten-Free: Use gluten-free dough and ensure the sauce is gluten-free as well.
  • Dairy-Free: Replace mozzarella with dairy-free cheese alternatives made from coconut milk or almonds, and top with veggies or lean meats.

4. Baking: Secrets to a Perfect Crust

Baking your mini-pizzas is crucial to getting the perfect crispy crust. Here are some tips for baking them:

  • Oven Temperature: Preheat your oven to 220°C (425°F) before placing your mini-pizzas in. A high temperature is key for quick cooking and a golden, crispy crust.
  • Quick Cooking: Mini-pizzas usually bake for 8 to 10 minutes, depending on the thickness of the dough and toppings. Keep an eye on them to prevent burning.
  • Use a Pizza Stone: If you have a pizza stone, it’s ideal for even cooking and an extra crispy crust. If you don’t have one, a regular baking sheet works just fine.

5. Chef Tips for the Finishing Touch

  • Add Fresh Herbs After Baking: For an extra fresh, aromatic touch, add basil, oregano, or arugula after baking your pizzas.
  • Flavored Olive Oil: Drizzle some garlic or truffle-infused olive oil on the pizzas after baking for a luxurious finish.
  • Shredded Cheese: If you love melted cheese, sprinkle some parmesan or Gruyère on your pizzas before baking, or add a dollop of buffalo mozzarella for extra stretch.

6. Variations for Different Occasions

  • Appetizers with Friends: Serve a variety of mini-pizzas with different sauces and toppings to cater to all tastes. You can even host a “make-your-own pizza” night where guests assemble their own mini-pizzas.
  • Light Dinner or Buffet: Mini-pizzas are perfect for a buffet-style meal where guests can grab different flavors. They also work well as part of a light dinner spread.
  • Family Meal: Prepare several mini-pizzas with various toppings to please everyone in the family, from kids to adults.

Conclusion

Mini pizzas are a fantastic, versatile dish for any occasion. With the right ingredients, proper baking, and creative toppings, you can create delicious and personalized mini pizzas that will satisfy all your guests. Whether it’s a casual gathering, a family dinner, or a special event, these bite-sized pizzas are sure to be a hit. So, get creative, fire up your oven, and enjoy making these mini pizzas with your loved ones!Looking for another gourmet snack in minutes?”
→ Link to: Pizza Crackers & Ricotta in Just 2 Minutes!

How to Use a Pizza Stone – King Arthur Baking
https://www.kingarthurbaking.com/blog/2021/06/10/how-to-use-a-pizza-stone