What If You Could Make Perfect Donuts at Home?

Golden donuts dusted with powdered sugar on a rustic wooden table, with a warm and inviting atmosphere

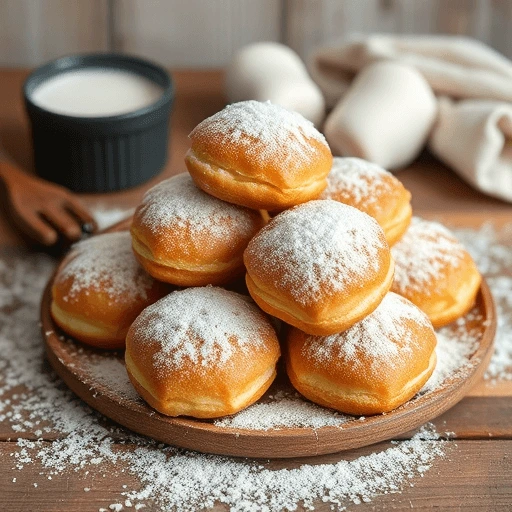
perfect homemade donuts

La pâte à frire est l’une des techniques les plus importantes en cuisine, en particulier pour ceux qui cherchent à obtenir une texture légère et croustillante pour leurs plats frits. Que ce soit pour des légumes, des fruits de mer, des viandes ou même des desserts, la pâte à frire transforme des ingrédients simples en mets irrésistibles. Pourtant, maîtriser cette pâte demande une compréhension fine du processus, car sa légèreté et sa croquant dépendent de détails subtils.

L’Essence de la Pâte à Frire

La pâte à frire est avant tout un moyen de créer une fine couche dorée et croustillante autour de la nourriture, tout en préservant la tendreté et la saveur du cœur de l’aliment. Contrairement aux autres types de panures, la pâte à frire est conçue pour être légère et aérée, évitant ainsi d’alourdir le plat. Le défi est de trouver l’équilibre parfait entre la croûte et l’intérieur, afin que le résultat soit à la fois croquant et délicat.Link to a brioche or dough-making post :https://briochechic.com/ultimate-waffle-recipe-secrets/

Les Étapes Clés de la Préparation de la Pâte à Frire

Mélanger sans Excès

Lorsque l’on prépare la pâte à frire, l’un des aspects les plus importants est de ne pas trop mélanger. La pâte doit être homogène, mais il est normal de laisser quelques grumeaux. Cela peut sembler contre-intuitif, mais ces petites irrégularités contribuent à une texture plus aérée après la friture. Un mélange trop homogène pourrait rendre la pâte trop dense, ce qui réduirait le croustillant.

Travailler Rapidement et à Température Basse

Une fois que la pâte est prête, il est crucial de l’utiliser immédiatement. Au fur et à mesure que la pâte repose, elle perd sa légèreté, ce qui peut altérer la texture finale. Il est donc conseillé de préparer la pâte juste avant de tremper les aliments à frire.

De plus, les ingrédients utilisés, en particulier les liquides, doivent être froids, voire glacés. Cela crée une différence de température importante entre la pâte et l’huile chaude, favorisant la formation d’une croûte légère et croquante.

L’Application de la Pâte : Une Fine Couche

L’application de la pâte à frire sur les aliments doit être légère et uniforme. Une couche trop épaisse risque de devenir lourde et grasse une fois frite, ce qui nuit à la texture. Il suffit de tremper les ingrédients dans la pâte et d’enlever l’excédent avant de les plonger dans l’huile. Une couverture fine est idéale pour obtenir ce croquant parfait.

Le Choix de l’Huile et de la Température

La température de l’huile est essentielle pour une friture réussie. Si l’huile est trop froide, la pâte absorbera trop de graisse, ce qui la rendra grasse et molle. Si elle est trop chaude, la pâte risque de brunir trop vite, sans permettre à l’intérieur de cuire correctement. L’huile doit être chauffée à une température stable, autour de 170°C à 180°C, et il est important de ne pas trop remplir la friteuse ou la poêle, afin de ne pas abaisser la température de l’huile.

Le Temps de Cuisson : Juste ce qu’il Faut

La friture doit être rapide, permettant à la pâte de se dorer en quelques minutes. Une fois que la pâte est dorée et croustillante, l’aliment doit être retiré de l’huile et posé sur du papier absorbant pour éliminer l’excédent de graisse.

Les Astuces pour un Résultat Parfait

  • Ne pas trop mélanger la pâte : Laisser quelques grumeaux dans la pâte peut contribuer à une meilleure texture une fois frite.
  • Utiliser des ingrédients froids : Cela favorise l’aération de la pâte et l’obtention d’une croûte plus légère.
  • Chauffer l’huile à la bonne température : Trop froide, elle rendra la pâte molle ; trop chaude, elle brûlera la pâte avant que l’aliment à l’intérieur ne soit cuit.
  • Ne pas surcharger la friteuse ou la poêle : Cela permet à l’huile de maintenir sa température et de frire chaque morceau uniformément.

La Pâte à Frire, un Incontournable en Cuisine

La pâte à frire est incroyablement versatile. Elle peut être utilisée pour une variété de préparations, des plus simples aux plus complexes :

  • Tempura : Un plat japonais classique, où des légumes ou des fruits de mer sont enrobés dans une pâte légère et croustillante.
  • Poissons et Fruits de Mer : Une fine couche de pâte, légère et dorée, accompagne parfaitement des filets de poisson ou des crevettes.
  • Légumes : Des légumes comme les courgettes, les champignons, ou les oignons sont excellents lorsqu’ils sont enrobés de pâte à frire et légèrement dorés.
  • Fritures sucrées : Certaines pâtisseries, comme les churros ou les beignets, bénéficient d’une pâte à frire qui leur donne une texture croustillante à l’extérieur et moelleuse à l’intérieur.

Light and Crispy Donuts Recipe

For: 20 donuts
Preparation time: 20 minutes
Cooking time: 2 minutes per batch
Storage: Best consumed immediately

Required Equipment:

  • Sifter
  • Whisk
  • Frying pan
  • Slotted spoon (or spider)

Ingredients:

  • 200 g all-purpose flour
  • 6 g baking powder
  • 20 g granulated sugar
  • 40 g egg yolks
  • 200 g semi-skimmed milk
  • 100 g egg whites
  • Fruits of choice (optional, for filling or garnishing)
  • Sufficient powdered sugar (for dusting)

Method:

  • Sift the flour with the baking powder. Place both in a large bowl along with the sugar, then add the egg yolks in the center. Pour in the milk and mix until the batter is smooth and homogeneous.
  • Whip the egg whites until frothy and gently fold them into the batter.
  • Pat the fruit dry or blot it with a paper towel. Dip each piece into the batter using a fork to coat it evenly.
Fruits trempés dans une pâte pour une préparation pâtissière
Assurez-vous que chaque fruit est bien enrobé de pâte pour une cuisson homogène et dorée.
  • Carefully place the coated fruit into hot oil at 170°C (340°F) and fry for about 40 seconds on each side, until golden.
  • Using a slotted spoon, remove the fritters and place them on paper towels to absorb any excess oil.
Beignets saupoudrés de sucre glace prêts à être servis
Un saupoudrage généreux de sucre glace pour une touche sucrée parfaite avant de servir
  • Dust the fritters generously with powdered sugar before serving.

Conclusion

Light, crisp, and golden – these homemade fruit fritters are the perfect indulgence for a weekend treat or a festive table. The batter is airy thanks to the whipped egg whites, creating a delicate texture that contrasts beautifully with the tender fruit inside. Whether you’re using apples, bananas, or more exotic choices like pineapple or figs, each piece becomes a small, warm delight straight out of the fryer.

This recipe is both simple and satisfying, requiring only a few pantry staples and basic utensils. The short frying time and fast prep make it ideal for impromptu dessert cravings or an interactive cooking moment with friends and family.

Don’t forget the final touch: a generous snowfall of powdered sugar, which adds not only sweetness but also a touch of elegance. Enjoy them fresh and warm – that’s when the magic happens. And remember, the secret to the perfect fritter is in the lightness of the batter and the care you take with the oil temperature.

Now that you know the method, let your creativity shine. Try different fruits, spice up your batter with cinnamon or lemon zest, or serve them with a dipping sauce like chocolate ganache or fruit coulis. There are countless ways to make this recipe your own.Learn more about

how to proof yeast dough properly from King Arthur Bakingt; http://King Arthur Baking: Yeast Dough Techniques


Frequently Asked Questions (FAQ)

Can I prepare the batter in advance?
Yes, you can make the batter a few hours ahead, but for the best texture, add the whipped egg whites just before frying.

What oil should I use for frying?
Use a neutral oil with a high smoke point, such as sunflower, canola, or grapeseed oil.

Can I bake the fritters instead of frying them?
This specific batter is designed for frying. Baking will not achieve the same crispy texture.

How do I know if my oil is at the right temperature?
Use a thermometer to check for 170°C (340°F). If you don’t have one, dip the tip of a wooden spoon into the oil – small bubbles should form around it.

What fruits work best for this recipe?
Apples, pears, bananas, and pineapple all work well. Softer fruits like strawberries are possible but must be handled delicately.

Can I make them gluten-free?
Yes – you can substitute the flour with a gluten-free mix that includes rice flour or potato starch, but you may need to adjust the liquid slightly.

Chef’s 2 Secret Revealed: The Ultimate Waffle Recipe with Pro Tips & Answers!

Perfectly golden, crispy waffles with pro chef tips for achieving waffle perfection at home.

ultimate waffle recipe

Crisp on the outside, tender on the inside, and etched with their signature deep pockets, gaufres — or waffles — are far more than a humble breakfast item. Rooted in centuries of European culinary tradition, they’ve evolved from medieval honeycomb cakes pressed between iron plates to the decadent, versatile delicacies we adore today.

Originating in Belgium and France, gaufres have long held a cherished place in street markets, home kitchens, and patisseries. Each bite speaks of both nostalgia and indulgence — whether served hot from a cast-iron press in a winter fair or plated with elegance in a fine café. Their charm lies in the contrast: a golden crust giving way to a warm, soft interior, ready to carry both the simplest dusting of sugar or the richest toppings, from Chantilly cream to molten chocolate or fresh seasonal fruits.

But beyond taste, gaufres are a celebration of texture and geometry. The grid pattern is more than aesthetic — it’s a perfect cradle for sauces and syrups, ensuring that each forkful is a delicious mosaic of flavor and crunch. They are endlessly adaptable too: sweet or savory, thick or thin, airy or chewy. Each region, and indeed each kitchen, has its signature touch.

Whether enjoyed at brunch with friends, as a street snack wrapped in parchment, or transformed into a dramatic dessert, gaufres embody warmth, creativity, and timeless pleasure. One bite, and you’re instantly transported to a sunlit terrace in Brussels or a Parisian bakery window.

Golden Gaufres: Light, Crisp, and Irresistible

ultimate waffle recipe

Yield: 8 to 10 waffles
Prep Time: 35 minutes
Resting Time: 1 hour
Cooking Time: 3 minutes per batch
Storage: Best enjoyed immediately — warm and crisp!


Tools You’ll Need

  • Whisk
  • Ladle
  • Waffle maker (classic or Belgian-style)

Ingredients

  • 250 g whole milk
  • 75 g melted butter
  • 250 g all-purpose flour
  • 15 g sugar
  • 1 g salt
  • 1 g liquid vanilla extract
  • 90 g egg whites (approx. 3 large)
  • Icing sugar, for dusting (as needed)

Instructions

  • Prepare the Batter:
    In a large mixing bowl, combine the sugar, salt, and flour. Gradually add the milk and melted butter, whisking continuously until the mixture is smooth. Stir in the vanilla extract.
  • Rest the Batter:
    Cover the bowl and let the batter rest at room temperature for 1 hour. This allows the flour to hydrate fully, resulting in a better texture.
  • Whip the Egg Whites:
    In a separate bowl, beat the egg whites until stiff peaks form. This will help make the waffles light and airy.
  • Incorporate the Egg Whites:
    Gently fold the whipped egg whites into the rested batter using a spatula. Be careful not to deflate the mixture.
Whipped egg whites gently folded into waffle batter for a light, airy texture.
Discover how folding whipped egg whites into your waffle batter creates the lightest, fluffiest waffles that melt in your mouth!
  • Preheat the Waffle Maker:
    Set your waffle maker to 220°C (428°F). Lightly grease it if necessary, following the manufacturer’s instructions.
  • Cook the Waffles:
    Using a ladle, pour enough batter into the waffle maker to just fill the mold. Close the lid and cook for about 3 minutes, or until the waffles are golden brown and crisp.
Golden, crispy waffles cooking to perfection, with chef-approved tips for the ultimate texture.
Ready to cook the perfect waffles? Discover the secret to achieving the ideal golden crunch on the outside and soft fluffiness inside with these simple steps!
  • Serve:
    Carefully remove the waffles and place them on a serving plate. Dust with icing sugar and serve immediately for the best taste and texture.
Fluffy and crispy homemade waffles with chef’s secrets for a perfect breakfast treat.
Craving waffles that are perfectly crispy and light? Unlock the expert secrets to making flawless waffles every time—plus answers to your burning questions!

Conclusion: Perfecting the Art of Waffle Making

ultimate waffle recipe are more than just a delicious breakfast treat; they embody the creativity and joy of cooking. With their crispy golden exterior and soft, airy interior, they provide the perfect balance of texture and flavor. The beauty of waffles lies in their versatility—whether you enjoy them sweet with syrup, fruit, and whipped cream, or savory with eggs, cheese, and even bacon, waffles can be customized to suit any taste.

To master the perfect ultimate waffle recipe, it’s essential to understand the importance of each step in the process. The resting time for the batter, the gentle folding of whipped egg whites, and the careful preheating of the waffle iron all contribute to the texture and quality of your final product. By following the recipe and incorporating expert techniques, you can create waffles that rival those from your favorite brunch spots.

The key to great waffles lies not just in the ingredients but in the technique. A well-balanced batter, the right cooking time, and serving them immediately after cooking can ensure that every waffle you make is light, crispy, and perfectly golden. Don’t hesitate to experiment with different flavors, toppings, and fillings—there’s a whole world of possibilities for you to explore.

In the end, ultimate waffle recipe represent more than a recipe; they are an experience—a way to gather around the table, share a meal, and create memories. Whether it’s for a leisurely weekend breakfast or an indulgent treat at any time of the day, waffles bring joy to every occasion

Link to my brioche post:
Make It at Home: The Ultimate Braided Brioche in Just 10 Minutes — Like the Pros!

Link to a food science article or baking technique:
👉 King Arthur Baking “How to Get Crispy Edges in Waffles”


Frequently Asked Questions

Q: Can I prepare the waffle batter in advance?

A: Yes, you can prepare the waffle batter ahead of time. In fact, letting the batter rest for an hour allows the flour to fully absorb the liquid, which can improve the texture. If you’re using whipped egg whites, however, it’s best to fold them into the batter just before cooking to maintain their lightness. For the best results, you can also make the batter the night before and store it in the refrigerator.

Q: How do I keep waffles crispy after cooking?

A: Waffles tend to soften quickly after cooking due to moisture buildup. To keep them crispy, place the cooked waffles on a wire rack instead of stacking them. This allows air to circulate around them and prevents them from becoming soggy. If you’re serving a large batch, you can also keep them warm and crisp by placing them on a baking sheet in an oven set to 200°F (93°C) while you cook the rest.

Q: Can I freeze waffles for later?

A: Absolutely! Waffles freeze well and are perfect for meal prep. After cooking, let the waffles cool completely. Then, place them in a single layer on a baking sheet and freeze them until solid. Once frozen, transfer them to an airtight bag or container for long-term storage. When you’re ready to enjoy them, simply reheat in a toaster or oven until crispy and warmed through.

Q: Why do my waffles sometimes split or get stuck in the waffle iron?

A: Waffles may split or stick if there is too much batter or if the waffle iron isn’t properly preheated. Overfilling the waffle iron can cause the batter to overflow and split. Make sure to use just enough batter to cover the plates without overfilling them. Additionally, preheat the waffle iron thoroughly before pouring in the batter to ensure even cooking. Greasing the plates lightly with oil or butter before cooking can also help prevent sticking.

Q: Can I add flavorings to my waffle batter?

A: Absolutely! There are many ways to enhance the flavor of your waffle batter. You can add vanilla extract, cinnamon, nutmeg, or even citrus zest to give your waffles a unique twist. If you like a bit of chocolate, try folding in some chocolate chips or cocoa powder. For a savory version, you can incorporate herbs like rosemary, thyme, or even grated cheese for a deliciously savory waffle experience.


Expert Tips for Perfect Waffles

  • Preheat Your Waffle Iron: Always ensure that your waffle iron is fully preheated before adding the batter. A hot waffle iron helps achieve a crispy golden exterior while keeping the interior soft and airy.
  • Use Room Temperature Ingredients: Make sure that your eggs, milk, and butter are at room temperature before mixing. This allows the batter to come together more smoothly and results in a more consistent texture.
  • Don’t Overmix the Batter: It’s important not to overmix your batter. Stir until the ingredients are just combined, as overmixing can lead to dense, tough waffles. A few lumps in the batter are perfectly fine.
  • Serve Immediately: Waffles are best enjoyed fresh and hot. If you need to keep them warm, place them on a wire rack in a low-temperature oven (200°F/93°C) to avoid sogginess.

What’s the Secret Behind the Softest Milk Rolls You’ve Ever Tasted?

Pain au lait maison, doré et moelleux, posé sur une nappe avec un léger saupoudrage de farine

Soft Milk Rolls

Light as a cloud, golden as morning sunlight, and delicately sweet without ever being heavy—pains au lait are the quiet charmers of the French boulangerie. Often overshadowed by their more flamboyant cousins like croissants or brioches, these humble milk rolls embody everything that makes French baking so irresistibly refined: simplicity, softness, and subtlety.

At first glance, a pain au lait may seem modest—gently scored across the top, baked to a flawless honeyed hue, and often nestled in a linen-lined basket. But from the first bite, it becomes clear: this is not just bread. This is a carefully balanced composition of texture and comfort, tradition and nostalgia.

The crumb is tender and airy, the crust impossibly fine and golden. Each roll seems to melt in the mouth, carrying hints of milk and sweetness that evoke memories of childhood breakfasts and cozy afternoons. Served plain, slathered with jam, or split and filled with chocolate sticks, pains au lait are as versatile as they are beloved.

Whether enjoyed at the kitchen table with warm coffee, packed into a schoolbag for a mid-morning snack, or presented on a brunch table beside fine butter and preserves, pains au lait belong to that rare category of bakes that feel both everyday and precious. They remind us that perfection doesn’t have to be loud—sometimes it’s as simple as a warm, pillowy roll shared with someone you love.Enriched Breads – Wikipedia

Classic Pains au Lait (French Milk Rolls)

Tender, golden, and delicately sweet – a timeless French bakery staple.


Yields:

  • 30 navettes or 10 small milk rolls

Timing Overview:

  • Preparation: 1 hour
  • First proof (pointage): 50 minutes
  • Final rise (pousse): 1 hour 30 minutes
  • Baking: 6 minutes
  • Shelf life: Best within 24 hours, stored in an airtight container

Equipment:

  • Stand mixer with dough hook
  • Bench scraper (dough cutter)
  • Pastry brush
  • Baking tray and parchment paper

Ingredients for Pains au Lait (for 30 navettes or 10 small rolls)

Dough:

  • 250 g flour (preferably high-gluten, such as French “farine de gruau”)
  • 10 g fresh yeast
  • 5 g salt
  • 30 g sugar
  • 65 g eggs (about 1 whole egg + a bit)
  • 75 g whole milk
  • 65 g unsalted butter, softened

Egg Wash:

25 g whole milk

25 g whole egg

20 g egg yolk

Method – How to Make Pains au Lait

1. Frasage & Kneading

Begin by combining all ingredients except the butter in the bowl of a stand mixer fitted with a dough hook. Mix gently until the ingredients come together into a shaggy dough — this is the frasage phase.
Knead on low speed for about 10 minutes, until the dough becomes smooth and pulls away from the sides of the bowl.👉https://briochechic.com/crispy-caramelized-bliss6-secret-to-perfect-palmiers-revealed/#more-390

2. Incorporate the Butter

Scrape down the bowl using a dough scraper to ensure full integration, then gradually add the softened butter. Continue kneading until fully incorporated and the dough is supple, elastic, and slightly glossy.

3. First Proof (Pointage)

Transfer the dough onto a tray, cover it with plastic wrap or a damp cloth, and let it rest at room temperature (around 20°C / 68°F) for 45 minutes to 1 hour, until slightly puffed.

4. Degassing & Scaling

Gently flatten the dough to release trapped air.
Portion the dough according to your desired format:

  • 15 g pieces for mini navettes
  • 50 g pieces for small milk rolls
Manoeuvre de dégazage d'une pâte de pain au lait, en pressant doucement pour éliminer les bulles d'air
Le dégazage est une étape clé pour assurer une texture uniforme et moelleuse au pain au lait

5. Shaping

Shape each piece into an oval or shuttle (navette) form by gently rolling and sealing the dough. Place the shaped pieces on a nonstick baking tray or a tray lined with parchment paper.

6. Egg Wash & Final Proof

Brush the rolls with a first layer of egg wash using a pastry brush.
Allow the shaped dough to proof for about 1 hour 30 minutes in a warm, humid environment:

  • Ideally in a proofing chamber at 26°C (79°F)
  • Alternatively, in a switched-off oven with a bowl of hot water inside
Applying an egg wash to milk bread dough balls before baking.
“An egg wash gives your milk bread a golden, glossy finish, making it even more tempting.”

Chef’s Tips & Tricks

  • Keep the dough moist during proofing:
    During the final rise, place the shaped dough in a warm, humid environment (ideally between 25–30°C / 77–86°F) to prevent the surface from drying out. A switched-off oven with a bowl of steaming water works perfectly.
  • Make the dough in advance:
    For better flavor and flexibility, the dough can be prepared the day before. After the initial proofing, cover it tightly and refrigerate overnight. Shape and proof as usual the next day — the cold fermentation will enhance both taste and texture.
Milk bread dough rising for the final time before going into the oven.
The final proof ensures the dough has fully developed before baking, resulting in an airy texture.

Conclusion

Baking Soft Milk Rolls pains au lait is a quiet, patient process—one that rewards attention to detail and respect for the dough. These golden rolls, so simple in appearance, hold the essence of French bakery craft: softness, precision, and subtlety. From the gentle kneading to the delicate shaping, every step brings you closer to the perfect bite—light as air, delicately sweet, and melting on the tongue.

Whether served warm for breakfast with butter and jam, turned into elegant mini sandwiches, or simply enjoyed on their own, pains au lait add a touch of elegance to the everyday. Their versatility is matched only by their charm: adored by children, appreciated by adults, and endlessly adaptable to your personal style.

As with all viennoiseries, the magic lies not in complexity but in mastery of the basics. Learning to control proofing times, understand the dough’s texture, and apply a perfect egg wash is what transforms a home baker into an artisan. And once you’ve made these just once, you’ll find yourself returning to them again and again—not only for the result, but for the quiet joy of the process.

So the next time you crave comfort and refinement in a single bite, turn to the timeless pain au lait. Soft, golden, and handmade—this is baking at its most honest.


Frequently Asked Questions (Q&A)

Q: Can I use dry yeast instead of fresh yeast?
A: Yes. Replace the 10 g of fresh yeast with approximately 3.3 g of active dry yeast, and dissolve it in a bit of warm milk before incorporating.

Q: Why are my rolls not as soft as bakery ones?
A: It’s often due to overbaking or insufficient kneading. Be sure to bake only until pale golden, and knead long enough for gluten to develop properly.

Q: Can I prepare the dough the night before?
A: Absolutely. After the first proof, cover and refrigerate the dough overnight. The next morning, bring it to room temperature, shape, and continue with proofing.

Q: How can I make them sweeter or more buttery?
A: For a richer version, you can slightly increase the sugar or butter, but be cautious—too much fat may affect the dough’s strength.

Q: Can I freeze them?
A: Yes. Freeze after shaping (before proofing), or after baking and cooling. To reheat, warm gently in the oven at 150°C (300°F) for 5–7 minutes.

4 Secret to Perfect Small Brioches à Tête: Unlocking the Art of French Pastry

A tray of freshly baked Petites Brioches à Tête, with golden, glossy tops and perfectly formed heads.

Small Brioches à Tête

Among the many treasures of the French boulangerie, few pastries evoke the same sense of nostalgia and refinement as the brioche à tête. These small, golden domes—named for the distinctive little “head” that crowns each one—are the embodiment of French morning elegance: rich, airy, and unmistakably luxurious.

The brioche à tête is more than a roll; it is a ritual. Traditionally served at breakfast or during a leisurely afternoon tea, it carries within its delicate crumb centuries of baking tradition. Its iconic silhouette, with a smooth, rounded base and a smaller, sculpted knob on top, is instantly recognizable and lovingly associated with Parisian pastry counters and country village bakeries alike.

What makes these brioches exceptional is their deeply nuanced texture: light as a feather, yet satisfyingly rich. Behind their glistening, golden crust lies a tender interior that pulls apart in soft, buttery strands. The flavor is subtle and balanced—never overly sweet—allowing the quality of the dough and the craftsmanship to shine through.

To shape a true brioche à tête is to engage in a delicate dance of technique and touch. The dough is enriched, slow-fermented, and handled with patience and care. Shaping the head—traditionally by pinching and twisting a small portion of dough—is a skill passed from one baker to the next, often learned by hand rather than by instruction.

Despite their apparent simplicity, these brioches require precision. Every detail—from the proofing time to the exact oven humidity—plays a role in achieving their flawless rise and burnished sheen. And yet, when done right, the result feels effortlessly elegant.

Whether enjoyed plain, still warm from the oven, or with a touch of jam, honey, or fresh butter, petites brioches à tête are a timeless indulgence. They speak of Sundays, of café counters, of quiet mornings spent savoring something made with intention. In a world that often rushes, they remind us to slow down—and to delight in the artistry of simplicity.Brioche – Wikipedia

SMALL BRIOCHES:

Yields: 6 small brioches or 1 large brioche for 4 people


Timings

  • Preparation: 40 minutes
  • First proof (pointage): 30 minutes
  • Chilling time: Minimum 2 hours
  • Final proof (pousse): 1 hour 30 minutes
  • Baking time:
    – 8 minutes for small brioches
    – 20 minutes for larger versions
  • Storage: Up to 48 hours

Ingredients for 240 to 300 g of Brioche Dough

  • 125 g gruau flour (strong bread flour)
  • 62 g eggs (roughly 1 large egg + a teaspoon)
  • 12 g whole milk
  • 12 g sugar
  • 2.5 g fine salt
  • 4 g fresh baker’s yeast
  • 25 g crème fraîche
  • 60 g softened butter

INGREDIENTS FOR small brioches

  • 240 to 300 g cold brioche dough (either 6 portions of 40 g for individual brioches or 300 g for a large brioche)

Egg Wash

  • 25 g whole egg
  • 20 g egg yolk
  • 25 g whole milk

Equipment

  • Stand mixer
  • Bench scraper (or corne)
  • Dough cutter (coupe-pâte)
  • Pastry brush (pinceau)
  • 6 individual brioche à tête molds (6 cm diameter) or 1 large brioche à tête mold (16 cm diameter)

Method for Small Brioches à Tête

  • Divide and Shape:
    Divide the dough into six equal portions, each about 40 g. Shape them into small balls and refrigerate for 15 minutes before shaping.
  • Forming the Brioche:
    Roll each portion into a small log. Using the edge of your hand, create a slight indentation about two-thirds of the way down the dough, creating a constriction between the “head” and the “body” of the brioche without twisting. Pinch the “head” tightly and insert it into the bottom of a lightly buttered brioche mold.
A baker shaping the dough for Petites Brioches à Tête, creating a smooth log and forming the iconic "head" with precision.
Learn how to perfectly shape Petites Brioches à Tête by creating a gentle constriction for the signature “head” without twisting the dough.
  • Shaping the Head:
    Lightly flour your finger and gently lift the “head” away from the body, forming a hook-like shape. This creates the signature brioche à tête look.
  • Egg Wash:
    Using a pastry brush, delicately apply the egg wash to the surface of each brioche.
  • Proofing:
    Let the dough rise in a warm, humid environment (around 26°C / 79°F) for approximately 1 hour 30 minutes. If using an oven, place a bowl of boiling water inside the oven to maintain humidity.
 Petites Brioches à Tête dough resting and rising in a warm, humid environment for the perfect proofing process.
Ensure your Petites Brioches à Tête rise perfectly with the right proofing environment—warm and humid for the best results.
  • Final Egg Wash and Baking:
    Apply a second coat of egg wash and bake on a hot baking sheet at 220°C (428°F / Gas Mark 7-8) for about 8 minutes, or until the brioches are golden and have risen beautifully.
  • Unmolding:
    Immediately after removing the brioches from the oven, unmold them to allow the steam to escape, ensuring they stay light and fluffy.
A freshly baked Petites Brioche à Tête being carefully removed from its mold to maintain its shape and texture.
Master the art of unmolding Petites Brioches à Tête immediately after baking to preserve their light texture and golden finish.

hef’s Tip: The Secret to a Perfect Brioche “Head”

To achieve a perfectly formed “head” that is well detached from the body of the brioche, avoid pressing too hard when creating the indentation with your hand. The goal is to create gentle tension between the head and the body without forcing it. A light touch is all that’s needed to define the separation effectively.

Another tip: Before shaping the brioches, ensure the dough is cold. This makes it easier to handle and results in brioches that keep their shape during baking without excessive spreading. If you’re working in a warm kitchen, you can also let the dough rest in the fridge between each step to maintain an optimal texture

Conclusion: Mastering the Art of Petites Brioches à Tête

Creating Petites Brioches à Tête is a delightful journey into the world of French pastry. While the process may seem intricate, the result is worth every minute of patience and attention to detail. From the soft, buttery dough to the delicate shaping and golden, glossy finish, these brioches embody the true spirit of French craftsmanship.

The unique “head” formation, achieved through a simple yet effective technique, adds an unmistakable charm to each piece. Whether served as a breakfast treat or a light afternoon snack, these brioches elevate any occasion with their elegance and depth of flavor.

And with the added benefit of being able to refrigerate and store them for up to 48 hours, these brioches become the perfect make-ahead option for busy mornings or special gatherings. Once you master the technique, you’ll find yourself enjoying the simple joy of freshly baked brioche whenever you please.

Baking, much like any art form, is about repetition, patience, and refinement. The more you practice, the closer you get to the perfect brioche. So, don’t hesitate to embrace the process, make adjustments as needed, and enjoy the rewards of your efforts.How to Shape the Perfect Brioche à Tête


Frequently Asked Questions (FAQ)

Q1: How can I make sure my brioches rise properly?
A: Ensure that your dough is kept in a warm, humid environment during proofing. If your kitchen is cold, you can place a bowl of boiling water in the oven with the dough to help maintain warmth and moisture. Also, don’t rush the proofing time—patience is key to getting that beautiful rise.

Q2: Can I freeze the dough or the brioches?
A: Yes, both the dough and the finished brioches can be frozen. For dough, shape it into balls, wrap it tightly in plastic, and freeze. For baked brioches, let them cool completely before wrapping and freezing them. To bake frozen dough, let it thaw in the refrigerator overnight and then allow it to rise before baking.

Q3: My brioches came out dense. What went wrong?
A: Dense brioches are usually a result of under-proofing or not having enough fat in the dough. Ensure that your dough has had enough time to rise and that you’re incorporating the butter fully. A good tip is to make sure the dough feels light and airy before shaping.

Q4: How can I get the “head” of my brioche to stand out more?
A: When shaping the dough, make sure you create a distinct constriction between the head and the body without twisting. Pinch the top tightly and insert it firmly into the mold. Applying the egg wash twice before baking will also help achieve a beautiful golden finish that highlights the “head” beautifully.

Q5: What’s the best way to serve these brioches?
A: These brioches are perfect as a breakfast treat, but you can also serve them as an elegant snack with jam, honey, or a light dusting of powdered sugar. Pair them with a hot drink like coffee or tea to enhance their light, buttery flavor.

King’s Cake: The Chef’s Secret to Recreate at Home

Golden and flaky Galette des Rois with frangipane filling, perfect for recreating at home with the chef’s secret

King’s Cake

The Galette à la Frangipane is a beloved French pastry that embodies tradition, celebration, and indulgence. Often associated with the festive season of Epiphany, this golden delicacy is far more than just a dessert—it is a cultural ritual, a shared moment of joy passed down through generations.

With its flaky, buttery layers and a rich, sweet filling, the galette is a marvel of contrasting textures. Crisp on the outside and meltingly soft within, each bite reveals a delicate balance of refinement and comfort. Traditionally enjoyed in January, it brings together families and friends who gather around not only to savor its taste but to partake in the charming custom of discovering the hidden charm—the fève—tucked inside.

The artistry behind a well-made Galette à la Frangipane lies in its craftsmanship. From the precision of the scoring on its golden crown to the meticulous layering of its filling, this pastry demands both skill and patience. It is often crowned with a beautifully burnished surface, etched in graceful patterns that hint at the elegance of the treat that lies within.

Whether served warm from the oven or enjoyed at room temperature, the galette is a celebration in itself—a symbol of sharing, tradition, and French pâtisserie at its most regal. Its timeless appeal has made it a cherished centerpiece in both humble homes and grand pâtisseries across France and beyond

moor infos: Galette des Rois – Wikipedia

GALETTE À LA FRANGIPANE

Serves 8


Timing

  • Preparation: 3 hours
  • Refrigeration: 24 hours
  • Freezing: Overnight
  • Baking: 40 minutes
  • Storage: Up to 48 hours in the refrigerator

Equipment Needed

  • Sieve
  • Rolling pin
  • Whisk
  • Piping bag fitted with a 10 mm round tip
  • Fève (ceramic trinket or bean)
  • Pastry brush
  • Paring knife

Ingredients

Puff Pastry

  • 200 g flour
  • 4 g salt
  • 10 g icing sugar
  • 40 g melted butter
  • 100 g cold water
  • 140 g beurre de tourage (or high-quality dry butter for laminating)

Frangipane Cream

  • 50 g butter
  • 50 g sugar
  • 40 g egg
  • 10 g heavy cream (35% fat)
  • 50 g almond flour
  • A dash of liquid vanilla
  • 5 g dark rum

Pastry Cream (for Frangipane)

  • 25 g pastry cream
  • (Yields about 100–150 g; adjust as needed)
  • 125 g milk (preferably whole)
  • 30 g egg yolks (about 1.5 yolks)
  • 30 g sugar
  • 10 g cornstarch (or 15 g flour for a thicker version)
  • 10 g butter
  • ½ tsp vanilla extract (or ½ vanilla bean, scraped

Egg Wash

  • 50 g beaten egg

Finishing Syrup

  • 50 g water
  • 50 g sugar
  • 10 g dark rum

Puff Pastry

  • 200 g all-purpose flour
  • 4 g fine salt
  • 10 g icing sugar (confectioners’ sugar)
  • 40 g melted butter
  • 100 g cold water
  • 140 g dry butter for laminating (beurre de tourage or European-style butter)

Preparation Method

Puff Pastry

Prepare a classic puff pastry with 5 single turns (see lamination technique, Divide the final dough into two 250 g squares. Fold each corner of the square toward the center, flip the dough over seam-side down on your work surface, and shape into a smooth ball. Flatten each ball gently into a disk. Wrap in plastic wrap and refrigerate for 24 hours.How to Make Perfect Puff Pastry


Frangipane Cream

In a mixing bowl, cream the softened butter with the sugar until smooth. Add the egg and the heavy cream, mixing well. Incorporate the almond flour, vanilla, and rum. Finally, blend in the pastry cream until fully combined.
Transfer the frangipane into a piping bag and pipe a spiral (cord) about 20 cm in diameter onto a sheet of baking paper. Don’t forget to insert the fève (ceramic trinket or bean) into the cream. Freeze overnight.


Assembly

The next day, roll out both puff pastry disks to 23 cm in diameter, keeping the original dough seam side (the folded side) underneath. Flip one round over so the seam side is now facing up—this side should be in contact with the cream.

Brush the edge of this first pastry round with a little water using a pastry brush. Place the frozen frangipane disk in the center. Cover with the second pastry round, seam side down (facing the cream), aligning the edges carefully. Seal the edges by gently pressing them together, then flute the border (chiqueter) using the back of a paring knife—this will help prevent the filling from leaking during baking.

Lightly moisten a baking tray with water and place the galette upside down on it (the top is now the smoothest side). Brush the surface with egg wash and refrigerate for 30 minutes.

Apply a second layer of egg wash. Score the top with decorative patterns using the tip of a paring knife.

Bake in a preheated oven at 190°C (375°F), then lower the temperature to 170°C (340°F) and bake for 40 minutes, until golden and crisp.

As soon as it comes out of the oven, brush with a light syrup to give it a beautiful shine. Let cool before serving.

Conclusion

The Galette à la Frangipane is much more than a seasonal pastry—it is a celebration of craftsmanship, tradition, and the simple joy of sharing. From the delicate folds of the puff pastry to the aromatic, melt-in-the-mouth frangipane filling, every stage of its creation invites us to slow down and reconnect with the rituals of French baking.

Whether you’re preparing it for Epiphany, a festive gathering, or simply to impress your guests, this galette is an elegant centerpiece that carries with it a sense of warmth and conviviality. The contrast of crisp layers and creamy almond filling is timeless and satisfying. And let’s not forget the playful tradition of hiding the fève—whoever finds it becomes the king or queen of the day, crowned with a paper crown and a smile.

Patience and precision are the keys to success, but the reward is well worth the effort: a truly majestic dessert that embodies the best of French pâtisserie. Let it cool just slightly before slicing, and serve with a glass of cider or a cup of tea for a perfectly regal moment.


Frequently Asked Questions

Q: Can I use store-bought puff pastry?
A: Yes, if you’re short on time, a high-quality all-butter puff pastry will still give excellent results. However, homemade puff pastry provides superior flavor and texture.

Q: Can I make the frangipane in advance?
A: Absolutely. You can prepare the frangipane (including the pastry cream) up to 2 days in advance. Store it in an airtight container in the fridge.

Q: Do I have to freeze the frangipane spiral overnight?
A: Freezing it helps maintain a neat shape during assembly and prevents over-spreading during baking. If you’re in a rush, chill it in the freezer for at least 2 hours.

Q: How do I store leftovers?
A: Wrap the galette in foil or keep it in an airtight container at room temperature for up to 2 days. Reheat slightly in the oven to refresh the crispness.

Q: What can I use instead of rum?
A: You can omit the rum or replace it with a few drops of almond extract or orange blossom water for a different twist.

Q: Can I prepare the entire King’s Cake of time?
A: Yes! You can assemble the galette, freeze it raw, and bake it straight from the freezer—just add 5–10 minutes to the baking time.


4 Secret to Perfect Brioche: Chef’s Tips Revealed

Step-by-step guide to making perfect, fluffy brioche at home.

Perfect Brioche

Golden, airy, and subtly rich—the Brioche Nanterre is a quiet triumph of French baking. Unlike its more flamboyant cousins, it makes no loud declarations. Its beauty lies in its structure: a series of smooth, rounded domes nestled tightly in a rectangular mold, rising together to form a loaf that’s both sculptural and indulgent. It’s the kind of pastry that whispers of precision, patience, and restraint.

This traditional brioche is baked in a loaf tin, distinguishing it from braided versions or individual buns. Its crumb is exceptionally light, delicately enriched with butter, and its crust, a deep honeyed brown, gives way to a feathery interior. When pulled apart, each piece offers a gentle resistance, stretching just slightly before melting in the mouth.

Making a Brioche Nanterre is as much about technique as it is about time. The dough must be developed slowly, often over two days, with long fermentations that reward the baker with complexity of flavor and unmatched texture. It’s a ritual that respects the process as much as the result.

Served with jam, a touch of honey, or enjoyed plain, it’s perfect at breakfast, for a refined goûter, or as a base for more elaborate creations like French toast or bread pudding. But in its purest form, the Nanterre needs no embellishment. Its elegance is self-contained—just enough sweetness, just enough richness, and a lot of care.Brioche explained on Wikipedia

Timeline – For 6 Servings

  • Preparation time: 45 minutes
  • First proof (bulk fermentation): 30 minutes
  • Refrigeration (resting the dough): At least 2 hours
  • Final proof (before baking): 1 hour 30 minutes to 2 hours
  • Baking time: 25 minutes
  • Storage: Keeps for up to 48 hours at room temperature, well wrapped

Recipe for 300 g of Brioche Dough

Time:

  • Preparation: 30 minutes
  • First proof (bulk fermentation): 30 minutes
  • Refrigeration: At least 2 hours
  • Baking: 170°C to 220°C (depending on the size of the pieces)
  • Storage: Up to 48 hours in the refrigerator

Equipment:

  • Stand mixer
  • Dough scraper
Ingredients:
  • 125 g bread flour (or T45/T55 high-gluten flour)
  • 62.5 g eggs (about 1 whole egg plus a little extra)
  • 12.5 g whole milk
  • 12.5 g sugar
  • 2.5 g fine salt
  • 4 g fresh baker’s yeast
  • 25 g crème fraîche (or heavy cream)
  • 60 g softened butter

Finishing Touches

Egg Wash (Dore):

  • 25 g whole egg
  • 20 g egg yolk
  • 25 g whole milk
    → Mix well to create a smooth egg wash for a glossy golden crust.

Optional Topping:

  • Pearl sugar (as needed)

Equipment:

  • Stand mixer
  • Bench scraper
  • Pastry brush
  • Dough scraper
  • Brioche Nanterre mold or loaf pan (approx. 20 cm × 10 cm × 6 cm)

Shaping & Baking Instructions

  • Divide the dough into six equal portions and shape each into a smooth ball. Arrange them in a staggered (zigzag) formation inside a well-buttered loaf pan.
  • Brush the tops with the prepared egg wash. Then, allow the dough to proof in a warm, humid environment—either in a proofing box or in an oven that’s turned off with a bowl of steaming water inside—for 1 hour 30 minutes to 2 hours at around 26 °C (78.8 °F).
Brioche dough brushed with egg wash and proofing in a warm environment.
Brush with egg wash, then allow the brioche to proof for a golden, soft finish
  • Once fully risen, brush with egg wash a second time. Bake in a preheated oven at 175 °C (347 °F) for about 25 minutes, until golden and well-risen.
  • If desired, sprinkle pearl sugar over the top before baking for a decorative finish.
Brioche brushed with egg wash and sprinkled with pearl sugar, ready for baking.
Brush the brioche with egg wash, add pearl sugar, and bake to golden perfection.
  • Unmold the brioche immediately after baking to allow steam to escape and the crust to set properly.
Fluffy, golden brioche made at home with professional techniques.
Discover the secret to achieving a melt-in-your-mouth brioche with these chef-approved tips.

CHEF’S TIPS

  • You can also line the mold with parchment paper.
  • The rising time before baking can vary; the dough should double in size.

Conclusion:

In conclusion, mastering the art of brioche is a rewarding journey for any baker. Whether you’re new to the world of brioche or you’re looking to perfect your technique, the process can be both exciting and deeply satisfying. The golden, buttery texture and the light, fluffy crumb are the hallmarks of a successful brioche. Remember, the key to achieving the best brioche lies in patience—giving your dough the right amount of time to rise and using quality ingredients. With the right tools and a bit of practice, you’ll soon be able to enjoy a perfectly braided, tender brioche fresh from the oven.

Baking brioche is as much about understanding the dough as it is about enjoying the process. Once you’ve mastered the basics, feel free to experiment with different fillings or shapes, and make it your own! Brioche is versatile enough to be adapted for a wide range of recipes, from savory to sweet, making it a staple that can bring joy in any season.moor recipe: How to Shape the Perfect Brioche à Tête


Questions and Answers:

Q: Why does the dough need to rest for so long before baking? A: Resting allows the dough to rise and develop flavor. The yeast needs time to ferment and create the light, airy texture characteristic of a good brioche. Patience is key to achieving that melt-in-your-mouth crumb.

Q: Can I make brioche without a stand mixer? A: Yes, you can make brioche by hand, though it requires a bit more effort. The dough is quite sticky and soft, so be prepared for a longer kneading time. If using a stand mixer, the dough will come together faster and more evenly.

Q: Can I freeze brioche dough? A: Absolutely! Brioche dough freezes well. After the first rise, you can freeze it in a ball or shaped into the desired form. Just make sure to wrap it tightly before freezing. When you’re ready to bake, allow it to thaw in the fridge overnight before proceeding with the second rise and baking.

Q: Can I make a savory version of brioche? A: Yes, you can! To create a savory brioche, reduce or eliminate the sugar in the dough and add savory ingredients like herbs, garlic, or cheese. This will give your brioche a different, more savory flavor profile while maintaining the light, tender texture.

Crispy, Caramelized Bliss:6 Secret to Perfect Palmiers Revealed!

Palmiers are a quintessential French treat that brings the best of both simplicity and sophistication to your baking. These buttery,

Perfect Palmiers

Crisp, caramelized, and irresistibly buttery, the Palmier is a classic emblem of French pâtisserie, instantly recognizable by its iconic heart or butterfly shape. Often called an “elephant ear” in English due to its wide, rounded form, the Palmier is a deceptively simple treat with deep roots in French baking heritage. It transforms just two basic ingredients—puff pastry and sugar—into something extraordinarily refined.

This pastry’s elegance lies in its technique. A sheet of puff pastry is sprinkled generously with sugar, then rolled inward from both sides until the coils meet in the center, creating the signature double-spiral. As it bakes, the sugar caramelizes on the outside, forming a crisp, golden crust while the layers of dough puff up into delicate, flaky folds. The result is a pastry that’s both light and crunchy, with a deeply satisfying caramelized finish.

While often served plain, Palmiers can be enhanced with touches of vanilla sugar, cinnamon, or even a brush of chocolate for a modern twist. Despite its simplicity, achieving the perfect Palmier requires an understanding of balance—not too thick, not too thin, and just the right amount of sugar to ensure a proper caramel glaze without burning.

In France, Palmiers are a staple of boulangeries and afternoon goûters, enjoyed with coffee or tea. They embody everything we love about French pastry: precision, minimalism, and indulgence. Whether bought fresh from the bakery or prepared at home, they’re a celebration of how a humble recipe can become a timeless delicacy when mastered with care.Origine des palmiers (source historique) :

👉 Palmiers, also known as elephant ears, have their roots in French patisserie. Read more on Wikipedia.

For 8 to 10 Palmiers

Preparation time: 2 hours 30 minutes
Chilling time: At least 2 hours
Freezing time: 30 minutes
Baking time: 20 minutes
Storage: Keeps for 3 days in an airtight container


Equipment

  • Rolling pin
  • Pastry brush

Ingredients

140 g granulated sugar

Inverted Puff Pastry

Beurrage (butter block):

  • 200 g unsalted butter
  • 100 g all-purpose flour

Détrempe (dough base):

  • 150 g all-purpose flour
  • 5 g salt
  • 87 g water

Egg Wash (Dorure):

  • 50 g whole egg
  • 40 g egg yolks
  • 50 g whole milk

Inverted Puff Pastry (Pâte Feuilletée Inversée)

This advanced version of puff pastry reverses the traditional method: instead of encasing the butter inside the dough, the dough is encased inside the butter. This results in a more tender and beautifully layered pastry — perfect for recipes like palmiers, mille-feuille, or galettes des rois.


Ingredients

Butter Block (Beurre Manié):

  • 200 g unsalted butter (cold but pliable)
  • 100 g all-purpose flour

Dough Base (Détrempe):

  • 150 g all-purpose flour
  • 5 g fine salt
  • 87 g cold water

Method

  1. Prepare the butter block (beurre manié):
    • Mix the butter and flour together until smooth but firm.
    • Shape into a flat square about 2 cm thick.
    • Wrap in plastic wrap and refrigerate for 30 minutes.
  2. Prepare the dough (détrempe):
    • In a bowl, mix the flour and salt, then add cold water gradually.
    • Knead briefly until a smooth dough forms — do not overwork.
    • Shape into a small square, wrap, and chill for 30 minutes.
  3. Encasing the dough in the butter:
    • Roll out the butter block into a large square.
    • Place the détrempe in the center and fold the butter around it like an envelope.
    • Gently seal the edges to encase the dough fully.
  4. Lamination – First Turn (Single Fold):
    • Roll out the dough into a long rectangle.
    • Fold it into thirds like a letter (single turn).
    • Chill for 30 minutes.
  5. Repeat turns:
    • Do 3 single folds in total, chilling for 30 minutes between each.
    • Roll gently to avoid melting the butter into the dough.
  6. Rest and use:
    • After the final turn, wrap the dough and refrigerate for at least 2 hours before using.
    • For best results with palmiers, freeze for 30 minutes before slicing and baking.

Shaping and Baking the Palmiers

Prepare the puff pastry:
Sprinkle the surface of the dough with sugar and give it a fifth single turn (fold into thirds like a letter).
Roll the dough out to a 5 mm thickness into a 25 cm × 80 cm rectangle.

Folding the dough:
Fold each end inward to the 12 cm mark, so that the edges meet but do not overlap — this forms a double fold on each side.
Fold once more along the center line to bring both sides together. Gently press the top with a rolling pin to flatten slightly.

"Unlock the secret to perfectly flaky palmiers by mastering the art of folding dough.
“Unlock the secret to perfectly flaky palmiers by mastering the art of folding dough. Each precise fold creates layers of buttery, crispy goodness that make these pastries irresistible

Final fold:
Fold the dough in half again. You should now have a log (pâton) approximately 10 cm wide and 3 cm thick.
Wrap and freeze for 30 minutes to firm it up.

Shaping the palmiers:
Using a sharp knife, slice 1 cm thick pieces. Lay them flat on a lightly greased baking tray, leaving space between each.

Shaping palmiers is all about precision and care.
Shaping palmiers is all about precision and care. Watch as the dough transforms into beautiful, crisp spirals that are both delicate and delicious

Baking:
Brush with egg wash and bake in a preheated oven at 200°C (390°F / Gas mark 6–7) for 20 minutes.
Halfway through baking, flip each palmier so they become evenly caramelized and golden on both sides.

Finishing:
Remove immediately from the tray after baking to prevent sticking.

o maintain their crisp texture and prevent sticking, be sure to remove your palmiers from the baking tray right after they’re done
To maintain their crisp texture and prevent sticking, be sure to remove your palmiers from the baking tray right after they’re done. This simple step ensures they stay perfectly golden and crunchy.

Chef’s Tips & Tricks

• For the fifth turn, swap flour for sugar — use 25% of the dough’s total weight to ensure optimal caramelization.
• The more sugar you use, the more intensely caramelized your palmiers will be — just take care not to burn the edges.
• Chill the dough well between folds to maintain sharp layers and prevent butter leakage.
• Use a sharp knife to slice the rolled dough cleanly and avoid crushing the delicate lamination.
• Flip the palmiers midway through baking for an even golden finish on both sides.

Conclusion: The Elegant Simplicity of the Palmier

Crisp, caramelized, and irresistibly buttery, the palmier stands as one of the most refined examples of what French pâtisserie does best — elevate the humble into the sublime. With nothing more than pâte feuilletée, sugar, and careful hands, you create a pastry that delights in both its flavor and its form.

Though deceptively simple in appearance, mastering the palmier is a true baker’s rite of passage. It demands precision in lamination, an intuitive understanding of caramelization, and patience with every fold and chill. Yet, the result is an elegant swirl of golden layers, kissed by heat and sugar, melting on the tongue with every bite.

This recipe offers not just a treat to enjoy, but an experience in craftsmanship. Whether you serve them with coffee, at the end of a sophisticated meal, or package them as edible gifts, palmiers have a way of stealing the spotlight through sheer elegance and texture

Vers un article sur les viennoiseries :

👉 If you love French classics, don’t miss our post on perfect raisin buns.


Your Palmier Questions — Answered by the Chef

Q: Can I use store-bought puff pastry instead of homemade inverse puff?
A: Yes, but results will differ. Store-bought puff pastry (especially if not made with pure butter) lacks the depth, flakiness, and layering of homemade inverted puff pastry (feuilletage inversé). If you’re short on time, opt for an all-butter version and chill it well before shaping.


Q: Why is sugar used for the fifth turn instead of flour?
A: Replacing flour with sugar in the final fold ensures even distribution of caramelization. As the pastry bakes, the sugar melts and coats the layers, creating the classic crisp, glossy shell unique to true palmiers.


Q: How do I prevent my palmiers from overcooking or burning?
A:
Keep an eye on oven temperature: 200°C is ideal, but ovens vary. Use a thermometer if possible.
Rotate your tray halfway through baking.
Flip the palmiers as instructed to ensure even color and to prevent the bottom from overbaking in sugar.
Remove immediately once golden — residual heat can keep cooking them.


Q: Can palmiers be frozen?
A: Yes. Once shaped and sliced, freeze them raw on a tray, then store in an airtight bag for up to one month. Bake straight from frozen — no thawing needed — and extend the baking time by a few minutes.


Q: Why is chilling so important?
A: Chilling between folds, before slicing, and before baking is crucial for structure. It ensures clean lamination, prevents butter from leaking, and helps the dough maintain its shape in the oven.


Q: What’s the ideal thickness for slicing palmiers?
A: Around 1 cm thick. Thicker slices may not crisp through, and thinner ones risk over-caramelizing or collapsing.

6 Secrets to Making Perfectly Flaky and Irresistible Raisin Buns at Home

A freshly baked batch of golden, flaky raisin buns with a glossy finish, sitting on a wire rack ready to be enjoyed.

Perfect raisin buns at home

Raisin buns, known in France as pain aux raisins, are a beloved classic in French pastry that blends the rich, buttery texture of a flaky dough with the natural sweetness of raisins and the indulgence of a creamy custard filling. This pastry, often enjoyed for breakfast or as an afternoon treat, has its origins deeply rooted in French viennoiserie, drawing inspiration from European traditions of enriched doughs. The dough itself is made with a combination of butter, sugar, eggs, and milk, creating a soft, slightly sweet, and airy texture that serves as the perfect foundation for the filling. Raisins, typically plump and soaked to enhance their flavor, are spread evenly across the dough, often with a layer of velvety custard added for an extra touch of richness.

Perfect raisin buns at home

Once the dough is rolled up and sliced into individual portions, the buns are carefully baked, allowing the dough to rise and develop a golden, crispy exterior while remaining soft and fluffy on the inside. Some variations of the raisin bun may be finished with a light glaze of sugar syrup, giving it a glossy, sweet shine, or with a sprinkle of sliced almonds for added texture and flavor. The result is a perfect balance of textures: the crunch of the outside, the pillowy softness of the inside, and the sweet, tangy burst of raisins that infuse every bite. Best enjoyed fresh and warm, pain aux raisins is a comforting and decadent pastry that offers a rich experience of French baking tradition. Whether paired with coffee or enjoyed alone, it is a treat that transports you straight to a charming French bakery, where the smell of freshly baked viennoiseries fills the air. With its combination of sweet, savory, and creamy elements, this pastry remains a timeless favorite that never fails to satisfy.

Raisin Buns Recipe

For 8 to 10 raisin buns

Preparation Time

  • 100 g raisins
  • 500 g croissant dough

Croissant Dough (Pâte à Croissant) Ingredients

  • 500 g all-purpose flour
  • 10 g salt
  • 50 g sugar
  • 15 g fresh yeast (or 7 g dry yeast)
  • 300 ml cold water
  • 30 g unsalted butter, softened
  • 250 g unsalted butter (for laminating)
Pastry Cream (Crème Pâtissière) Ingredients
  • 500 ml whole milk
  • 1 vanilla bean (or 1 tablespoon vanilla extract)
  • 6 egg yolks
  • 100 g granulated sugar
  • 40 g cornstarch (or all-purpose flour)
  • 50 g unsalted butter
  • Pinch of salt

For egg wash:

  • 50 g whole egg
  • 50 g egg yolks
  • 50 g whole milk

Optional:

  • Sufficient amount of rum, orange peel, or ground cinnamon (to flavor the raisins)

Equipment

  • Stand mixer
  • Whisk
  • Bench scraper
  • Rolling pin
  • Offset spatula
  • Pastry brush

Instructions for Raisin Buns

Prepare the dough:

Roll out the cold dough into a rectangle of 40 cm × 20 cm.

Spread the pastry cream:

Evenly spread a layer of pastry cream over the dough.

Prepare the raisins:However

Blanch the raisins in boiling water, then, if desired, let them soak in rum along with orange peel and cinnamon for added flavor. Drain the raisins thoroughly and evenly distribute them over the pastry cream.

Raisins soaking in a bowl of warm water with optional rum, orange peel, and cinnamon for added flavor, ready to be used in a delicious pastry.
Plump and flavorful raisins, perfectly prepared for making the most irresistible raisin buns!

Brush with egg wash: Using a pastry brush, apply the egg wash over the top of the dough.

Cut and shape:

Slice the dough into 2 to 2.5 cm thick pieces to create about 8 to 10 evenly sized raisin buns. Place them directly on a non-stick baking sheet, making sure the seam (where the dough was rolled) is placed under the buns to prevent them from opening during baking.

Slices of rolled dough, filled with pastry cream and raisins, being cut into individual portions to create perfectly shaped raisin buns.
Shaping the dough into perfect rounds for golden, flaky raisin buns that are sure to impress!
  • Proof the dough: Allow the buns to rise in a warm and humid environment (no more than 25°C) for about 1 hour.
  • Bake: Preheat the oven to 180°C (350°F, gas mark 6) and bake the buns for 12 to 14 minutes, or until golden and fully cooked.

more recipe : Make It at Home: The Ultimate Braided Brioche in Just 10 Minutes — Like the Pros!

Raisin buns baking in the oven, turning golden brown, and filling the kitchen with a delightful aroma.
Baking the perfect raisin buns to a golden perfection – the ultimate reward for your efforts!

Conclusion

The raisin buns (pain aux raisins)

are a true delight in the world of French viennoiserie, blending the soft, buttery texture of croissant dough with the sweetness of raisins and the indulgence of pastry cream. This delicious pastry represents the art of French baking, where technique and attention to detail come together to create something irresistibly delicious. The process, while requiring patience and precision, rewards you with a golden, flaky pastry that is perfect for breakfast, a snack, or any occasion that calls for something special. From the dough’s delicate layers to the rich filling of raisins and custard, every bite is a perfect balance of flavors and textures, and the addition of a light glaze or cinnamon can elevate the experience even further.

In addition Making these raisin buns at home allows you to appreciate the craftsmanship behind each bite and brings a touch of French bakery charm into your own kitchen. Whether you’re preparing them for a cozy breakfast with family or a special treat for friends, these buns are sure to impress and delight anyone who tastes them.


Questions and Answers

1. Can I use store-bought dough instead of making my own croissant dough?
Yes, you can! If you’re short on time or prefer convenience, you can use store-bought croissant dough. However, making the dough from scratch will result in a more authentic and flaky texture, and you’ll have control over the ingredients and flavor.

2. Can I freeze the raisin buns before baking them?
Absolutely! After shaping the buns and placing them on a baking sheet, you can freeze them for up to a few weeks. Once frozen, transfer them to a zip-top bag or airtight container. When you’re ready to bake them, simply let them thaw and rise for about 30-60 minutes before baking.

3. Can I substitute the raisins with another fruit?
Yes, you can. Dried cranberries, currants, or even chopped dried apricots can be used in place of raisins for a different twist. Just be sure to adjust the soaking time depending on the fruit you choose.

4. What is the best way to store these raisin buns?


Store them in an airtight container at room temperature for up to 24 hours. If you have leftovers, you can reheat them in the oven at a low temperature for a few minutes to bring back their soft, flaky texture.

5. Can I add a glaze on top of the buns?
Yes, glazing the buns after baking will give them a beautiful shine and extra sweetness. A simple sugar syrup or apricot glaze works well, but you can also experiment with different flavors like orange glaze for a citrusy kick.

6. Can I make the pastry cream ahead of time?
Yes, you can make the pastry cream a day in advance. Just be sure to cover it with plastic wrap directly on the surface of the cream to prevent a skin from forming. Refrigerate it until you’re ready to use it.

7. How can I ensure my dough rises properly?
To get a good rise, make sure your yeast is fresh and the environment is warm (but not too hot). The dough should be placed in a draft-free, slightly warm area to rise, such as an oven with the light on or near a warm stove.

Finally On Dough Lamination Techniques

Link: https://www.kingarthurbaking.com/learn/guides/laminated-dough
Why: Offers in-depth guidance on lamination—a key to flakiness in raisin buns.


7 Secrets to Perfect Homemade Pain au Chocolat You Need to Know!

Freshly baked golden pain au chocolat with rich chocolate filling, displayed on a baking tray.

perfect homemade pain au chocolat

Pain au chocolat is one of the most iconic pastries in French baking, perfectly embodying the delightful union of melt-in-your-mouth chocolate and light, golden, flaky dough. If you’ve ever had a pain au chocolat fresh from the oven, you know how the combination of airy pastry and melting chocolate can be pure bliss. But why settle for store-bought when you can easily make this delicious treat at home with a simple recipe that will rival those from your favorite bakeries?

In this post, I’ll walk you through the secret to making perfect homemade pain au chocolat that’s every bit as good as what you’ll find in the best pastry shops. Forget about long hours of waiting or complicated techniques—here, you’ll learn a straightforward and quick method to create golden, flaky, and, of course, incredibly tasty pain au chocolat.go to history : http://Pain au Chocolat History (Saveur)

Why Make Pain au Chocolat at Home?

Making pain au chocolat at home is a true indulgence. Not only do you get to control the quality of the ingredients, but you also have the flexibility to customize every aspect of the recipe. Whether you prefer a smooth, rich dark chocolate or a sweet milk chocolate filling, the choice is yours. Plus, there’s something incredibly satisfying about pulling a perfectly baked pain au chocolat out of the oven and filling your kitchen with its irresistible scent.

The Perfect Puff Pastry for an Exquisite Result

The secret to a great pain au chocolat lies in the puff pastry. In this recipe, I’ll guide you step-by-step in making your own pastry dough. However, if you’re in a rush, you can always use store-bought puff pastry, and it will still yield great results. We’ll cover how, by working with the dough, you can create those beautiful, flaky layers that, when baked, will give you that signature light and crisp texture we all love.

Key Ingredients for the Perfect Dough

To make homemade pain au chocolat, you’ll need a few essential ingredients: flour, butter, sugar, milk, yeast, and of course, high-quality chocolate. The chocolate is the star of the show here, so choose a bar of dark or milk chocolate that you particularly enjoy. You can also get creative by adding nuts like hazelnuts or almonds, or even a touch of candied orange peel for a delightful twist.ather recipes: Make It at Home: Make It at Home: The Ultimate Braided Brioche in Just 10 Minutes — Like the Pros

An Easy and Effective Method for a Perfect Result

While making puff pastry from scratch requires a bit of technique, don’t worry! I’ll share all the tips and tricks you need to make each step as simple as possible. From mixing the ingredients to letting the dough rest, and from shaping the pain au chocolat to baking them, you’ll be guided through the process to avoid common pitfalls and achieve that perfect pastry.

The most rewarding moment? When you pull your pain au chocolat from the oven, golden and crisp, with the chocolate inside still soft and melted. It’s a visual and gustatory treat that will impress everyone at the table

Chef’s Tips for Perfect Homemade Pain au Chocolat 1:

  • To ensure your pain au chocolat comes out just right, I’ll also share some professional tips. You’ll learn how to roll the dough to get the perfect shape, how to achieve that golden, shiny finish, and how to avoid issues like dough tearing or chocolate spilling over during baking.

Ingredients for Croissant Dough (for 6 pain au chocolat)

Ingredients for Egg Wash:
  • 50 g of whole egg
  • 50 g of egg yolks
  • 50 g of whole milk
Other Ingredients:
  • 400 g of croissant dough (you can make it from scratch using a specific croissant dough recipe or buy pre-made dough)

If you want to make the croissant dough yourself, here is a basic recipe:

Ingredients for the Croissant Dough (Base):

  • 500 g of all-purpose flour (type 55)
  • 10 g of salt
  • 40 g of sugar
  • 20 g of fresh yeast
  • 300 ml of whole milk
  • 30 g of melted butter
  • 200 g of cold butter (for laminating)

Steps:

  • Mix the Ingredients: In a stand mixer, combine the flour, salt, sugar, and crumbled yeast. Gradually add the warm milk and melted butter, and knead until the dough is smooth and homogeneous.
  • First Rise: Let the dough rest at room temperature for about 1 hour or until it doubles in size.
  • Incorporate the Butter for Laminating: Roll the dough into a rectangle, place the cold butter in the center, and fold the dough around it to enclose the butter. Perform several turns (fold and roll) while allowing the dough to rest between each turn (about 30 minutes). This process creates the flaky layers in the dough.
  • Rest and Final Rise: Let the dough rest between each turn and repeat the folding and rolling process 3 to 4 times.
  • 12 sticks of chocolate (or chocolate bars, depending on your preference)

Equipment Needed:

  • Stand mixer
  • Whisk
  • Dough scraper (for cutting and handling the dough)
  • Rolling pin
  • Pastry brush (for applying the egg wash)

Shaping and Baking the Pain au Chocolat

  • Roll out the dough to a thickness of 4 mm. Cut it into rectangles measuring 9 cm × 15 cm.
  • Place one stick of chocolate on each rectangle.
  • Roll the dough once over the chocolate, then place a second stick of chocolate on top.
  • Finish rolling the dough all the way up. Using the palm of your hand, gently press down on each pain au chocolat to seal the seam firmly in the center.
Hands gently pressing a rolled pain au chocolat to seal the seam before proofing.
Gently sealing the dough ensures perfect layers and a clean rise during baking.
  • Place the rolled pains au chocolat onto a non-stick baking tray.
  • Brush them lightly with the egg wash using a pastry brush.
  • Let them proof for about 2 hours in a proofing chamber (or in an off oven with a bowl of boiling water inside) at 26°C (78.8°F).
    • The pains au chocolat should double in volume.
  • Brush them again very gently with the egg wash.
Pastry brush gently applying egg wash to proofed pain au chocolat for a golden crust.
A delicate second egg wash gives your pain au chocolat that irresistible golden shine.
  • Bake in a ventilated (fan) oven at 165°C (329°F) for 14 to 16 minutes, until beautifully golden and flaky.
Golden and flaky homemade pain au chocolat with layers of buttery pastry and melted chocolate.
Buttery, flaky, and filled with rich chocolate — this homemade pain au chocolat is pure morning bliss.

Chef’s Tips and Tricks 2:

  • During proofing, make sure the temperature does not exceed 29–30°C (84–86°F), to prevent the butter from melting inside the dough.
  • Before baking, chill the pains au chocolat in the refrigerator for a few minutes. This will help the dough firm up and hold its shape beautifully during baking.

Conclusion

Making your own pain au chocolat at home is a rewarding experience that brings the authentic taste of French pastry right to your kitchen. By carefully preparing your croissant dough, respecting the resting and proofing times, and mastering the gentle baking techniques, you can create flaky, golden, melt-in-your-mouth pains au chocolat that rival the best bakery versions.

From the delicate layering of the dough to the perfect incorporation of rich, luscious chocolate, every step contributes to creating a pastry that is both a joy to make and a delight to eat. Whether for a cozy weekend breakfast, a brunch with friends, or simply to indulge your love for pastry, homemade pain au chocolat is always a brilliant idea.

Remember, the beauty of baking at home is that you can tweak the recipe to suit your preferences—experiment with different chocolates, add a hint of orange zest, or even try variations with hazelnut spreads for a delicious twist. With practice and passion, each batch will be better than the last!

Now that you have all the tools and tips in hand, it’s time to roll up your sleeves and get baking. Trust the process, enjoy the craft, and savor every flaky, chocolatey bite of your homemade pains au chocolat!


Frequently Asked Questions (FAQ)

Can I use store-bought puff pastry instead of homemade croissant dough?

Yes, you can! If you’re short on time, a good quality store-bought puff pastry can work. However, traditional croissant dough gives a much richer, more buttery flavor and a lighter, flakier texture that’s closer to authentic bakery pains au chocolat.

Why is it important not to proof above 30°C?

Because butter starts melting around 29–30°C. If the butter melts during proofing, the layers of the dough will collapse, and you’ll lose the beautiful flakiness that defines a perfect pain au chocolat.

How do I know when my dough is properly proofed?

After proofing, the pains au chocolat should be visibly puffed up and almost doubled in size. When you gently press a finger on the dough, the indentation should slowly bounce back. If it springs back too quickly, it needs a little more time.

Can I freeze the unbaked pains au chocolat?

Absolutely! After shaping but before proofing, you can freeze them on a baking sheet. Once frozen solid, transfer them to an airtight container or bag. When ready to bake, thaw them overnight in the fridge, let them proof, and then bake as usual.

What kind of chocolate is best for pain au chocolat?

Traditionally, batons of semi-sweet or dark chocolate (around 55–65% cacao) are used. You can also use milk chocolate if you prefer a sweeter pastry. Make sure to choose good-quality chocolate for the best flavor.

Why chill the pains au chocolat before baking?

Chilling helps the dough firm up, ensuring sharper, cleaner layers and preventing the butter from leaking out during baking. It also helps create an even, beautiful rise in the oven.

Can I add flavors or fillings to the traditional recipe?

Of course! While the classic version is simply chocolate, you can get creative by adding a bit of orange zest to the dough, sprinkling chopped nuts with the chocolate, or even using flavored chocolates for a fun twist

Perfect Croissants at Home: 4 Secrets from the French Pastry Tradition

Perfect homemade croissants with golden layers and a buttery finish, inspired by French pastry traditions.

Perfect croissants at home

A true symbol of French baking tradition, the croissant is much more than just a pastry — it’s a masterpiece of craftsmanship, patience, and pure indulgence. Beneath its golden, flaky layers lies a soft, buttery heart that has captivated pastry lovers across the world.

In this article, we’ll unveil the secrets to making croissants at home, step by step. From preparing the delicate laminated dough to achieving that perfect, crisp bake, you’ll discover how to recreate the magic usually found only in the finest bakeries.
Each technique is carefully explained to guide you through the process, making what once seemed daunting an exciting and deeply satisfying experience.

Baking croissants at home

is a true adventure — one that requires a little time and care, but rewards you with the incomparable joy of a warm, homemade pastry.
Whether you’re looking to elevate a breakfast spread, impress at a brunch gathering, or simply enjoy the meditative pleasure of baking, mastering the croissant will soon become a cherished skill.

MORE RECIPE: Make It at Home: The Ultimate Braided Brioche in Just 10 Minutes — Like the Pros!

the croissant dough:

  • Fresh yeast: 12 gr, to ensure steady fermentation and develop rich flavors.
  • Whole milk: 144 gr, to add softness and richness to the dough.
  • T55 flour: 150 gr, for a supple, well-balanced dough.
  • Strong flour (high-protein flour): 150 gr, ideal for giving strength and structure to support the lamination process.
  • Fine salt: 6 gr, to enhance the flavor and control fermentation.
  • Sugar: 35 gr, for a subtle sweetness and to promote beautiful browning during baking.
  • Honey: 9 gr, adding a delicate aromatic note and improving freshness.
  • Butter: 60 gr, incorporated directly into the dough for a tender texture.

lamination:

  • Dry butter (or laminated butter): 150 gr, to achieve the light, airy, and melt-in-the-mouth layers typical of a perfect croissant.

egg wash:

  • Whole egg: 50 gr, to bring shine to the croissants.
  • Egg yolks: 50 gr, to deepen the golden color.
  • Whole milk: 50 gr, to slightly thin the mixture and ensure an even glaze.

Essential equipment:

  • Stand mixer: for kneading the dough efficiently and consistently.
  • Whisk: to blend the egg wash smoothly.
  • Bench scraper: to handle and cleanly move the dough without damaging it.
  • Rolling pin: for evenly rolling out the dough during the lamination process.
  • Pastry brush: for delicately applying the egg wash to the croissants

Homemade Croissants — Full Method

Work Time:

  • Preparation: 2 hours
  • First proof (pointing): 30 minutes
  • Freezing: 30–40 minutes
  • Chilling: 30 minutes
  • Final proof (rising): 2 hours
  • Baking: 14–16 minutes
  • Storage: up to 24 hours

Method – Step-by-Step

Using a whisk
dissolve the fresh yeast in the whole milk directly in the bowl of a stand mixer.

"Whisking fresh yeast into whole milk in a stand mixer bowl to start croissant dough.
Dissolving the fresh yeast in milk is the first crucial step for light, airy croissants

Add the remaining
ingredients (except the laminated butter) into the mixer bowl fitted with the dough hook. Knead for 4 minutes at low speed, then 6 minutes at medium speed.
At the end of kneading, the dough should be elastic and smooth.

"Adding ingredients to the stand mixer and kneading the croissant dough until smooth and elastic.
After combining all ingredients (except laminated butter), the dough is kneaded to develop strength and elasticity

.Shape the dough
into a ball, cover it with plastic wrap, and let it proof for 30 minutes (first rise).

Croissant dough shaped into a ball and covered with plastic wrap for the first proofing.
After kneading, the dough is shaped into a ball and left to rise gently for 30 minutes


Once proofed


gently flatten the dough to release any gas produced during fermentation.
Place it on a tray and freeze for 30 to 40 minutes to chill thoroughly.Meanwhile, roll out the 150 grams of laminated butter into a neat square.
After chilling, place the butter square onto the center of the dough.

Flattening the croissant dough after proofing and preparing the laminated butter square.
After the first rise, the dough is gently flattened to remove air bubbles and chilled to prepare for butter incorporation.”
"Placing the laminated butter square onto the center of the chilled croissant dough
The chilled butter square is carefully placed onto the center of the dough, ready for the first folds of lamination


Fold the dough over the butter and seal the edges carefully.
Roll the dough out into a rectangle approximately 60 cm long by 25 cm wide.
Give the dough a book fold (double fold) followed by a single fold.
Let the dough rest in the refrigerator for 30 minutes before proceeding.


Next Step: Shaping and Baking

Shaping the Croissants

  • Roll out the dough to 4 mm thickness, forming a rectangle of approximately 50 cm × 24 cm.
  • Using the tip of a knife, mark the edges of the dough every 8 cm along one side.
    Repeat on the opposite side, but offset the marks by 4 cm to create perfect triangle shapes.
  • Cut the dough along these marks to form even triangles.
    Each triangle should weigh approximately 50 to 55 grams.
"Cutting croissant dough into evenly sized triangles, each weighing 50 to 55 grams."
The dough is cut along pre-marked lines to create uniform triangles, the perfect base for rolling croissants.
  • Cut out the triangles neatly along the marks.
  • At the base of each triangle, make a small slit with the tip of a knife.Gently stretch each triangle slightly before rolling to shape the croissants.
Making a small slit at the base of each croissant triangle and gently stretching the dough before rolling.
A small slit at the base and a gentle stretch help create the classic curved shape of croissants.

Gently roll each triangle

  • from the base up toward the tip, without pressing or crushing the dough, to preserve the lamination.
  • Place the shaped croissants onto a baking tray lined with parchment paper.
  • Using a pastry brush, apply the first coat of egg wash evenly across the croissants.
  • Proof the croissants for 2 hours at 26°C (79°F).
    You can create a homemade proofing environment by placing the trays in an off oven with a bowl of steaming hot water inside to maintain humidity.

"Proofing shaped croissants on trays in a humid environment at 26°C (79°F)."
The croissants are left to proof for two hours, allowing them to rise gently and develop their light, airy structure

Chef’s Tips & Tricks

  • Be sure to separate the yeast from the salt and sugar at the beginning of the kneading process. This prevents the salt from deactivating the yeast, ensuring proper fermentation.
  • To check if the dough is kneaded enough, press your finger gently into the surface of the dough. If it returns to its original shape, the dough is ready and properly kneaded.
  • You can replace regular butter or laminated butter with an AOP butter (Appellation d’Origine Protégée). This gives your croissants an extra layer of flavor and a richer, more authentic taste

Conclusion

Making homemade croissants is as rewarding as it is delicious. While the process requires patience and attention, the result is undoubtedly worth it: golden, flaky croissants with impeccable layers, a rich buttery taste, and a melt-in-your-mouth texture. With each step, you can enjoy mastering an age-old French pastry technique. Whether for breakfast, brunch, or simply to impress your loved ones, these homemade croissants will delight your taste buds.

Through this recipe, you now have all the keys to preparing these little wonders at home, from preparing the dough to the final bake. It’s important to take your time, respect fermentation and resting times, and treat the dough with care. Croissants aren’t just a recipe; they are a unique baking experience, both technical and creative.

more techniques:http://French Pastry Techniques — Le Cordon Bleu


Long-Form Q&A

Q1: Why does the croissant dough need to rest multiple times, and what is the importance of each step?
The resting times between each step are crucial for several reasons. First, they allow the yeast to ferment properly, making the dough light and airy. The rests between each turn also let the gluten relax, which makes it easier to roll out the dough. Each resting period allows the butter to solidify, creating layers of dough and butter that give the croissant its signature flaky texture. In short, each rest is a “pause” for the dough, giving the ingredients time to develop and balance, ensuring perfect flakiness at the end.

Q2: Why is it important to work with specific temperatures for both the dough and butter?
Temperature plays a vital role in the success of croissants. If the dough gets too warm, the butter will melt and mix with the dough, ruining the formation of layers. On the other hand, if the dough is too cold, it will be difficult to roll out. That’s why it’s essential to follow the recommended temperatures. The dough should be cold enough to keep the butter firm during the lamination process but not too hard to prevent it from being stretched easily. It’s all about finding the right balance.

Q3: What’s the difference between homemade croissants and those bought at a bakery?


Homemade croissants stand out because of their freshness, rich flavor, and incredibly light and flaky texture. Homemade dough is often made with higher-quality ingredients and without preservatives, ensuring a pure, authentic taste. Plus, by making the croissants yourself, you have the ability to customize them to your liking, whether it’s with the type of butter or the egg wash. Finally, the satisfaction of enjoying a croissant you made with your own hands is unbeatable – every bite carries the story of your patience and craftsmanship.

Q4: Can you prepare croissants in advance and freeze them?
Yes, you can! Once the croissants are shaped and before the final proof, you can freeze them on a tray. Once frozen, transfer them into a freezer bag. When you’re ready to bake them, simply let them proof in the fridge overnight before brushing with egg wash and baking as usual. Freezing doesn’t compromise the texture or flavor if done correctly.

Q5: Any tips for successfully shaping croissants?
Shaping is a delicate but essential step. Here are a few tips to ensure it goes smoothly:

  • Don’t overload with butter: it should be evenly distributed but not excessive.
  • Avoid stretching the dough too much when rolling it to prevent losing the layers.
  • Mark the base of each triangle clearly to prevent tearing when rolling.
  • Finally, roll tightly but without pressing too much, so the croissant keeps its shape and layers.