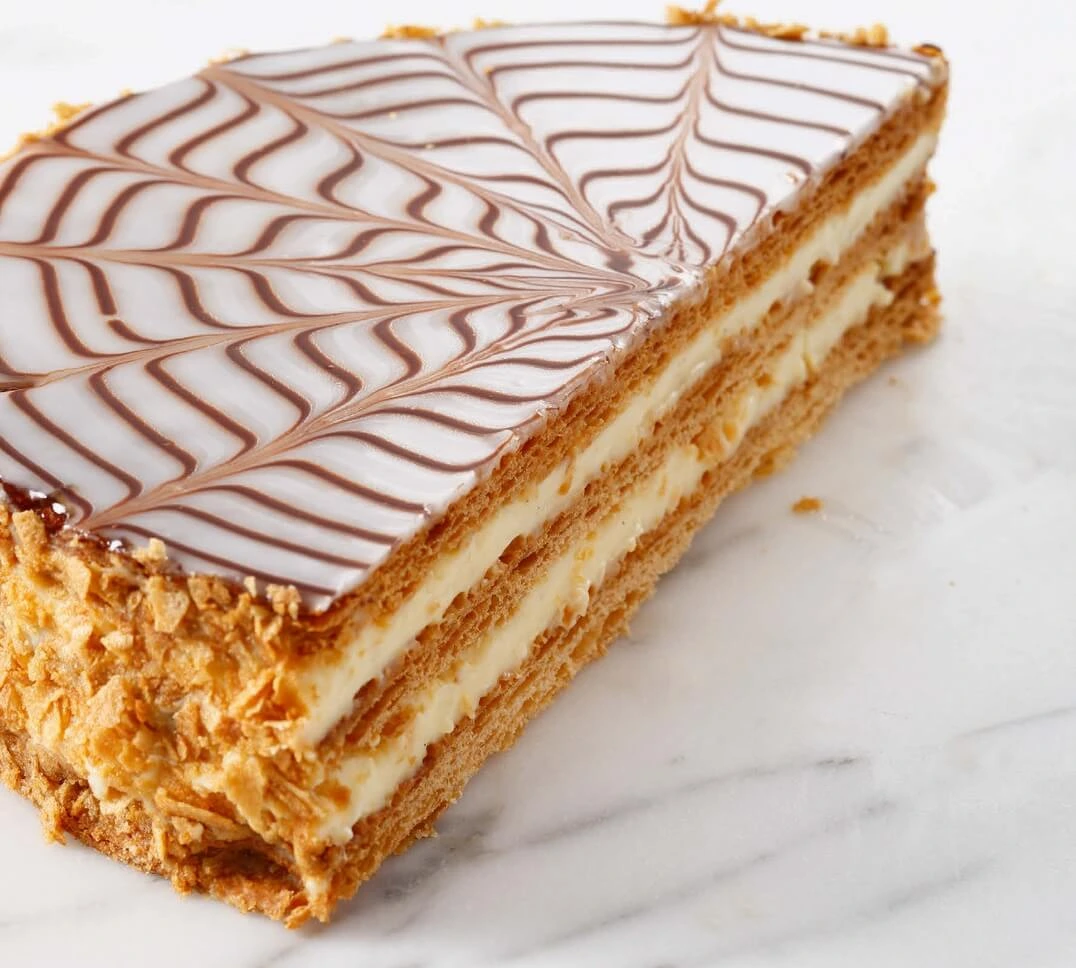
From Oven to Elegance: A Chef’s Chocolate Millefeuille in Under 4 Hours

Chocolate Millefeuille dessert with three layers of golden puff pastry, filled with vanilla mousseline cream and topped with piped vanilla Chantilly.

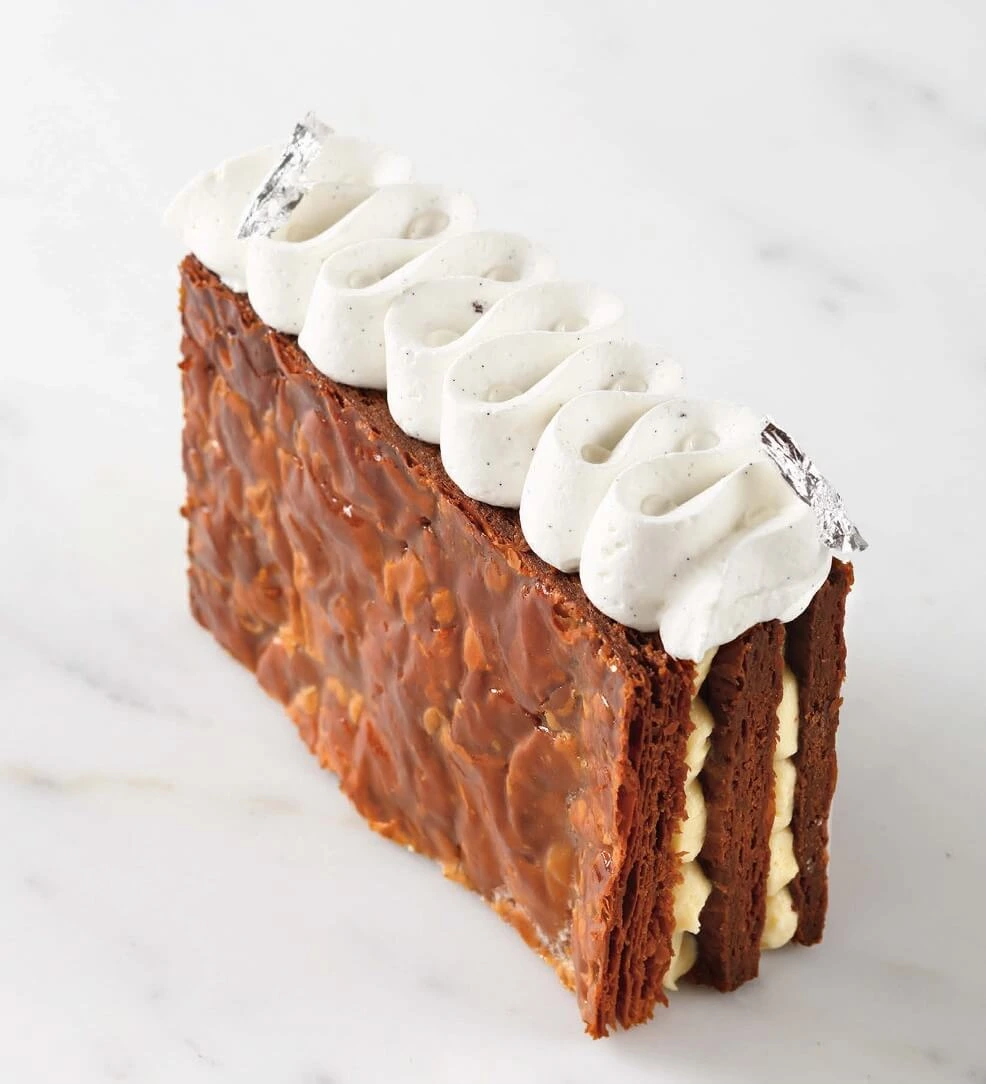
chocolate millefeuille recipe

Layer upon layer of indulgence, the chocolate millefeuille is a dessert that redefines refinement. Rooted in the grand tradition of French pâtisserie, this elegant creation transforms a classic into something boldly modern, where crispness meets richness and precision meets decadence.

At first glance, the millefeuille seduces with its striking architecture — alternating tiers of ultra-thin, golden puff pastry and luscious chocolate cream, stacked with the precision of a jeweler setting stones. Each bite is a journey: the shattering crunch of the pastry, the silken glide of the chocolate filling, the delicate balance between sweetness and depth. It is a study in contrasts — airy and dense, crisp and smooth, refined and indulgent.If you’re new to laminated dough, start with our Beginner’s Puff Pastry Guide

But beyond

its visual and textural sophistication lies an emotional appeal. The chocolate millefeuille evokes both nostalgia and novelty. It pays homage to the traditional millefeuille, that elegant patisserie staple served in salons de thé, while inviting the richness and intensity of fine chocolate to take center stage. The result is a dessert that feels at once timeless and boldly contemporary.

Served as the grand finale to a dinner party or savored in quiet solitude with a cup of espresso, the chocolate millefeuille brings a sense of ceremony to the table. Its meticulous layers invite admiration before the first forkful is even taken — and once tasted, its elegance lingers in memory.

Crafting it at home is an ode to patience and precision, but above all, to pleasure. Whether you’re a seasoned baker or a curious enthusiast, making a chocolate millefeuille is not just about assembling a dessert — it’s about creating a moment of pure, layered joy.

Recipe Overview — Chocolate Millefeuille

Serves: 6
Preparation time: 4 hours
Chilling time: 3 hours
Baking time: 50 minutes
Storage: Keeps for up to 48 hours in the refrigerator when well wrapped

This recipe is designed to serve six guests with individual portions or larger slices for sharing. It requires careful attention to detail and a generous timeline, but the result is a pastry that rivals those found in the finest patisseries.


Recommended Equipment

To achieve chocolate millefeuille recipe with professional-level precision and elegance, the following tools are essential:

  • Fine sieve
    For sifting dry ingredients and preventing lumps in creams and doughs, ensuring a smooth, refined texture throughout.
  • Dough scraper (bench scraper)
    Perfect for handling pastry dough, cleaning work surfaces efficiently, or transferring mixtures cleanly.
  • Rolling pin
    A sturdy wooden or stainless steel rolling pin helps roll the puff pastry evenly without compressing its delicate layers.
  • Balloon whisk
    Ideal for emulsifying creams or mixing batters thoroughly by hand, offering control and lightness.
  • Electric mixer or stand mixer
    Essential for whipping creams or preparing chocolate ganache with a light, airy texture.
  • Piping bag with two nozzles
    • Plain round tip for neat piping between layers or within the pastry
    • Saint-Honoré tip for creating elegant, ribbon-like decorative finishes on the top layer
  • Serrated knife (bread knife)
    To slice cleanly through the crisp puff pastry and soft fillings without compressing the layers. A gentle sawing motion preserves the pastry’s structure and presentation.

Ingredients

Inverted Puff Pastry

  • 100 g all-purpose flour
  • 200 g dry butter (beurre de tourage)
  • 5 g fine sea salt
  • 90 g cold water
  • 150 g all-purpose flour (for the détrempe)

Vanilla Mousseline Cream

  • 250 g whole milk
  • 50 g granulated sugar
  • 1 vanilla bean
  • 40 g egg yolks (approximately 2 yolks)
  • 20 g custard powder (or cornstarch as a substitute)
  • 60 g unsalted butter (for the pastry cream)
  • 65 g softened butter (for the mousseline texture)

Vanilla Chantilly Cream

  • 100 g heavy cream (35% fat)
  • 10 g granulated sugar
  • 2 vanilla beans (scraped)

Inverted Puff Pastry — Method

Begin by preparing a classic feuilletage inversé, or inverted puff pastry, where the butter envelops the dough rather than the reverse. This technique yields an exceptionally flaky and tender pastry, perfect for a refined millefeuille.

1. Prepare the butter layer (beurrage):
Place 200 g of dry butter (beurre de tourage) between two sheets of parchment paper. Using a rolling pin, gently flatten it into a square approximately 15 x 15 cm. Place in the refrigerator to chill and firm up, but not harden completely.

2. Prepare the dough (détrempe):
In a mixing bowl, combine 150 g of flour, 5 g of fine salt, and 90 g of cold water. Mix just until a homogeneous dough forms — do not overwork. Shape it into a square approximately 10 x 10 cm, wrap in plastic, and chill for 20–30 minutes.

3. Encase the dough in the butter:
Once both components are chilled and workable, place the détrempe at the center of the butter square. Fold the butter over the dough to encase it entirely, as if wrapping a present. Lightly seal the edges.

4. Perform the turns (tours):


Roll the dough lengthwise into a long rectangle. Give it a single turn (fold into thirds like a letter), rotate it 90 degrees, and chill for 20 minutes. Repeat this process three more times, chilling between each turn. Be precise and gentle to maintain distinct layers.

5. Final roll-out and baking:
Roll the rested dough out to a 3 mm thickness, adjusting it to match the dimensions of your baking sheet — approximately 30 x 40 cm. Transfer to a parchment-lined tray, then rest again in the refrigerator for 30 minutes to prevent shrinkage during baking.

6. Bake to golden perfection:
Preheat the oven to 220°C (428°F). Bake the pastry for 10 minutes to initiate a strong rise, then reduce the temperature to 190°C (374°F) and continue baking for about 40 minutes, or until the layers are evenly puffed, golden, and fully cooked through.

7. Cool and reserve:
Once baked, allow the puff pastry sheet to cool completely on a wire rack. Trim the edges carefully if needed. Store in an airtight container until ready to assemble the millefeuille.

Vanilla Mousseline Cream — Method

1. Infuse the milk:
In a medium saucepan, combine the whole milk, half the sugar, and the vanilla bean, split lengthwise and scraped. Place over medium heat and bring just to a simmer, allowing the vanilla to infuse its full aroma into the milk.

2. Prepare the egg mixture:
In a separate mixing bowl (preferably a stainless steel bowl or cul-de-poule), whisk together the egg yolks and the remaining sugar until pale and slightly thickened — this is called “blanchir.” Sift in the custard powder and whisk again until fully incorporated.

3. Temper the eggs:
Once the milk reaches a boil, remove it from the heat. Gradually pour a small amount of the hot milk into the egg mixture while whisking continuously to temper the yolks and prevent curdling. Then, pour the tempered mixture back into the saucepan with the remaining milk.

4. Cook the pastry cream:


Return the saucepan to medium heat and cook the mixture while whisking constantly. Once it begins to thicken and boil, continue cooking for 2 full minutes at a gentle simmer to ensure the custard is fully set and smooth. The cream should be glossy and thick.

5. Finish with butter:
Remove from the heat and immediately whisk in the first quantity of butter (60 g), cut into small pieces. Stir until completely melted and incorporated.

6. Chill the base cream:
Spread the hot pastry cream onto a tray lined with plastic wrap. Cover it directly with another layer of wrap (film it “au contact”) to prevent a skin from forming. Refrigerate until fully cooled.

7. Transform into mousseline:
Once cold, transfer the pastry cream to a mixing bowl. Using an electric mixer or stand mixer fitted with the paddle or whisk attachment, beat the cream until smooth and loosened. Gradually incorporate the softened butter (65 g) in small additions, beating until the mixture becomes light, fluffy, and perfectly emulsified.

The result is a silky, airy vanilla mousseline — stable, richly flavored, and perfect for layering in the millefeuille.

Vanilla Chantilly Cream — Method

In the bowl of a stand mixer fitted with the whisk attachment (or using a handheld electric mixer), whip the cold heavy cream until it begins to thicken. Add the sugar and the seeds of the vanilla beans, scraped and dispersed evenly.

Continue to whip just until soft, elegant peaks form. The texture should be smooth and airy, not overwhipped. Transfer the chantilly into a piping bag fitted with a Saint-Honoré tip, and reserve chilled until needed.


Assembly — Chocolate Millefeuille

1. Prepare the pastry base:
Trim the baked puff pastry sheet to create clean, even edges. Cut it into three equal-sized strips, each approximately 10 x 30 cm (or to fit your presentation format). Handle the layers gently to preserve their delicate flakiness.

2. Prepare the mousseline cream:
Remove the chilled mousseline cream from the refrigerator. Using a flexible spatula (maryse), gently loosen and smooth the cream. Transfer it into a piping bag fitted with a plain round tip.

3. Layer the millefeuille:
Place the first puff pastry strip on your work surface or serving board. Pipe an even cordon of mousseline cream along the entire length. Top with the second puff pastry strip and repeat the process, ensuring a neat and uniform finish. Finally, place the third strip of pastry on top to complete the layering.

4. Set the structure:
Refrigerate the assembled millefeuille for at least 30 minutes. This allows the cream to firm up and stabilizes the layers for clean slicing.

5. Portioning:
Using a serrated knife (bread knife), carefully cut the millefeuille into six equal portions. Saw gently to avoid compressing the layers.

6. Final decoration:
Stand each millefeuille piece upright on its side. Using the prepared piping bag with the Saint-Honoré tip, pipe elegant rosettes or ribbon-like waves of vanilla chantilly on the visible surface. The contrast between the creamy topping and crisp pastry will create a visually stunning, texturally refined finish.

Conclusion

The Chocolate Millefeuille is not just a dessert — it’s a celebration of contrast, technique, and elegance. From the shattering crispness of the inverted puff pastry to the silky lightness of the vanilla mousseline and the airy crown of chantilly, every element is designed to awaken the senses and honor classic French pâtisserie. This dessert demands time, precision, and respect for detail, but the reward is an exquisite creation that bridges tradition and modern refinement.

Whether served at an intimate dinner or as the centerpiece of a sophisticated gathering, this millefeuille offers both a visual spectacle and a delicate harmony of textures and flavors. It’s the kind of pastry that invites silence at the first bite and conversation long after the last crumb.

Let this millefeuille be more than a recipe — let it be a pastry ritual, a moment of pause, and a tribute to craft.Add depth with culinary context:
“Learn about the millefeuille’s origins from Larousse Gastronomique.”


Questions & Answers

Q: Can I make the components in advance?
A: Absolutely. The puff pastry can be baked and stored in an airtight container for up to 48 hours. The mousseline cream and chantilly can be prepared the day before, kept separately in the fridge, and assembled on the day of serving for optimal texture and freshness.

Q: What if I don’t have time to make inverted puff pastry from scratch?
A: While homemade inverted puff pastry yields the most refined result, high-quality all-butter puff pastry from a trusted bakery or gourmet store can be used in a pinch. Look for one with visible layering and no additives.

Q: How do I ensure clean cuts when slicing the millefeuille?
A: Use a serrated knife and a gentle sawing motion. Chilling the assembled pastry before slicing is crucial — it stabilizes the cream and prevents collapse. Clean the knife between each cut for sharp, professional edges.

Q: Can I flavor the mousseline differently?
A: Yes. While vanilla offers a classic base, you can infuse the milk with coffee beans, citrus zest, or even earl grey tea for a more personalized touch. Just be sure to strain well and balance the flavors carefully.

Q: Is this dessert suitable for summer service?
A: Definitely — its light creams and delicate layers make it perfect for warmer months. Serve well-chilled, and consider garnishing with fresh raspberries or edible flowers for a seasonal finish.

How to Bake the Most Elegant Coffee Éclairs at Home

A gourmet éclair filled with coffee mascarpone cream, topped with dark chocolate and Dulcey glaze, finished with a brushed decorative texture.

coffee éclairs recipe

An elegant take on the classic French éclair, the Éclair Café Mascarpone seduces the palate with its refined balance of bitterness and sweetness. Each éclair begins with a golden, delicately crisp choux pastry shell, baked to perfection to create a light and airy texture that contrasts beautifully with the rich filling inside.

At the heart of this creation lies a smooth, velvety mascarpone cream, infused with the bold essence of finely brewed espresso. This luxurious cream offers a modern twist on the traditional pastry cream, adding both depth and softness. The mascarpone brings a creamy richness that softens the intensity of the coffee, resulting in a harmonious, subtly sweet flavor.

The éclair

is crowned with a thin, glossy coffee glaze, bringing a gentle bitterness and an elegant sheen to the presentation. For added sophistication, each piece may be garnished with delicate chocolate decorations, edible gold leaf, or a few roasted coffee beans—an ode to its aromatic inspiration.

This dessert is more than a pastry—it’s an experience. Perfect for coffee lovers, afternoon tea, or a chic dessert course, the Éclair Café Mascarpone is a testament to French patisserie’s ability to reinvent classics with finesse and creativity.

Whether enjoyed in a quiet moment of indulgence or served at a stylish gathering, this éclair promises to leave a lasting impression, bite after silky bite.“Love éclairs? Try our Pistachio Choux with Citrus for a flavor twist!”

Éclair Café Mascarpone

Delicate choux éclairs filled with silky coffee mascarpone cream and finished with a glossy glaze


Yield

For 10 éclairs


Preparation Time

Preparation: 2 hours
Resting: 12 hours
Baking: 40 minutes
Refrigeration: 1 hour


Required Equipment

  • Thermometer (accurate to 1°C)
  • Hand blender (immersion blender)
  • Piping bag
  • Star nozzle (2 cm diameter)
  • Plain round nozzle
  • Metal brush (for cleaning, if needed)

Ingredients

Coffee Mascarpone Cream

  • 6 gelatin sheets
  • 70 g granulated sugar
  • 45 g unsalted butter
  • 2 g fleur de sel
  • 90 g espresso (freshly brewed)
  • 190 g mascarpone

Choux Pastry

  • 150 g water
  • 150 g whole milk
  • 160 g butter, cut into small pieces
  • 4 g fleur de sel
  • 5 g granulated sugar
  • 10 g liquid vanilla extract
  • 160 g all-purpose flour (type T55 if available)
  • 280 g whole eggs (about 5–6 eggs, depending on size)

Chocolate Glaze

  • 300 g Valrhona Dulcey chocolate
  • 300 g dark couverture chocolate

Coffee Mascarpone Cream

The day before, soak the gelatin sheets in cold water.

In a saucepan, cook the sugar dry until it forms a golden caramel. Deglaze with the butter and add the fleur de sel. Pour in the hot espresso and stir gently to combine. Let the mixture cool to 50°C, then incorporate the drained gelatin.

When the preparation reaches 45°C, pour it over the mascarpone placed in a mixing bowl. Blend thoroughly using an immersion blender until smooth and homogenous.

Cover and refrigerate for 12 hours to allow the cream to set and develop its full flavor.

Choux Pastry

On the same day, preheat the oven to 180°C (350°F).

Prepare the choux pastry (see method below). When the dough is smooth and firm, transfer it to a piping bag fitted with a 2 cm star tip.

Pipe 10 evenly spaced, parallel logs onto a baking tray lined with parchment paper. Leave enough space between them, as they will expand during baking.

Place the tray in the oven and immediately lower the temperature to 175°C (345°F). Bake for 40 minutes, or until the éclairs are puffed and evenly golden.

Once they are fully risen, slightly open the oven door (about 1 cm) to allow steam to escape. This helps prevent the éclairs from cracking and ensures a crisp shell.

Assembly

Temper both the Dulcey chocolate and the dark chocolate, then set them aside.

Pierce two small holes on the underside of each éclair. Using a piping bag fitted with a plain round tip, fill the éclairs with the coffee mascarpone cream until they are full and slightly heavy.

Dip the top of each éclair into the tempered dark chocolate, then place them briefly in the refrigerator to allow the chocolate to set slightly.

Once set, dip the same surface into the tempered Dulcey chocolate. Allow the éclairs to cool for 1 hour in the refrigerator.

Using a metal brush, gently scrape the surface of the Dulcey glaze to create a refined textured finish.

Chef’s Tips

For the Mascarpone Cream

  • Caramel control: Watch the sugar closely as it cooks—remove it from the heat the moment it reaches a deep amber color to avoid bitterness. Deglazing with butter must be done off the heat to prevent splattering.
  • Mascarpone texture: Use mascarpone straight from the fridge to stabilize the cream when blending. Overmixing can cause it to split—pulse gently with the immersion blender until smooth.

the Choux Pastry

  • Perfect consistency: The choux dough is ready when it forms a smooth, glossy mass that slowly falls from the spatula. Add the eggs gradually—depending on humidity and flour absorption, you may not need all of them.
  • Piping precision: For uniform éclairs, pipe in one confident motion and use a template underneath the baking paper if needed.
  • Drying the choux: Do not open the oven during the first 30 minutes. Letting out steam too early can cause collapse. The final 10 minutes with the oven door slightly ajar ensures a crisp shell.

the Glaze and Finish

  • Tempering matters: Properly tempered chocolate gives a beautiful snap and shine. Use a thermometer to reach ideal working temperatures (Dark chocolate: 31–32°C, Dulcey: 29–30°C).
  • Double glaze technique: Make sure the first layer of chocolate is semi-set before applying the second to create clean, contrasting layers.
  • Decorative brushing: The metal brush adds texture reminiscent of brushed velvet. Practice on a test éclair to master pressure and movement before working on your final batch.

Conclusion

The Éclair Café Mascarpone is more than just a pastry—it is a refined expression of technique, balance, and modern French artistry. From the delicate snap of the choux shell to the silky depth of the coffee-infused mascarpone cream, each element has been carefully crafted to deliver a multi-sensory experience. The contrast between the bitter espresso notes, the buttery roundness of Dulcey chocolate, and the bold intensity of dark couverture creates a harmony that lingers well beyond the last bite.

This dessert demands precision and patience, but it rewards the baker with a product that is as elegant in appearance as it is in flavor. The layered glazing and brushed finish give each éclair a couture-like allure, worthy of a boutique pâtisserie window or a fine dining dessert cart.

Whether served at a celebratory table, featured in a high-end afternoon tea, or simply shared with those who appreciate exceptional pastry, the Éclair Café Mascarpone never fails to impress. It embodies the essence of modern pâtisserie: technical mastery, artistic detail, and the pursuit of pure pleasure in every bite.“Éclairs have a rich history in French patisserie — read the classic version from L’École Lenôtre.”

Questions & Answers

prepare the cream the same day as the assembly?

Ideally, no. The cream must rest for at least 12 hours to fully set and develop its texture and flavor. Preparing it the day before ensures optimal consistency for piping.

My éclairs deflated after baking. What went wrong?

This usually happens if the oven was opened too early or if the dough was underbaked. Make sure to bake for the full 40 minutes, and only open the oven door slightly at the very end to release steam.

use instant coffee instead of espresso?

While possible, it is not recommended. A freshly brewed espresso provides both intensity and aromatic depth that instant coffee lacks. If necessary, use a concentrated instant coffee dissolved in minimal hot water.

How do I temper chocolate properly?

Tempering involves heating, cooling, and reheating chocolate to stabilize its crystals. Use a thermometer and follow temperature curves carefully:

  • Dark chocolate: melt to 45–50°C, cool to 28–29°C, work at 31–32°C.
  • Dulcey chocolate: melt to 45°C, cool to 27°C, work at 29–30°C.

What is the purpose of the metal brush in the final step?

The brush creates a unique visual texture by lightly abrading the surface of the Dulcey glaze. This decorative touch mimics brushed velvet or patina and adds a modern, artistic flair to the finished éclair.

Can I freeze the finished éclairs?

It is not recommended. Freezing may alter the texture of the choux and cause condensation that ruins the glaze. However, the unfilled choux shells can be frozen and recrisped in the oven before use.

Craquelin-Top Choux: A Perfect Harmony of Crunch and Lightness

Delicious choux pastries topped with a golden, crispy craquelin, showcasing a perfect balance of texture and flavor.

craquelin choux recipe

In the world of French pastries, few creations evoke the feeling of pure indulgence quite like the religieuse. This iconic pastry, with its layered, delicate choux pastry and rich cream filling, is elevated to a whole new level when paired with the luxurious flavors of caramel and vanilla. The soft, pillowy choux is the perfect vessel for the silky smooth vanilla cream, while the golden caramel adds a depth of flavor that lingers on the palate long after the last bite.

Much like its name

religieuse,” meaning “nun” in French, this dessert has a serene, almost meditative quality. The smooth caramel topping, drizzled with precision over the cream-filled choux, is like a golden halo — visually stunning and exquisitely sweet. It’s a pastry that captures the essence of classic French pâtisserie, with a modern twist that makes it both comforting and refined.

The caramel vanilla religieuse isn’t just a treat; it’s an experience. Each bite is a delightful contrast of textures: the light, airy pastry against the rich, smooth filling. The combination of the deep caramel notes with the aromatic vanilla creates a harmonious flavor profile that speaks to both tradition and creativity.

Perfect for special occasions or a luxurious treat to accompany afternoon tea, this pastry is a showstopper — visually captivating and utterly delicious. With its delicate craftsmanship and luxurious flavor, the religieuse caramel vanilla is a true testament to the art of French pastry making.“New to pâte à choux? Read our Ultimate Choux Guide.”

Caramel Vanilla Religieuse – A Heavenly French Delight

The religieuse is a pastry that embodies both artistry and indulgence. With its delicate choux pastry, rich filling, and glossy caramel coating, it’s the perfect balance of elegance and decadence. This caramel vanilla religieuse combines the classic flavors of French pastry with the velvety smoothness of vanilla cream and the deep richness of caramel. It’s a treat that’s as much a feast for the eyes as it is for the taste buds.

The religieuse owes its name to its shape, which is said to resemble the habit worn by nuns, with two choux buns stacked one on top of the other. When made with care, the caramel vanilla religieuse stands as a testament to classic French patisserie techniques, showcasing the perfect choux pastry, silky smooth filling, and a stunningly shiny caramel glaze.

Perfect for special occasions or as an indulgent dessert for the discerning sweet tooth, this pastry will leave a lasting impression. From the golden caramel drizzle to the smooth vanilla cream filling, it’s a pastry that speaks to the heart of French culinary craftsmanship.


Recipe Overview

  • Yield: 12 religieuses
  • Preparation Time: 2 hours
  • Cooking Time: 45 minutes
  • Storage: Up to 48 hours
  • Equipment Needed:
    • Stand mixer
    • Rolling pin
    • Sieve
    • Piping bags with plain tips (10 and 15 mm diameter)
    • Thermometer
    • Whisk

Ingredients

For the Craquelin:

  • 30 g flour
  • 50 g butter
  • 20 g almond flour
  • 50 g brown sugar

the Choux Pastry:

  • 250 g water
  • 100 g butter
  • 3 g salt
  • 5 g sugar
  • 150 g flour
  • 250 g eggs (about 5 medium eggs)

Base Caramel:

  • 300 g sugar
  • 300 g 35% cream
  • 180 g salted butter

(Créméux au Caramel) Caramel Cream :

  • 350 g caramel base (as prepared earlier)
  • 2 g gelatine sheets
  • 10 g water
  • 250 g mascarpone

THE Caramel Pastry Cream (Crème Pâtissière au Caramel):

  • 350 g semi-skimmed milk
  • 50 g egg yolks
  • 50 g sugar
  • 17 g flour
  • 17 g custard powder
  • 350 g caramel base (as prepared earlier)

Caramel Fondant:

  • 100 g sugar
  • 50 g glucose
  • 200 g cream (35% fat)
  • 15 g salted butter
  • 400 g fondant

Vanilla Pastry Cream (Crème Pâtissière Vanille):

  • 260 g semi-skimmed milk
  • 1 vanilla pod
  • 40 g egg yolks
  • 35 g sugar
  • 25 g custard powder
  • 1.5 g gelatine sheets
  • 25 g butter
  • 125 g whipped cream

Finishing Touch:

  • Gold leaves (for decoration)
  • 360 g dark chocolate (58%)

Choux with Craquelin

Ingredients:

Craquelin:

  • 50 g butter (softened)
  • 50 g brown sugar
  • 50 g flour
  • A pinch of salt

Choux Pastry:

  • 250 ml water
  • 80 g butter
  • A pinch of salt
  • 1 tsp sugar
  • 130 g flour
  • 4 eggs

Preparation:

Craquelin:

  1. In the bowl of a stand mixer, attach the paddle attachment and mix all the ingredients for the craquelin until you get a smooth dough.
  2. Roll the dough out between two sheets of parchment paper to a thickness of 3 mm.
  3. Place the dough in the freezer while you prepare the choux pastry.

Choux Pastry:

  1. In a saucepan, bring the water, butter, salt, and sugar to a boil. Once the butter is melted and the water is boiling, add the flour all at once.
  2. Stir vigorously with a spatula until the dough pulls away from the sides of the pan and forms a ball. Let the dough cook for 1 to 2 minutes to dry it out.
  3. Remove from heat, then incorporate the eggs one at a time, making sure to fully incorporate each egg before adding the next. The dough should be smooth and slightly glossy.
Forming the Choux:
  1. Preheat your oven to 180°C (350°F).
  2. On a baking sheet lined with parchment paper, pipe 12 choux of about 5 cm in diameter for the body and 12 smaller choux of 2.5 cm for the heads.

Assembly with Craquelin:

  1. Take the craquelin dough out of the freezer and use a cookie cutter or glass to cut out discs of 5 cm and 2.5 cm in diameter.
  2. Place the craquelin discs on top of the choux before baking.

Baking:

  1. Bake the choux at 180°C (350°F) for 40 minutes. Do not open the oven before the end of the baking time to prevent the choux from collapsing.
  2. When the choux are golden brown, remove them from the oven and let them cool on a wire rack.

Chef’s Tips:

Craquelin: Let the choux cool completely before filling them to prevent them from becoming soggy.

Choux Pastry: You can test the consistency of the dough by lifting it with a spatula—it should form a peak that slowly falls back.

Religieuses with Caramel

Ingredients:

Base Caramel:

  • 250 g sugar
  • 250 ml heavy cream
  • 100 g salted butter

Caramel Cream:

  • 350 g base caramel (see recipe)
  • 4 g gelatin (rehydrated and squeezed)
  • 250 g mascarpone cheese

Pastry Cream caramel:

  • 350 g base caramel (see recipe)
  • 500 ml milk
  • 100 g sugar
  • 4 egg yolks
  • 40 g flour
  • 50 g butter
Caramel Fondant:
  • 200 g sugar
  • 100 g glucose
  • 250 ml heavy cream
  • 100 g salted butter

Vanilla Pastry Cream:

  • 500 ml milk
  • 100 g sugar
  • 4 egg yolks
  • 40 g flour
  • 1 vanilla bean

Preparation:

1. Base Caramel:

  • In a saucepan, cook the sugar without stirring until it turns golden and slightly darkened.
  • Add the warmed cream to the caramel to stop the cooking process. Stir well.
  • Incorporate the salted butter.
  • Separate the caramel into two portions: one for the caramel pastry cream and the other for the caramel cream. Let cool in the fridge.

2.cream Caramel :

  • Once the base caramel (350 g) reaches about 50°C, add the rehydrated gelatin and squeeze out any excess water.
  • Whisk this caramel into the mascarpone cheese until smooth and well combined.

3. Pastry Cream caramel:

  • Prepare the classic pastry cream (see recipe p. 196).
  • Once the pastry cream is ready, add the base caramel (350 g) off the heat, while the cream is still warm but not boiling. Mix well until smooth.
4. Caramel Fondant:
  • In a saucepan, cook the sugar and glucose until it forms a caramel.
  • Add the cream and bring the mixture to 109°C.
  • Stir in the salted butter and set aside in the fridge to firm up slightly.
  • Once cooled, add the caramel into the fondant and mix until smooth.

5. Vanilla Pastry Cream:

  • Prepare the classic vanilla pastry cream by infusing the vanilla bean in the warm milk. Mix the egg yolks, sugar, and flour, then slowly add the hot milk. Cook the cream on low heat until it thickens.

Assembling the Religieuses:

  1. Filling:
    • Using a piping bag, fill the large choux with the caramel cream and caramel pastry cream.
    • Fill the small choux with the vanilla pastry cream.
  2. Glazing:
    • Glaze the choux with the caramel fondant. Use your finger to remove any excess around the edges.
  3. Finishing Touch:
    • Place a chocolate collar (see technique p. 593) between the large and small choux.
    • Decorate with a piece of gold leaf for an elegant finish.

Chef’s Tips:

  • Gelatin: Make sure to properly rehydrate and squeeze out the gelatin before adding it to the caramel to avoid lumps.
  • Caramel: Keep an eye on the caramel’s temperature to avoid burning and getting a bitter taste.
  • Chocolate Collars: If you don’t have a ready-made chocolate collar, you can melt the chocolate and pour it into a mold to create your own collar before applying it to the choux.

Conclusion:

Making choux pastry with craquelin choux recipe is a delightful and rewarding experience that allows you to create a truly sophisticated and delicious dessert. The combination of the light, airy choux and the crisp, caramelized craquelin creates a perfect balance of textures that will leave your guests in awe. While the process may seem intricate, it’s all about attention to detail, patience, and following the steps closely to achieve a perfect result.

The key to success lies in the preparation of the choux pastry. You want to ensure that your dough is smooth, glossy, and has the right consistency for piping. As you incorporate each egg into the dough, you’ll notice the texture transforming into something more pliable and ready for the oven. The craquelin, made from just a few simple ingredients, provides a beautiful, crunchy topping that not only adds a visually appealing element to your choux but also brings a burst of sweetness and texture.

One of the most critical tips

is to avoid opening the oven door too early while the choux are baking. This allows them to rise to their full potential without collapsing. The golden-brown, perfectly puffed choux will give you a satisfying sense of accomplishment and make your effort worthwhile.

The filling possibilities for these choux are endless. Whether you decide to fill them with pastry cream, whipped cream, or even a decadent chocolate ganache, the lightness of the choux combined with the crispy craquelin is sure to elevate any filling you choose. These choux with craquelin are ideal for a special occasion, such as a birthday, afternoon tea, or any event where you want to impress with your pastry skills.

In the end,

mastering this technique will not only elevate your pastry repertoire but also give you the confidence to experiment with other choux-based desserts. You’ll find that once you have perfected these little pastries, your creativity in the kitchen will flourish as you begin to play with new flavors, fillings, and shapes. It’s the kind of dessert that truly embodies the beauty of French pâtisserie: delicate, yet indulgent, elegant yet approachable.

So, whether you’re an experienced baker or a novice looking to try something new, take the time to enjoy the process of creating these choux with craquelin. With patience and care, you’ll be able to produce a dessert that looks as beautiful as it tastes, impressing both yourself and anyone lucky enough to enjoy it.Learn how craquelin is used in professional kitchens from L’École Valrhona.”

Questions & Answers:

1. What is the purpose of adding craquelin to the choux?

Craquelin is a sweet, crispy topping that adds a delightful crunch and a caramelized flavor to the choux. It not only enhances the texture but also contributes a touch of sweetness and an appealing golden color to the pastries.

2. How can I ensure my choux pastry rises correctly?

To make sure your choux pastry rises properly, avoid opening the oven door while they’re baking. The oven’s consistent heat is crucial for the choux to puff up and form their hollow centers. Additionally, make sure your dough is smooth and glossy and that you don’t overwork it when adding the eggs.

3. Can I make the choux and craquelin dough in advance?

Yes, both the choux dough and craquelin can be made ahead of time. You can store the craquelin dough in the freezer until you’re ready to bake. The choux dough can be refrigerated for up to 24 hours before baking, though it’s best to pipe and bake it fresh for optimal texture.

4. What should I do if my choux pastry doesn’t puff up properly?

If your choux doesn’t puff up as expected, it may be due to undercooking or insufficient oven temperature. Make sure to bake them at the right temperature and don’t open the oven door too early. Additionally, ensure that the dough is the right consistency by testing it with a spatula – it should form a peak that slowly falls back.

5. Can I use any other filling besides pastry cream?

Absolutely! While pastry cream is a classic choice, you can get creative with other fillings like whipped cream, chocolate ganache, or even fruit curds. The versatility of choux pastry makes it a perfect base for many types of fillings, both sweet and savory.

6. How do I store the choux with craquelin?

Once filled, the choux with craquelin should be eaten the same day, as they can become soggy over time. However, unfilled choux can be stored in an airtight container for a day or two at room temperature. The craquelin will stay crisp as long as it isn’t exposed to moisture.

7. Can I make mini choux for a bite-sized treat?

Yes, you can definitely make smaller choux for bite-sized treats. Just reduce the size of the choux and craquelin discs accordingly. These mini choux are perfect for serving at parties or events where guests can enjoy a delicate, single bite.

8. What if my craquelin isn’t sticking to the choux?

Make sure to press the craquelin discs gently onto the choux before baking. If the craquelin doesn’t adhere, it could be because the dough isn’t cold enough. Ensure the craquelin is well-chilled before applying it to the choux.

9. How can I make the choux pastry gluten-free?

To make gluten-free choux pastry, substitute the regular flour with a gluten-free flour blend. Be sure to check that your gluten-free flour includes xanthan gum or another binding agent to help give the dough the right consistency.

10. What is the best way to serve these choux?

These choux with craquelin are perfect for serving at tea time, as a dessert for special occasions, or as part of a larger pastry selection. They can be served on their own or paired with other pastries for a beautiful, elegant dessert spread.

6 Secret of the Vanilla-Raspberry Religieuse

A delicate and sophisticated Vanilla-Raspberry Religieuse, with layers of rich vanilla and tangy raspberry crémeux, topped with a glossy red glaze and garnished with vanilla caviar spheres.

Vanilla-Raspberry Religieuse

is a refined and elegant French pastry that beautifully captures the balance between delicate sweetness and vibrant fruitiness. As part of the classic French pâtisserie tradition, the religieuse—whose name means “nun” in French—has a whimsical appearance reminiscent of a robed figure, typically composed of two choux pastry rounds stacked one on top of the other. However, the artistry of this pastry goes far beyond its shape.

This particular version combines the smooth, comforting warmth of vanilla with the bright, tangy notes of raspberry, creating a harmonious flavor profile that appeals to both traditional and modern palates. The choux shells are light and airy, expertly baked to achieve a golden crisp exterior while maintaining a soft, hollow interior ready to be filled with luscious creams.

Inside, the religieuse is generously filled with a silky vanilla cream that is both rich and velvety. This custard is smooth on the tongue, offering a deeply satisfying mouthfeel enhanced by the aromatic complexity of real vanilla. The base note of the vanilla cream provides a luxurious contrast to the vibrant punch of raspberry introduced through an accenting layer—either as a compote, a gel, or a subtle glaze.

The top choux puff

is often adorned with a shiny, raspberry-colored glaze that gives the dessert its eye-catching finish. This glaze may be subtly tart, adding a refreshing dimension to the sweetness of the cream filling. In many interpretations, a decorative band of piped vanilla cream is added around the base of the upper choux, serving both as a visual connector and a playful nod to traditional religious garments, from which the dessert gets its name.

Each component of the Vanilla-Raspberry Religieuse is meticulously prepared and assembled with precision. The textures—from the crisp pastry shell to the smooth creams and soft fruit fillings—are carefully balanced to offer a sophisticated tasting experience. The presentation is often topped with delicate garnishes such as edible flowers, gold leaf, or fresh raspberries, making it not just a dessert, but a visual and gustatory delight.

Ultimately, the Vanilla-Raspberry Religieuse is a celebration of French pastry craftsmanship. It offers a delicate interplay of flavors and textures, inviting the gourmand to experience the subtle complexities that make it such a beloved and iconic dessert. Whether served at a high-end patisserie or created for a special occasion, this dessert is a testament to the timeless elegance of French baking.“Check out our Tools of the Trad page for more on essential pâtisserie equipment

Preparation Overview – For 50 Vanilla-Raspberry Religieuses

Preparation time: 1 hour 30 minutes
Baking time: 30 minutes
Refrigeration: 2 hours
Freezing: 1 hour
Shelf life: Best consumed within 48 hours


Required Equipment

  • Rolling pin – for evenly flattening dough or decorations.
  • Round cutters – diameters of 1 cm and 2 cm, ideal for shaping decorations or inserts with precision.
  • Fine mesh sieve – essential for sifting dry ingredients to avoid clumps and ensure smooth mixtures.
  • Piping bags with plain nozzles (4 mm and 10 mm) – used to fill and assemble the choux and for decorative finishes.
  • Cooking thermometer – for accurately measuring temperatures during sugar work or custard preparation.
  • Handheld immersion blender – to emulsify creams, glazes, or fruit purées into smooth, homogeneous textures.
  • Silicone mold with small sphere shapes – used for forming raspberry inserts or decorative domes to add texture and visual interest.

Ingredients – For 50 Religieuses

Vanilla Craquelin

  • 50 g butter
  • 50 g sugar
  • 10 g hazelnut powder
  • 10 g almond powder
  • 20 g flour
  • 1 vanilla bean

Choux Pastry

  • 125 g water
  • 125 g whole milk
  • 5 g salt
  • 5 g sugar
  • 100 g butter
  • 150 g flour
  • 250 g eggs

Vanilla Crémeux

  • 4 g leaf gelatin
  • 80 g egg yolks
  • 70 g sugar
  • 340 g heavy cream (35% fat)
  • 1 vanilla bean

Raspberry Crémeux

  • 2 g leaf gelatin
  • 200 g raspberry purée
  • 60 g egg yolks
  • 75 g whole eggs
  • 50 g sugar
  • 75 g butter

Red Glaze

  • 4 g leaf gelatin
  • 115 g heavy cream (35% fat)
  • 190 g white chocolate
  • 75 g neutral glaze
  • Red fat-soluble food coloring (as needed)

Vanilla Caviar

  • 100 g milk
  • 1 vanilla bean
  • 1.5 g leaf gelatin

Vanilla Craquelin – Preparation

By hand, mix all the ingredients together to form a sweet dough.
Roll out the dough between two sheets of parchment paper to a thickness of 2 mm.
Using round cutters, cut out craquelin discs.
Place the discs directly on top of the raw choux pastry — small discs for the small choux, and large discs for the large choux.

Choux Pastry – Preparation

In a saucepan, bring the water, milk, salt, sugar, and diced butter to a boil.
Once boiling, add the sifted flour to the liquid and stir vigorously. Continue cooking over high heat to dry out the dough, stirring constantly.
Remove from the heat, and incorporate the eggs one at a time, mixing thoroughly with a spatula after each addition until smooth and glossy.

Using a piping bag fitted with a plain tip, pipe 20 small choux (1 cm in diameter) for the tops and 20 large choux (3 cm in diameter) for the bases onto a nonstick baking tray.
Bake at 180°C (350°F / gas mark 6) for 20 to 30 minutes, until puffed and golden.


Vanilla Crémeux – Preparation

Soak the gelatin in a bowl of cold water until softened.
In another bowl, whisk the egg yolks and sugar together until light and slightly thickened (blanched).
Transfer this mixture to a saucepan, add the cream and the scraped seeds from the vanilla bean.
Cook the mixture to a custard consistency (nappe), reaching 82–84°C (179–183°F) while stirring constantly.
Add the well-drained gelatin and stir to dissolve completely.
Remove from the heat, transfer to a mixing bowl, and blend with an immersion blender for a few seconds to achieve a smooth, glossy texture.
Let cool before use.

Fill the bottom choux (the “bodies”) with the vanilla crémeux using a piping bag fitted with a 10 mm plain tip.


Raspberry Crémeux – Preparation

Soak the gelatin in cold water until softened.
In a saucepan, combine all ingredients except the butter and gently bring to a light boil while stirring constantly.
Remove from the heat and add the drained gelatin, mixing well to dissolve.
Once the mixture has cooled to about 35–40°C (95–104°F), incorporate the butter and emulsify using an immersion blender.
Transfer to a bowl and refrigerate until set.

Fill the top choux (the “heads”) with the raspberry crémeux using a piping bag fitted with a 4 mm plain tip.

Red Glaze – Preparation

Soften the gelatin by soaking it in a bowl of cold water.
In a saucepan, bring the cream to a boil, then incorporate the drained gelatin.
Pour the hot cream over the chopped white chocolate and neutral glaze.
Stir the mixture as you would for a ganache, until smooth and fully emulsified.
Add the red fat-soluble food coloring and mix well to achieve an even color.
Use the glaze at a temperature of 30–35°C (86–95°F).

Dip the bottom side of each filled “head” (the smaller choux) into the glaze. Allow to cool and set.


Vanilla Caviar – Preparation

Bring the milk to a boil along with the scraped vanilla seeds and the split vanilla pod.
Add the softened, drained gelatin and stir until fully dissolved.
Pour the mixture into a small sphere-shaped silicone mold, and place in the freezer until fully set.


Assembly of the Religieuses

On each filled base choux (the “body”), place a raspberry half, sliced horizontally to create a raspberry “ring.”
Gently set the glazed choux “head” on top of the raspberry ring, with the glazed side facing upward.
Finish by placing one or more vanilla caviar spheres on top of the glazed choux for an elegant and flavorful garnish.

Conclusion

The Vanilla-Raspberry Religieuse is far more than a composition of pastry elements—it is a testament to the precision, discipline, and creativity inherent in the art of French pâtisserie. Each component, from the delicate craquelin to the vibrant raspberry crémeux, is executed with purpose and care. This dessert is a celebration of contrasts: soft and crisp, creamy and airy, sweet and tart, traditional and modern.

The construction

of the religieuse demands not only technical mastery but also a deep understanding of balance—flavor, texture, temperature, and visual composition all play equally vital roles. A perfectly baked choux should be dry and hollow, providing the ideal vessel for the crémeux fillings. The vanilla craquelin adds a subtle crunch and aromatic complexity that complements the creaminess inside. The two crémeux, when prepared and piped with finesse, deliver a layered tasting experience—one that begins with the comforting familiarity of vanilla and evolves into the lively brightness of raspberry. These are not arbitrary pairings, but carefully considered components designed to heighten the sensory experience with each bite.

The vibrant red

glaze is more than decorative. It brings cohesion and finish, enhancing the elegance of the final product. Meanwhile, the vanilla caviar, in its frozen spherical form, crowns the religieuse with a touch of refinement, playing with temperature and texture. Even the act of placing the raspberry ring between the two choux becomes a quiet detail that brings structure and a clever nod to the dessert’s fruit-forward identity.

To execute this recipe successfully requires more than following steps—it requires an appreciation for pacing, temperature control, ingredient behavior, and above all, patience. Like all truly great pastry work, the religieuse teaches the value of time and attention. It’s a dessert that rewards focus and care, and in return, offers an experience that is both nostalgic and elevated.

Whether served at a patisserie

, in the setting of a fine dining menu, or as part of a showcase of advanced techniques, the Vanilla-Raspberry Religieuse is a shining example of how classical French pastry can be reimagined with freshness and elegance. In its perfect form, it does not just satisfy the palate—it tells a story of tradition, innovation, and the endless pursuit of pastry perfection.Link to a reference on choux tips, like La Cuisine de Référence (trusted culinary school resource).

Questions & Answers – Vanilla-Raspberry Religieuse


Q1: Why use both hazelnut and almond powders in the craquelin?

A: The combination adds a deeper, more rounded nutty flavor than using just one. Almond brings a soft sweetness, while hazelnut contributes richness and complexity. Together, they enhance the craquelin’s aroma and contrast beautifully with the fillings.


Q2: How do I know when the choux dough has been sufficiently dried?

A: After adding the flour, stir over medium-high heat until the dough forms a smooth ball that pulls away from the sides of the pan. You should see a thin film forming at the bottom. The dough should be firm and leave the sides of the pan clean. Over-drying can make the dough too stiff; under-drying can lead to collapsed choux.


Q3: What’s the purpose of using two different crémeux (vanilla and raspberry)?

A: This dual filling brings contrast in both flavor and color. Vanilla provides a smooth, rich base with warmth and familiarity, while raspberry adds bright acidity and fruitiness. Together, they balance each other and provide a layered sensory experience.


Q4: Why is the red glaze applied to the bottom of the top choux and not the top?

A: Glazing the bottom of the top choux (the “head”) allows the glossy red to act as a visual collar when placed onto the body. This creates a more polished presentation and avoids disrupting the placement of the vanilla caviar garnish on top.


Q5: My glaze isn’t smooth. What went wrong?

A: Glaze can become grainy if the chocolate isn’t fully melted or the temperature is too low when mixing. Always pour hot cream over the chocolate and glaze base, let it sit briefly, then stir gently from the center outwards. An immersion blender helps achieve a smooth, homogenous texture—just avoid introducing too much air.


Q6: Can I prepare the vanilla caviar in advance?

A: Yes. The vanilla caviar spheres can be prepared several days ahead and kept in the freezer. They should be placed on the religieuses just before serving or after assembly is complete, to maintain their spherical shape and contrast in temperature and texture.


Q7: How should I store the finished religieuses?

A: Store them in an airtight container in the refrigerator and consume within 48 hours. For the best texture and flavor, let them sit at room temperature for 5–10 minutes before serving.


Q8: Can I substitute the raspberry purée with another fruit?

A: Yes, but choose fruits with bright acidity and smooth texture, such as passion fruit, blackcurrant, or mango. Adjust the sugar and gelatin slightly based on the fruit’s water content and tartness.


Q9: What can go wrong when piping the choux?

A: Uneven sizes can lead to uneven baking and mismatched religieuses. Pipe consistently, hold the bag vertically, and keep spacing even. Craquelin should be centered and match the diameter to ensure uniform puffing and crispness.


Q10: Why is it important to use liposoluble (fat-soluble) food coloring in the glaze?

A: White chocolate is fat-based, so only liposoluble (fat-soluble) colorants will properly disperse and give an intense, even color. Water-based or gel colors will not mix well and can cause the glaze to seize.

2 Secret of the Pastry Chef: Mendiant Carolines with a Glossy Finish

A close-up of mini éclairs topped with chocolate fondant, pistachios, dried apricots, and toasted hazelnuts, showcasing their glossy finish.

Mendiant Carolines glossy finish

Simple yet sophisticated, the Chocolat Mendiant is one of those quiet triumphs of French confectionery—an elegant disc of tempered chocolate adorned with jewel-like dried fruits and nuts. Traditionally gifted during the holidays, it carries with it centuries of symbolism and a sense of restrained indulgence.

But beyond tradition

the mendiant is a canvas: a meeting point between texture and flavor, where glossy chocolate meets the crunch of nuts, the chew of dried fruit, and the balance of natural sweetness.

Whether served at the end of a meal with coffee or offered in a box of homemade confections, it’s a moment of refinement—a miniature expression of care and craftsmanship.Creating mendiants requires precision, but also creativity. Each piece invites a bit of play:

a pistachio here, a fig there, perhaps a touch of citrus peel or a whisper of sea salt. The beauty lies not in complexity, but in harmony.

For Caroline, this recipe is more than chocolate and garnish—it’s a quiet ritual of elegance. A way to bring beauty to the everyday, one glossy round at a time.

For 50 Carolines

Preparation time: 1 hour
Baking time: 30 to 40 minutes
Chilling time: 40 minutes
Shelf life: 48 hours


Equipment Needed

  • Fine sieve
  • Piping bags + plain round tips (6 mm and 10 mm Ø)
  • Whisk
  • Thermometer
  • Fine chinois or cheesecloth
  • Immersion blender

Ingredients

Choux Pastry

  • 125 g water
  • 125 g whole milk
  • 5 g salt
  • 5 g sugar
  • 100 g butter
  • 150 g flour
  • 250 g eggs

Chocolate Crémeux

  • 200 g whole milk
  • 200 g heavy cream (35% fat)
  • 80 g egg yolks
  • 40 g sugar
  • 160 g dark chocolate (70%)

Finishing

  • As needed: chocolate fondant
  • As needed: halved pistachios
  • As needed: diced dried apricots
  • As needed: crushed toasted hazelnuts

Choux Pastry

In a saucepan, bring the water, milk, salt, sugar, and diced butter to a boil.
Remove from the heat and immediately add the sifted flour. Stir vigorously, then return to high heat and cook while stirring to dry out the dough until it pulls away from the sides of the pan and forms a smooth ball.


Off the heat, incorporate the eggs one at a time, mixing well with a spatula after each addition until the dough is smooth and glossy.Transfer the choux paste into a piping bag fitted with a 10 mm plain tip.
On a non-stick baking tray, pipe out mini éclairs about 5 cm long and 1.5 cm in diameter.

Bake at 180°C (350°F / gas mark 4) for 30 to 40 minutes, until golden and crisp.

Chocolate Crémeux

Mendiant Carolines glossy finish In a saucepan, bring the milk and cream to a boil.
Meanwhile, in a separate bowl, whisk the egg yolks with the sugar until pale and slightly thickened (blanchir).


Pour this mixture into the hot milk and cream, then cook over low heat, stirring constantly, until the custard reaches 82–84°C (180–183°F) and coats the back of a spoon (à la nappe).

Strain through a fine chinois or cheesecloth directly over the chopped dark chocolate.
Blend with an immersion blender, keeping the blender fully submerged to avoid incorporating air.

Chill in the refrigerator for 30 to 40 minutes before use.

Assembly

Bring the chocolate fondant to the right working consistency.
Using a piping bag fitted with a 6 mm plain tip, fill the Carolines with the chocolate crémeux from the base or side.

Glaze the tops of the Carolines with the warm chocolate fondant.
Before the fondant sets, arrange the dried fruits and nuts decoratively on top.

Serving & Enjoyment

These Carolines are best enjoyed slightly chilled or at room temperature,when the chocolate crémeux has reached its ideal smoothness and the glaze retains its subtle sheen.Their size makes them the perfect bite-sized indulgence

—elegant enough for a dessert table, yet comforting enough for an afternoon treat alongside a cup of tea or an espresso.Each bite offers a beautiful balance: the delicate crispness of the choux shell, the deep richness of the dark chocolate crémeux, and the satisfying crunch of roasted nuts and chewy dried fruits.

The glaze, silky and glossy, adds a final note of sweetness and refinement.

Serve them on a minimalist platter or a fine porcelain tray to highlight their polished finish. These little pastries are a tribute to the art of detail—small in size, but grand in pleasure.

Conclusion

Delicate, refined, and full of contrast, the Caroline au Chocolat Mendiant is a celebration of French pastry elegance in miniature form.

From the precise piping of the choux to the silken chocolate crémeux,

from the glossy fondant glaze to the thoughtfully placed fruits and nuts — each element is a testament to craftsmanship and care.Whether you serve them at a festive gathering, as part of a refined tea service, or simply to delight those you love, Carolines bring joy in every bite.

They invite us to slow down, savor textures, and admire the beauty of small things done well.

Take your time with each step, trust the process, and above all — enjoy the art of making something truly exquisite.

2 Secrets of the Pastry Chef

Achieving a glossy finish on Mendiant Carolines starts with understanding the chocolate tempering process.

For a detailed explanation on chocolate tempering science, check out this insightful guide by Valrhona Chocolate, a leader in premium chocolate craftsmanship.

Questions, Answers:

Q: Can I prepare the choux pastry in advance?


A: Absolutely. The choux pastry dough, once made, can be piped onto a tray and frozen raw.

Simply freeze the piped shapes until firm, then store them in an airtight container or bag.

Bake them directly from frozen—just allow a few extra minutes in the oven.

Once baked, unfilled choux shells can also be stored in an airtight container for up to 24 hours or frozen for longer keeping. Recrisp them briefly in the oven before use.


Q: Is it possible to replace the dark chocolate in the crémeux with milk chocolate?


A: Yes, but it will change both the flavor and texture. Milk chocolate contains more sugar and less cocoa, resulting in a sweeter, softer crémeux.

If you opt for milk chocolate, consider reducing the sugar in the custard slightly to maintain balance.

Also, choose a high-quality couverture chocolate with at least 40% cocoa solids to preserve some intensity.


Q: I don’t have a thermometer—can I still make the crémeux?


A: While a thermometer ensures precision, you can still succeed with visual cues.

Cook the custard over low heat, stirring constantly, until it thickens enough to coat the back of a spoon.

When you draw a finger across the coated spoon, the line should hold cleanly. This classic à la nappe test corresponds roughly to 82–84 °C (180–183 °F).


Q: How can I make the glaze extra shiny and smooth?


A: The key is proper temperature and handling.

Warm the chocolate fondant gently over a bain-marie without overheating—it should be fluid but not runny.

Stir continuously and avoid incorporating air.

For added shine, you can mix in a touch of glucose or invert sugar. Glaze the Carolines quickly and in one motion; excess handling will dull the finish.


Q: Can I customize the topping ingredients?


A: Of course! While pistachios, dried apricots, and toasted hazelnuts are traditional choices inspired by the classic mendiant,

feel free to explore: candied orange peel, gold leaf, roasted almonds, or even dried cherries can add color, contrast, and character.

Just remember: harmony of texture and color is key.

The 3 Chef’s Secrets: The Chocolate Religieuse, The Hidden Art of French Pastry

Close-up of a perfectly crafted Chocolate Religieuse, showcasing its glossy fondant glaze and delicate pastry layers

chocolate religieuse recipe

Among the many gems of French pâtisserie, the Religieuse au Chocolat holds a place of particular reverence—both for its whimsical appearance and its decadent character. This classic pastry, whose name translates to “the nun,” is not just a testament to culinary finesse, but a symbol of the refined indulgence that defines traditional French desserts.

Visually striking and structurally intricate, the Religieuse is composed of two perfectly rounded choux buns, one smaller than the other, delicately stacked like a tiered confection. Its silhouette is said to resemble a nun in her habit, hence the name, although many see it as a miniature, edible sculpture. The pastry is finished with glossy chocolate glaze and intricate piped cream details, adding both charm and opulence to its form.

What makes the Religieuse au Chocolat truly extraordinary is the contrast between its light, airy shell and its rich, silky filling. With every bite, there is a delightful interplay between textures: the crispness of the choux, the smoothness of the filling, the luxurious glaze, and the delicate touch of piped cream that binds it all. It is a pastry that feels ceremonial in its assembly and almost sacred in its consumption.

Historically, chocolate religieuse recipe made its debut in the 19th century, becoming a darling of Parisian pastry shops and tea salons. Though variations exist today—filled with flavors ranging from coffee to pistachio—chocolate remains the most iconic version, embodying the deep, comforting decadence that only French chocolate pastries can offer.

Often displayed under glass domes in elegant pâtisseries, the Religieuse au Chocolat is more than a dessert—it’s an experience. It invites admiration before it even touches the palate and offers a moment of pure, luxurious pleasure with each bite. Whether enjoyed as an afternoon treat in a sunlit café or as the finale to a grand dinner, this classic continues to enchant generations of pastry lovers with its timeless beauty and irresistible flavor.To complement this soup, try our https://briochechic.com/perfect-millefeuille-secret/, perfect for dipping

Religieuses au Chocolat – For 16 servings

Preparation: 1 hour
Baking time: 30 to 45 minutes
Storage: Keeps for up to 48 hours refrigerated

Equipment Needed:

  • Fine-mesh sieve
  • Piping bags with plain round tips (10 mm and 15 mm in diameter)
  • Whisk
  • Cooking thermometer

Ingredients

Choux Pastry

  • 250 g water
  • 3 g salt
  • 5 g sugar
  • 100 g butter
  • 150 g flour
  • 250 g eggs (about 5 large eggs, beaten and added gradually)

Chocolate Pastry Cream

  • 1 litre whole milk
  • 200 g sugar
  • 1 vanilla bean (split and scraped)
  • 160 g egg yolks (approx. 8 large yolks)
  • 45 g cornstarch
  • 45 g flour
  • 100 g butter
  • 90 g dark chocolate (50% cocoa)

Finishing

  • 300 g chocolate fondant (pâtisserie-grade)
  • 50 g dark chocolate (50% cocoa)

Choux Pastry

In a saucepan, bring the water, salt, sugar, and diced butter to a boil. Once the mixture is boiling and the butter has fully melted, remove the pan from the heat. Add the sifted flour all at once and stir vigorously with a spatula until the mixture comes together into a smooth dough—this is your panade.

Return the panade to the heat and cook it over medium heat for about 10 seconds to dry it out slightly, stirring continuously. The dough should form a ball and pull away cleanly from the sides of the pan.

Transfer the dough to a mixing bowl to stop the cooking process. Gradually incorporate the beaten eggs in several additions, mixing thoroughly between each one. The final consistency should be smooth and supple. To test, run a spatula through the dough: if the groove closes slowly, your choux paste is ready. If it’s too firm, add a little more egg until the desired texture is reached.

Shaping and Baking the Choux

Using a piping bag fitted with a plain tip, pipe 16 large choux (about 5 cm in diameter) onto a buttered baking tray—these will form the base. Then pipe 16 smaller choux (about 2.5 cm in diameter) for the tops.

Brush the choux lightly with clarified melted butter for an even, golden finish. Bake in a preheated oven at 180°C (355°F) for 30 to 45 minutes, until puffed and deeply golden. Avoid opening the oven door during baking to prevent collapse.

Once baked, transfer the choux to a wire rack and allow them to cool completely before filling and assembling.

Chocolate Pastry Cream

Prepare the pastry cream as follows:

chocolate religieuse recipe In a saucepan, bring the milk and the scraped vanilla bean (both seeds and pod) to a simmer over medium heat. Meanwhile, in a mixing bowl, whisk together the egg yolks and sugar until pale and slightly thickened. Add the cornstarch and flour, and whisk until smooth and fully incorporated.

Once the milk starts to steam, remove the vanilla pod and slowly pour about a third of the hot milk over the egg mixture, whisking constantly to temper it. Pour the tempered mixture back into the saucepan with the remaining milk.

Return the pan to medium heat and cook the cream, whisking continuously, until it thickens and comes to a boil. Once boiling, continue cooking for 1 to 2 minutes to eliminate any starchy taste.

Remove from the heat and immediately add the chopped dark chocolate. Stir until fully melted and the cream is smooth and glossy. Then incorporate the butter for extra richness and shine.

Transfer the chocolate pastry cream to a shallow dish, cover with plastic wrap in direct contact with the surface, and chill until completely cool before using.

Chocolate Fondant Glaze

In a small saucepan, gently heat the chocolate fondant over low heat until it reaches 37°C (98.6°F). Stir constantly to ensure a smooth, fluid texture without overheating.

Chocolate Squares

Temper the dark chocolate using your preferred method (tabling, seeding, or microwave technique) until it reaches the correct working temperature.

Once tempered, spread the chocolate in a thin, even layer on a sheet of acetate or parchment paper. Allow it to set slightly, then cut out 16 neat squares, each measuring 3 cm on each side. Let them fully crystallize at room temperature.

Assembly

Using a piping bag fitted with a small plain tip, fill all the choux with the chilled chocolate pastry cream by piercing the base or the side.

Dip the tops of each chocolate religieuse recipe in the warm chocolate fondant glaze. Let any excess drip off, then gently remove the surplus glaze with your finger to achieve a clean, polished finish.

To assemble the religieuses, place a square of tempered chocolate on top of each large choux (the base). Carefully position a smaller choux (the head) on top, pressing lightly to secure. The chocolate square serves both as a decorative detail and as structural support.

The 3 Chef's Secrets: The Chocolate Religieuse, The Hidden Art of French Pastry
Unlock the secrets of French pastry perfection with this luxurious Chocolate Religieuse, a true masterpiece of flavor and technique

Chef’s Tips & Tricks

Halfway through baking, slightly open the oven door to allow steam to escape. This helps the choux dry out properly and ensures a crisp, evenly puffed shell.

Conclusion

The Religieuse au Chocolat is truly a showstopper in the world of French pastries. With its graceful appearance and indulgent flavor, this dessert captures the essence of French pâtisserie in every bite. The delicate choux pastry, paired with the rich chocolate pastry cream and glossy fondant glaze, creates a delightful contrast of textures and flavors. Whether you’re preparing them for a special occasion or simply treating yourself to a moment of decadence, these pastries are sure to impress. Mastering the Religieuse requires precision and patience, but with each carefully executed step, you’ll create a pastry that embodies both skill and artistry.

The secret chocolate religieuse recipe to perfecting the Religieuse au Chocolat lies in the details: from getting the choux pastry just right, to tempering the chocolate, and achieving the perfect glaze. It’s a true celebration of French pastry traditions. Once you’ve completed your masterpiece, the Religieuse au Chocolat will not only be a treat for the taste buds but also a visual delight, worthy of admiration and praise.

This pastry invites us to slow down and savor the process of creation, transforming simple ingredients into something extraordinary. Whether you’re an experienced pastry chef or a home baker looking to challenge yourself, the Religieuse au Chocolat is a wonderful way to expand your repertoire and indulge in the artistry of French patisserie.Institut Paul Bocuse for professional culinary training info.

King Arthur Baking Company for detailed baking science.

Wikipedia pages for technical terms like lamination or pâte à choux.


Frequently Asked Questions (FAQ)

1. Can I make the choux dough ahead of time?
Yes, you can prepare the choux dough in advance. After it has cooled, wrap it tightly in plastic wrap and store it in the refrigerator for up to 24 hours. When ready to bake, bring the dough to room temperature before piping.

2. Can I use a different filling for the religieuses?
Absolutely! While chocolate pastry cream is traditional, you can experiment with different flavors. Coffee, vanilla, or fruit-flavored pastry creams are all great alternatives. Just make sure your filling is thick enough to hold up during assembly.

3. How can I ensure the choux pastry rises perfectly?
The key to perfect choux pastry is ensuring the dough has the right consistency before baking. If the dough is too wet, the choux may not rise properly. Also, avoid opening the oven door during the first 20 minutes of baking to allow the choux to puff without collapsing.

4. How do I store the Religieuses au Chocolat?
Store them in an airtight container in the refrigerator for up to 48 hours. For the best texture, it’s ideal to eat them within 24 hours. Bring them to room temperature before serving for optimal flavor and texture.

5. Can I make the fondant glaze in advance?
You can prepare the chocolate fondant ahead of time. Store it in an airtight container at room temperature. If it thickens too much, gently reheat it until it reaches the desired consistency before glazing the choux.

The Secret Behind the Perfect Millefeuille (It’s Not What You Think…)

"Homemade millefeuille with layers of golden puff pastry, vanilla pastry cream, and glossy fondant icing with chocolate decoration

Perfect Millefeuille

The millefeuille, also known as the “Napoleon” in some regions, is a quintessential French pastry renowned for its sophisticated layers and delicate textures. Its name, derived from the French words “mille” (thousand) and “feuille” (leaf), refers to the many thin layers of puff pastry that make up the dessert, creating a visually stunning and texturally complex experience.

At its core, the millefeuille is composed of alternating layers of crispy, flaky pastry and a smooth, rich filling. The top is often glazed with a shiny, elegant icing, sometimes featuring a decorative pattern. The layers of puff pastry, when properly baked, provide a delicate crunch that contrasts beautifully with the creamy interior, making each bite an indulgence in texture.

The preparation of a millefeuille is both an art and a science. The dough must be folded repeatedly, allowing it to puff up perfectly in the oven, achieving the characteristic layers. The filling, typically smooth and velvety, complements the crispness of the pastry, offering a balanced and refined flavor.

A true millefeuille requires precision, as every element must be executed perfectly, from the puff pastry to the filling and the final assembly. The result is a pastry that’s not just delicious but visually impressive, a true centerpiece in any pastry display.

The millefeuille is a symbol of French pastry mastery, often enjoyed during special occasions or as a decadent treat. Its layered structure and combination of textures make it a favorite among pastry enthusiasts, while its delicate flavors continue to captivate palates worldwide. Whether served as a personal indulgence or shared among friends and family, the millefeuille remains an iconic and beloved dessert in the world of pastry.Mention: “This dough is similar to the one I used in my ultimate braided brioche recipe.

For 6 to 8 people

Preparation: 4 hours
Chilling: 2 hours 30 minutes
Baking: 50 minutes
Storage: 48 hours

Equipment:

  • Rolling pin
  • Whisk
  • Sieve
  • Thermometer
  • Piping bag + 15mm round nozzle
  • Palette knife

Ingredients

Puff Pastry

  • 250g flour
  • 5g salt
  • 125g water
  • 190g butter

Pastry Cream

  • 50g sugar
  • 250g whole milk
  • 1 vanilla pod
  • 40g egg yolks
  • 15g cornstarch (powdered cream)
  • 10g flour
  • 25g warm butter

Finishing

  • Sufficient amount of white fondant
  • Sufficient amount of 66% dark couverture chocolate
  • Sufficient amount of feuilletine (crunchy caramelized wafer flakes)

Puff Pastry Method

  1. On a clean work surface, make a well in the flour. Add the salt dissolved in water in the center and the cold butter cut into cubes. Mix everything well and form the dough into a ball. Refrigerate for 30 minutes.
  2. Flour your work surface and roll out the dough. Begin the lamination process: perform 1 “portefeuille” fold (folding the dough into thirds) and 1 simple turn (folding it into half). Rest the dough in the refrigerator for 45 minutes.
  3. Give the dough another “portefeuille” fold and another simple turn. Rest the dough again in the fridge for 45 minutes.
  4. Roll the dough into 3 discs, each 20 cm in diameter and 5 mm thick. Rest in the refrigerator for 30 minutes.
  5. Preheat the oven to 220°C (thermostat 7/8) and bake the discs for 10 minutes. Then, reduce the heat to 190°C (thermostat 6/7) and continue baking for about 40 minutes, or until fully cooked through.
  6. Set the baked puff pastry aside to cool.

Pastry Cream Method

  1. In a saucepan, heat half of the sugar with the milk and the vanilla pod (split and scraped).
  2. In a separate bowl (cul-de-poule), whisk the egg yolks with the remaining sugar until pale and creamy. Add the cornstarch and sifted flour, and mix well.
  3. Once the milk reaches a boil, pour a little of the hot milk into the egg mixture to gently loosen it, then return everything to the saucepan. Cook for about 2 minutes, stirring constantly.
  4. Once the mixture has thickened, remove from heat and incorporate the butter.
  5. Transfer the pastry cream onto a tray, cover it with plastic wrap directly on the surface (to prevent a skin from forming), and refrigerate until fully cooled.

Finishing

Prepare your white fondant (you can warm it gently in a bain-marie if needed to make it pourable and glossy). Make a parchment paper piping cone (cornet), and fill it with melted 66% dark couverture chocolate—just enough to pipe with precision.

This is where the millefeuille transforms from pastry to art. The contrast between the pristine white fondant and the dark chocolate allows for elegant decoration: think thin spirals or feathered marbling reminiscent of the classic millefeuille finish. It’s the same attention to visual storytelling you might use in a composed plated dessert—or even when styling a refined brioche tressée for a magazine cover.

Assembly

Using a small paring knife, trim the baked puff pastry into 3 clean discs, each 18 cm in diameter.

  1. First layer: Place the first puff pastry disc on your serving platter. Using a piping bag fitted with a 15 mm plain tip, pipe half of the chilled pastry cream in a smooth, even spiral or concentric circles.
  2. Second layer: Gently place the second disc of puff pastry over the cream. Pipe the remaining pastry cream evenly on top.
  3. Top layer: Finish with the third puff pastry disc, pressing down very lightly to set the layers.
  4. Glazing: Pour the white fondant over the top of the millefeuille. Smooth it carefully with a palette knife for an even, glossy surface.
  5. Decoration: With your cornet filled with melted dark chocolate, pipe a spiral starting from the center and working outward. Then, using the tip of a paring knife, draw radial lines from the center to the edge and alternate with lines from the edge inward to create a marbled pattern (classic millefeuille design).
  6. Final touches: Lightly score the top to indicate portion sizes—just enough to mark the fondant. Remove any excess fondant dripping over the sides, then mask the edges with finely crushed puff pastry trimmings for a clean, professional finish.
Slice of millefeuille on a porcelain plate, showing crisp pastry layers, creamy vanilla filling, and chocolate-glazed fondant top
Each bite of this millefeuille offers a perfect balance of crisp pastry, smooth vanilla cream, and a sweet fondant glaze marbled with dark chocolate.

Chef’s Tips & Tricks

For a flawless fondant finish:
Before glazing your millefeuille with white fondant, brush the top layer of puff pastry with a very thin coat of neutral hot glaze (also called nappage neutre). This creates a smooth, slightly sticky surface that helps the fondant adhere evenly and shine beautifully once set.

Avoid soggy layers:
Always let your pastry cream cool completely before assembling. Warm cream can cause the puff pastry to soften and lose its crispness.

Clean cuts, every time:
Use a serrated knife dipped in hot water and wiped dry between each slice to avoid dragging the cream and breaking the glaze. This ensures sharp, clean portions.

Want extra crunch?
Dust each baked pastry disc with icing sugar and caramelize under the broiler or with a blowtorch. This adds a delicate crunch and enhances presentation.

Uniformity is key:
Use cake rings or templates to trim your puff pastry discs evenly. A perfectly stacked millefeuille is not only more elegant—it’s easier to serve.

Conclusion

Making a millefeuille at home is an ambitious but immensely rewarding culinary project. It embodies everything that makes French pastry so captivating: precision, patience, and a true celebration of texture. Each element—the crisp and delicately caramelized puff pastry, the silky smooth pastry cream, the glossy fondant topping with its elegant marbled finish—comes together to create a dessert that is both visually striking and delightfully indulgent.

While the process is meticulous, it is also meditative. The care you invest in each fold of the dough, each whisk of the cream, and every final decorative detail is returned tenfold in the finished result. Serving a homemade millefeuille is not just offering a dessert—it’s presenting a symbol of craftsmanship, elegance, and timeless culinary tradition.

Whether you’re preparing it for a special occasion or simply to challenge yourself in the kitchen, a millefeuille is more than a dessert. It’s an experience—a delicious and unforgettable one.

So take your time, follow each step with intention, and above all, enjoy the journey of creating one of the most iconic pastries in the world.These links point to high-authority external sites for credibility or extra information:

Mention: “This method is inspired by traditional French pastry techniques taught at Le Cordon Bleu


Frequently Asked Questions (FAQ)

Can I make the puff pastry in advance?

Yes! You can prepare the puff pastry dough up to 2 days in advance and keep it refrigerated. You can also freeze it (before or after the final lamination) for up to a month.

Can I use store-bought puff pastry?

Technically yes, but for a true millefeuille experience—with ultra-crisp layers and rich buttery flavor—homemade puff pastry is highly recommended.

What is “fondant blanc” and where can I find it?

Fondant blanc is a white, glossy glaze made from sugar syrup, often used in classic French pastries. You can find it in specialty baking stores, or make it yourself from sugar, glucose, and water.

Can I replace the pastry cream with another filling?

Yes, though it won’t be traditional. Variations include chantilly cream, diplomat cream (a mix of pastry cream and whipped cream), or even fruit compotes for a modern twist.

How long does millefeuille stay crisp?

Ideally, it should be assembled shortly before serving. After a few hours in the fridge, the pastry may begin to soften due to the cream. For best texture, enjoy it within 24 hours of assembly.

What can I use if I don’t have a piping bag?

You can use a zip-top plastic bag with the tip cut off, or spread the cream carefully with an offset spatula. However, for a neat and professional look, a piping bag with a round nozzle is best.

Kouign-Amann: 2 Secret to Perfectly Caramelized Pastry Revealed!

Kouign-Amann breton caramélisé, croustillant à l’extérieur et fondant à l’intérieur

Kouign-Amann is a traditional Breton pastry that has gained international acclaim for its unique combination of buttery richness and satisfying sweetness. Its name, derived from the Breton words “kouign” meaning cake and “amann” meaning butter, gives a hint of what to expect: a pastry that is unapologetically indulgent.

This delightful treat hails from the town of Douarnenez in Brittany, a coastal region in the northwest of France, where it was originally created in the 19th century. The concept behind Kouign-Amann is simple yet brilliant—layering dough with a generous amount of butter and sugar, then folding it into a compact shape before baking it to perfection.

What results is a pastry with a golden, crisp exterior and a tender, almost caramelized interior.

The magic of Kouign-Amann lies in its balance

As it bakes, the butter and sugar melt and caramelize, creating a slightly crunchy, sweet coating while the inside remains soft and layered. The outer layers puff up, almost like a croissant, while the caramelization provides a wonderful contrast to the richness of the butter.

Each bite is an experience, with the crispy outer crust giving way to a sweet, soft interior that melts in your mouth.

Kouign-Amann is a pastry that thrives on simplicity.

While it may seem like a decadent indulgence, its flavor profile is refined, not overwhelming. It is not just sweet, but also has a savory depth from the butter and the slight saltiness of the dough

Many variations of the Kouign-Amann exist, with some incorporating fruit or chocolate, but the traditional version stays true to its roots, allowing the butter and sugar to shine through

Often enjoyed

with a cup of coffee or tea, Kouign-Amann can be served as a breakfast treat, a mid-afternoon snack, or even as a special dessert. Its versatility, however, doesn’t end with its taste; it is also a perfect example of French culinary craftsmanship—an art of creating something deceptively simple, yet deeply satisfying.

Whether you’re lucky enough to enjoy it in the quaint bakeries of Brittany or decide to bake it yourself at home, Kouign-Amann remains a beloved symbol of French pastry tradition, adored for its texture, flavor, and the unmistakable joy it brings with each bite

Preparation Time:

3 hours
This includes the time to prepare the dough, the layering process, and the initial rising.

Pointage (First Rise):

1 hour
Allow the dough to rest and rise at room temperature for about an hour. This helps to activate the yeast and creates a fluffy texture.

Freezing Time:

30 minutes
Place the dough in the freezer for 30 minutes. This step helps solidify the butter layers, which is crucial for achieving the flaky, caramelized texture of the Kouign-Amann.

Refrigeration Time:

30 minutes
Refrigerating the dough allows it to firm up, making it easier to handle during shaping and baking.

Second Rise (Pousse):

1 hour 30 minutes
After shaping the dough into individual Kouign-Amann portions, let them rise again for 1 hour and 30 minutes. This ensures a soft, airy texture inside the pastry once baked.

Baking Time:

12 to 15 minutes
Bake at a high temperature, and keep a close eye on the pastries. They should be golden-brown and slightly crispy on the edges, with a caramelized surface from the butter and sugar.

Storage:

48 hours
Kouign-Amann is best enjoyed fresh, but it can be stored at room temperature for up to 48 hours. To preserve its texture, reheat in the oven for a few minutes before serving.

Ingredients:

  • 250 g of flour
  • 10 g of fresh yeast
  • 190 g of sugar
  • 5 g of salt
  • 20 g of butter
  • 125 g of eggs
  • 150 g of semi-salted butter
  • For the Egg Wash:
    • 50 g of whole egg
    • 50 g of egg yolks
    • 50 g of whole milk
  • For the Finishing:
    • Sufficient quantity of sugar pearls (for sprinkling on top)

Equipment:

  • Stand mixer (robot pâtissier)
  • Rolling pin (rouleau à pâtisserie)
  • Non-stick molds (moules antiadhésifs)
  • Pastry brush (pinceau)

Here’s the detailed step-by-step ,method for preparing Kouign-Amann:

  • Prepare the Dough:
    • In the bowl of a stand mixer fitted with a dough hook, add 250 g of flour, 10 g of fresh yeast, 40 g of sugar, 5 g of salt, 20 g of butter, and 125 g of eggs.
    • Mix on low speed for 10 minutes, then increase to medium speed and knead for an additional 2 minutes.
  • Rest and Cool:
    • Cover the dough with plastic wrap and let it rest for 1 hour at room temperature for the first rise (pointage).
    • Once rested, place the dough flat in the freezer for 30 minutes to chill. This will help the butter layers stay firm for the next steps.
  • Laminate the Dough:
    • After the dough has chilled, add 150 g of semi-salted butter and perform 2 simple folds (turns) to create layers in the dough.
    • Let the dough rest for 30 minutes in the refrigerator.
Tourage de la pâte sur un plan fariné, repliée en trois pour créer des couches feuilletées
L’étape de tourage : on replie la pâte avec du beurre pour obtenir un feuilletage léger et bien structuré.
Add Sugar Layers:
  • After the rest, spread 150 g of sugar evenly on the dough and fold it in once more, ensuring that the sugar is fully incorporated into the dough.
  • Shape the Kouign-Amann:
    • Roll out the dough to 4 mm thickness and cut it into 13 cm x 4 cm strips.
    • Roll each strip into a snail shape (escargot-style) and place them in non-stick molds.
  • Proofing (Pousse):
    • Let the Kouign-Amann rise in a warm area (20°C max) for about 1 hour and 30 minutes. Ensure the temperature does not exceed 20°C, as the butter and sugar will melt otherwise.
  • Egg Wash and Sugar:
    • In the meantime, prepare the egg wash by mixing 50 g of whole egg, 50 g of egg yolks, and 50 g of whole milk.
    • Use a pastry brush to regularly brush the pastries with the egg wash and sprinkle with sugar pearls.
  • Baking:
    • Preheat your oven to 180°C (th. 6).
    • Bake the Kouign-Amann for 12 to 15 minutes, until golden and slightly crispy.
    • Flip the pastries over and continue baking for 2 more minutes for an even golden color on both sides.
  • Cool and Serve:
    • Remove from the molds and transfer to a cooling rack to cool down completely.

Conclusion:

Kouign-Amann is not just a pastry; it’s an experience. The rich history behind this buttery, caramelized delight, combined with the technique and precision required to perfect it, makes it a true testament to the art of pastry making. Originating in the coastal region of Brittany, France, this sweet treat combines the best elements of French baking:

buttery layers, sugar, and an unmistakable crispy texture. While it may seem like a simple concept—dough, butter, sugar—Kouign-Amann requires patience and careful attention to detail to master. The reward is a pastry that is both indulgent and balanced, with every bite revealing layers of flavor and texture..

Making Kouign-Amann at home

can be an intimidating task for some, especially for those who are new to laminated doughs.

However, with patience and the right techniques, anyone can recreate this French classic. The process of layering butter and sugar into the dough, resting it, folding it, and baking it to perfection is a gratifying journey that allows you to appreciate the complexities behind one of the world’s most beloved pastries.

The final result—crispy, golden, and beautifully caramelized on the outside, with a soft, sweet, and buttery interior—is nothing short of a triumph. It is the kind of pastry that will impress anyone who tastes it, whether at a special occasion or as a personal indulgence with a cup of coffee.

Making Kouign-Amann is more than just following a recipe; it’s about understanding the delicate balance between dough and butter, between patience and passion. The results speak for themselves.According to the New York Times, Kouign-Amann is one of the most beloved caramelized pastries in Brittany.http://What Is Kouign-Amann? – The New York Times Cooking.


Q&A:

Q1: How long can I store Kouign-Amann?

  • Kouign-Amann is best eaten fresh to enjoy its crispy texture, but it can be stored for up to 48 hours at room temperature. To maintain its flakiness, reheat it in the oven for a few minutes before serving.

Q2: What should I do if I don’t have semi-salted butter?

  • If you don’t have semi-salted butter, you can use unsalted butter and simply add a pinch of salt to the dough during the mixing process. The salt plays a key role in balancing the sweetness of the sugar, so be sure to compensate for the lack of salt in the butter.

Q3: Can I make Kouign-Amann without a stand mixer?

  • While a stand mixer certainly makes the process easier, especially when kneading the dough and incorporating butter, it is possible to make Kouign-Amann by hand. Just be sure to knead the dough until it’s smooth and elastic and take care during the butter laminating process. The key is in the folding and chilling phases.

Q4: What if my dough doesn’t rise properly?

  • If your dough isn’t rising as expected, make sure that the yeast is fresh and active. If you’re unsure, try proofing it in warm water with a bit of sugar before adding it to your dough. Additionally, ensure the dough is kept in a warm, draft-free spot during the rise. If the environment is too cold, the dough may take longer to rise.
Q5: Can I add fillings or change the flavor?
  • Absolutely! While the traditional Kouign-Amann is a classic, you can experiment with different fillings. Adding fruits like apples or berries, or even chocolate, can give the pastry a twist. Just be careful not to overfill, as it may affect the texture and crispiness of the final product.

Q6: Is it possible to make Kouign-Amann in advance?

  • Yes, you can prepare the dough in advance and store it in the fridge or freezer. If freezing, make sure to thaw the dough completely and allow it to rise properly before shaping and baking. However, the best results come from baking and serving them fresh for the ultimate flaky texture.

Q7: How can I get the perfect caramelization on the top?

  • The key to perfect caramelization is in both the sugar used and the temperature of the oven. Make sure to coat the pastries evenly with sugar pearls before baking. If you want extra caramelization, you can increase the oven temperature slightly for the last few minutes of baking, but be careful not to burn the sugar.

check out our guide to layering butter like a pro:https://briochechic.com/ultimate-waffle-recipe-secrets/

A Chef’s Secret: The Perfect Brioche Revealed in 10 Minutes

Step-by-step guide to creating the perfect brioche in just 10 minutes, showcasing golden, fluffy results

perfect brioche

Let it rest Pain perdu, or “French toast” in English, is a beloved and timeless dish that holds a special place in many cultures.

French cooks first created this dish in ancient times to repurpose stale bread, turning leftovers into a smart and resourceful meal

“Pain perdu” means “lost bread.” It refers to saving bread that would have been thrown away and transforming it into something delightful and satisfying.

6 Secrets to Making Perfectly Flaky and Irresistible Raisin Buns at Home
Anchor: learn more about enriched doughs

The preparation of pain perdu

is simple yet versatile, allowing for various adaptations depending on personal tastes and regional preferences. With its rich history and broad appeal, Pain Perdu can be made with many types of bread. From classic white bread to brioche or even gingerbread, each brings a unique twist to the dish..

before being cooked to golden perfection in a skillet.

The result is a soft, custard-like interior with a crispy, caramelized exterior.

This dish can be enjoyed in multiple ways, either as a sweet treat or a savory dish. Sweet variations often feature toppings such as fresh fruits, whipped cream, honey, or a dusting of powdered sugar.

On the savory side, pain perdu can be paired with ingredients like cheese, ham, or even herbs, transforming .

it into a more substantial meal.

Pain perdu

is not just a comforting breakfast or brunch option; it also serves as a nostalgic reminder of home cooking.

with each bite evoking warmth and a sense of indulgence.

Its simplicity in ingredients and method of preparation .make it a versatile dish, perfect for any time of day.

Though many countries have their version of this dish, pain perdu stands out for its rich French history and the elegance.

with which it elevates a humble slice of bread into a decadent experience.

Whether served as a special treat on a weekend morning or a satisfying dessert after a meal.

pain perdu continues to delight palates around the world, offering a delicious taste of both history and innovation in each bite.

French Toast (Pain Perdu)perfect brioche:


For 6 servings
Preparation Time: 30 minutes
Cooking Time: 15 minutes
Storage: To be consumed immediately

Equipment:

Silicone mat

Serrated knife or bread knife

Ingredients for 6 servings:

  • 6 slices of bread, about 1.5 cm thick
  • 200 g whole milk
  • 60 g eggs (approximately 2 eggs)
  • 20 g butter
  • 30 g sugar

Instructions for French Toast (Pain Perdu):

  • Prepare the bread:
    Slice 6 pieces of bread about 1.5 cm thick using a serrated or bread knife. Opt for slightly stale bread, as it will absorb the custard mixture better without becoming too soggy.

  • Make the egg mixture:
    In a large bowl, whisk together 200 g whole milk, 60 g eggs (approximately 2 eggs), and 30 g sugar.
  • You can add a little vanilla or salt for extra flavor, but this is optional.
A smooth, well-mixed egg mixture, ready to be used in your recipe.
Learn the technique for creating a smooth, creamy egg mixture that will elevate your dish
  • Heat the pan:
    Melt 20 g of butter in a pan over medium heat, making sure it evenly coats the bottom.
  • The butter will give the bread slices a nice golden color.

  • Dip the bread:
    Dip each slice of bread into the egg mixture, soaking both sides thoroughly but avoiding making it too soggy.

  • Cook the bread slices:
    Place the soaked bread slices in the hot pan and cook for about 3-4 minutes on each side, or until golden and slightly crispy.
Golden-brown slices of bread toasted to perfection, ready for a delicious topping
Master the art of toasting bread slices to golden-brown perfection with this simple technique
  • Serve:
    Serve immediately while the slices are warm and golden. You can top them with fresh fruit, a dusting of powdered sugar, or even maple syrup for a sweet touch.
"Golden, fluffy brioche made in 10 minutes using a chef's secret technique."
Discover the chef’s time-saving technique for making a soft and golden brioche in just 10 minutes!

Tips:

  • Generously sprinkle For a richer taste. add a pinch of cinnamon or nutmeg to the milk and egg mixture.
  • Feel free to experiment with different types of bread, such as brioche or white bread, for an even more indulgent result.

  • You can add vanilla beans or vanilla extract. to your custard mixture and dip the bread into a vanilla custard or another flavored custard before cooking for an extra flavor boost.

  • You can replace the bread with brioche or gingerbread (nothing goes to waste!). but be mindful of the sugar already present in these types of bread.

  • You can toast the bread, brioche, or other types of bread before preparing the French toast for a different texture and flavor.

Conclusion:

Gradually add Pain Perdu, or French Toast, is a versatile and timeless. dish that combines simple ingredients to create a comforting and indulgent treat.

Whether served as a sweet breakfast or a savory brunch option, this dish can be easily adapted to suit various tastes and preferences.

The magic of French toast lies in its ability to transform stale or leftover bread into something luxurious. with its golden exterior and soft, custardy interior.

With its rich history and broad appeal, Pain Perdu can be made with many types of bread. From classic white bread to brioche or even gingerbread, each brings a unique twist to the dish.

The addition of flavorful ingredients like vanilla. cinnamon, or nutmeg enhances the richness, making each bite an experience to savor. Whether you enjoy it with fresh fruits, syrup, powdered sugar, or a savory touch, there are endless possibilities to customize this dish.

King Arthur Baking: What Makes Brioche Different
Anchor: brioche dough explained

Questions & Answers:

1. Can I use any type of bread for Pain Perdu?
Yes, you can use various types of bread for Pain Perdu. While the classic choice is white bread, other options like brioche, whole grain, or even stale baguettes work wonderfully. Brioche, with its soft and rich texture, will create an even more decadent version.

You can also use gingerbread, which adds a lovely spiced flavor. Just remember to adjust the sugar amount because the bread is already sweet.

2. How can I make my Pain Perdu more flavorful?
There are several ways to boost the flavor of your Pain Perdu. Adding vanilla extract or using a vanilla bean in the custard mixture will bring a lovely aromatic depth. You can also incorporate spices like cinnamon or nutmeg for warmth and a touch of complexity.

Another option is to infuse your milk with other flavors. such as orange zest or almond extract, before adding it to the egg mixture.

3. Can I prepare Pain Perdu in advance?
While Pain Perdu is best enjoyed right after cooking, you can prepare the custard mixture ahead and keep it refrigerated for a few hours.

However, the bread should be dipped and cooked right before serving to maintain its crispy. golden exterior and soft, custard-filled interior.

4. Can I make Pain Perdu savory instead of sweet?
Absolutely! To make a savory version of Pain Perdu.

you can skip the sugar in the custard and add savory ingredients like herbs, cheese, or even cooked ham.

This makes for a delicious brunch or lunch option and can be topped with things like poached eggs or sautéed vegetables.

5. How do I achieve the perfect texture for my Pain Perdu?


The key to perfect French toast lies. in the balance between soaking the bread and cooking it to golden perfection. Be sure not to soak the bread too long, or it will become soggy. The custard should be absorbed.but the bread should still hold its shape. Cooking on medium heat allows for a crisp outside while keeping the inside soft and custardy.

6. Can I make a healthier version of Pain Perdu?
Yes, you can easily make a lighter version ,of Pain Perdu by using whole-grain or gluten-free bread.as well as swapping whole milk for a lighter option like almond milk or oat milk.

You can reduce the sugar, content or substitute it with natural sweeteners like honey or maple syrup

. To reduce the fat, you can use a non-stick pan with less butter or opt for cooking the French toast on a griddle.

In conclusion, Pain Perdu is a delightful dish that offers endless customization options.

whether you prefer it sweet or savory, rich or lighter. It’s a dish that showcases the beauty of simplicity in cooking.with the ability to create something extraordinary from the most basic ingredients. So, the next time you have leftover bread, why not give Pain Perdu a try? The possibilities are endless, and the result is always a crowd-pleaser.

Crêpes Like a Chef:4 Secrets, Technique & the Perfect Golden Finish

Golden, paper-thin French crêpes stacked on a plate with a crisp lacy edge, served with fresh fruit and a drizzle of syrup.

perfect crêpe technique

Crêpes are a timeless French delicacy that embodies simplicity and elegance in every bite. Originating from Brittany in northwest France, they have become a global favorite, appreciated for their versatility and deliciousness. Thin, golden, and perfectly delicate, crêpes can be enjoyed in countless ways, from sweet to savory, and from breakfast to dinner.

Serious Eats – How to Make Perfect Crêpes
Anchor: crêpe troubleshooting and tips

The key to a perfect crêpe

lies in its batter, which should be smooth, light, and slightly runny, allowing it to spread evenly across the pan, creating a uniform texture. The cooking technique is just as important: crêpes should be cooked on a moderately hot surface, giving them just enough time to form a soft, lacy edge without overcooking the center. The result is a delicate pancake, thin enough to roll, fold, or stack, and full of possibilities for fillings and toppings.

When it comes to sweet crêpes, they are often paired with classic fillings such as lemon and sugar, Nutella, or fruit preserves. For a more indulgent treat, whipped cream, melted chocolate, or a dusting of powdered sugar adds a rich finish. For savory crêpes, think about fillings like ham and cheese, spinach and mushroom, or even smoked salmon and crème fraîche. The beauty of crêpes is that they can be adapted to suit any flavor profile, making them a perfect dish for any occasion.

Whether prepared for a casual breakfast,

perfect crêpe technique a luxurious brunch, or a charming dinner party, crêpes offer endless opportunities for creativity. Their thin texture and slightly crispy edges provide the ideal balance to any filling, ensuring that each bite is a harmonious combination of flavors.

In France, crêpes are often enjoyed during the celebration of La Chandeleur, also known as Crêpe Day, where the tradition is to flip the crêpe with a flourish while holding a coin in the other hand for good luck. This playful and festive aspect of crêpe-making adds a charming touch to the experience.

Overall, crêpes are more than just a dish; they are a part of French culinary tradition, bringing people together to enjoy food that is simple yet refined. Whether served with a cup of coffee in the morning or as a satisfying dessert in the evening, crêpes remain a beloved treat that continues to delight people around the world.

For 10 crêpes


Preparation Time: 45 minutes
Resting Time: 2 hours
Cooking Time: 3 minutes per crêpe
Storage: Best enjoyed immediately

Equipment Needed:

  • Whisk
  • Sieve
  • Microplane Grater
  • Crêpe Pan
  • Ladle

Ingredients:

  • 100 g eggs
  • 30 g granulated sugar
  • 170 g T45 flour
  • 500 g whole milk
  • Zest of 1 orange
  • 50 g butter
  • 30 g alcohol of your choice (such as rum or Grand Marnier)
  • 30 g oil

Instructions:

  • Prepare the Batter: In a large bowl, whisk the eggs and sugar together until well combined. Gradually add the flour, sifting it in to ensure a smooth mixture. Slowly pour in the milk while whisking continuously to prevent lumps. Add the zest of the orange for a fresh citrus note. Finally, incorporate the alcohol and oil into the batter, giving it a silky, slightly runny consistency.
  • Rest the Batter: Cover the bowl with a clean cloth or plastic wrap and let the batter rest for 2 hours at room temperature. This resting time allows the flour to absorb the liquids fully, resulting in a smooth and elastic batter that yields perfect crêpes.
A glass bowl of crêpe batter resting on a countertop, lightly covered with plastic wrap, beside a whisk and a folded kitchen towel.
Letting your crêpe batter rest helps develop texture and prevents lumps—an essential step for thin, tender crêpes.
  • Cook the Crêpes: Heat a crêpe pan over medium-high heat. Lightly grease the pan with butter or oil. Pour a ladle of batter into the hot pan, swirling it to coat the bottom evenly. Cook each crêpe for about 1-2 minutes on one side, or until the edges lift and turn golden. Flip the crêpe and cook for another minute or so, until golden brown on both sides.
A golden crêpe cooking in a non-stick pan with crisp edges, just about to be flipped with a spatula.
The moment of truth: cook your crêpes over medium heat until golden, flip gently, and repeat for a flawless finish.
  • Serve Immediately: Serve your crêpes right away while they’re still warm. You can enjoy them plain, or fill them with sweet or savory ingredients of your choice.
Freshly cooked crêpes folded on a serving plate, topped with powdered sugar and garnished with berries, steaming gently.
Crêpes are best enjoyed fresh and warm—delicate, flavorful, and ready for your favorite filling.

Chef’s Tips and Tricks:

  • Prepare perfect crêpe technique the Day Before: For the best results, it’s ideal to prepare the crêpe batter the night before. This allows the ingredients to fully meld together, enhancing the flavor and achieving a smoother consistency. Additionally, the rest period ensures the batter becomes thicker and easier to work with, leading to more delicate crêpes when cooked.
  • “Culotter” the Pan: This French technique, known as culotter, involves heating a thin layer of oil (about half a centimeter) in the pan before you start cooking. Once the oil is hot, carefully remove it and wipe the pan with a paper towel. This technique helps to create a perfect, golden-brown color on your crêpes without drying them out. The result is a beautifully crisp edge with a soft, tender center, ensuring your crêpes cook evenly and don’t stick to the pan.

Conclusion:

Crêpes are much more than just a simple French dish; they embody the art of comfort food, blending tradition with endless possibilities for innovation. The batter itself is a blank canvas, where the delicate balance of eggs, flour, and milk creates the perfect texture—light, smooth, and airy—yet strong enough to hold a variety of fillings, both sweet and savory. With just a few basic ingredients, you can create something elegant enough for a special occasion or casual enough for a Sunday brunch.

The addition of orange zest and alcohol in the batter elevates this classic recipe, giving the crêpes an extra layer of flavor that transports the dish beyond ordinary pancakes. These subtle hints of citrus and richness are part of what makes crêpes such a versatile treat. Whether you are indulging in a sweet filling like Nutella and strawberries or savoring a savory combination like ham, cheese, and a drizzle of béchamel, the crêpe serves as the perfect vessel for whatever culinary direction you choose.

Cooking crêpes

perfect crêpe technique may seem intimidating at first, especially when it comes to achieving that golden, lacy edge and perfectly soft center, but with practice and patience, anyone can master this dish. The key lies in a smooth batter, proper heat management, and the right technique when flipping the crêpes. It’s a technique that, once mastered, offers infinite variations to explore, making it a rewarding recipe for anyone who enjoys cooking or hosting.

In France, perfect crêpe technique are often associated with celebrations like La Chandeleur (Crêpe Day), where the tradition of flipping crêpes symbolizes good fortune for the year ahead. In addition to their symbolic nature, crêpes have a joyful, fun aspect to them, whether you’re tossing them in the pan or experimenting with new fillings and toppings. As a shared dish, crêpes bring people together, creating moments of enjoyment around the table. Whether served at a family breakfast, a festive gathering, or as a simple dessert, they never fail to charm.

So, the next time you make crêpes, remember that you’re not just cooking a meal—you’re embracing a piece of French culinary heritage, one delicious crêpe at a time. Enjoy the process, experiment with fillings, and most of all, savor the result. There’s truly nothing like a freshly made crêpe to bring joy to your day.

Link to other French classics like:
https://briochechic.com/the-cherry-clafoutis-secret-mastering-the-perfect-tart/#more-705
Anchor: master more French pastry recipes


Question and Answer Section:

Q: Why is resting the batter so important when making crêpes?
A: Resting the batter is essential because it allows the flour to fully absorb the liquids, which helps to avoid a grainy texture in the crêpes. The resting time also gives the gluten in the flour a chance to relax, resulting in crêpes that are tender and less likely to tear during cooking. Additionally, it allows any air bubbles to settle, leading to a smoother, more even batter. This step ensures that your crêpes will have a delicate, thin texture that’s perfect for folding or filling.

Q: Can I use different types of flour in my crêpe batter?
A: Yes, you can use different types of flour, but it’s important to note that the texture and consistency of your crêpes may change depending on the flour you use. For example, T45 flour (a soft, finely milled flour) is commonly used for crêpes because it creates a soft, tender texture. However, you can experiment with other flours, such as whole wheat or buckwheat (for savory crêpes), but these will give a different flavor and texture. Just keep in mind that substitutions might require small adjustments to the liquid content of the batter to achieve the right consistency.

Q: How can I ensure my crêpes don’t stick to the pan?


A: The key to preventing perfect crêpe technique from sticking is to use a non-stick crêpe pan or skillet, and to lightly grease the pan with butter or oil. It’s important to only grease the pan once before you start cooking, and not in between crêpes. If you add too much oil or butter, the crêpes may become greasy. The pan should be at the right temperature—hot enough that the batter sizzles gently when poured in, but not so hot that it burns the crêpes.

Q: Can I make the crêpe batter ahead of time?
A: Absolutely! You can make the batter the night before and refrigerate it overnight. This actually allows the flavors to develop more fully, and the batter will have an even smoother consistency the next day. Just give it a good stir before using it the next morning. If the batter thickens too much during refrigeration, you can add a small amount of milk to thin it out to the desired consistency.

Q: What are some creative ways to fill or top my crêpes?
A: The possibilities are endless when it comes to crêpe fillings and toppings! For sweet crêpes, classic options include Nutella, fresh fruit (like strawberries or bananas), whipped cream, or a simple dusting of powdered sugar. For savory crêpes, try fillings like ham and cheese, smoked salmon and crème fraîche, or even a savory spinach and ricotta mixture. You can also drizzle crêpes with sauces like chocolate, caramel, or lemon juice for an added burst of flavor. The beauty of crêpes is their versatility—they can be made to suit any flavor preference!