You’ll Never Buy Burger Buns Again After This Recipe

Homemade hamburger buns with golden crust on a wooden table

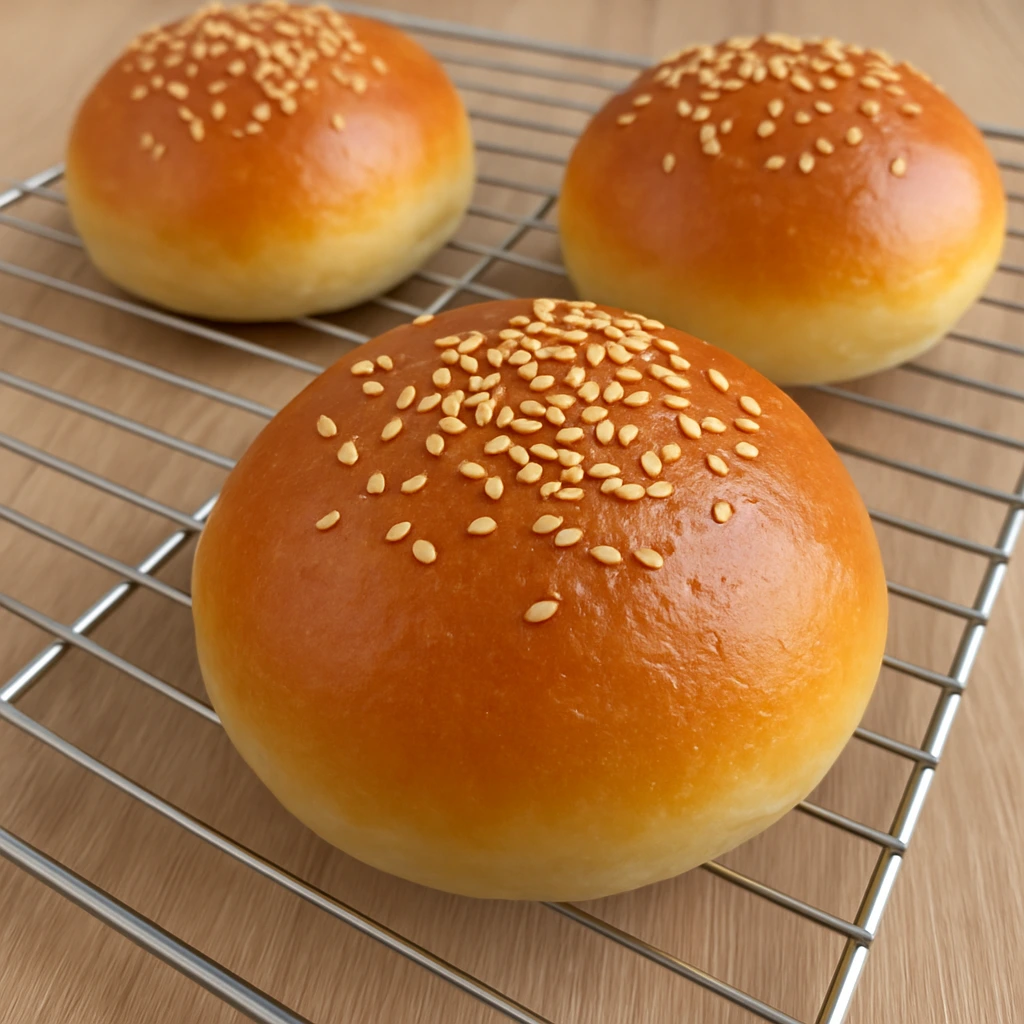
homemade hamburger buns

Soft, golden, and irresistibly fluffy — this hamburger bun is the perfect base for any gourmet burger. Its smooth, tender crumb melts in your mouth, while the light crust adds just the right amount of structure without overpowering the filling. Whether lightly toasted or served fresh, it holds together beautifully, even with juicy toppings and generous sauces.

Its subtle flavor enhances every bite, complementing meats, vegetables, and condiments alike. This bun is not just a carrier — it’s a vital part of the burger experience. From the first warm touch to the final satisfying chew, it brings comfort, elegance, and that unmistakable artisan quality to your table.

Perfect for backyard barbecues, homemade creations, or restaurant-level burgers, it elevates even the simplest ingredients into something memorable. Once you try this bun, no other will do — it’s the soft, pillowy crown your burger deserves.
Ingredients for Hamburger Buns

(Yields approx. 15–20 medium buns)

IngredientExact QuantityFunction & Notes
All-purpose flour (T45/T55)1 kgThe structure of the dough. Choose a flour with moderate-to-high gluten content for a soft yet strong bun.
Fine salt20 gEnhances flavor and regulates yeast activity. Do not mix directly with the yeast.
Fresh baker’s yeast30 gLeavens the dough and adds volume. If using dry yeast, reduce to approx. 10 g.
Water (lukewarm)400 gHydrates the dough. Ideally between 25–30°C to help activate the yeast without killing it.
Granulated sugar100 gAdds sweetness, feeds the yeast, and promotes browning during baking.
Whole eggs100 g (~2 eggs)Contribute richness, tenderness, and color. Bind the dough and enhance flavor.
Unsalted butter100 gAdds softness, a rich mouthfeel, and a light brioche flavor. Should be added cold or slightly softened at the end of kneading.

Pro Chef Tips:

Baking: Preheat oven to 180°C (356°F) and bake for 15–20 minutes depending on size, until deeply golden.

Mixing: Start slow, then knead at medium speed until the dough is smooth and elastic. Gluten development is key.

Butter incorporation: Add butter after the dough is well-formed, so it doesn’t hinder gluten structure. Add it in small chunks.

First rise (bulk fermentation): Let the dough rise at room temperature for 1.5 to 2 hours, or until doubled in size.

Shaping: Divide into balls of 80–100 g each for standard buns. Keep the tops smooth.

Second rise (proofing): Let the shaped buns rise for another 45 minutes to 1 hour.

Egg wash: Brush with beaten egg before baking for a shiny, golden finish.

Complete Hamburger Bun Recipe (Brioche Style)

Total Time: ~3.5 to 4 hours

Active time: 45 mins | Resting & proofing: ~3 hours
Baking time: 15–20 minutes


1. Prepare the Dough

In a stand mixer bowl (or large mixing bowl):

  1. Add 1 kg flour.
  2. Add 100 g sugar and 20 g salt on opposite sides of the bowl.
  3. Crumble 30 g fresh yeast (or 10 g dry yeast) into the center.
  4. Pour in 400 g lukewarm water (25–30°C).
  5. Add 100 g whole eggs (about 2 large eggs).

Mix on low speed for 4–5 minutes until a rough dough forms.


🧈 2. Add Butter (Final Kneading)

  1. Cut 100 g unsalted butter into small pieces (cold or soft).
  2. Add the butter slowly while kneading on medium speed.
  3. Continue kneading for 10–15 minutes, until the dough is smooth, stretchy, and not sticky.
    You should be able to stretch it gently without tearing (windowpane test).

3. First Rise (Bulk Fermentation)

  1. Cover the dough with a clean cloth or plastic wrap.
  2. Let it rise at room temperature for 1.5 to 2 hours, or until doubled in size.
    (Optional: Place in a slightly warm oven – 28–30°C – to speed up rising.)

4. Shaping the Buns

  1. Punch down the dough gently to remove excess gas.
  2. Divide into 80–100 g portions (for standard burger size).
  3. Shape into tight, smooth balls by folding the edges underneath.
  4. Place them on a tray lined with parchment paper, spacing them apart.

5. Final Proofing (Second Rise)

  1. Cover the buns lightly with a cloth.
  2. Let them rise again for 45 minutes to 1 hour, or until puffy and light.

6. Egg Wash + Optional Toppings

  1. Brush each bun gently with beaten egg (1 egg + pinch of salt).
  2. Optional: Sprinkle with sesame seeds, poppy seeds, or oats for decoration.

7. Baking

  1. Preheat oven to 180°C (356°F).
  2. Bake the buns for 15 to 20 minutes, or until golden brown on top and hollow-sounding when tapped underneath.
  3. Let cool on a rack before slicing.

Storage Tips

  • Store in an airtight container for up to 3 days at room temperature.
  • Can be frozen up to 2 months — wrap individually and reheat slightly before serving.

Conclusion

Making your own hamburger buns is more than just baking — it’s elevating your burgers from ordinary to unforgettable. These soft, golden, brioche-style buns offer the perfect balance of texture, flavor, and structure. Whether you’re hosting a BBQ, building a gourmet burger, or simply craving bakery-quality bread at home, this recipe delivers every time.

Once you taste the result, you’ll never go back to store-bought buns again. Soft inside, slightly crisp on the outside, and full of rich flavor — your burgers deserve nothing less.


Frequently Asked Questions (Q&A)

Q: Can I use dry yeast instead of fresh yeast?

A: Yes! Use about 10–11 g of dry yeast in place of 30 g of fresh yeast. Mix it directly with the flour.


Q: Can I use milk instead of water?

A: Absolutely. Milk will make the crumb even softer and slightly sweeter. Use the same amount (400 g).


Q: How do I make the buns shinier on top?

A: Brush them with egg wash before baking. For an extra glossy look, apply a second layer halfway through baking.


Q: Can I make the dough ahead of time?

A: Yes! After kneading, cover and refrigerate the dough overnight. Let it warm up 30–60 minutes before shaping.


Q: How long can I freeze them?

A: Once baked and cooled, freeze buns for up to 2 months. Reheat slightly before serving for best texture.

https://briochechic.com/perfect-homemade-donuts/. What is Gluten and Why It Matters in Baking – King Arthur Baking

The Chef’s Secret to Ultra-Soft Chocolate Babka with a Beautiful Glaze

Babka dough rolled with chocolate hazelnut spread

chocolate hazelnut babka

Babka is a rich, sweet, and beautifully twisted yeast cake that has captured the hearts of pastry lovers around the world. Originally from Eastern Europe, particularly Poland and Ukraine, this brioche-like bread was traditionally baked for festive occasions and family gatherings.

What makes Babka truly irresistible is its intricate swirls of filling—most often chocolate, cinnamon, or nut pastes—woven into soft, buttery layers. Its distinctive braided shape not only looks stunning but also ensures every bite is laced with flavor.

Today, Babka has evolved beyond its traditional form, inspiring modern bakers to experiment with creative fillings, glazes, and toppings. Whether enjoyed for breakfast, dessert, or an afternoon treat, Babka is more than just a pastry—it’s a celebration of culture, craftsmanship, and indulgence.

Babka Dough Recipe

Total dough weight: 500 g

Ingredients (Baker’s Percentages)

  • All-purpose flour (13–15% protein): 115 g – 23%
  • Flour: 115 g – 23%
  • Sugar: 35 g – 7%
  • Salt: 6 g – 1%
  • Fresh yeast: 13 g – 2%
  • Milk (2.5% fat): 46 g – 9%
  • Whole eggs: 77 g – 16%
  • Butter (82% fat): 93 g – 19%

Tip: Place all ingredients in the refrigerator the night before preparation.


Method

  1. Initial Mixing:
    In the bowl of a stand mixer fitted with a dough hook, combine the sifted flour, sugar, salt, milk, eggs, and fresh yeast. Mix on low speed for 5 minutes until a rough dough forms.
  2. Kneading:
    Increase the speed and knead the dough for 12 to 15 minutes until it becomes smooth and elastic. The final dough temperature should be 24–25 °C (75–77 °F).
  3. Incorporate Butter:
    Cut the chilled butter into small cubes and gradually add it to the dough. Continue kneading until all the butter is fully incorporated.
  4. Shape:
    Transfer the dough onto a silicone mat or lightly floured surface. Shape it into a square using your hands.
  5. Fermentation:
    Cover the dough with cling film, ensuring it touches the surface to prevent skin formation. Place in the refrigerator for 12 hours to ferment slowly.

Chocolate–Hazelnut Spread

Total weight: 150 g

Ingredients (Equal Parts – 33% Each)

  • Hazelnuts: 50 g
  • Icing sugar: 50 g
  • Dark chocolate (Valrhona Caraïbe 66%): 50 g

Method

  1. Toast the Hazelnuts:
    Preheat a convection oven to 150 °C (302 °F). Spread the hazelnuts on a tray and toast for 15 minutes. Let them cool completely.
  2. Make the Nut Paste:
    Place the cooled hazelnuts and icing sugar in a food processor. Blend until the mixture becomes a smooth paste — this may take a few minutes depending on your processor’s power.
  3. Melt the Chocolate:
    Gently melt the dark chocolate to 45 °C (113 °F), either over a bain-marie or in short bursts in the microwave.
  4. Combine:
    Pour the melted chocolate into the hazelnut paste and blend again until fully combined and silky smooth.
  5. Storage:
    Transfer the spread to an airtight container and refrigerate. It will keep well for up to 7 days.

Arabic Gum Glaze

Total weight: 147 g

Ingredients (Baker’s Percentages)

  • Water: 56 g – 38%
  • Brown sugar: 56 g – 38%
  • Glucose or corn syrup: 25 g – 17%
  • Arabic gum: 10 g – 7%

Method

  1. Heat the Mixture:
    In a small saucepan, combine the glucose (or corn syrup), water, brown sugar, and Arabic gum. Place over medium heat and stir continuously with a spatula until everything is fully dissolved.
  2. Blend the Glaze:
    Remove the pan from the heat and transfer the mixture to a measuring cup. Use a hand blender to process until smooth and homogeneous.
  3. Strain and Cool:
    Pass the glaze through a fine sieve into a clean bowl. Let it cool to room temperature.
  4. Storage:
    Cover with cling film directly touching the surface and keep at room temperature until ready to use.

Assembly & Glazing of the Babka

Ingredients for Assembly

  • Stabilized babka dough (prepared and rested overnight)
  • Chocolate–hazelnut spread: 40 g
  • Arabic gum glaze: 30 g
  • Butter (82% fat): for greasing the mold (approx. 10 g)
  • Chopped hazelnuts: as needed
  • Dark chocolate callets (Valrhona Caraïbe 66%): as needed

Method

  1. Warm the Filling:
    Gently heat the chocolate–hazelnut spread to 35 °C (95 °F) so it becomes easy to spread.
  2. Roll Out the Dough:
    Take the chilled dough out of the fridge and roll it between two sheets of parchment paper into a rectangle approximately 3 mm thick and 30 cm wide.
  3. Spread & Sprinkle:
    Remove the top sheet of parchment. Using an offset spatula, spread the chocolate–hazelnut filling evenly across the dough. Sprinkle with chopped hazelnuts and dark chocolate callets.
  4. Roll the Dough:
    Starting from the long edge, carefully roll the dough into a tight log, peeling it gently away from the parchment paper.
  5. Cut & Braid:
    With a sharp knife, cut the roll lengthwise into two long halves. With the cut sides facing upward, twist the two strands together, starting from the center. Be gentle to avoid overstretching the dough.
  6. Prepare the Mold:
    Grease a loaf pan (size: 8 × 23 × 8 cm) with butter. Place the braided dough into the mold.
  7. Proof:
    Cover the dough loosely with cling film and proof in a warm place or proofer at 26 °C (79 °F) for 2.5 to 3 hours, until puffed.
  8. Bake:
    Preheat a convection oven to 155 °C (311 °F). Remove the cling film and bake for about 35 minutes, turning the pan halfway through (after 20 minutes) for even coloring.
  9. Glaze While Hot:
    Carefully unmold the baked babka and immediately brush it with Arabic gum glaze while still hot for a beautiful shine.
  10. Cool & Serve:
    Allow the babka to cool at room temperature. It is best served the same day, when the texture and flavor are at their peak.

Braiding chocolate babka step by step
Warning: This Chocolate Babka Is Dangerously Addictive (You’ve Been Warned!)

Conclusion: The Beauty of Babka, Layer by Layer

There’s something undeniably captivating about Babka. From the moment you roll out the dough to the final brush of glossy Arabic gum glaze, this pastry embodies both technique and indulgence. Every layer tells a story: of warm hazelnuts, silky chocolate, and a dough so tender it practically melts on the tongue.

Baking Babka isn’t just about the result — it’s about the process. The overnight fermentation, the careful braiding, the rich filling — each step is an invitation to slow down and appreciate the craft of baking. Whether you’re making it for a holiday, a family gathering, or just to celebrate a quiet morning at home, this Babka promises both elegance and comfort.

So the next time you want to impress, surprise, or simply treat yourself — let Babka be your signature bake.


Questions & Answers: Your Babka, Perfected

Q: Can I make the dough ahead of time?
A: Yes! In fact, this recipe is designed for it. The dough is refrigerated overnight to develop flavor and structure, making it easier to work with and richer in taste.

Q: What if I don’t have Valrhona chocolate?
A: You can use any high-quality dark chocolate, ideally around 66–70% cocoa. The key is to choose a chocolate that melts smoothly and balances sweetness with a deep cocoa flavor.

Q: Can I swap the hazelnuts for another nut?
A: Absolutely. Almonds, pecans, or even pistachios work wonderfully. Just toast them and chop coarsely before adding them to the filling.

Q: How do I know when my Babka is fully baked?
A: Look for a deep golden color and a slightly firm top. You can also insert a skewer in the center — it should come out clean or with just a few moist crumbs.

Q: Can I freeze Babka?
A: Yes, once baked and completely cooled, wrap it tightly in cling film and freeze for up to one month. Thaw at room temperature and rewarm slightly before serving.

Q: What does the Arabic gum glaze add?
A: It gives the Babka a professional finish — a glossy sheen and a lightly tacky surface that enhances both look and texture, without overwhelming the flavor.Link to: [Your brioche recipe post or glossary of baking terms]Valrhona Caraïbe 66% – Official Page
👉 https://www.valrhona-chocolate.com/en/our-products/caraibe-66

Golden, Buttery, and Filled with Fall: Meet the Most Elegant Turnover Ever

Golden-brown cherry and chestnut turnovers with flaky puff pastry on a rustic wooden board

cherry chestnut turnovers

Delicate, flaky, and richly evocative of French patisserie, the Chausson Griottes et Marron is a pastry that tells a story with every bite — one of crisp morning air, golden leaves, and the comforting indulgence of fall flavors. Wrapped in a tender, buttery puff pastry, this refined turnover blends the tart intensity of griottes (sour cherries) with the sweet earthiness of chestnut — a timeless pairing that has delighted palates for generations.

Each chausson offers a harmonious contrast of textures: the crunch of golden layers giving way to a soft, luxurious filling that is both bright and velvety. It’s not just a dessert — it’s a moment of seasonal poetry on a plate. Traditionally enjoyed warm with a dusting of powdered sugar, this French classic is perfect for autumnal gatherings, a chic afternoon tea, or an elegant brunch table.

Whether you serve it with a dollop of crème fraîche, a drizzle of syrup, or enjoy it as is with a cup of black tea, the Chausson Griottes et Marron captures the soul of rustic sophistication. It’s a pastry for those who appreciate balance — where bold fruit meets creamy comfort, and tradition meets finesse.

Sour Cherry & Chestnut Turnovers (Chaussons Griottes et Marron)

Serves: 6
Prep Time: 45 minutes (excluding base recipes)
Resting Time: 1 night + 1 hour
Baking Time: 30 minutes


Main Dough

  • 500 g of inverted puff pastry
  • 1 whole egg, for egg wash

Cherry & Chestnut Filling

  • 275 g of chestnut cream (canned)
  • 70 g of chestnut paste (canned)
  • 140 g of amarena cherry jam
  • 2 tablespoons of Armagnac (approx. 12 g)
  • 1 vanilla bean
  • A pinch of fleur de sel (approx. 1 g)

Step 1 – The Day Before: Prepare the Inverted Puff Pastry

Make the inverted puff pastry according to the recipe.

Roll the dough out very thinly to a thickness of about 1.5 mm. Prick it all over with a fork to prevent puffing. Then, using an oval pastry cutter — or, if unavailable, a dessert plate and a sharp knife — cut out six oval discs of approximately 15 cm in diameter each (about 100 g per piece).

Cover the cut-outs with plastic wrap and refrigerate overnight to rest and firm up.


Homemade Amarena Cherry Jam

(Perfect for refined pastries like chaussons, tarts, or as a topping for ice cream)


Prepare the day before

Ingredients:

  • Amarena cherries (fresh or jarred, pitted)
  • Sugar
  • Lemon juice
  • A dash of the cherry syrup (if using jarred amarena)
  • Optional: a few drops of almond extract for depth

Instructions:

Cool and store:
Let cool slightly, then transfer to a jar. Keep refrigerated until ready to use.

Macerate the cherries:
In a bowl, combine the cherries with an equal weight of sugar. Add a splash of lemon juice and a little of their own syrup (if using jarred amarena cherries). Let the mixture sit overnight in the fridge to macerate and draw out the juices.

Cook the jam:
The next day, transfer the mixture to a saucepan. Bring to a gentle boil over medium heat, then lower to a simmer. Skim off any foam. Cook until the jam thickens slightly and the cherries become glossy and rich — about 20–25 minutes. Stir regularly.

Check the consistency:
To test, place a drop on a cold plate. If it wrinkles slightly when pushed, it’s ready. The jam should remain spoonable, not too stiff.

Step 3 – The Same Day: Prepare the Cherry & Chestnut Compote

In a bowl, combine all the filling ingredients. Split the vanilla bean lengthwise, scrape out the seeds, and add them to the mixture. Stir until everything is evenly blended into a smooth, aromatic compote.


Step 4 – Assemble the Turnovers

Using a pastry brush, lightly moisten half the edge of each puff pastry disc with water.

Spoon about 70 grams of the cherry and chestnut compote onto one half of each disc. Spread it evenly, leaving about 5 mm of space from the edge.

Fold the pastry over the filling to create a turnover, carefully aligning the edges and pressing them together to seal tightly.

Brush the surface of each turnover with beaten egg. Place them in the refrigerator for 1 hour to rest.

After chilling, brush the turnovers a second time with the egg wash.

Bake in a preheated oven at 170°C (340°F) for 30 minutes, or until beautifully golden.

Let cool slightly before serving. These turnovers are best enjoyed warm or at room temperature, but never hot, to allow the flavors to fully express themselves.

Conclusion: A Seasonal Masterpiece in Every Bite

The Chaussons Griottes et Marron are more than just pastries — they are a celebration of autumn’s most comforting flavors and a testament to French patisserie’s ability to marry texture, balance, and finesse. Each bite delivers the gentle warmth of chestnut, the bright intensity of sour cherries, and the delicate crunch of golden puff pastry — a contrast that feels both luxurious and nostalgic.

While the recipe requires patience and care — from the resting times to the delicate assembly — the final result is well worth the effort. These turnovers are ideal for impressing guests at a holiday table, elevating a casual afternoon tea, or simply indulging in a moment of seasonal refinement at home.

Let them rest just enough before serving, allowing their aroma to unfold and their filling to settle. Paired with a lightly sweetened crème fraîche or a drizzle of cherry syrup, these turnovers bring out the essence of French countryside elegance — rustic yet refined, familiar yet elevated.The Secret to Perfect Puff Pastry at Home


Frequently Asked Questions (Q&A)

Q: Can I use store-bought puff pastry instead of making inverted puff pastry?
A: Yes — while inverted puff pastry gives an unbeatable flakiness, high-quality store-bought puff pastry can be used as a time-saving alternative. Choose an all-butter variety for the best results.

Q: Can I substitute the amarena cherry jam?
A: You can use any high-quality sour cherry or black cherry jam, though amarena offers a distinctive depth and syrupy richness. A touch of lemon juice or kirsch can help mimic the original flavor if needed.

Q: How long can I store the turnovers?
A: Once baked and cooled, they keep well in an airtight container for up to 2 days at room temperature. Reheat gently in a low oven before serving.

Q: Can I freeze the unbaked turnovers?
A: Absolutely. Assemble the turnovers, freeze them on a tray until firm, then store them in freezer bags. Bake directly from frozen, adding a few extra minutes to the baking time.

Q: What can I serve with them?
A: These pair beautifully with crème fraîche, whipped cream lightly infused with vanilla, or even a scoop of roasted chestnut gelato. For a drink, consider a glass of sweet wine or black tea.What Are Amarena Cherries? – Saveur Magazine

2 Secret Wheel: Mastering the Paris-Brest Like a Pastry Chef

Close-up of a traditional Paris-Brest pastry, filled with praline mousseline cream and dusted with icing sugar

Paris-Brest recipe

Among the many jewels of French pâtisserie, few desserts command such quiet awe as the Paris-Brest. With its delicate balance of textures and its rich, nutty depth, this ring-shaped creation has long been revered by pastry lovers—not only for its bold, wheel-like silhouette but for the sheer elegance of its flavor.

Born from a playful nod to the Paris–Brest–Paris bicycle race in the early 20th century, this dessert has become a lasting symbol of French creativity and technical finesse. Shaped like a bicycle wheel, the Paris-Brest is made from a light choux pastry—golden, crisp on the outside, and tender within—split open and lavishly filled with an irresistibly smooth, praline-infused cream. Its form may seem whimsical, but its execution is anything but: every element must be precise, from the piping of the dough to the silky emulsion of the cream.

What makes the Paris-Brest truly unforgettable is its filling—a rich mousseline or buttercream deeply flavored with hazelnut or almond praline. It is both generous and refined, offering a nutty warmth that lingers long after the first bite. The choux shell provides just enough structure to contrast with the creamy heart, creating a balance that is neither too heavy nor too sweet. Often crowned with a dusting of powdered sugar or toasted almonds, the final touch brings both texture and visual charm.

This dessert is a favorite of pâtissiers for a reason: it showcases technical mastery while inviting creative interpretation. Some keep it traditional; others elevate it with modern twists—hazelnut gianduja, salted caramel, or even crisp inserts hidden within the cream. Yet, even in its most classic form, the Paris-Brest never fails to impress.

Served chilled, each slice is an invitation into a world where airiness meets decadence, and tradition meets invention. It’s the kind of dessert that turns heads in a pastry shop display, and once tasted, leaves a memory that lingers like a fine perfume.

The Paris-Brest is not just a dessert—it is a celebration of craftsmanship, history, and that uniquely French ability to transform the simple into the sublime .https://briochechic.com/pate-a-choux-step-by-steptep

Paris-Brest Recipe Sheet

Yield: Serves 8
Preparation time: 1 hour 30 minutes
Baking time: 45 minutes
Storage: Up to 48 hours in the refrigerator


Equipment

  • Fine-mesh sieve
  • Piping bags
  • 15 mm plain piping tip
  • Fluted piping tip
  • Pastry brush
  • Whisk
  • Electric mixer or stand mixer

Ingredients

Toasted Almonds

  • Sufficient quantity of flaked almonds (for topping before baking)

Choux Pastry

  • 250 g water
  • 3 g fine salt
  • 5 g sugar
  • 100 g unsalted butter
  • 150 g all-purpose flour
  • 250 g whole eggs (approx. 5 eggs)

Egg Wash

  • 50 g whole egg
  • 50 g egg yolks

Pastry Cream

  • 350 g whole milk
  • 60 g whole eggs
  • 50 g sugar
  • 35 g pastry cream powder (or cornstarch as an alternative)

Praliné Mousseline Cream

(To be made using the pastry cream above)

  • 500 g pastry cream
  • 150 g unsalted butter, softened (beurre pommade)
  • 25 g hazelnut paste
  • 150 g praline paste (hazelnut or mixed almond-hazelnut)

Finishing

  • Sufficient quantity of icing sugar (for dusting the finished pastry)

Choux Pastry – Preparation and Piping for Paris-Brest

Choux Pastry Recipe

Ingredients:

  • 250 g water
  • 3 g fine salt
  • 5 g sugar
  • 100 g unsalted butter
  • 150 g all-purpose flour
  • 250 g whole eggs (approx. 5 eggs, beaten and strained)

Method:

  1. In a medium saucepan, bring the water, salt, sugar, and butter to a full boil. Stir occasionally to ensure the butter is completely melted before boiling.
  2. Remove from heat, add the sifted flour all at once, and stir vigorously with a wooden spoon or spatula until the mixture forms a smooth dough that pulls away from the sides of the pan.
  3. Return the pan to medium heat, and dry the dough for 1–2 minutes, stirring constantly, until a thin film forms at the bottom of the pan.
  4. Transfer the dough to a mixing bowl or stand mixer. Allow it to cool slightly (around 5 minutes).
  5. Add the beaten eggs gradually, mixing well between each addition until the dough is smooth, shiny, and holds a soft peak when lifted. The final texture should be supple, not runny.

Piping and Baking the Paris-Brest

  1. Transfer the choux pastry into a piping bag fitted with a 15 mm plain round tip.
  2. On a baking sheet lined with parchment paper or a perforated silicone mat, pipe the first ring: a circle of about 18 cm in diameter.
  3. Pipe a second ring inside the first one, very close to it.
  4. Pipe a third ring directly on top, over the seam where the first two touch.
  5. Sprinkle the surface evenly with flaked almonds.
  6. Pipe a separate, single ring of 16 to 17 cm diameter — this will be used as the inner base during assembly.
  7. Bake at 180°C (350°F) for approximately 45 minutes, or until the crown is puffed and golden. Do not open the oven during the first 30 minutes.
  8. Let cool completely before slicing or filling.

Conclusion – A Crown of Tradition and Technique

The Paris-Brest recipe is more than just a dessert—it is a triumph of French pâtisserie that blends tradition, precision, and indulgence into a single, breathtaking creation. From the airy resilience of its choux pastry to the velvety depth of the praline mousseline cream, each element demands care and craft, patience and passion.

Behind its iconic wheel-shaped silhouette lies a story: one that began as a tribute to a cycling race and evolved into a masterpiece savored in the grand salons of Paris and the quiet corners of home kitchens. Reproducing this pastry isn’t simply about following a recipe—it’s about learning to balance heat and humidity, strength and softness, richness and restraint.

Whether you are a seasoned baker or embarking on your first Paris-Brest, the reward is immense. The moment the knife glides through the crisp crown, revealing generous swirls of praline cream, you understand why this dessert has stood the test of time. It’s not only the taste that lingers—it’s the sense of accomplishment, the elegance of the process, and the timeless beauty of French culinary art.

So, let this be more than just another recipe in your collection. Let it be a milestone—a reminder that with the right tools, the right guidance, and a touch of daring, even the most iconic creations are within reach. And above all, that in pastry as in life, it’s the journey toward perfection that brings the deepest pleasure.https://www.philippeconticini.fr/

Paris-Brest: Questions & Answers

Q: Can I make the Paris-Brest in advance?

A: Yes, you can prepare most components ahead of time. The choux crown can be baked the day before and stored in an airtight container once cooled. The praline mousseline cream should also be made in advance and kept refrigerated. Assemble the Paris-Brest on the day of serving for optimal texture and freshness.


Q: How long does it keep in the fridge once assembled?

A: The finished Paris-Brest keeps well for up to 48 hours in the refrigerator. However, for the best flavor and texture—especially the crispness of the choux—it is recommended to enjoy it within 24 hours of assembly.


Q: Can I freeze it?

A: You can freeze the choux pastry alone, either baked or unbaked (piped and frozen raw, then baked straight from frozen). However, the assembled Paris-Brest is not ideal for freezing, as the mousseline cream may split and the texture will suffer upon thawing.


Q: Can I replace the praline with another flavor?

A: Absolutely. While hazelnut praline is traditional, you can substitute it with almond praline, pistachio paste, or even incorporate coffee or salted caramel for a contemporary twist. Just be sure to maintain the cream’s texture and balance the sweetness accordingly.


Q: My choux pastry collapsed after baking. What went wrong?

A: The most common causes are undercooking or opening the oven too early, which releases steam before the structure has set. Make sure to bake at the correct temperature, and never open the oven during the first 30 minutes. The choux should be deep golden and feel hollow when gently tapped.


Q: Is it possible to make mini Paris-Brests for individual servings?

A: Yes, and they are stunning! Simply pipe smaller rings—about 6–8 cm in diameter—and adjust the baking time accordingly (typically 25–30 minutes). Mini Paris-Brests are perfect for elegant plating or buffet-style desserts.

3 Secret Recipe : The Art of the Brioche Tartlet Masterpiece

Close-up of a golden brioche tartlet topped with glossy Italian meringue and toasted almond slices, with visible layers of syrup-soaked brioche and creamy pastry filling.

brioche tartlet recipe

Polonaise is a timeless culinary preparation that brings a touch of elegance and warmth to the table, beloved across generations for its simple yet sophisticated charm. At its heart, it embodies the perfect marriage between fresh, tender vegetables and a luxurious finishing touch that transforms everyday ingredients into a celebration of texture and flavor.

Imagine freshly cooked vegetables—often tender, vibrant, and gently steaming—waiting patiently to be dressed in a sumptuous sauce that is both rich and nuanced. The Polonaise style introduces a harmonious blend of buttery richness, the subtle crunch of toasted breadcrumbs or nuts, and a delicate hint of bright, fresh herbs, all united by a subtle acidity that lifts the dish beyond mere comfort food.

What makes this preparation

so special is its ability to elevate humble vegetables, such as cauliflower, green beans, or asparagus, transforming them from simple sides into the centerpiece of any meal. The warm, nutty breadcrumbs add a golden, crisp texture that contrasts beautifully with the softness of the vegetables, creating a sensory experience that is both satisfying and refined.

The essence

of Polonaise lies not only in its flavors but also in its symbolism—a dish that celebrates freshness, care, and the art of finishing touches. It is often associated with convivial family meals, holiday gatherings, or elegant dinner parties where every detail matters. This dish invites diners to slow down and appreciate the nuances of simple ingredients, expertly brought together through a thoughtful balance of texture, aroma, and taste.

Serving Polonaise is like offering a warm embrace on the plate—comforting yet sophisticated, familiar yet elevated. Its rich history and timeless appeal make it a favorite that continues to inspire cooks and diners alike, proving that with the right approach, even the simplest vegetables can be transformed into something truly memorable.

Want to learn pâte levée? Start with our Classic Brioche Guide.

recipe details

For 12 people

Preparation time: 3 hours
First rise (pointage): 30 minutes
Refrigeration: 2 hours
Freezing: 1 hour
Baking time: 40 minutes
Storage: Up to 48 hours

Equipment:

  • Stand mixer
  • Pastry scraper
  • 6 brioche molds
  • Whisk
  • Sieve
  • Rolling pin
  • 6 tartlet molds (7 cm diameter)
  • Thermometer
  • Piping bag without tip
  • Fine mesh strainer

Ingredients:

  • 20 g candied fruit or rum-soaked raisins

Brioche dough:

  • 250 g all-purpose flour (type T45)
  • 5 g salt
  • 30 g sugar
  • 15 g fresh yeast
  • 150 g eggs
  • 130 g butter

Sweet pastry dough (pâte sucrée):

  • 250 g flour
  • 100 g butter
  • 100 g powdered sugar
  • 2 g salt
  • 60 g eggs

Syrup (112°D):

  • 1000 g water
  • 500 g sugar
  • Sufficient amount of orange zest
  • 100 g kirsch

Pastry cream:

  • 250 g milk
  • 50 g eggs
  • 50 g sugar
  • 12.5 g flour
  • 12.5 g custard powder (flan powder)

Italian meringue:

  • 100 g egg whites
  • 200 g cooked sugar syrup

Finishing:

  • Sufficient quantity of sliced almonds
  • Sufficient quantity of powdered sugar

Brioche (Short Recipe)

Mix flour, sugar, salt, fresh yeast, eggs, and softened butter until smooth and elastic. Let the dough rise until doubled in size. Shape into small brioche forms and bake at 210°C (410°F) for about 15 minutes. Once cooled, slice into pieces.


Sweet Pastry Dough (Pâte Sucrée) – Short Recipe

Cream butter and powdered sugar together until smooth. Add eggs and mix well. Incorporate flour and salt, knead gently until just combined. Chill the dough before rolling out.

Roll the dough to 3 mm thickness, cut into 8 cm diameter disks. Line tartlet molds with the dough and bake blind at 180°C (350°F) for 20 minutes. Set aside.


Syrup Preparation

Boil water, sugar, and orange zest to make a syrup. Remove from heat, add kirsch, and cool to about 60°C (140°F). Dip brioche slices briefly into the warm syrup, then drain on a rack.


Pastry Cream (Short Recipe)

Heat milk until just boiling. In a bowl, whisk eggs, sugar, flour, and custard powder until smooth. Slowly pour hot milk into the egg mixture while whisking. Return to heat and cook gently, stirring constantly until thickened. Cool before piping.


Assembly

Fill tartlet shells with pastry cream. Scatter some rum-soaked raisins over the cream. Place a syrup-dipped brioche slice on top. Pipe more pastry cream over the brioche slice to finish.

Prepare the brioches:
Bake them at 210°C (410°F) for 15 minutes. Once cooled, slice them into pieces.

Prepare the sweet pastry dough:
Roll the dough out to 3 mm thickness, cut out 8 cm diameter discs, and line tartlet molds with them. Blind bake at 180°C (350°F) for 20 minutes, then set aside.

Close-up of smooth, pale yellow sweet pastry dough rolled out on a floured surface, ready to be cut into shapes.
Rolling out perfectly smooth sweet pastry dough to a precise thickness, the essential base for delicate tartlets and refined desserts.

Prepare the syrup:
Make a syrup by boiling water, sugar, and orange zest. Remove from heat, add kirsch, and wait until the syrup cools to about 60°C (140°F). Dip the brioche slices briefly into the syrup, then drain on a rack.

A small saucepan with simmering golden syrup infused with orange zest, ready to be removed from heat.
A fragrant syrup made by boiling water, sugar, and orange zest, then enriched with kirsch to soak and flavor brioche slices beautifully.

Prepare the pastry cream:
Let the pastry cream cool before transferring it to a piping bag. Fill the tartlet shells with cream. Scatter some rum-soaked raisins over the cream. Place a syrup-soaked brioche slice on top. Pipe more pastry cream over the brioche slice, then add more raisins. Repeat the layering, and finally, place the top “hat” of the brioche on it. Freeze for 1 hour.

A glossy, pale yellow bowl of freshly cooked pastry cream, ready to be piped into tart shells.
Velvety pastry cream made by gently cooking eggs, sugar, milk, and flour into a smooth, rich custard—perfect for filling tarts and pastries.

Prepare the Italian meringue:
Insert the tip of a knife beneath the brioche part of the tartlet and dip that portion carefully into a bowl of Italian meringue. Be careful not to cover the entire tartlet with meringue. Sprinkle sliced almonds over the exposed meringue.

A glossy, stiff Italian meringue in a mixing bowl, with a glossy sheen and firm peaks.
Light and glossy Italian meringue made by slowly incorporating hot sugar syrup into whipped egg whites, perfect for topping delicate pastries.

Conclusion

This delicate assembly of syrup-soaked brioche, silky pastry cream, and crisp sweet pastry shells is a true celebration of texture and flavor. The subtle infusion of kirsch in the syrup adds a refined aromatic note that complements the richness of the brioche and the smooth creaminess of the custard. The layered raisins, soaked to perfection, bring bursts of sweetness and complexity with every bite. The final touch of Italian meringue, lightly kissed with toasted almond slices, offers a gentle crunch and a hint of sweetness that balances the dessert perfectly.

This dessert is as visually striking as it is delicious, showcasing the harmony of traditional French pastry techniques and thoughtful ingredient pairing. The preparation, while detailed, invites patience and care, rewarding you with a sophisticated creation that will impress at any gathering or special occasion. Moreover, the option to freeze the tartlets before finishing with meringue allows you flexibility in timing, making it ideal for both planned events and last-minute indulgences.

Whether served at a formal dinner or as a luxurious treat to elevate your afternoon tea, this dessert embodies elegance and comfort simultaneously. It invites the savoring of each component, encouraging mindfulness in enjoying every bite. Taking the time to prepare this will surely deepen your appreciation for the artistry of French patisserie and the joy of homemade delicacies.he brioche tartlet has roots in traditional French baking — learn more from Institut Paul Bocuse


Frequently Asked Questions

Q: Can I prepare this dessert in advance?
A: Absolutely! You can prepare the brioche, pastry shells, syrup, and pastry cream ahead of time. The tartlets can be assembled and frozen for up to 24 hours before finishing with the Italian meringue. This makes it perfect for planning ahead without compromising freshness or quality.

Q: What if I don’t have kirsch?
A: You can substitute kirsch with another clear fruit brandy, such as eau-de-vie or a mild cherry liqueur. If you prefer a non-alcoholic version, try using orange blossom water or a splash of fresh orange juice to complement the citrus zest in the syrup.

Q: How can I make sure my brioche is soft and tender?
A: Use fresh ingredients and ensure the dough is well kneaded for gluten development. Allow ample time for the dough to rise in a warm, draft-free environment. Adding enough butter contributes to a tender crumb, while baking at the right temperature ensures a golden crust without drying the interior.

Q: Can I replace the raisins with other dried fruits?
A: Certainly! Dried cherries, cranberries, or chopped apricots soaked in rum or another spirit of your choice will add delightful variations while maintaining the moist texture and flavor contrast.

Q: How do I achieve a smooth, glossy Italian meringue?
A: Slowly pour hot sugar syrup into whisked egg whites while continuing to whip at medium speed. Whip until the mixture cools and forms stiff, glossy peaks. Use fresh eggs and a clean mixing bowl for best results.

Just in 10 Minutes: The Ultimate Trio Dip with Golden Twists & Crispy Toasts

Golden puff pastry twists, grilled bread toasts, and a creamy dip on a serving board.

trio dip recipe

Imagine the moment just before your guests arrive: the table set, the light low, and the air scented with something buttery and faintly smoky.

At the center of it all lies a generous bowl of creamy, luxurious dip—warm, inviting, and impossibly smooth.

Surrounding it, like golden sunrays, are puff pastry twists: each one hand-rolled and baked to a perfect crisp, their flaky layers catching the light and snapping gently between the fingers.

Next to them, an assortment of miniature toasts, lightly grilled, brushed with olive oil and coaxed to the very edge of caramelization.

These aren’t just accompaniments. They are characters in their own right—grilled to bring out rustic depth, twisted to add whimsy, and prepared to cradle the dip with texture and grace.

The contrast of warm crunch and silken dip creates a bite that is at once simple and refined. Whether dipped, scooped, or elegantly broken, each element invites you to linger a little longer at the table.

This is not an appetizer. It’s an overture. A quiet but confident beginning that sets the stage for what’s to come: shared stories, good wine, and laughter that fills the room.

“For best results, try our Quick Puff Pastry from Scratch for those golden twists!”

Ingredients for 6 to 8 guests:

  • 2 packs of puff pastry twists.
    Choose high-quality puff pastry twists, preferably those made with real butter for optimal flavor and flakiness.
  • These will serve as the primary dippers, offering a golden, crispy contrast to the creaminess of the dip.
  • 1 pack of mini toasted breads
    Select a variety of finely sliced miniature toasts or crostini. Ideally, they should be gently grilled or oven-toasted to achieve a delicate crunch without being too hard. These will complement the puff pastry with a more rustic, wheaty base.
  • 200 ml of light crème fraîche.
    Use a reduced-fat crème fraîche to create a dip that is smooth and luscious without being overly heavy.
  • This forms the creamy base of your dip, offering a mild tang and a silky texture.
  • 1 tablespoon of tapenade.
    Incorporate a spoonful of classic black or green olive tapenade for depth and umami. This Mediterranean spread brings a salty, rich dimension to the cream base, balancing its freshness with earthy intensity.

1 tablespoon of dried persillade.


A blend typically composed of parsley and garlic, dried persillade adds an herbaceous, and slightly pungent note that enhances the aromatic quality of the dip.

  • Rehydrate slightly if desired, or allow the crème fraîche to absorb and soften it naturally.
  • 1 tablespoon of sun-dried tomato caviar.
    This concentrated tomato paste, often made from finely blended sun-dried tomatoes, adds a sweet and savory accent.
  • It enriches the dip with a subtle fruitiness and a deep red hue that hints at slow Mediterranean afternoons.
  • Fine sea salt and freshly ground black pepper, to taste.
    Season delicately, allowing the natural flavors of the tapenade and tomato caviar to shine.
  • A light touch of salt heightens the savory notes, while a grind or two of black pepper adds gentle warmth and complexity.

Preparation

Begin by placing three small serving bowls side by side—preferably matching in style or color for a cohesive and inviting presentation.

Into each bowl, pour an equal portion of the light crème fraîche, carefully dividing .the 200 ml so that each bowl receives just enough to serve as the base for a distinct flavor variation.

Use a small spoon or spatula to smooth the surface of the crème in each bowl, ensuring an even texture.

Now, season each portion lightly with a pinch of fine sea salt and a gentle twist of freshly ground black pepper.

Stir gently to incorporate, allowing the seasoning to blend fully with the creamy base without disrupting its smooth consistency.

“Classic hummus is a staple in Middle Eastern cuisine. Yotam Ottolenghi shares a traditional version here.”

Next, begin creating the flavor pairings:

  • In the first bowl, add a generous tablespoon of olive tapenade.
  • Using a spoon, gently fold the tapenade into the crème fraîche, watching as the two combine. into a subtly marbled mixture of cream and dark olive richness
  • . Continue stirring until the color is even and the flavor fully integrated. This dip will offer a briny, savory punch—bold and sophisticated.
  • In the second bowl, introduce a full tablespoon of dried persillade.
  • Let the herbs begin to absorb some of the moisture from the crème fraîche as you stir, releasing their aromatic notes of garlic and parsley. The blend should take on a faint greenish hue and a lightly speckled texture, signaling the presence of herbs throughout.
  • In the third bowl, add a spoonful of sun-dried tomato caviar.
  • This concentrated ingredient, often deep red and rich in consistency, will blend into .the crème fraîche to create a vibrant, slightly sweet, and deeply flavorful spread. Stir gently but thoroughly, until the mixture becomes a soft terracotta color with the occasional fleck of tomato visible.
Once all three dips are fully prepared

cover and chill them for about 10 to 15 minutes if time allows—just long enough to let the flavors meld and the texture settle.

When ready to serve, arrange the three bowls on a serving platter or wooden board. Surround them artfully with the grilled puff pastry twists, placing them at varying angles for a touch of rustic charm. Then add a scattering of mini toasted breads, either plain or lightly brushed with olive oil before grilling, ready to be spread or dipped.

Encourage guests to explore each dip: to swipe the golden, flaky twists through the tapenade-laced cream, or to spread the tomato and herb variations generously over the crispy toasts.

The variety of textures and flavors makes this both a playful and refined way to begin a meal—or to accompany drinks in style.

Conclusion

This trio of dips, paired with crisp puff pastry twists and delicate grilled toasts, offers more than just a prelude to a meal—it is an invitation to slow down, gather, and savor.

Each element, from the buttery crunch of the feuilletés to the silken depth of the seasoned crème fraîche, has been chosen not for complexity, but for harmony. Together, they form a tableau of texture, taste, and conviviality.

What makes this dish particularly special is its effortless elegance. It requires no elaborate cooking, no complicated techniques—just thoughtful assembly and attention to balance.

The ingredients speak for themselves: the boldness of tapenade, the brightness of herbs, the sun-drenched sweetness of tomato caviar, all tempered by the gentle richness of crème fraîche.

The result

is a set of flavors that feel both familiar and refined, perfect for sharing on a quiet evening or at the start of a festive gathering.

More than anything, this is food meant to be touched, shared, and enjoyed with company. It encourages interaction, sparks conversation, and turns even the simplest moment into something memorable. Whether served at a cocktail party, as a prelude to a leisurely dinner, or as a centerpiece for an apéritif among friends, this spread promises satisfaction without excess, indulgence without pretense.

So take your time. Let your guests linger. And above all, let this deliciously unhurried experience remind you of what makes entertaining so deeply rewarding: the pleasure of good food, beautifully served, and generously shared.

Q: Chef, what makes this trio of dips with puff pastry twists and grilled toasts .stand out from a typical appetizer platter?

A: Ah, that’s an excellent question.
What elevates this simple offering to something truly memorable is not the complexity of the preparation, but rather the intention behind it. Anyone can lay out crackers and a bowl of store-bought dip.

But when you take the time to compose three distinct flavor profiles—each with its own character, each balanced and complementary—you create an experience, not just a snack.

Let’s take the base, the crème fraîche. It’s light yet luscious, with a subtle tang that supports both bold and delicate additions. By dividing it and blending it thoughtfully—

with a deep, briny tapenade in one, a rustic herbaceous persillade in another, and the sweet-savory richness .of sun-dried tomato caviar in the third—you offer your guests three perspectives on the same core ingredient.

This isn’t just clever. It’s smart cuisine: using restraint, balance, and contrast to full effect.

Then there’s the matter of texture.

A true chef knows that flavor is only part of the picture. The puff pastry twists? They bring a buttery, flaky crunch that practically melts in the mouth after the first bite. The grilled toasts? Earthier, sturdier, designed to hold a generous smear of dip without losing integrity. The combination keeps the palate alert and engaged.

But perhaps most importantly, this dish speaks to a certain philosophy I hold dear: that food should never be rushed. This presentation encourages dipping, passing, savoring. It draws people in. It’s generous. It’s warm.

In a way, it becomes the quiet heartbeat of the table—the thing everyone keeps returning to between sips and stories.

So yes, it’s simple. But in the hands of someone who cares about detail, timing, and harmony—it becomes something far greater than the sum of its parts. That, to me, is the essence of good cooking.

3 Secrets Inside: Pistachio Choux with a Citrus Soul

Close-up of a Pistachoux pastry showing a golden craquelin topping, creamy pistachio filling, and a vibrant lemon cream insert in the center.

pistachio choux recipe

Delicately crisp on the outside and sumptuously soft within, the Pistachoux is a celebration of refinement and indulgence. Inspired by the grand tradition of French pâtisserie, this elegant creation brings together the airy lightness of pâte à choux and the rich, nutty sophistication of pistachio in a harmony of textures and flavors.

Each piece is crafted with precision, beginning with a perfectly baked choux shell — golden, tender, and just the right balance of crunch and chew. The heart of the Pistachoux reveals a luscious pistachio cream, smooth and silky, offering an intense yet nuanced nutty note that lingers delicately on the palate. Often crowned with a glossy glaze or a subtle decorative crunch, it’s as pleasing to the eye as it is to the taste buds.

Ideal for refined tea times, celebratory tables, or as a signature treat for those with a taste for the exquisite, the Pistachoux is more than a pastry — it’s a moment of Parisian charm, bite after luxurious bite.“Try our basic pâte à choux tutorial before making this bold flavor variation.”

For 6pistachio choux recipe
Preparation Time: 2 hours
Baking Time: 1 hour 15 minutes
Storage: Best enjoyed within 24 hours

Equipment Needed:

  • Whisk: For mixing creams and batters smoothly by hand.
  • Immersion Blender: Essential for emulsifying creams or ganache to a perfect texture.
  • Silicone Half-Sphere Molds: Used to shape inserts or fillings — ideal for freezing and unmolding cleanly.
  • Vegetable Peeler: Handy for shaving chocolate, zesting citrus, or prepping pistachios.
  • Fine Sieve: For straining custards or sifting dry ingredients to ensure a lump-free result.
  • Food Processor: For grinding nuts into paste or blending components into a smooth texture.
  • Rolling Pin: Useful if the recipe includes a thin base or craquelin topping.
  • Sifter or Fine Mesh Strainer: To aerate flour or icing sugar and eliminate clumps.
  • Stand Mixer: Speeds up the process for whipping creams, making pâte à choux, or kneading dough.
  • Piping Bag + 15 mm Plain Tip (Round Nozzle): For clean, precise filling and shaping of choux pastries

Ingredients

Lemon Cream Insert

  • 300 g unsalted butter
  • 480 g granulated sugar
  • 600 g whole eggs
  • 320 g fresh lemon juice (yellow lemons)
  • 16 g lime zest
  • 36 g gelatin mass

Lemon Confit

  • 100 g lemon zest
  • 250 g fresh lemon juice
  • 150 g granulated sugar
  • 12 g lemon verbena leaves

Cocoa Streusel

  • 195 g all-purpose flour (T55)
  • 30 g unsweetened cocoa powder
  • 223 g toasted almond flour
  • 223 g light brown sugar
  • 4 g fleur de sel
  • 223 g unsalted butter

Craquelin (Crispy Topping)

  • 80 g softened butter
  • 100 g light brown sugar
  • 100 g all-purpose flour

Choux Pastry

  • 187 g semi-skimmed milk
  • 187 g water
  • 165 g unsalted butter
  • 3 g fleur de sel
  • 22 g sugar
  • 214 g all-purpose flour (T55)
  • 375 g whole eggs

Pistachio Pastry Cream

  • 336 g semi-skimmed milk
  • 60 g heavy cream
  • 74 g granulated sugar
  • 80 g egg yolks
  • 36 g cornstarch
  • 186 g unsalted butter
  • 50 g gelatin mass
  • 214 g pistachio paste

pistachio choux recipe

Lemon Cream Insert

Heat the butter and granulated sugar in a saucepan. Once the mixture is smooth and fully melted, add the eggs, fresh lemon juice, and lime zest. Place over medium heat and cook, whisking continuously, until the mixture comes to a gentle simmer.

Immediately remove from the heat, stir in the gelatin mass, and blend the mixture using an immersion blender until smooth.

Pour the lemon cream into silicone half-sphere molds — slightly smaller than the choux shells — and refrigerate until set.


Lemon Confit

Wash the lemons thoroughly. Using a vegetable peeler, remove the zest, leaving behind as much of the white pith as possible (as it adds bitterness).

Place the zest in a small saucepan filled halfway with water and bring to a boil to blanch. Drain through a sieve and repeat the blanching process two more times — blanching three times helps preserve the aroma while removing bitterness.

Place the blanched zest back into a saucepan with the lemon juice and sugar. Simmer over medium heat for 40 to 50 minutes, until the mixture has reduced and thickened.

Add the lemon verbena leaves, then blend the mixture while still hot in a food processor until smooth. Be aware: this preparation is intensely tart and full of flavor. Use only a small amount in the center of each lemon cream insert.


Cocoa Streusel

In a mixing bowl, combine all the dry ingredients. Add the cold butter cut into small cubes, then rub everything together between your fingers until the mixture takes on a sandy texture.

Roll or press the streusel out into a thin layer on a baking sheet lined with parchment paper.

Bake at 150°C (300°F) for 20 minutes, or until crisp and lightly browned

Craquelin (Crispy Topping)

Mix the light brown sugar and flour with the softened butter. Do not whip or incorporate air — just mix until smooth.

Roll the dough out between two sheets of parchment paper to a thickness of 2 mm. Transfer to the freezer and let it firm up completely.

Once solid, cut out small discs that match the size of your piped choux buns.


Choux Pastry

In a saucepan, bring the milk, water, butter, fleur de sel, and sugar to a boil.

Remove from the heat and immediately add the sifted flour all at once. Stir vigorously with a spatula until the mixture comes together into a dough and pulls away from the sides of the pan.

Dry the dough (panade) over medium heat for about 1 minute while stirring constantly.

Transfer the dough to the bowl of a stand mixer fitted with the paddle attachment (or whisk). Mix on medium speed until the steam dissipates and the dough cools slightly — it should no longer release visible steam.

Incorporate the eggs one at a time, mixing well after each addition until the dough becomes smooth and pipeable.

Transfer the choux dough into a piping bag fitted with a 15 mm plain tip. On a baking sheet, pipe 6 lines of 4 choux buns each, touching one another.

Place a craquelin disc on top of each choux.

Bake in a deck oven at 210°C (410°F) for 20 to 25 minutes, until golden brown and well puffed.


Pistachio Pastry Cream

In a saucepan, heat the milk and heavy cream together.

In a bowl, whisk the sugar and egg yolks until pale and creamy, then add the sifted cornstarch and mix well.

Pour the hot milk mixture over the egg yolk blend while whisking, then return the mixture to the saucepan.

Cook over medium heat, whisking constantly, until thickened like a classic pastry cream.

Remove from the heat and stir in the butter, gelatin mass, and pistachio paste. Mix thoroughly until smooth.


Assembly

Carefully cut each line of baked choux two-thirds of the way up, creating a “lid.”

Place a spoonful of cocoa streusel inside the base of each choux, then add a small amount of pistachio cream.

Set a frozen lemon cream insert in the center of each choux bun.

Pipe the remaining pistachio cream on top and sprinkle with additional streusel.

Replace the lids and dust lightly with icing sugar to finish.

Conclusion

The pistachio choux recipe is more than just a pastry — it is the embodiment of balance, technique, and refined indulgence. With its contrasting layers of crisp choux, delicate craquelin, silky pistachio cream, and the vibrant brightness of lemon, it invites the palate on a journey that is both nostalgic and innovative. Each element has been carefully composed: the comforting richness of the pistachio is lifted by the tart complexity of the citrus insert, while the textural interplay between the soft interior and the crisp topping elevates every bite into an experience.

Though this creation demands time, patience, and precision, it rewards the effort with a dessert that is as visually striking as it is flavorfully harmonious. Whether served as a showstopping centerpiece for a special occasion or enjoyed as a luxurious afternoon treat, the Pistachoux is sure to captivate and delight. It’s a testament to the magic of French pastry — where craftsmanship meets emotion, and tradition is reinvented with elegance.

So take your time, savor the process, and let your guests discover the hidden surprise at the heart of each choux. Because true pastry is not only about taste — it’s about evoking wonder.“Want to make your own pistachio paste? Check out this traditional Italian method from Eataly.”

Questions & Answers (FAQ)

Q: Can I make the Pistachoux in advance?
A: Yes — partially. The lemon inserts, confit, and streusel can all be prepared up to two days ahead. The inserts can even be frozen. However, for optimal texture and freshness, the final assembly should be done the same day you plan to serve them.

Q: Can I substitute the pistachio paste?
A: If you don’t have pistachio paste, you can use praline or hazelnut paste, but keep in mind this will change the flavor profile completely. To stay true to the Pistachoux identity, try to use a 100% pure pistachio paste if possible.

Q: What if I don’t have silicone half-sphere molds?
A: You can use a mini muffin silicone mold or even freeze the lemon cream flat and cut out rounds using a cookie cutter. The goal is to have a gelled insert that holds its shape and creates a surprise element in the center.

Q: Can I freeze the Pistachoux?
A: You can freeze the unfilled choux pastry. Once assembled, freezing is not ideal, as it will compromise the texture. If you need to plan ahead, freeze the components separately and assemble the day you serve them.

Q: What’s the difference between streusel and craquelin?
A: Streusel is a crumble topping baked separately and used for crunch and contrast, while craquelin is a thin layer of dough placed raw on top of the choux before baking — it melts into a crisp, crackled surface.

Q: Can I make this recipe without a stand mixer?
A: Yes, but it will require more manual effort — especially when incorporating the eggs into the choux dough or finishing the creams. A whisk, some elbow grease, and patience will get the job done!

2 Secret Recipe for the Perfect Tarte Tatin — Revealed!

Close-up of a golden caramelized Tarte Tatin topped with glossy apple slices on a flaky puff pastry base, served on a rustic wooden board.

tarte Tatin recipe

Few desserts carry a tale as charming—and as delicious—as the Tarte Tatin. Born from a fortunate mishap in a countryside inn in late 19th-century France, this upside-down apple tart has since earned a place of honor on some of the finest tables around the world. It was the Tatin sisters, two hoteliers in the Sologne region, who unintentionally created what would become a culinary icon, proving once again that some of the greatest creations begin with a happy accident.

What makes the Tarte Tatin so captivating is the harmony it strikes between textures and flavors: meltingly soft fruit against a crisp, buttery pastry; deep caramel notes balanced by the natural brightness of the apples. Its signature lies in the reversed baking process—fruit caramelized directly in the pan before being topped with pastry and baked to golden perfection. The real spectacle, however, comes at the very end: the dramatic inversion, when the tart is flipped out of its mold, revealing glistening fruit bathed in amber syrup.

Though it began as a rustic country dessert

the Tarte Tatin has transcended its humble roots. Chefs have reimagined it in countless variations, yet its soul remains intact—a celebration of simplicity, craftsmanship, and patience. Warm from the oven, often served with a dollop of cream or a scoop of vanilla ice cream, it invites both comfort and sophistication.

More than just an upside-down apple tart, the Tarte Tatin is a testament to the French art of turning the ordinary into the extraordinary. It’s a dessert that tells a story—of chance, of tradition, of slow caramelization and bold gestures. And whether enjoyed in a cozy kitchen or a refined dining room, it continues to enchant those who appreciate.

the beauty of culinary serendipity “If you’re new to caramel, don’t miss our How to Master Dry Caramel.”

General Information – Tarte Tatin (Serves 4)

Timings

  • Preparation time: 3 hours
    (Includes making puff pastry, preparing caramels, cooking apples, and assembling)
  • Chilling time: 2 hours 30 minutes
    (Resting the dough, cooling components, setting apples before final baking)
  • Baking time: 2 hours 20 minutes total
    (Blind-baking the tart shell, roasting apples, final baking in the Tatin pan)
  • Storage: Up to 48 hours in the refrigerator
    (Best enjoyed slightly warm; reheat gently before serving if made in advance)

Required Equipment

Tatin pan – 18 cm diameter:
A thick, oven-safe pan used for assembling and baking the apples upside down.
This size ensures deep caramelization and a compact, elegant final tart.

Fine sieve:
For sifting the flour to ensure a smooth puff pastry base.

Dough scraper (bench knife):
Ideal for mixing and folding puff pastry, and for keeping your work surface clean.

Rolling pin:
Used to roll out the puff pastry evenly before lining the tart ring.

Tart ring – 20 cm diameter:
Used to blind-bake the puff pastry base. It gives a clean edge and professional finish.

Candy or cooking thermometer:
Essential for controlling the precise temperatures needed for both the homemade caramel (175°C) and the light caramel (165°C) stages.


Ingredients

Puff Pastry

  • 170 g flour
  • 3 g salt
  • 90 g water
  • 20 g butter
  • 110 g dry butter (for laminating)

Homemade Caramel

  • 100 g sugar
  • 30 g water
  • 15 g glucose syrup
  • 65 g heavy cream (35% fat)

Light Caramel

  • 200 g sugar
  • 40 g butter

Apple Mixture

  • 10 Golden apples
  • 200 g homemade caramel
  • 72 g heavy cream (35% fat)
  • 20 g sugar
  • 3 g liquid vanilla
  • 50 g melted butter

Tarte Tatin – Chef’s Recipe for 4 Servings

Recipe Overview

  • Prep time: 3 hours
  • Chilling time: 2 h 30
  • Baking time: 2 h 20
  • Storage: Up to 48 hours in the refrigerator

Required Equipment

  • Fine sieve
  • Dough scraper
  • Rolling pin
  • 20 cm tart ring
  • 18 cm Tatin pan
  • Cooking thermometer
  • Parchment paper + baking weights


Step-by-Step Instructions

1. Puff Pastry

  • Prepare a classic puff pastry with 5 single folds.
  • Roll out the dough and line a 20 cm tart ring (see technique reference if needed).
  • Cover the base with parchment paper and fill with baking weights.
  • Blind-bake at 180 °C (356 °F) for 30 minutes. Set aside to cool.

2. Homemade Caramel

  • In a saucepan, cook the sugar, water, and glucose to 175 °C (347 °F).
  • Carefully deglaze by adding the hot cream. Stir and set aside.

3. Light Caramel

  • In a clean saucepan, cook the sugar to 165 °C (329 °F).
  • Remove from heat and deglaze with the butter. This will be used to coat the base of the Tatin pan.

4. Apple Filling

  • Peel, core, and cut the apples into even quarters.
  • In a saucepan, heat together the homemade caramel, cream, sugar, vanilla, and melted butter.
  • Off the heat, immerse the apple quarters in the warm mixture to coat thoroughly.
  • Arrange them on a rimmed baking sheet, sprinkle lightly with sugar, and bake at 180 °C (356 °F) for 35 minutes.
  • Once baked, cool and refrigerate for about 30 minutes

Chef’s Tips & Tricks

To ensure a flawless unmolding of the apples from the tart, try gently warming the outer edges of the Tatin pan with a culinary blowtorch. This technique softly melts the caramel along the sides, loosening it from the mold and making the flipping process much easier and cleaner.

Using a blowtorch allows precise control of the heat without overheating the tart itself, preventing any risk of burning or overcooking the caramel. This simple step can transform a tricky moment into a smooth, elegant finish — perfect for impressing guests or achieving that flawless presentation“Tarte Tatin has a legendary origin in French cuisine. Read the story from La Tarte Tatin officielle.”

Conclusion: The Timeless Allure of Tarte Tatin

The Tarte Tatin is much more than a dessert — it is a story captured in caramel and pastry, a celebration of the unexpected beauty born from a simple accident. Its layers of tender, caramelized apples resting atop a crisp, buttery puff pastry embody the very essence of French patisserie: balancing rustic charm with refined technique.

Mastering the Tarte Tatin is a rewarding journey that teaches patience, precision, and respect for ingredients. From preparing the delicate puff pastry, through the careful caramelization processes, to the artful assembly and dramatic flipping, each step is a moment to savor in itself. The process demands attention and care, but the result is a dessert that enchants with its golden hues, luscious textures, and deeply satisfying flavors.

Serving the Tarte Tatin warm, perhaps accompanied by a scoop of vanilla ice cream or a dollop of crème fraîche, invites moments of pure indulgence and comfort. It connects us to tradition while allowing room for personal creativity — whether by experimenting with different apples, infusing spices, or exploring variations of caramel.

In every slice, the Tarte Tatin offers a glimpse into the magic that happens when technique meets passion and when simplicity is elevated to art. Whether you’re a seasoned pastry chef or a home baker eager to explore classic French desserts, this timeless tart promises to delight your palate and your heart.

So take your time, enjoy each step, and share this beautiful creation with those you love — because the true sweetness of Tarte Tatin lies not only in its caramel but in the memories it helps create.

Frequently Asked Questions (FAQ) — Tarte Tatin

Q1: What type of apples are best for Tarte Tatin?

A: Firm, slightly tart apples that hold their shape when cooked work best. The classic choice is Golden Delicious, but Granny Smith or Braeburn can also be excellent.

Q2: Can I use store-bought puff pastry instead of making it myself?

A: Yes, you can. While homemade puff pastry offers superior texture and flavor, good-quality store-bought puff pastry is a convenient alternative that still yields delicious results.

Q3: How do I prevent the caramel from burning?

A: Use a candy thermometer to monitor the temperature carefully. Cooking sugar to the exact temperature needed and promptly deglazing with cream or butter will help prevent burning.

Q4: What if my tart sticks to the pan when I flip it?

A: To help with unmolding, gently warm the edges of the pan with a culinary blowtorch to melt the caramel slightly and loosen the tart. Alternatively, let the tart cool a little before flipping.

Q5: Can I prepare the Tarte Tatin in advance?

A: Yes! You can prepare it a day ahead and store it in the refrigerator for up to 48 hours. Reheat gently before serving to bring back the caramel’s glossy texture and warm flavors.

Q6: What can I serve with Tarte Tatin?

A: Traditional accompaniments include vanilla ice cream, crème fraîche, or lightly whipped cream. These add a creamy contrast to the tart’s rich caramel and buttery pastry.

15 Steps to Perfect Caramel Religieuses Every Time

Caramel religieuses with glossy caramel glaze and delicate almond paste decorations on a white plate.

caramel religieuses recipe

There are pastries that impress with complexity, and others that seduce with comfort — the religieuse au caramel does both. A timeless emblem of French pâtisserie, this elegant choux pastry brings together silky fillings, refined textures, and deep, buttery notes of caramel in a layered delight that feels both nostalgic and sophisticated.

At first glance, the religieuse evokes reverence: two perfectly puffed choux buns — a small one perched atop a larger — both generously filled with smooth cream and glazed with amber caramel icing that glistens like lacquer. But its beauty lies not only in form. Cut through the crisp, golden shell, and you reveal a heart of luscious, caramel-infused crème, rich yet balanced, dancing between sweetness and slight bitterness — the hallmark of a well-made caramel.

What makes the religieuse special is its dual personality: comforting like a childhood dessert, yet elegant enough to grace the window of a Parisian pâtisserie. Each element is a craft — from the perfectly baked pâte à choux, to the deeply aromatic caramel glaze, to the silky crème pâtissière that anchors every bite.

Finished with piped rosettes of caramel cream connecting the two tiers, this pastry isn’t just a treat — it’s a sculpture. It invites slow tasting, reverent admiration, and the quiet joy that comes from indulging in something made with skill, patience, and butter.

Whether enjoyed as a show-stopping dessert or a luxurious goûter, the caramel religieuse is more than a pastry — it’s a golden bite of pâtisserie history.“Want more caramel magic? Don’t miss our Tarte Tatin Secrets.

Religieuses au Caramel

Pour 15 religieuses


Temps indicatifs

  • Préparation : 2 heures
  • Congélation : 30 minutes
  • Réfrigération : 1 heure
  • Cuisson : 25 minutes
  • Conservation : 24 heures au réfrigérateur

Matériel nécessaire

  • Thermomètre de cuisine
  • Robot pâtissier
  • Rouleau à pâtisserie
  • Robot mixeur
  • Râpe type Microplane
  • Chinois ou tamis très fin
  • Feuilles guitare (ou papier cuisson)
  • Emporte-pièce uni de 7 cm de diamètre
  • Empreinte de stries (pour décorer le fondant ou les disques)
  • Poche à douille + douille cannelée de 6 mm de diamètre
  • Mixeur plongeant

Ingrédients

Fudge caramel

  • 30 g de chocolat blond Dulcey 32 %
  • 1,7 g de sirop d’érable
  • 17,7 g de sucre vergeoise blonde
  • 1 g de farine T55
  • 0,2 g de levure chimique
  • 4,4 g de beurre
  • 0,1 g de sel fin
  • 8,2 g de lait concentré non sucré

Crème chantilly caramel

  • 0,6 g de gousse de vanille Bourbon
  • 0,4 g de sachet de gousse à infuser (type vanille)

Crème chantilly caramel (suite)

  • 1,6 g d’eau froide
  • 0,3 g de gélatine en poudre
  • 79,4 g de crème liquide à 35 % de MG
  • 5,3 g de glucose
  • 0,1 g de fève tonka râpée
  • 0,2 g de sel fin
  • 13,2 g de sucre semoule

Décor en pâte d’amandes

  • 3,7 g de sirop à 15 °C Brix
  • 0,01 g de colorant jaune or hydrosoluble
  • 0,01 g de colorant jaune citron hydrosoluble
  • 0,01 g de colorant brun café hydrosoluble
  • 225,9 g de pâte d’amandes blanche 23 %
  • 11,3 g de beurre de cacao
  • 9,0 g de Trimoline (ou sucre inverti)

Pâte à choux

  • 81,4 g d’eau
  • 81,4 g de lait demi-écrémé
  • 3,6 g de sucre semoule
  • 3,6 g de sel fin
  • 72,4 g de beurre
  • 90,5 g de farine T55
  • 167,3 g d’œufs entiers battus

Pâte de vanille (aromatisation)

  • 0,8 g de mix vanille (ou extrait concentré)
  • 1,6 g d’eau
  • 0,1 g de whisky Ballantine’s
  • 0,1 g de rhum Saint James 54 %
  • 0,1 g de glucose

Crémeux caramel allégé

  • 14,4 g d’eau
  • 2,4 g de gélatine en poudre
  • 169,9 g de sucre semoule (pour caramel)
  • 492,6 g de lait demi-écrémé
  • 2,4 g de pâte de vanille
  • 75,0 g de jaunes d’œufs
  • 25,5 g de sucre semoule
  • 38,2 g de fécule de maïs
  • 2,4 g de sel fin
  • 273,5 g de beurre
  • 984,8 g de crème liquide à 35 % de MG

FUDGE

In a saucepan, cook all the fudge ingredients together until the mixture reaches 114 °C (237 °F), stirring regularly to ensure an even texture. Once the temperature is reached, transfer the hot mixture to the bowl of a stand mixer fitted with the paddle attachment. Mix for 10 minutes to cool and achieve a smooth, glossy consistency. Then, spread the fudge between two sheets of parchment paper to a thickness of about 1 cm (0.4 in). Let it set and then cut into small cubes measuring 0.5 cm (0.2 in) on each side, ready to be used or garnished.


CARAMEL WHIPPED CREAM

To prepare the vanilla mix, freeze the vanilla bean and then grind it finely in a blender. Add the vanilla powder sachet to enhance the flavor. Combine the cold water with powdered gelatin and refrigerate until set, then cut into small cubes. In a saucepan, mix cold cream, glucose, 0.2 g of the vanilla mix, fine salt, and freshly grated tonka bean. Bring to a boil and let infuse for 10 minutes to fully develop the flavors. Meanwhile, cook the sugar until it forms a golden caramel. Deglaze the caramel with the hot infused cream, bring back to a boil. Add the gelatin cubes, strain through a fine sieve to remove impurities, then blend with an immersion blender until perfectly smooth and silky. Chill the caramel whipped cream in the refrigerator until ready for assembly.


MARZIPAN DECOR

In a small bowl, carefully blend the water-soluble yellow gold, lemon yellow, and coffee brown food colorings with syrup heated to 15 °C (59 °F) until you get a harmonious caramel-like shade (“Snickers” tone). Pour this colored syrup into a stand mixer bowl fitted with the dough hook and add the white marzipan. Then add the melted hot cocoa butter along with trimoline, an inverted sugar syrup that adds softness and shine. Mix until you get a smooth, evenly colored dough. Roll out this dough between two silicone baking mats (or parchment paper) to a 2 mm thickness. Cut out 7 cm (2.75 in) diameter circles with a round cutter. For a refined touch, imprint the circles using a striated embossing mold before baking or use.


CHOUX PASTRY

Prepare your choux pastry following the classic recipe. Pipe the dough with a suitable nozzle into small and large sizes. Place a crunchy topping (like craquelin) on the large choux to add a crisp and golden texture during baking. On the small choux, sprinkle an even mix of dextrose and Mycryo cocoa butter for a delicate, shiny finish. Bake everything in a preheated oven at 210 °C (410 °F) (gas mark 7) for about twenty minutes until the choux are puffed up, golden brown, and dry.

VANILLA PASTE

Blend all the ingredients together with the remaining vanilla mix until you achieve a smooth, homogeneous paste. This vanilla paste will provide an intense, pure vanilla flavor, essential for the balanced sweetness of the final dessert.


LIGHT CARAMEL CRÉMEUX

Soak the gelatin in water and refrigerate until fully set. Cut the gelatin into small cubes once firm. In a saucepan, prepare a dry caramel by melting the sugar carefully until it turns golden amber. Meanwhile, heat the milk infused with vanilla and strain it to remove any solids. Deglaze the caramel by slowly pouring the hot vanilla milk over it, stirring gently to combine into a smooth caramel milk mixture.

In a separate bowl, whisk together the egg yolks, sugar, and cornstarch until the mixture becomes pale and slightly thickened. Gradually pour the warm caramel milk over this mixture, then return everything to the saucepan and cook gently while stirring continuously until the mixture boils and thickens into a custard-like consistency.

Remove from heat, stir in the salt, then add the softened gelatin cubes, mixing well until fully dissolved. Finally, incorporate the butter to give richness and a velvety texture. Cool the crémeux rapidly in the refrigerator to prevent spoilage.

Once cooled, loosen the crémeux by gently folding in the pre-whipped cream, creating a lighter texture perfect for filling.


ASSEMBLY

Begin by lightly toasting both the small and large choux buns in a 180 °C (350 °F, Gas Mark 6) oven for 2 minutes to refresh their crispness, then allow them to cool.

Pipe the light caramel crémeux generously into all the choux, ensuring each is well filled. Place a circle of marzipan on the larger choux, carefully shaping it so it adheres snugly to the pastry without deforming its shape.

For the smaller choux, trim the rounded bottom so they sit flat, then attach them onto the top center of the larger choux using a bit of melted Dulcey chocolate as edible glue.

Finish by piping a decorative rosette of caramel Chantilly cream on top using a star-shaped nozzle. To complete the presentation, adorn each religieuse with a small cube of fudge for texture and a touch of elegance.

Conclusion

Mastering the caramel religieuses recipe is a journey into the heart of classic French pâtisserie, where technique meets artistry. This dessert beautifully balances the rich, buttery notes of the choux pastry with the silky smoothness of the light caramel crémeux and the delicate sweetness of the caramel Chantilly. The intricate layering of textures—from the tender pastry to the creamy filling and the crunchy fudge topping—creates a symphony of flavors that delight every bite.

The process may seem detailed, but each step serves to elevate the final product, resulting in an elegant pastry worthy of any special occasion or gourmet celebration. The use of marzipan adds a subtle nutty depth and a polished finish, turning the simple choux into a refined masterpiece.

Patience is key: letting the crémeux mature and caramel religieuses recipe crisp just right ensures a texture contrast that is essential to the religieuse’s charm. Whether you’re an experienced pastry chef or an ambitious home baker, this recipe invites you to hone your skills and enjoy the satisfaction of crafting a truly exquisite dessert.“Pierre Hermé’s take on religieuses is a must-read for choux lovers. View his interpretation.”


Questions & Answers

Q: Can I prepare parts of this recipe ahead of time?
A: Absolutely! The fudge, vanilla paste, and caramel crémeux can all be made in advance and stored properly. Choux pastry is best made fresh, but you can bake and freeze them, then refresh in the oven before assembly.

Q: What alternatives do I have if I don’t have Dulcey chocolate?
A: You can substitute with a high-quality white or milk chocolate, but Dulcey’s unique caramelized flavor adds an extra depth that complements the caramel theme perfectly.

Q: How important is the temperature control in this recipe?
A: Temperature is critical, especially during caramel making and cooking the crémeux. Precise temperatures ensure the right consistency and flavor development without burning or curdling.

Q: Can I adjust the sweetness?
A: Yes, you can reduce the sugar slightly in the crémeux or Chantilly to suit your preference, but keep in mind caramel relies on sugar for its signature flavor and texture.

Q: What’s the best way to store the finished religieuses?
A: Store them in an airtight container in the refrigerator and consume within 24-48 hours to enjoy optimal freshness and texture.

4 Secrets Unveiled: The Insider’s Guide to Perfect Kougelhopf

Close-up of a golden, fluted Kougelhopf cake, showcasing its tender crumb and delicate sugar glaze, symbolizing traditional Alsatian baking secrets.

kougelhopf recipe

Kougelhopf is more than just a cake — it is a symbol of heritage and celebration, deeply rooted in the cultural tapestry of Alsace and neighboring regions. Its iconic fluted shape, reminiscent of a crown or a festive wreath, evokes centuries of tradition and craftsmanship passed down through generations.

This baked masterpiece captivates not only by its distinctive silhouette but also by the remarkable contrast of textures and flavors it offers. The exterior, golden and delicately crisp, gives way to a tender, airy crumb that is both buttery and subtly fragrant. Each slice reveals a tender crumb that is light yet rich, embodying a perfect balance between indulgence and refinement.

Often enjoyed

during holidays or special occasions, Kougelhopf carries with it an air of conviviality and warmth, inviting friends and family to gather around the table and share in its simple pleasure. Its presence on the table is a nod to timeless artistry — the kind that transforms humble ingredients into a cherished centerpiece, rich with history and soul.

Whether savored for breakfast alongside a steaming cup of coffee or as an afternoon treat, Kougelhopf offers a moment of gentle luxury, a pause to appreciate the delicate craftsmanship and heartfelt tradition that make this cake a true classic of French pastry.Never made enriched dough before? Learn it first in our Brioche Masterclass

Kougelhopf Recipe Overview (Serves 4 to 6)

  • Preparation Time: 1 hour
  • First Proofing (Pointage): 1 hour
  • Refrigeration: 30 minutes
  • Second Proofing (Pousse): 2 hours
  • Baking Time: 45 minutes to 1 hour
  • Storage: Best consumed within 1 to 3 days for optimal freshness

Essential Equipment

  • Stand mixer (robot pâtissier) — to achieve the perfect dough texture with ease
  • Traditional 20 cm diameter earthenware Kougelhopf mold — for that iconic fluted shape and ideal heat distribution
  • Pastry brush — for glazing and finishing touches

Ingredients

  • 100 g golden raisins
  • 18 g kirsch (cherry brandy)
  • 250 g flour
  • 15 g fresh yeast
  • 6 g salt
  • 50 g egg (about 1 large egg)
  • 75 g whole milk
  • 40 g sugar
  • 75 g sourdough starter (optional)
  • 125 g butter
  • 25 g raw almonds

Kirsch Syrup

  • 100 g water
  • 80 g sugar
  • 10 g kirsch

Finishing

  • Sufficient quantity of melted butter
  • Sufficient quantity of powdered sugar

Preparation Method

Begin by plumping the golden raisins: immerse them in boiling water and let them soak gently for about 30 minutes. Once rehydrated, drain thoroughly and transfer the raisins to a small bowl to macerate in kirsch, allowing them to infuse with the rich cherry brandy aroma while you prepare the dough.

In the bowl of your stand mixer fitted with a dough hook, prepare the poolish starter by combining the milk, flour, and fresh yeast. Mix at low speed for no more than 5 minutes, just until the mixture forms a smooth and homogeneous batter. Cover the bowl tightly with cling film and allow the poolish to ferment at room temperature for approximately 1 hour and 30 minutes, until it has visibly risen and developed bubbles.

Once the poolish is ready,

add all the remaining brioche dough ingredients except for the butter into the mixer bowl. Begin kneading on low speed for about 7 minutes to combine, then increase to medium speed and continue kneading for an additional 10 minutes. The dough should become elastic and smooth. Gradually incorporate the butter in small pieces, continuing to knead gently until fully incorporated. Finally, fold in the kirsch-soaked raisins and almonds, mixing just enough to distribute them evenly without overworking the dough.

Stand mixer bowl with dough in process, showing the gradual addition of butter while kneading at low speed for optimal texture.
Carefully adding butter to the dough while kneading at low speed ensures a rich, smooth texture — the cornerstone of a tender, buttery Kougelhopf.
Transfer the dough

to a lightly floured work surface or tray, cover, and allow it to proof at room temperature for 1 hour, during which the dough will continue to rise and develop flavor.

Next, gently degass the dough by folding it over itself to release excess gas. Cover tightly and place in the refrigerator for a minimum of 2 hours, or preferably overnight — this cold rest will enhance flavor complexity and dough strength.

When ready, remove the dough from the refrigerator and shape it into a smooth ball. Using your thumb, carefully create a hole in the center of the dough ball. Stretch the dough gently to form a ring or crown shape, ensuring even thickness all around.

Hands delicately folding risen dough on a floured surface to gently release gas without tearing the gluten structure.
Folding the dough over itself with care releases excess gas while preserving its strength — a key gesture in refining texture before shaping.

Place the shaped dough into a traditional fluted Kougelhopf mold, previously buttered, and allow it to rise for 2 hours in a warm, humid environment. You can create this by placing the mold in an oven set to 26°C (about 78°F) with a container of boiling water inside to maintain humidity.

Once the dough has sufficiently proofed and almost doubled in size, use a pastry brush to glaze the surface with egg wash, giving it a beautiful golden finish. Using kitchen scissors, carefully make decorative incisions along the edges to enhance its characteristic look.

Pastry brush gently applying egg wash over the surface of a proofed Kougelhopf dough in its traditional fluted mold.
A delicate coat of egg wash ensures a glossy, golden crust — the hallmark of a beautifully finished Kougelhopf.

Sprinkle generously with pearl sugar for a delicate crunch and a touch of sweetness.

Bake the Kougelhopf at 140°C (about 285°F, oven setting 4/5) for 20 minutes. Once baked, carefully remove the cake from the oven and transfer it onto a wire rack to cool completely.

For a finishing touch, decorate the cooled Kougelhopf with an assortment of dried fruits and candied peel, adding vibrant color and festive flair.

Professional Tip:


When incorporating the soaked fruits into your dough, it is crucial to handle them with the utmost care. Avoid mixing them too vigorously or for too long in your stand mixer, as the mechanical action can easily break down the delicate texture of the fruits, turning them into an unwanted puree rather than maintaining their desirable plumpness and bite. To preserve their integrity and ensure each piece remains distinct, fold the macerated fruits gently and briefly by hand or at the lowest mixer speed, just until evenly distributed. This subtle technique guarantees a perfect contrast in texture throughout your Kougelhopf, elevating the overall eating experience“Kougelhopf is a cultural icon in Alsace — read more on TasteAtlas.”

Conclusion

The Kougelhopf is much more than a traditional cake; it is a celebration of history, craftsmanship, and the art of patience. Each step in its preparation—from the delicate soaking of golden raisins in kirsch to the slow, careful folding of butter into the enriched dough—reflects a timeless dedication to quality and technique. The dough’s long fermentation and multiple proofs not only develop complex flavors but also create the light, tender crumb that defines this iconic Alsatian specialty.

Baking Kougelhopf is an invitation to slow down and savor the process, honoring the harmony between texture, aroma, and taste. The final product is a stunning visual masterpiece with its elegant fluted shape and glistening pearl sugar topping, a treat that enchants the senses and invites conviviality.

Whether served for a festive occasion, a leisurely brunch, or an afternoon tea, Kougelhopf offers a perfect balance of rustic charm and refined sophistication. It is a reminder that the most memorable dishes are those made with patience, respect for tradition, and a touch of love.

By mastering this classic, you not only bring a piece of Alsace to your table but also carry forward a culinary legacy that continues to delight and inspire. So take your time, relish each moment, and let every bite tell a story of heritage and craftsmanship.

Frequently Asked Questions (FAQ) – Kougelhopf

Q1: Can I use dried fruits other than golden raisins in this recipe?
A: Absolutely. While golden raisins are traditional, you can experiment with other dried fruits such as currants, chopped dried apricots, or cherries. Just make sure to soak them adequately to ensure they remain plump and juicy in the final cake.

Q2: Is it possible to make Kougelhopf without fresh yeast?
A: Yes, you can substitute fresh yeast with active dry yeast. Use about one-third of the fresh yeast weight and activate it in warm milk before adding to the dough. The rising times may be slightly longer, so monitor the dough’s volume rather than the clock.

Q3: What is the purpose of the refrigeration step during dough preparation?


A: The refrigeration slows down fermentation, allowing the dough to develop deeper flavors and a more complex texture. It also makes the dough easier to handle and shape, resulting in a better final structure.

Q4: Can I use a different type of mold if I don’t have a traditional earthenware Kougelhopf mold?
A: Yes, you can use any fluted tube pan or Bundt pan with a similar shape to achieve the classic form. Just be sure to thoroughly grease the mold to prevent sticking.

Q5: How long can I keep Kougelhopf fresh?
A: Kougelhopf is best enjoyed within 1 to 3 days. To preserve freshness, store it in an airtight container at room temperature. Avoid refrigeration as it may dry out the cake.

Q6: Can Kougelhopf be frozen?
A: Yes, you can freeze Kougelhopf wrapped tightly in plastic wrap and placed in a freezer bag. Thaw it gently at room temperature before serving. Note that texture may slightly change after freezing.

Q7: What drinks pair well with Kougelhopf?
A: This cake pairs beautifully with light teas, coffee, or a glass of Alsatian white wine such as Riesling. For a festive touch, serve it alongside a glass of sparkling wine.