The Best Burnt Cheesecake Recipe You’ll Ever Try — No Water Bath, No Fuss

Burnt Basque Cheesecake with a deep caramelized top and creamy center

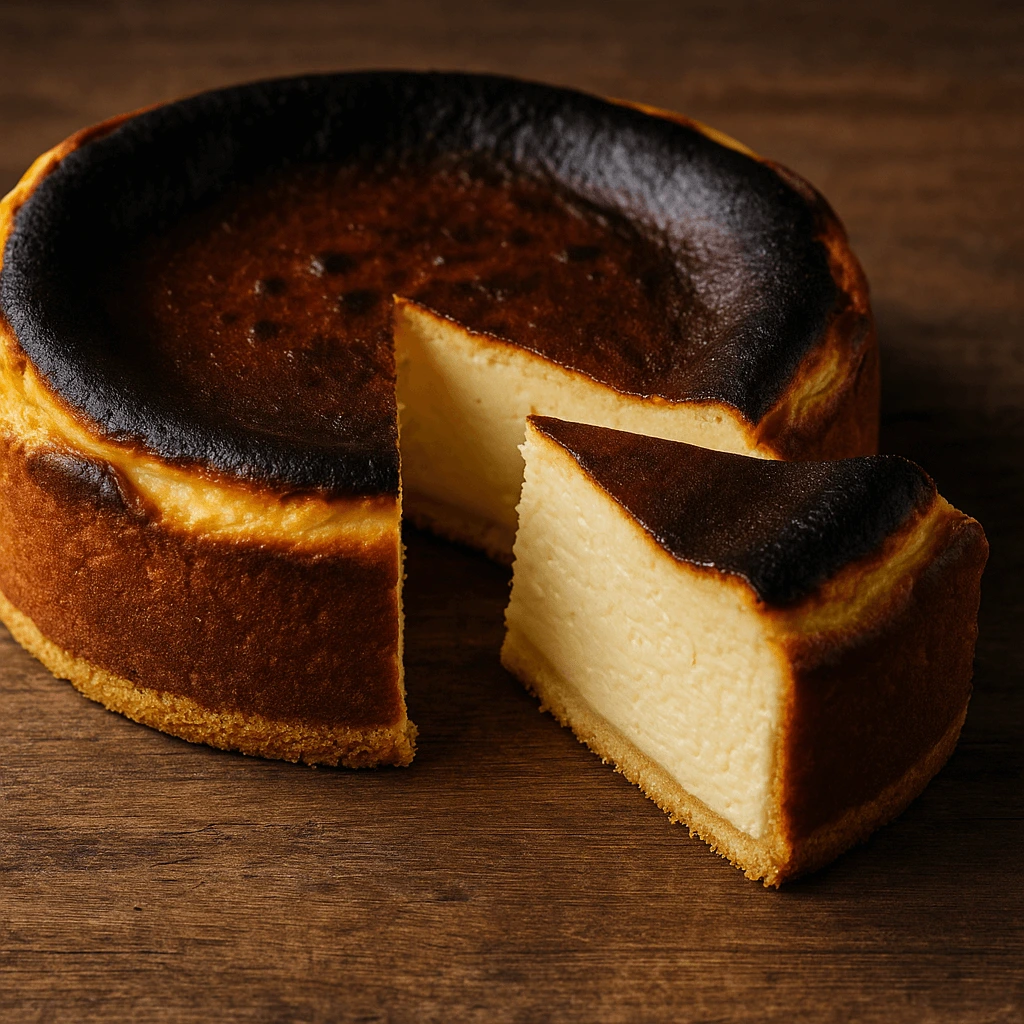
burnt basque cheesecake

At first glance, it looks like a mistake — scorched, cracked, and deeply caramelized. But make no mistake: the Basque Cheesecake is a masterpiece born from deliberate imperfection. Hailing from the culinary heart of San Sebastián in the Basque Country, this iconic dessert has captured the hearts of pastry chefs and home bakers alike across the globe.

Unlike its smooth and glossy New York cousin, the Basque Cheesecake breaks every rule. It’s baked at a high temperature, which creates its signature deeply browned, almost burnt top — a thin, bittersweet crust that contrasts stunningly with the creamy, custard-like interior. There’s no crust on the bottom. No water bath. No careful baking. And yet, it is divine.

What sets this cheesecake apart is its boldness. The rustic appearance, the wobbly center, and the intense flavor all speak of a dessert that embraces simplicity with audacity. It’s rich without being cloying, and light despite its decadence. The texture melts on the tongue — airy, silky, and slightly soufflé-like at the core, with just enough structure to hold its shape once sliced.

Traditionally served at room temperature or slightly chilled, the Basque Cheesecake is a perfect finish to a refined dinner or a quiet moment of indulgence. Pair it with a glass of sherry, a shot of espresso, or nothing at all — its flavor stands proudly on its own.

This dessert is more than a trend. It’s a quiet revolution in the world of cheesecake — proof that sometimes, breaking the rules leads to the most unforgettable results.

Shortbread Dough for Basque Cheesecake (26 cm mold)

Total weight: 232 g

IngredientWeightPercentage
All-purpose flour100 g43%
Butter 82% fat55 g24%
Icing sugar40 g17%
Almond powder15 g6%
Sea salt1 g<1%
Whole eggs20 g9%

Tips from the Chef:

  • Use cold butter cut into cubes and rub it into the flour for a perfect sablé texture.
  • Rest the dough in the fridge for at least 1 hour before rolling.
  • Pre-bake (blind bake) the shell if you want a crisp base under the cheesecake.

Method

1. Prepare your mise en place.
Sift together the flour, icing sugar, and almond powder. Ensure your butter is well chilled and cut into small cubes for easier blending.

2. Mix the dry ingredients and butter.
Place the sifted flour, icing sugar, almond powder, and salt into the bowl of a stand mixer. Add the cubed butter and mix on low speed with the paddle attachment until the mixture resembles fine crumbs. The butter should be fully incorporated without melting.

3. Add the eggs.
Pour in the beaten whole eggs and mix just until the dough comes together and forms a smooth, pliable texture. Do not overmix.

4. Roll and bake.
Roll out the dough between two sheets of parchment paper to a thickness of 2–3 mm. Carefully peel off the top sheet and transfer to a baking tray. Bake in a preheated oven at 150 °C (302 °F) for 15–20 minutes, or until evenly golden.

5. Cool and process.
Allow the baked shortbread to cool completely at room temperature. Then grind it into fine crumbs using a food processor — this will serve as the base layer for your cheesecake.

Chef’s Tip

The almond powder can be substituted with hazelnut powder or any finely ground nut of your choice. This allows you to subtly tailor the flavor of the shortbread base — try hazelnut for a toastier depth, or pistachio for a delicate twist.

Cheesecake Crust for Original Basque Cheesecake (26 cm ring)

Total crust weight: 250 g

IngredientWeightPercentage
Shortbread crumbs200 g80%
Butter (82% fat)50 g20%

Method

1. Combine the crust ingredients
In a bowl, mix the shortbread crumbs with softened butter (at room temperature) using a spatula until the mixture is evenly combined and resembles damp sand.

2. Prepare your mold
Place a 26 cm diameter, 6 cm high cake ring on a baking tray lined with parchment paper or a silicone mat. Line the inside of the ring with a strip of parchment paper to prevent sticking and ensure easy unmolding.

3. Press the crust
Pour the crumb mixture into the cake ring and press it firmly and evenly across the base using the bottom of a glass or flat spatula. Ensure the surface is level and compact.

4. Chill to set
Refrigerate the crust for at least 10 minutes to stabilize before adding the cheesecake filling.

Conclusion: A Bold Classic Reimagined

The Original Basque Cheesecake is a celebration of contrasts — rustic yet refined, burnt yet creamy, intense yet delicate. Its origins in the Basque Country have given it a character unlike any other cheesecake, and by adding a crisp shortbread crust, we elevate this already iconic dessert with a touch of buttery elegance and texture.

What makes this cheesecake truly unforgettable is its honesty: there are no unnecessary embellishments, no flashy decorations — only rich, caramelized flavor and melt-in-the-mouth texture. It’s proof that simplicity, when mastered, becomes sophistication.

Whether you’re a pastry enthusiast or a home baker looking to create something memorable, this cheesecake invites you to step away from perfectionism and embrace authenticity. It’s a dessert that doesn’t hide its flaws — it turns them into beauty.

Serve it at room temperature for the perfect balance of flavor and texture. Pair it with a bold espresso, a dessert wine, or even a drizzle of cherry coulis for an extra layer of indulgence. But most importantly, serve it with confidence — because this is a cheesecake that speaks for itself.Un article “Tips for the Perfect Cheesecake Bake


Q&A – All You Need to Know About Basque Cheesecake

Q: Is the cheesecake supposed to look burnt?
A: Yes! The signature of a true Basque cheesecake is its deep golden-brown, almost scorched surface. It’s the result of high-temperature baking and gives the cake a unique caramelized flavor.

Q: Can I skip the crust?
A: Traditionally, Basque cheesecake is made without a crust. However, the shortbread crust adds a delightful contrast in texture and makes it easier to slice and serve — especially when made in a cake ring.

Q: How do I know if it’s fully baked?
A: The center should still have a slight wobble when you take it out of the oven. It will set further as it cools. Overbaking will lead to a dry interior, so trust the jiggle!

Q: Can I make this cheesecake ahead of time?
A: Absolutely. This cheesecake actually improves after a day in the fridge. Prepare it a day ahead, chill it overnight, and bring it to room temperature before serving for best results.

Q: What variations can I try?
A: You can infuse the filling with vanilla bean, citrus zest, or even swap the shortbread crust for a nut-based one. Basque cheesecake is surprisingly versatile!San Sebastián Tourism Board (origine du gâteau

Golden, Buttery, and Filled with Fall: Meet the Most Elegant Turnover Ever

Golden-brown cherry and chestnut turnovers with flaky puff pastry on a rustic wooden board

cherry chestnut turnovers

Delicate, flaky, and richly evocative of French patisserie, the Chausson Griottes et Marron is a pastry that tells a story with every bite — one of crisp morning air, golden leaves, and the comforting indulgence of fall flavors. Wrapped in a tender, buttery puff pastry, this refined turnover blends the tart intensity of griottes (sour cherries) with the sweet earthiness of chestnut — a timeless pairing that has delighted palates for generations.

Each chausson offers a harmonious contrast of textures: the crunch of golden layers giving way to a soft, luxurious filling that is both bright and velvety. It’s not just a dessert — it’s a moment of seasonal poetry on a plate. Traditionally enjoyed warm with a dusting of powdered sugar, this French classic is perfect for autumnal gatherings, a chic afternoon tea, or an elegant brunch table.

Whether you serve it with a dollop of crème fraîche, a drizzle of syrup, or enjoy it as is with a cup of black tea, the Chausson Griottes et Marron captures the soul of rustic sophistication. It’s a pastry for those who appreciate balance — where bold fruit meets creamy comfort, and tradition meets finesse.

Sour Cherry & Chestnut Turnovers (Chaussons Griottes et Marron)

Serves: 6
Prep Time: 45 minutes (excluding base recipes)
Resting Time: 1 night + 1 hour
Baking Time: 30 minutes


Main Dough

  • 500 g of inverted puff pastry
  • 1 whole egg, for egg wash

Cherry & Chestnut Filling

  • 275 g of chestnut cream (canned)
  • 70 g of chestnut paste (canned)
  • 140 g of amarena cherry jam
  • 2 tablespoons of Armagnac (approx. 12 g)
  • 1 vanilla bean
  • A pinch of fleur de sel (approx. 1 g)

Step 1 – The Day Before: Prepare the Inverted Puff Pastry

Make the inverted puff pastry according to the recipe.

Roll the dough out very thinly to a thickness of about 1.5 mm. Prick it all over with a fork to prevent puffing. Then, using an oval pastry cutter — or, if unavailable, a dessert plate and a sharp knife — cut out six oval discs of approximately 15 cm in diameter each (about 100 g per piece).

Cover the cut-outs with plastic wrap and refrigerate overnight to rest and firm up.


Homemade Amarena Cherry Jam

(Perfect for refined pastries like chaussons, tarts, or as a topping for ice cream)


Prepare the day before

Ingredients:

  • Amarena cherries (fresh or jarred, pitted)
  • Sugar
  • Lemon juice
  • A dash of the cherry syrup (if using jarred amarena)
  • Optional: a few drops of almond extract for depth

Instructions:

Cool and store:
Let cool slightly, then transfer to a jar. Keep refrigerated until ready to use.

Macerate the cherries:
In a bowl, combine the cherries with an equal weight of sugar. Add a splash of lemon juice and a little of their own syrup (if using jarred amarena cherries). Let the mixture sit overnight in the fridge to macerate and draw out the juices.

Cook the jam:
The next day, transfer the mixture to a saucepan. Bring to a gentle boil over medium heat, then lower to a simmer. Skim off any foam. Cook until the jam thickens slightly and the cherries become glossy and rich — about 20–25 minutes. Stir regularly.

Check the consistency:
To test, place a drop on a cold plate. If it wrinkles slightly when pushed, it’s ready. The jam should remain spoonable, not too stiff.

Step 3 – The Same Day: Prepare the Cherry & Chestnut Compote

In a bowl, combine all the filling ingredients. Split the vanilla bean lengthwise, scrape out the seeds, and add them to the mixture. Stir until everything is evenly blended into a smooth, aromatic compote.


Step 4 – Assemble the Turnovers

Using a pastry brush, lightly moisten half the edge of each puff pastry disc with water.

Spoon about 70 grams of the cherry and chestnut compote onto one half of each disc. Spread it evenly, leaving about 5 mm of space from the edge.

Fold the pastry over the filling to create a turnover, carefully aligning the edges and pressing them together to seal tightly.

Brush the surface of each turnover with beaten egg. Place them in the refrigerator for 1 hour to rest.

After chilling, brush the turnovers a second time with the egg wash.

Bake in a preheated oven at 170°C (340°F) for 30 minutes, or until beautifully golden.

Let cool slightly before serving. These turnovers are best enjoyed warm or at room temperature, but never hot, to allow the flavors to fully express themselves.

Conclusion: A Seasonal Masterpiece in Every Bite

The Chaussons Griottes et Marron are more than just pastries — they are a celebration of autumn’s most comforting flavors and a testament to French patisserie’s ability to marry texture, balance, and finesse. Each bite delivers the gentle warmth of chestnut, the bright intensity of sour cherries, and the delicate crunch of golden puff pastry — a contrast that feels both luxurious and nostalgic.

While the recipe requires patience and care — from the resting times to the delicate assembly — the final result is well worth the effort. These turnovers are ideal for impressing guests at a holiday table, elevating a casual afternoon tea, or simply indulging in a moment of seasonal refinement at home.

Let them rest just enough before serving, allowing their aroma to unfold and their filling to settle. Paired with a lightly sweetened crème fraîche or a drizzle of cherry syrup, these turnovers bring out the essence of French countryside elegance — rustic yet refined, familiar yet elevated.The Secret to Perfect Puff Pastry at Home


Frequently Asked Questions (Q&A)

Q: Can I use store-bought puff pastry instead of making inverted puff pastry?
A: Yes — while inverted puff pastry gives an unbeatable flakiness, high-quality store-bought puff pastry can be used as a time-saving alternative. Choose an all-butter variety for the best results.

Q: Can I substitute the amarena cherry jam?
A: You can use any high-quality sour cherry or black cherry jam, though amarena offers a distinctive depth and syrupy richness. A touch of lemon juice or kirsch can help mimic the original flavor if needed.

Q: How long can I store the turnovers?
A: Once baked and cooled, they keep well in an airtight container for up to 2 days at room temperature. Reheat gently in a low oven before serving.

Q: Can I freeze the unbaked turnovers?
A: Absolutely. Assemble the turnovers, freeze them on a tray until firm, then store them in freezer bags. Bake directly from frozen, adding a few extra minutes to the baking time.

Q: What can I serve with them?
A: These pair beautifully with crème fraîche, whipped cream lightly infused with vanilla, or even a scoop of roasted chestnut gelato. For a drink, consider a glass of sweet wine or black tea.What Are Amarena Cherries? – Saveur Magazine

3 Secrets That Make Yogurt the Star of Elegant Homemade Cuisine

Creamy homemade lime yogurt topped with fresh berries and fruit coulis in a clear glass

how to make yogurt


It holds a special place in both everyday diets and gourmet cuisine around the world.

This creamy, tangy delight comes from the natural fermentation of milk by beneficial bacteria.
The two main strains used are Lactobacillus bulgaricus and Streptococcus thermophilus.
These microorganisms convert lactose, the natural sugar in milk, into lactic acid.
The acid thickens the milk and gives yogurt its tangy flavor and velvety texture.

Historically, yogurt is believed to have been discovered thousands of years ago.
It likely happened by accident when milk stored in warm conditions began to ferment naturally.

Since then, yogurt has become a global staple.
It is deeply rooted in the culinary traditions of regions like the Middle East, the Mediterranean, and the Indian subcontinent.

Link to your fruit coulis recipe
📝 Use in context like:
“Top your yogurt with this easy homemade fruit coulis for a refreshing finish.

For 6 People

Preparation Time:
Approximately 15 minutes of active preparation is required. This time includes gathering and measuring ingredients, preparing any necessary components, and setting up your workstation to ensure a smooth cooking process.

Cooking Time:
The cooking or baking process takes between 6 to 8 minutes. This relatively short duration ensures that your dish is cooked perfectly—whether you’re baking, simmering, or heating—without overcooking or losing texture and flavor.

Storage:
Once prepared, the dish can be stored safely in the refrigerator for up to 48 hours. To maintain optimal freshness and quality, cover your dish tightly with plastic wrap or use airtight containers. Before serving leftovers, allow them to come to room temperature or gently reheat as needed, depending on the recipe.


Equipment Needed

  • Thermometer:
    A cooking thermometer is essential for precise temperature control, ensuring your dish reaches the ideal cooking temperature for safety and texture without overcooking.
  • Fine Mesh Strainer (Passette):
    Use a fine mesh strainer to sift, drain, or strain ingredients, providing a smooth and refined texture by removing lumps or excess liquid.
  • 6 Transparent Glasses or Small Bowls:
    Serving your dish in six individual clear verrines or small glass bowls enhances presentation by showcasing the layers, colors, or textures of your preparation. Choose glasses that hold an appropriate serving size and are heat resistant if reheating is necessary.

Ingredients

  • 250 grams of heavy cream (crème fleurette) with 35% fat content
    This high-quality liquid cream is prized for its rich texture and excellent whipping properties.
  • The 35% fat content ensures a luxurious mouthfeel and stability. making it ideal for creating smooth, airy preparations like mousses, whipped toppings, or delicate creams. Using fresh, cold cream will help achieve the best consistency and flavor in your dish.
  • 20 grams of sugar
    A moderate amount of sugar is added to balance the natural tartness of the citrus and to enhance the overall flavor profile.
  • The sugar also contributes to the cream’s structure when whipped, providing slight sweetness without overpowering the freshness of the other ingredients.
  • 3 grams of lime zest
    The zest, or finely grated outer peel, of fresh limes brings a burst of bright, aromatic citrus oils that elevate the dish with lively fragrance and subtle bitterness. Lime zest adds complexity and depth to the cream, complementing its richness with a fresh, zesty note. It’s important to use only the green part of the peel, avoiding the white pith which can be bitter.
  • 20 grams of fresh lime juice
    The juice from freshly squeezed limes introduces a clean. tangy acidity that cuts through the richness of the cream, balancing flavors beautifully. The lime juice imparts a vibrant citrus tang that enlivens the palate and enhances the overall freshness of the preparation. Using freshly squeezed juice, rather than bottled, ensures the brightest and most natural flavor.

Preparation Instructions

  1. Heat the cream mixture:
    Pour the heavy cream into a saucepan and add the sugar along with the finely grated lime zest. Slowly heat this mixture over medium-low heat, stirring gently, until it reaches 80°C (176°F).
  2. Heating at this precise temperature allows the sugar to dissolve fully and helps infuse the cream with the aromatic oils released from the zest without curdling or boiling the cream.
  3. Strain the mixture:
    Once the cream mixture reaches 80°C, immediately remove it from the heat. Pour it through a fine mesh strainer (passette) into a clean bowl or container to remove the lime zest bits. This ensures a smooth, silky texture without any coarse bits of zest, resulting in a refined final product.
  4. Add the lime juice:
    While the cream mixture is still warm, add the freshly squeezed lime juice directly into the strained cream. Use a silicone spatula (maryse) to gently fold the juice in, combining the flavors thoroughly without incorporating too much air. The acidity from the lime juice will balance the richness of the cream and intensify the citrus notes.
  5. Pour into serving vessels:
    Immediately transfer the mixture into individual verrines, small glasses, or any other containers you prefer for serving or chilling. Pouring while the mixture is still warm helps it settle evenly and avoid lumps.
  6. Chill and set:
    Place the containers in the refrigerator and allow the mixture to cool completely and set. This chilling step usually takes several hours or overnight. The cream will thicken and develop a luscious texture as it cools.
  7. Serve with garnish:
    Once fully set, enhance your dish by adding a coulis (fruit sauce) or a selection of fresh fruits on top.
  8. The vibrant flavors and textures of the garnish will complement the creamy citrus base, creating a balanced and elegant dessert or appetizer.

Conclusion

This delicate lime-infused cream is a perfect example of how simple ingredients, when handled with care and attention to detail, can transform into an elegant and refreshing dish.

This delicate lime-infused cream is a perfect example of how simple ingredients can shine.
When handled with care and precision, they transform into an elegant and refreshing dish.

The balance between rich, velvety cream and the bright tang of lime zest and juice is remarkable.
It creates a harmonious flavor profile that delights the palate without overwhelming it.

Whether served as a light dessert, a sophisticated appetizer, or part of a larger dish,
this recipe showcases the beauty of French-inspired techniques with a modern twist.

Success depends on temperature and timing.
Heat the cream just enough to dissolve the sugar and release the citrus aroma.
Then add the lime juice carefully to preserve the smooth, creamy texture.

Once chilled, the mixture sets into a refreshing, spoonable delight.
It’s perfect for warm days or elegant occasions.

A coulis or fresh fruit on top adds vibrant color and contrast in flavor and texture.
It turns each portion into a visually stunning and delicious treat.

This recipe also welcomes creativity.
Try swapping citrus or adding herbs like mint or basil for a personal, seasonal touch.

In the end, this lime cream embodies the elegance of simplicity.
It proves that with good ingredients and thoughtful preparation, a humble dish becomes unforgettable.

On yogurt fermentation & health benefits
Link to a scientific or health site like Healthline’s article on yogurt benefits
Use in context like:
“According to Healthline, yogurt is rich in probiotics that support gut health and digestion.


Questions & Answers

Q: Can I use lemon instead of lime in this recipe?
A: Absolutely! Lemon zest and juice will provide a slightly different citrus flavor—more tart and bright—

while still complementing the cream beautifully. Adjust the quantity to taste since lemons can be more acidic.

Q: What if I don’t have a thermometer? How can I tell when the cream is ready?
A: If you don’t have a kitchen thermometer, heat the cream gently until you see tiny bubbles forming around the edges (just before boiling).

Stir frequently to prevent scorching, and don’t let it come to a full boil.

Q: Can I prepare this in advance? How long will it keep?
A: Yes, you can prepare it a day ahead. Store the cream covered in the refrigerator, and consume within 48 hours for best freshness and texture.

Q: How can I make this recipe dairy-free?
A: Use a full-fat coconut cream or other plant-based cream alternatives with similar fat content. Keep in mind that the flavor and texture may vary slightly, but it can still produce a delicious result.

Q: What coulis or fruits pair best with this lime cream?
A: Raspberry, mango, passion fruit, or strawberry coulis work wonderfully. Fresh berries, kiwi slices, or even pomegranate seeds add vibrant colors and refreshing contrasts.

Impress in 120 Seconds: Duck, Mango & Crunch on a Tuile

Crispy savory tuile topped with smoked duck breast, mango chutney, and crushed peanuts on a white plate

duck tuiles with mango chutney

A refined harmony of textures and flavors, this elegant appetizer showcases the French flair for transforming simple elements into a gastronomic experience. The star of the dish is the duck breast, expertly rendered into delicate tuiles—thin, crisp shards that offer both depth of flavor and a satisfying crunch. Slowly dried or oven-baked until perfectly crisp, the duck provides a rich, savory foundation with subtle smoky undertones.

Balanced against this intensity is a vibrant mango chutney. Smooth, sweet, and lightly spiced, it brings a tropical brightness that cuts through the richness of the duck, adding a layer of complexity and aromatic freshness. The interplay between sweetness and acidity enlivens the palate, making each bite a new discovery.

To finish, a scattering of crushed peanuts lends a final textural contrast and a hint of earthiness. These nutty bursts enhance both the visual appeal and the flavor profile, echoing the chutney’s exotic character while grounding the dish in comforting familiarity.

Served as an amuse-bouche or a starter, this composition is both playful and sophisticated—ideal for impressing guests or elevating a festive occasion. Every element has its place, and together they tell a story of balance, technique, and culinary creativity.

Explore more elegant appetizers:
Discover our recipe for Mini Brie and Fig Tarts — another perfect bite-sized treat for your next gathering.

Ingredients for 2 servings

1 pack of savory tuiles (thin crisp wafers)

This refers to a pack of delicate, crispy savory tuiles that will serve as the elegant base of the dish. Ideally, use neutral or lightly salted tuiles—either artisan or high-quality store-bought versions. These can be made from wheat or corn flour, and should be light enough to let the toppings shine. Plan for at least 8 to 10 pieces, with a few extra in case of breakage or for plating options.

Tip: If you’re making your own tuiles, a basic mixture of flour, egg whites, and butter spread thinly and baked can work beautifully.

90 g (about 3 oz) of thinly sliced smoked duck breast

Choose high-quality smoked duck breast, pre-sliced into thin, elegant pieces. These slices should showcase a nice balance between lean meat and creamy fat. The smokiness adds depth and richness, which pairs wonderfully with the fruity brightness of the chutney. You’ll need approximately 4 to 5 slices per person, depending on their size and how generously you layer them on the tuiles.

Chef’s note: Remove the slices from the refrigerator 10–15 minutes before plating to allow them to come to room temperature—this enhances both their flavor and texture.

2 tablespoons of mango chutney

Opt for a rich, balanced mango chutney—either homemade or a premium store-bought version. The chutney should have a smooth, jam-like consistency with tender mango chunks and a well-rounded flavor that combines sweetness, tanginess, and a subtle kick of spice. This component brings a vibrant contrast to the richness of the duck and adds an exotic twist to each bite.

Optional: If the chutney is too thick, stir in a few drops of warm water or fresh lemon juice to loosen it slightly for easier spreading or spooning.

1 tablespoon of dry-roasted peanuts, coarsely crushed

Use plain, unsalted dry-roasted peanuts to avoid overpowering the balance of flavors. Toast them lightly in a dry skillet if they aren’t already roasted, then let them cool before crushing them roughly with a knife or mortar and pestle. These irregular peanut shards will add a delightful crunch and a warm, nutty finish to the dish.

Tip: Avoid grinding the peanuts too finely—small pieces give a better texture and visual appeal than a powdery topping.

Step-by-Step Assembly Guide

Step 1: Prepare your workstation

Before you begin assembling, lay out all your ingredients and tools. Have your tuiles arranged carefully on a flat tray or plate to avoid breakage. Place your mango chutney in a small bowl with a spoon or small offset spatula, have the duck slices ready (ideally brought to room temperature), and keep your crushed peanuts close at hand.

Tip: Work gently and precisely—this is a dish of finesse, where presentation matters.


Step 2: Spread the mango chutney

Using a small spoon or a butter knife, delicately spread a thin layer of mango chutney onto the surface of each tuile. Aim for a generous—but not overwhelming—amount that covers the center area without soaking through the crisp.

The chutney should glide on smoothly. If it’s too thick, stir it slightly to loosen the texture. Try to leave the edges of the tuile visible for a clean look. The goal is to create a glossy, sweet-tart base that will anchor the other ingredients and balance the smoky richness of the duck.

Chef’s note: Think of this step as painting—gentle, even strokes to avoid cracking the delicate tuile.


Step 3: Add the smoked duck breast

Take one thin slice of smoked duck breast and fold or drape it artfully over the chutney-covered tuile. You can create a gentle wave or ribbon effect by folding the slice in half or slightly curling it for height and volume.

If the slices are large, you may want to cut them into smaller strips to better match the size of the tuile. Each piece should sit comfortably on top without overwhelming the base or sliding off.

Pro tip: Make sure the fat side of the duck faces up—it adds a beautiful glisten and a luxurious texture contrast.


Step 4: Sprinkle with crushed peanuts

Now, take a pinch of the coarsely crushed roasted peanuts and gently sprinkle them over the top of the duck. Be intentional—aim for a light, even distribution that adds texture and visual appeal without making the bite feel heavy.

The peanuts should land on both the duck and the chutney, creating pockets of crunch and enhancing the tropical profile of the dish. Their warmth and earthy flavor add balance and contrast to the smokiness and fruitiness of the other ingredients.

Finishing touch: For an elegant final presentation, avoid overcrowding—less is more. You can also add a tiny twist of freshly ground black pepper if desired.


Step 5: Serve immediately

These tuiles are best enjoyed fresh, as they retain their crisp texture and vibrant contrast of flavors. Serve them as elegant canapés, a gourmet appetizer, or as part of a festive amuse-bouche platter.

Pairing suggestion: A chilled glass of white wine with fruity notes—like a Viognier or a Gewürztraminer—will complement the dish beautifully.

Conclusion

This delicate composition of duck breast tuiles with mango chutney and crushed peanuts is a perfect illustration of how texture, balance, and precision can transform simple elements into a gourmet experience. Each bite offers a refined interplay: the crisp fragility of the tuile, the silky, smoky richness of the duck, the vibrant sweetness of mango chutney, and the nutty crunch of roasted peanuts.

Though effortless in its assembly, the dish captivates with its elegant contrasts. It celebrates the art of pairing sweet and savory, soft and crunchy, bold and delicate. Whether served as an amuse-bouche at a dinner party or as part of a festive hors-d’œuvre platter, this bite-sized delight is sure to leave a lasting impression.

Its charm lies in its versatility: minimal preparation, no cooking, and yet a deeply sophisticated result that feels like a treat. It invites you to play with ingredients and textures, encouraging creativity while honoring balance.

Perfect for a romantic dinner for two, a holiday gathering, or a chic cocktail soirée, these tuiles are not just a dish—they’re a conversation piece.If you have or plan to create a recipe or article on your blog about another elegant appetizer or duck dish, link to it like this:

“For more sophisticated bites, don’t miss our recipe for Classic Duck Breast with Orange Sauce.


Questions & Answers

Can I make these tuiles in advance?

Yes and no. You can prepare all components ahead of time—slice the duck, crush the peanuts, portion the chutney—but assemble them just before serving. The tuiles are sensitive to moisture and will soften quickly once the chutney is applied.

Pro tip: Keep everything at room temperature for 15–20 minutes before assembly to maximize flavor and texture.


What if I can’t find smoked duck breast?

Smoked duck breast is a delicacy, but if unavailable, you can substitute with:

  • Thin slices of cured duck or duck prosciutto
  • Smoked turkey breast for a lighter version
  • Even fine-quality jamón ibérico for a twist

Keep in mind that the smokiness and richness are key to the original flavor profile, so choose alternatives that maintain that depth.


Can I use other chutneys?

Absolutely! While mango chutney offers a tropical sweetness and gentle spice, other chutneys can bring unique flair:

  • Fig chutney for a deeper, earthier tone
  • Apricot chutney for a similar sweetness with more tang
  • Apple and onion chutney for a rustic twist

Choose according to the season or event, but always look for a balance of sweet, acidic, and aromatic notes.


How can I make this dish vegetarian?

You can replace the duck with thinly sliced smoked tofu, roasted beetroot, or even grilled eggplant strips. Match the substitute with a slightly more acidic chutney (like tamarind or tomato) to balance the richness.


What’s the best way to present this at a gathering?

Serve the assembled tuiles on a dark slate board or a minimalist white platter. Garnish lightly with microgreens, edible flowers, or a drizzle of aged balsamic for extra sophistication. Group them in sets of two or three for visual symmetry and ease of serving.

Ready in 3 Minutes: Elegant Crackers with Gorgonzola, Pear & Smoked Almond

Close-up of gourmet canapés featuring crackers topped with creamy gorgonzola, thin pear slices, and smoked almonds

Elegant crackers with Gorgonzola

Delicate, refined, and bursting with contrasts, these canapés are an invitation to rethink the role of the humble cracker. No longer a simple base, the cracker here becomes a stage—a crisp, neutral canvas that allows bold flavors and elegant textures to take center stage. This creation draws inspiration from the art of balance: sweet and salty, creamy and crunchy, rustic and refined.

At the heart of each bite is the unmistakable presence of a bold blue cheese. Its velvety texture and complex, lingering flavor form the base note of the canapé, immediately elevated by the juicy brightness of fresh fruit. The interplay of these two elements—earthy and sweet—awakens the palate and adds a surprising sense of lightness to what could otherwise be a rich mouthful.

To crown this duo, a nutty accent comes into play. But not just any nut—here, a smoked note adds depth, a whisper of warmth that gently lingers. It’s this final touch that transforms the canapé from a simple hors d’œuvre to something memorable: a layered, multi-sensory experience that surprises and satisfies.

Perfect for a chic apéritif, a festive gathering, or even an intimate wine pairing, these canapés are proof that sophistication can reside in the smallest of bites. Whether served as an amuse-bouche or as part of an elegant platter, they never fail to impress. And the best part? Behind their luxurious appearance lies a simplicity that makes them both accessible and endlessly customizable.

Crackers with Gorgonzola, Pear & Smoked Almonds

Serves: 4 people
Preparation time: 15 minutes
No cooking required
Storage: Best served immediately


Ingredients

  • 1 pack of fine, neutral-flavored crackers (approximately 12–16 pieces)
  • 1 ripe pear, firm yet juicy
  • 50 g of Gorgonzola (preferably dolce, for its creamy texture and balanced flavor)
  • 1 small handful of smoked almonds, roughly chopped

Equipment

  • Small sharp knife or mandoline
  • Small offset spatula or butter knife
  • Cutting board
  • Spoon for scooping cheese
  • Serving platter

Preparation Instructions

1. Prepare the Gorgonzola

Take Elegant crackers with Gorgonzola out of the refrigerator about 15 minutes before assembly to allow it to soften slightly. If needed, gently mash it with the back of a spoon or a small spatula to make it more spreadable. You want it creamy, not runny.

2. Slice the Pear

Wash and dry the pear. Using a sharp knife or mandoline, cut it into very thin slices—about 2 mm thick—removing any seeds or core as you go. The slices should be elegant and uniform to sit neatly on each cracker.

Chef’s tip: Choose a pear that’s ripe but still holds its shape—like a Comice or Williams—for the perfect balance of juiciness and structure.

3. Chop the Smoked Almonds

Take a small handful of smoked almonds and chop them coarsely with a knife. You’re looking for a balance of texture—some fine bits to sprinkle, and a few larger pieces for crunch.

4. Assemble the Canapés

Lay out your crackers on a clean serving platter.

For each canapé:

  1. Spread a small amount of Gorgonzola onto the cracker using a spatula or butter knife. It should cover most of the surface without overwhelming it.
  2. Gently place one or two slices of pear over the cheese, fanned out slightly for visual appeal.
  3. Sprinkle with a pinch of chopped smoked almonds, letting a few fall naturally onto the cheese or plate.

Presentation tip: Arrange the finished canapés in a neat, alternating pattern on the platter, and garnish the tray with a few fresh pear slices or almond crumbs for a refined look.


Serving & Storage

These canapés are best served immediately to preserve the cracker’s crunch. If preparing in advance, you may pre-slice the pear and chop the almonds, then assemble everything just before serving. Avoid refrigeration after assembly, as the moisture from the pear and cheese will soften the crackers.

Assembly Instructions:
Cut the pear into quarters, carefully remove the core, then slice each quarter into 16 thin, delicate slices.

Place a single slice of pear on each cracker, followed by a small piece of Gorgonzola cheese. Finish by topping each canapé with one smoked almond for a perfect balance of texture and flavor.

Arrange the canapés artfully on a serving platter and serve immediately to preserve the crispness of the crackers.

Conclusion

These Elegant crackers with Gorgonzola represent the perfect harmony of simplicity and sophistication. With just a few carefully chosen ingredients, each bite offers a symphony of textures and flavors: the crispness of the cracker, the luscious creaminess of Gorgonzola, the fresh sweetness of pear, and the smoky crunch of almonds. This combination elevates the humble appetizer to an elegant starter worthy of any occasion, from intimate gatherings to refined soirées.

Their effortless assembly and striking presentation make them an ideal choice for those who want to impress without spending hours in the kitchen. Beyond their immediate charm, these canapés invite experimentation, encouraging you to explore subtle variations while keeping the essence of balanced taste intact. Whether served as part of a festive spread or enjoyed as a sophisticated snack, they exemplify how quality ingredients and thoughtful pairing can transform a simple bite into a memorable experience.Link to official culinary sources (e.g. Le Cordon Bleu, La Cuisine de Référence, etc.).


Questions & Answers

Q: Can these canapés be prepared ahead of time?

A: It’s best to prepare the components—slicing the pear and chopping the almonds—ahead, but assemble just before serving to keep the crackers crisp.


Q: What is the best type of pear to use?

A: Choose a firm yet ripe pear, such as Comice or Williams, which offers sweetness without becoming mushy.


Q: Can I substitute the Gorgonzola with another cheese?

A: Absolutely! Blue cheeses with a creamy texture, like Roquefort or Stilton, work well. For a milder flavor, try a creamy goat cheese or a tangy feta.


Q: How can I add more texture or flavor?

A: Toasted seeds, a drizzle of honey, or a sprinkle of freshly cracked black pepper can enhance the complexity without overwhelming the balance.“If you enjoyed this recipe, try our classic Tarte au Citron next.

2 Secret Wheel: Mastering the Paris-Brest Like a Pastry Chef

Close-up of a traditional Paris-Brest pastry, filled with praline mousseline cream and dusted with icing sugar

Paris-Brest recipe

Among the many jewels of French pâtisserie, few desserts command such quiet awe as the Paris-Brest. With its delicate balance of textures and its rich, nutty depth, this ring-shaped creation has long been revered by pastry lovers—not only for its bold, wheel-like silhouette but for the sheer elegance of its flavor.

Born from a playful nod to the Paris–Brest–Paris bicycle race in the early 20th century, this dessert has become a lasting symbol of French creativity and technical finesse. Shaped like a bicycle wheel, the Paris-Brest is made from a light choux pastry—golden, crisp on the outside, and tender within—split open and lavishly filled with an irresistibly smooth, praline-infused cream. Its form may seem whimsical, but its execution is anything but: every element must be precise, from the piping of the dough to the silky emulsion of the cream.

What makes the Paris-Brest truly unforgettable is its filling—a rich mousseline or buttercream deeply flavored with hazelnut or almond praline. It is both generous and refined, offering a nutty warmth that lingers long after the first bite. The choux shell provides just enough structure to contrast with the creamy heart, creating a balance that is neither too heavy nor too sweet. Often crowned with a dusting of powdered sugar or toasted almonds, the final touch brings both texture and visual charm.

This dessert is a favorite of pâtissiers for a reason: it showcases technical mastery while inviting creative interpretation. Some keep it traditional; others elevate it with modern twists—hazelnut gianduja, salted caramel, or even crisp inserts hidden within the cream. Yet, even in its most classic form, the Paris-Brest never fails to impress.

Served chilled, each slice is an invitation into a world where airiness meets decadence, and tradition meets invention. It’s the kind of dessert that turns heads in a pastry shop display, and once tasted, leaves a memory that lingers like a fine perfume.

The Paris-Brest is not just a dessert—it is a celebration of craftsmanship, history, and that uniquely French ability to transform the simple into the sublime .https://briochechic.com/pate-a-choux-step-by-steptep

Paris-Brest Recipe Sheet

Yield: Serves 8
Preparation time: 1 hour 30 minutes
Baking time: 45 minutes
Storage: Up to 48 hours in the refrigerator


Equipment

  • Fine-mesh sieve
  • Piping bags
  • 15 mm plain piping tip
  • Fluted piping tip
  • Pastry brush
  • Whisk
  • Electric mixer or stand mixer

Ingredients

Toasted Almonds

  • Sufficient quantity of flaked almonds (for topping before baking)

Choux Pastry

  • 250 g water
  • 3 g fine salt
  • 5 g sugar
  • 100 g unsalted butter
  • 150 g all-purpose flour
  • 250 g whole eggs (approx. 5 eggs)

Egg Wash

  • 50 g whole egg
  • 50 g egg yolks

Pastry Cream

  • 350 g whole milk
  • 60 g whole eggs
  • 50 g sugar
  • 35 g pastry cream powder (or cornstarch as an alternative)

Praliné Mousseline Cream

(To be made using the pastry cream above)

  • 500 g pastry cream
  • 150 g unsalted butter, softened (beurre pommade)
  • 25 g hazelnut paste
  • 150 g praline paste (hazelnut or mixed almond-hazelnut)

Finishing

  • Sufficient quantity of icing sugar (for dusting the finished pastry)

Choux Pastry – Preparation and Piping for Paris-Brest

Choux Pastry Recipe

Ingredients:

  • 250 g water
  • 3 g fine salt
  • 5 g sugar
  • 100 g unsalted butter
  • 150 g all-purpose flour
  • 250 g whole eggs (approx. 5 eggs, beaten and strained)

Method:

  1. In a medium saucepan, bring the water, salt, sugar, and butter to a full boil. Stir occasionally to ensure the butter is completely melted before boiling.
  2. Remove from heat, add the sifted flour all at once, and stir vigorously with a wooden spoon or spatula until the mixture forms a smooth dough that pulls away from the sides of the pan.
  3. Return the pan to medium heat, and dry the dough for 1–2 minutes, stirring constantly, until a thin film forms at the bottom of the pan.
  4. Transfer the dough to a mixing bowl or stand mixer. Allow it to cool slightly (around 5 minutes).
  5. Add the beaten eggs gradually, mixing well between each addition until the dough is smooth, shiny, and holds a soft peak when lifted. The final texture should be supple, not runny.

Piping and Baking the Paris-Brest

  1. Transfer the choux pastry into a piping bag fitted with a 15 mm plain round tip.
  2. On a baking sheet lined with parchment paper or a perforated silicone mat, pipe the first ring: a circle of about 18 cm in diameter.
  3. Pipe a second ring inside the first one, very close to it.
  4. Pipe a third ring directly on top, over the seam where the first two touch.
  5. Sprinkle the surface evenly with flaked almonds.
  6. Pipe a separate, single ring of 16 to 17 cm diameter — this will be used as the inner base during assembly.
  7. Bake at 180°C (350°F) for approximately 45 minutes, or until the crown is puffed and golden. Do not open the oven during the first 30 minutes.
  8. Let cool completely before slicing or filling.

Conclusion – A Crown of Tradition and Technique

The Paris-Brest recipe is more than just a dessert—it is a triumph of French pâtisserie that blends tradition, precision, and indulgence into a single, breathtaking creation. From the airy resilience of its choux pastry to the velvety depth of the praline mousseline cream, each element demands care and craft, patience and passion.

Behind its iconic wheel-shaped silhouette lies a story: one that began as a tribute to a cycling race and evolved into a masterpiece savored in the grand salons of Paris and the quiet corners of home kitchens. Reproducing this pastry isn’t simply about following a recipe—it’s about learning to balance heat and humidity, strength and softness, richness and restraint.

Whether you are a seasoned baker or embarking on your first Paris-Brest, the reward is immense. The moment the knife glides through the crisp crown, revealing generous swirls of praline cream, you understand why this dessert has stood the test of time. It’s not only the taste that lingers—it’s the sense of accomplishment, the elegance of the process, and the timeless beauty of French culinary art.

So, let this be more than just another recipe in your collection. Let it be a milestone—a reminder that with the right tools, the right guidance, and a touch of daring, even the most iconic creations are within reach. And above all, that in pastry as in life, it’s the journey toward perfection that brings the deepest pleasure.https://www.philippeconticini.fr/

Paris-Brest: Questions & Answers

Q: Can I make the Paris-Brest in advance?

A: Yes, you can prepare most components ahead of time. The choux crown can be baked the day before and stored in an airtight container once cooled. The praline mousseline cream should also be made in advance and kept refrigerated. Assemble the Paris-Brest on the day of serving for optimal texture and freshness.


Q: How long does it keep in the fridge once assembled?

A: The finished Paris-Brest keeps well for up to 48 hours in the refrigerator. However, for the best flavor and texture—especially the crispness of the choux—it is recommended to enjoy it within 24 hours of assembly.


Q: Can I freeze it?

A: You can freeze the choux pastry alone, either baked or unbaked (piped and frozen raw, then baked straight from frozen). However, the assembled Paris-Brest is not ideal for freezing, as the mousseline cream may split and the texture will suffer upon thawing.


Q: Can I replace the praline with another flavor?

A: Absolutely. While hazelnut praline is traditional, you can substitute it with almond praline, pistachio paste, or even incorporate coffee or salted caramel for a contemporary twist. Just be sure to maintain the cream’s texture and balance the sweetness accordingly.


Q: My choux pastry collapsed after baking. What went wrong?

A: The most common causes are undercooking or opening the oven too early, which releases steam before the structure has set. Make sure to bake at the correct temperature, and never open the oven during the first 30 minutes. The choux should be deep golden and feel hollow when gently tapped.


Q: Is it possible to make mini Paris-Brests for individual servings?

A: Yes, and they are stunning! Simply pipe smaller rings—about 6–8 cm in diameter—and adjust the baking time accordingly (typically 25–30 minutes). Mini Paris-Brests are perfect for elegant plating or buffet-style desserts.

he Hidden Art of the Perfect Apricot Tart – A Pastry Chef’s Secret

Golden apricot tart with almond cream in a crisp pâte sucrée shell, arranged in a rosette pattern and finished with a glossy glaze

perfect apricot tart

There is a certain kind of dessert that captures the very essence of summer. Light, bright, and infused with the sun-drenched sweetness of stone fruits, the Tarte aux Abricots is one of those timeless creations that instantly transports you to a shaded garden table in Provence, where the scent of ripe fruit mingles with the aroma of freshly baked pastry.

This French tart is a celebration of contrasts—between crisp and tender, sweet and tart, rustic and refined. At its heart, it showcases the apricot in its purest form: halved or sliced, arranged meticulously, and gently baked until their juices caramelize and the fruit turns luscious and golden. The apricots bring a natural sharpness that is beautifully balanced by the subtle sweetness of the base and, sometimes, a delicate almond cream or glaze that enhances the depth of flavor.

Traditionally served at room temperature, this tart can be enjoyed on its own or with a spoonful of crème fraîche, a drizzle of honey, or a scoop of vanilla ice cream. Whether served at a summer lunch or as the finale to a festive dinner, the Tarte aux Abricots remains a symbol of French patisserie at its most sincere: no unnecessary embellishments, just seasonal fruit, impeccable technique, and a deep respect for simplicity.

Its beauty lies not just in taste but also in appearance—the golden hues, the glossy finish, the precise arrangement. It invites admiration before the first bite, and then rewards with a harmony of textures and a burst of flavor that only ripe apricots can deliver.

The Tarte aux Abricots is more than just a dessert; it’s a ritual, a reminder that sometimes the most elegant things are also the most honest. A dish that speaks the language of summer—sunny, fragrant, and fleeting.

Apricot Tart – Recipe Sheet

Serves: 6
Preparation time: 1 hour
Chilling time: 2 hours 30 minutes
Baking time: 20 minutes
Storage: Keeps for up to 48 hours in the refrigerator


Recommended Equipment

  • Whisk – For combining elements smoothly and incorporating air where necessary (e.g., in the almond cream or custard, if used).
  • Fine Sieve – For sifting flour, icing sugar, or almond powder to ensure a lump-free, aerated mixture and a finer texture in the final dough.
  • Flexible Dough Scraper (Bench Scraper) – Used to gather, lift, and fold the dough during mixing and to clean the work surface efficiently.
  • Rolling Pin – Essential for evenly spreading the pastry dough to the desired thickness without overworking it. A classic wooden or stainless steel model is ideal.
  • 22 cm Tart Ring (with no bottom) – Provides a clean, professional edge to the tart shell. It must be placed on a perforated baking mat or parchment-lined tray for even baking.
  • Pastry Brush – For applying glazes (such as apricot jam or neutral glaze) over the baked fruit or tart shell to enhance shine and preserve moisture. Natural or silicone bristles both work, though precision is key.

Ingredients

Apricots

  • 500 g ripe apricots
    (firm but fragrant, ideally in season for optimal flavor)

Sweet Shortcrust Pastry (Pâte Sucrée)

  • 60 g unsalted butter, softened
  • 1 g fine salt
  • 45 g icing sugar, sifted
  • 15 g almond powder (finely ground almonds)
  • 25 g whole egg (approx. half a medium egg, lightly beaten)
  • 120 g all-purpose flour, sifted

Almond Cream (Crème d’Amande)

  • 45 g unsalted butter, softened
  • 45 g caster sugar
  • 40 g whole egg (approximately ¾ of a medium egg, beaten)
  • 45 g almond powder
  • 8 g heavy cream (minimum 35% fat)

Finishing

  • Sufficient quantity of apricot glaze (or neutral glaze)
    (used warm to coat the fruit and bring shine and preservation)

Method

1. Sweet Shortcrust Pastry (Pâte Sucrée)

Prepare the pastry in advance to allow for proper resting and handling.

  1. Creaming the base: In a mixing bowl, combine the softened butter, salt, icing sugar, and almond powder. Mix with a spatula or the flat beater of a stand mixer until homogenous and smooth, without incorporating air.
  2. Add the egg: Lightly beat the egg and gradually add it to the mixture. Continue mixing until fully combined.
  3. Incorporate the flour: Add the sifted flour in one addition. Mix delicately, just until the dough comes together. Avoid overworking to preserve tenderness.
  4. Shape and chill: Bring the dough together into a flat disc. Wrap in cling film and refrigerate for at least 2 hours before use. This step is essential for the dough to firm up and become easier to roll out.

2. Almond Cream (Crème d’Amande)

  1. Soften the butter: Place the butter in the microwave for a few seconds until softened (not melted). Whisk it until it reaches a smooth, creamy texture (beurre pommade).
  2. Mix in the sugar: Add the caster sugar to the butter and mix thoroughly with a whisk. Do not overbeat—this mixture should not become airy.
  3. Add remaining ingredients: Incorporate the egg, then the almond powder, and finally the heavy cream. Mix until fully combined and smooth.
  4. Chill: Cover the cream and refrigerate for 30 minutes to firm up slightly before using.

3. Apricots

  1. Prepare the fruit: Rinse the apricots under cold water and dry them gently with a clean cloth.
  2. Halve and pit: Cut each apricot in half and remove the stone. Set aside the halved fruit, flesh-side up, for the assembly.

4. Assembly and Baking

  1. Line the tart ring: Roll out the chilled pâte sucrée to a thickness of about 2–3 mm. Line a 22 cm tart ring, pressing the dough into the edges and trimming the excess. Prick the base lightly with a fork.
  2. Add the filling: Spread the almond cream evenly over the base of the tart shell using a small offset spatula or the back of a spoon.
  3. Arrange the apricots: Place the apricot halves cut-side up in an elegant rosette pattern, starting from the outside and working inward. Ensure even spacing for aesthetic balance and even baking.
  4. Bake: Transfer the tart to a preheated oven at 170°C (338°F, gas mark 5/6). Bake for 20 to 30 minutes, or until the cream is set and the crust is lightly golden. Baking time may vary depending on your oven.

5. Finishing

  1. Unmould the tart: Once fully cooled, carefully remove the tart ring.
  2. Glaze: Gently heat the apricot glaze until fluid but not boiling. Using a pastry brush, apply a thin, even layer over the surface of the fruit to give shine and protect the tart from drying out.
  3. Serve: This tart is best enjoyed at room temperature, ideally on the day it is made, though it keeps well refrigerated for up to 48 hours.

Conclusion

The Apricot Tart is more than just a summer dessert—it is a graceful tribute to seasonal fruit and traditional French technique. In this tart, each component plays its part in harmony: the buttery, crisp pâte sucrée offering structure and contrast; the almond cream lending richness and depth; and the apricots, vibrant and sun-kissed, delivering natural acidity and fragrance.

Whether served as a refined end to a garden lunch or savored in the quiet of an afternoon with tea, this tart captures a sense of both effortlessness and precision. It invites the home baker to slow down, to select the ripest fruit with care, to practice the calm patience of resting and rolling dough, and to take pride in a tart that’s as beautiful to behold as it is satisfying to eat.

Like many great classics, the Tarte aux Abricots offers both tradition and creativity. Once mastered, it can be endlessly reimagined—swapping apricots for plums or peaches, adding herbs like thyme or rosemary, or incorporating subtle notes of citrus zest into the almond cream. Yet at its core, it remains a lesson in balance: between sweetness and acidity, between texture and tenderness.

Link to How to Master Pâte Sucrée: A Step-by-Step Guide”


Questions & Answers

Q: Can I make the tart shell in advance?
A: Absolutely. The pâte sucrée can be prepared and refrigerated up to 48 hours in advance, or frozen for up to one month. Just allow it to soften slightly before rolling.


Q: What if my apricots are very tart?
A: A touch of sugar sprinkled directly on the fruit before baking can help balance acidity. Alternatively, you can poach the apricot halves briefly in a light syrup before arranging them in the tart.


Q: Can I replace the almond cream with custard or frangipane?
A: Yes. While almond cream is the traditional base for this tart, you may use crème pâtissière (pastry cream) for a lighter texture, or enrich the almond cream with a little flour and extra egg to create a frangipane-like filling.


Q: How do I get a perfectly crisp tart base?
A: Ensure the dough is well chilled before baking and consider blind baking the tart shell for 10 minutes before adding the filling. Baking on a perforated tray or a baking stone also improves heat circulation for a crisp bottom.


Q: Is the apricot glaze necessary?
A: While optional, the glaze serves both aesthetic and practical purposes: it enhances shine, preserves the fruit’s moisture, and prevents oxidation. For the most professional finish, it is strongly recommended.

Apricot Varieties for Baking – Specialty Produce Database

3 Secret Recipe : The Art of the Brioche Tartlet Masterpiece

Close-up of a golden brioche tartlet topped with glossy Italian meringue and toasted almond slices, with visible layers of syrup-soaked brioche and creamy pastry filling.

brioche tartlet recipe

Polonaise is a timeless culinary preparation that brings a touch of elegance and warmth to the table, beloved across generations for its simple yet sophisticated charm. At its heart, it embodies the perfect marriage between fresh, tender vegetables and a luxurious finishing touch that transforms everyday ingredients into a celebration of texture and flavor.

Imagine freshly cooked vegetables—often tender, vibrant, and gently steaming—waiting patiently to be dressed in a sumptuous sauce that is both rich and nuanced. The Polonaise style introduces a harmonious blend of buttery richness, the subtle crunch of toasted breadcrumbs or nuts, and a delicate hint of bright, fresh herbs, all united by a subtle acidity that lifts the dish beyond mere comfort food.

What makes this preparation

so special is its ability to elevate humble vegetables, such as cauliflower, green beans, or asparagus, transforming them from simple sides into the centerpiece of any meal. The warm, nutty breadcrumbs add a golden, crisp texture that contrasts beautifully with the softness of the vegetables, creating a sensory experience that is both satisfying and refined.

The essence

of Polonaise lies not only in its flavors but also in its symbolism—a dish that celebrates freshness, care, and the art of finishing touches. It is often associated with convivial family meals, holiday gatherings, or elegant dinner parties where every detail matters. This dish invites diners to slow down and appreciate the nuances of simple ingredients, expertly brought together through a thoughtful balance of texture, aroma, and taste.

Serving Polonaise is like offering a warm embrace on the plate—comforting yet sophisticated, familiar yet elevated. Its rich history and timeless appeal make it a favorite that continues to inspire cooks and diners alike, proving that with the right approach, even the simplest vegetables can be transformed into something truly memorable.

Want to learn pâte levée? Start with our Classic Brioche Guide.

recipe details

For 12 people

Preparation time: 3 hours
First rise (pointage): 30 minutes
Refrigeration: 2 hours
Freezing: 1 hour
Baking time: 40 minutes
Storage: Up to 48 hours

Equipment:

  • Stand mixer
  • Pastry scraper
  • 6 brioche molds
  • Whisk
  • Sieve
  • Rolling pin
  • 6 tartlet molds (7 cm diameter)
  • Thermometer
  • Piping bag without tip
  • Fine mesh strainer

Ingredients:

  • 20 g candied fruit or rum-soaked raisins

Brioche dough:

  • 250 g all-purpose flour (type T45)
  • 5 g salt
  • 30 g sugar
  • 15 g fresh yeast
  • 150 g eggs
  • 130 g butter

Sweet pastry dough (pâte sucrée):

  • 250 g flour
  • 100 g butter
  • 100 g powdered sugar
  • 2 g salt
  • 60 g eggs

Syrup (112°D):

  • 1000 g water
  • 500 g sugar
  • Sufficient amount of orange zest
  • 100 g kirsch

Pastry cream:

  • 250 g milk
  • 50 g eggs
  • 50 g sugar
  • 12.5 g flour
  • 12.5 g custard powder (flan powder)

Italian meringue:

  • 100 g egg whites
  • 200 g cooked sugar syrup

Finishing:

  • Sufficient quantity of sliced almonds
  • Sufficient quantity of powdered sugar

Brioche (Short Recipe)

Mix flour, sugar, salt, fresh yeast, eggs, and softened butter until smooth and elastic. Let the dough rise until doubled in size. Shape into small brioche forms and bake at 210°C (410°F) for about 15 minutes. Once cooled, slice into pieces.


Sweet Pastry Dough (Pâte Sucrée) – Short Recipe

Cream butter and powdered sugar together until smooth. Add eggs and mix well. Incorporate flour and salt, knead gently until just combined. Chill the dough before rolling out.

Roll the dough to 3 mm thickness, cut into 8 cm diameter disks. Line tartlet molds with the dough and bake blind at 180°C (350°F) for 20 minutes. Set aside.


Syrup Preparation

Boil water, sugar, and orange zest to make a syrup. Remove from heat, add kirsch, and cool to about 60°C (140°F). Dip brioche slices briefly into the warm syrup, then drain on a rack.


Pastry Cream (Short Recipe)

Heat milk until just boiling. In a bowl, whisk eggs, sugar, flour, and custard powder until smooth. Slowly pour hot milk into the egg mixture while whisking. Return to heat and cook gently, stirring constantly until thickened. Cool before piping.


Assembly

Fill tartlet shells with pastry cream. Scatter some rum-soaked raisins over the cream. Place a syrup-dipped brioche slice on top. Pipe more pastry cream over the brioche slice to finish.

Prepare the brioches:
Bake them at 210°C (410°F) for 15 minutes. Once cooled, slice them into pieces.

Prepare the sweet pastry dough:
Roll the dough out to 3 mm thickness, cut out 8 cm diameter discs, and line tartlet molds with them. Blind bake at 180°C (350°F) for 20 minutes, then set aside.

Close-up of smooth, pale yellow sweet pastry dough rolled out on a floured surface, ready to be cut into shapes.
Rolling out perfectly smooth sweet pastry dough to a precise thickness, the essential base for delicate tartlets and refined desserts.

Prepare the syrup:
Make a syrup by boiling water, sugar, and orange zest. Remove from heat, add kirsch, and wait until the syrup cools to about 60°C (140°F). Dip the brioche slices briefly into the syrup, then drain on a rack.

A small saucepan with simmering golden syrup infused with orange zest, ready to be removed from heat.
A fragrant syrup made by boiling water, sugar, and orange zest, then enriched with kirsch to soak and flavor brioche slices beautifully.

Prepare the pastry cream:
Let the pastry cream cool before transferring it to a piping bag. Fill the tartlet shells with cream. Scatter some rum-soaked raisins over the cream. Place a syrup-soaked brioche slice on top. Pipe more pastry cream over the brioche slice, then add more raisins. Repeat the layering, and finally, place the top “hat” of the brioche on it. Freeze for 1 hour.

A glossy, pale yellow bowl of freshly cooked pastry cream, ready to be piped into tart shells.
Velvety pastry cream made by gently cooking eggs, sugar, milk, and flour into a smooth, rich custard—perfect for filling tarts and pastries.

Prepare the Italian meringue:
Insert the tip of a knife beneath the brioche part of the tartlet and dip that portion carefully into a bowl of Italian meringue. Be careful not to cover the entire tartlet with meringue. Sprinkle sliced almonds over the exposed meringue.

A glossy, stiff Italian meringue in a mixing bowl, with a glossy sheen and firm peaks.
Light and glossy Italian meringue made by slowly incorporating hot sugar syrup into whipped egg whites, perfect for topping delicate pastries.

Conclusion

This delicate assembly of syrup-soaked brioche, silky pastry cream, and crisp sweet pastry shells is a true celebration of texture and flavor. The subtle infusion of kirsch in the syrup adds a refined aromatic note that complements the richness of the brioche and the smooth creaminess of the custard. The layered raisins, soaked to perfection, bring bursts of sweetness and complexity with every bite. The final touch of Italian meringue, lightly kissed with toasted almond slices, offers a gentle crunch and a hint of sweetness that balances the dessert perfectly.

This dessert is as visually striking as it is delicious, showcasing the harmony of traditional French pastry techniques and thoughtful ingredient pairing. The preparation, while detailed, invites patience and care, rewarding you with a sophisticated creation that will impress at any gathering or special occasion. Moreover, the option to freeze the tartlets before finishing with meringue allows you flexibility in timing, making it ideal for both planned events and last-minute indulgences.

Whether served at a formal dinner or as a luxurious treat to elevate your afternoon tea, this dessert embodies elegance and comfort simultaneously. It invites the savoring of each component, encouraging mindfulness in enjoying every bite. Taking the time to prepare this will surely deepen your appreciation for the artistry of French patisserie and the joy of homemade delicacies.he brioche tartlet has roots in traditional French baking — learn more from Institut Paul Bocuse


Frequently Asked Questions

Q: Can I prepare this dessert in advance?
A: Absolutely! You can prepare the brioche, pastry shells, syrup, and pastry cream ahead of time. The tartlets can be assembled and frozen for up to 24 hours before finishing with the Italian meringue. This makes it perfect for planning ahead without compromising freshness or quality.

Q: What if I don’t have kirsch?
A: You can substitute kirsch with another clear fruit brandy, such as eau-de-vie or a mild cherry liqueur. If you prefer a non-alcoholic version, try using orange blossom water or a splash of fresh orange juice to complement the citrus zest in the syrup.

Q: How can I make sure my brioche is soft and tender?
A: Use fresh ingredients and ensure the dough is well kneaded for gluten development. Allow ample time for the dough to rise in a warm, draft-free environment. Adding enough butter contributes to a tender crumb, while baking at the right temperature ensures a golden crust without drying the interior.

Q: Can I replace the raisins with other dried fruits?
A: Certainly! Dried cherries, cranberries, or chopped apricots soaked in rum or another spirit of your choice will add delightful variations while maintaining the moist texture and flavor contrast.

Q: How do I achieve a smooth, glossy Italian meringue?
A: Slowly pour hot sugar syrup into whisked egg whites while continuing to whip at medium speed. Whip until the mixture cools and forms stiff, glossy peaks. Use fresh eggs and a clean mixing bowl for best results.

Dip Into Luxury: Soft-Boiled Eggs & Crispy Bacon Soldiers

Close-up of a soft-boiled egg cracked open with golden yolk, crispy bacon tuile, and airy soufflé sticks arranged on a white plate.

luxury breakfast recipe

Imagine beginning your day with a plate that transcends the simple pleasure of breakfast, transforming it into an experience both refined and comforting. At the heart of this creation lies the quintessential soft-boiled egg—its delicate white perfectly set, embracing a golden, molten yolk that invites the first gentle crack of the shell. This humble egg, when cooked with patience and precision, becomes a vessel of richness and warmth, a true celebration of nature’s simplest gift.

Accompanying

this velvety core of sunshine are slender, crisp tuiles of bacon, artfully crafted to provide a smoky contrast both in texture and flavor. These thin, wafer-like shards possess an irresistible crunch, their edges delicately curled, offering a savory whisper that dances on the palate. Their smoky aroma weaves effortlessly with the creaminess of the egg yolk, creating a harmony of indulgence and finesse.

But the true pièce de résistance lies in the presentation of the soldiers—those elegant “frites” fashioned not from bread, but from airy soufflés. Each stick-like piece carries the lightness of a cloud, with a golden crust that gives way to an ethereal interior, perfectly suited for dipping. These soufflé soldiers, shaped with care and baked to a subtle puff, elevate the customary dip to a symphony of textures, transforming the simple act of dunking into a ritual of delight.

Together,

these elements invite you to savor a breakfast that balances rustic charm with sophisticated technique. The softness of the egg’s molten core, the crisp smokiness of the bacon tuiles, and the delicate buoyancy of the soufflé soldiers combine to create a dish both playful and elegant. Every bite offers a layered contrast—the tender, the crisp, the airy—all woven into a timeless tradition reimagined.

This is more than a breakfast; it is an experience of textures and flavors, an artful dance of simplicity and complexity. Perfect for those quiet mornings when you crave a moment of indulgence, or as a luxurious start to a leisurely weekend, this dish invites you to slow down, to appreciate the craft, and to delight in the pure pleasure of breaking bread—and egg—together.

ingredients

For a refined breakfast experience serving two, the foundation of this dish begins with an essential selection of fresh, quality ingredients, each chosen to contribute to the harmony of textures and flavors on the plate.

First,

there are the soufflé sticks—delicate, airy creations shaped like slender fries. These soufflés, light as a whisper, offer an ethereal texture that will perfectly complement the richness of the eggs. Their subtle golden hue promises a tender crispness on the outside, while the interior remains soft and cloud-like, ideal for dipping into the luscious yolk.

Next,

two extra-fresh eggs take center stage. The freshness of the eggs is paramount, for it ensures the whites set just enough to cradle the molten yolk within—a vibrant orb of golden silk waiting to be revealed. These eggs must be of the highest quality, laid recently, with firm whites and deep yellow yolks, signaling their superior taste and texture. The magic of a perfectly soft-boiled egg lies in this balance, the yolk thick enough to coat, yet fluid enough to cascade over the accompaniments.

To add a contrasting note of smoky, savory richness, a single slice of bacon is included. This bacon is not merely a side but an essential flavor accent—carefully cooked until it becomes a crisp tuile, thin and brittle, yet packed with an intense aroma and taste. The bacon’s saltiness and smokiness will beautifully counterbalance the mild, creamy eggs and airy soufflés, adding depth and character to each bite.

A teaspoon of high-quality olive oil is introduced to lend a delicate fruitiness and smooth finish, enhancing the overall mouthfeel without overpowering the natural flavors. This olive oil, golden and fragrant, is drizzled with care, its subtle peppery notes weaving seamlessly into the ensemble.

For seasoning,

freshly cracked pepper from the mill provides a bright and slightly pungent touch, awakening the palate and sharpening the delicate nuances of the eggs and bacon. The pepper’s aromatic complexity elevates the dish, ensuring each mouthful carries a hint of spice and warmth.

Finally, a sprinkle of finely chopped chives brings a fresh, herbal brightness to the plate. Their gentle oniony flavor is both subtle and refreshing, a perfect contrast to the richness of the other ingredients. The vivid green of the chives also adds a touch of color, enhancing the visual appeal and inviting the diner to savor every element thoughtfully placed.

Together, these ingredients form a balanced and exquisite composition—each element indispensable, each flavor thoughtfully considered. They promise a dish that is at once simple and sophisticated, rustic yet elegant, comforting and refined—a true celebration of breakfast’s finest traditions.

elegant step-by-step description of the cooking and serving process

Begin by preparing your eggs with careful attention to timing and temperature, for this will be the key to achieving the perfect soft-boiled consistency. Bring a saucepan of water to a gentle but lively boil, ensuring the water is salted to enhance the subtle flavor of the eggs during cooking. Once boiling, carefully lower the two extra-fresh eggs into the water. Allow them to cook for exactly three minutes—this precise timing is essential to achieve the ideal balance where the whites are just set, tender yet firm enough to hold their shape, while the yolks remain irresistibly runny, glowing with a deep golden hue.

While the eggs gently simmer,

turn your attention to the bacon. Take the single slice and place it in a preheated skillet, warmed with a teaspoon of fine olive oil. The oil will gently sizzle around the bacon, coaxing out its rich, smoky flavors while helping it crisp to perfection. Keep the heat at medium to avoid burning and allow the bacon to render its fat slowly, becoming beautifully golden and crisp without losing its tender texture. Flip the slice as needed to ensure an even cook on both sides. You will know it’s ready when it has transformed into a crisp, delicate wafer—a tuile—that promises a satisfying crunch with every bite.

Once the bacon has reached this perfect state, carefully transfer it to a plate lined with absorbent paper to soak up any excess oil, preserving its crispness. With gentle hands, break the bacon slice into two pieces, maintaining their thin, fragile structure so they resemble elegant tuiles—light, curved shards of smoky delight, ready to accompany the eggs.

As the eggs finish cooking,

prepare to serve them in the most inviting manner. Remove them from the boiling water with a slotted spoon and gently place them onto a warm plate. Using a small knife or an egg topper, delicately crack the shell open at the top, revealing the luscious, molten yolk beneath the pristine white. This moment—the unveiling—is a sensory delight, the rich aroma and vibrant color inviting the first taste.

To complete the presentation, scatter a handful of finely chopped chives over the exposed yolk and the surrounding plate area. The fresh, grassy notes and bright green hue of the chives provide a striking contrast against the soft yellow and white of the eggs, enhancing both flavor and visual appeal.

Arrange the crispy bacon tuiles alongside the eggs,

their smoky fragrance beckoning you to taste their crunchiness. Finally, add the soufflé “frites,” those delicate, airy sticks, neatly lined up as perfect dippers. These soufflé soldiers are designed to be dipped into the golden yolk, soaking up the creamy richness and delivering a unique texture that complements the other elements beautifully.

Serve immediately, encouraging your guests to break into the eggs, dip the soufflé sticks, and savor the interplay of creamy, crunchy, and airy textures. This dish, simple in its components yet sophisticated in its execution and presentation, transforms the familiar ritual of soft-boiled eggs into a gourmet experience—one that delights the senses and elevates breakfast to an art form.

Conclusion

This elegant dish of soft-boiled eggs with bacon tuiles and soufflé-shaped soldiers is much more than a simple breakfast — it is a celebration of contrasts and harmony, simplicity elevated by technique. From the moment you set the pot to boil, to the satisfying crack of the egg shell, and the final dip of a light, airy soufflé stick into the molten yolk, every step is infused with care and intention. The interplay of textures — the silky richness of the egg yolk, the smoky crispness of the bacon, and the delicate buoyancy of the soufflé soldiers — invites you to slow down and truly savor each bite.

It reminds us that even the most humble ingredients can be transformed into something extraordinary with a little patience and attention. This dish also embraces tradition while offering a modern twist, reimagining the classic “egg and soldiers” in a way that delights both the eye and the palate. Whether enjoyed as a leisurely weekend brunch or a special treat to start the day, it encourages us to reconnect with the simple joys of cooking and eating well.

By bringing together fresh ingredients, precise cooking times, and a thoughtful presentation, you create not just a meal, but a memorable experience — one that lingers long after the last bite, inspiring you to explore more culinary adventures with the same passion and careWant more Parisian breakfast inspiration? Don’t miss our post on Café-Style Baguette & Butter Rituals.


Frequently Asked Questions

Q: Why is the freshness of the eggs so important for this recipe?
A: Fresh eggs have firmer whites and richer yolks, which are crucial for achieving the perfect soft-boiled texture where the white holds shape but the yolk remains luxuriously runny. Older eggs tend to have weaker whites and flatter yolks, which can alter the dish’s texture and appearance.

Q: Can I substitute the soufflé soldiers with regular bread soldiers?
A: While traditional bread soldiers work well, soufflé soldiers add a unique lightness and airiness that contrasts beautifully with the richness of the egg yolk. They elevate the dish by introducing a delicate texture that regular bread can’t replicate.

Q: How can I make sure the bacon becomes perfectly crisp without burning?
A: Cook the bacon slowly over medium heat with a bit of olive oil, turning it occasionally to ensure even cooking. Using a lower temperature allows the fat to render gently, creating a crisp texture without burning.

Q: What if I don’t have fresh chives? Are there alternatives?
A: Fresh chives add a subtle oniony brightness and vibrant color, but if unavailable, finely chopped green onions or a light sprinkle of fresh parsley can work as a substitute. However, avoid dried herbs as they lack the freshness needed here.

Q: How should I serve this dish to best enjoy it?
A: Serve immediately after cooking to ensure the eggs remain warm and the soufflé soldiers crisp. Encourage diners to break open the egg, dip the soufflé sticks into the runny yolk, and savor the combination of textures and flavors together.For the bacon soldiers, we like using streaky bacon wrapped around slices of toasted brioche. (Need a homemade version? Here’s our recipe for 10-Minute Braided Brioche.)

The Cherry Clafoutis Secret: Mastering the Perfect Tart

Photo of a golden tart with a crisp crust, topped with glossy fresh fruit (or lemon cream, or caramelized apples depending on the tart).

cherry clafoutis perfect tart

Some desserts transcend time and trend, offering not just taste but memories. Cherry clafoutis is one such treasure — a beloved staple of French home baking that blends rustic elegance with quiet sophistication. Born in the heart of the Limousin region, this dish transforms ripe cherries into a celebration of the season, nestled in a custard-like batter that’s tender, golden, and delicately perfumed.

Clafoutis is more than just a dessert — it’s a story. It tells of sunlit orchards, lazy summer afternoons, and kitchens filled with the scent of warm fruit and vanilla. Its texture is somewhere between a flan and a soft cake, and every bite offers the sweet-tart burst of cherries wrapped in silky softness. Served warm, at room temperature, or chilled, it adapts to every mood and every moment.

Though its preparation may appear simple, true success lies in the details: the perfect ripeness of the fruit, the smoothness of the batter, the precision of the bake. Some add a hint of almond or a dash of kirsch, others keep it purely traditional — but all agree on its quiet power to please. Finished with a dusting of powdered sugar, clafoutis never clamors for attention. Instead, it gently captures the heart.

In the world of Brioche Chic, where tradition meets refinement, cherry clafoutis is right at home — a dessert that doesn’t need adornment to be unforgettable. It’s the kind of recipe that brings generations together, served simply and savored slowly, with a nod to heritage and a taste of home.

Cherry Clafoutis – Full Recipe for 6 Servings


Preparation Time
– Prep: 30 minutes
– Chilling: 1 hour
– Baking: 1 hour
– Storage: Up to 3 days in the refrigerator


Required Equipment
– Whisk
– Bowl scraper
– Sieve
– Rolling pin
– 22 cm tart ring
– Baking rice or ceramic baking weights


Ingredients

tart base
– 250 g sweet shortcrust pastry (or scraps of puff pastry)

For the clafoutis custard
– 75 g whole eggs
– 20 g egg yolk
– 62 g granulated sugar
– 10 g all-purpose flour
– 125 g semi-skimmed milk
– 125 g cream
– 300 g cherries (preferably with pits for flavor)

finishing
– Icing sugar (as needed for dusting)


Instructions

1. Prepare the tart shell
Roll out the sweet pastry to about 3 mm thickness. Line a 22 cm tart ring placed on a baking sheet. Chill in the refrigerator for 1 hour to firm up the dough.
Preheat the oven to 170°C (fan-assisted).
Line the shell with baking paper and fill with baking rice or ceramic weights.
Blind-bake for 20 minutes. Remove the weights and paper, then return to the oven for 5 more minutes to dry out the base. Allow to cool slightly.

2. Make the clafoutis custard
In a mixing bowl, whisk together the whole eggs, yolk, and sugar until pale and slightly thickened.
Sift in the flour and mix to combine.
Gradually add the milk and cream while whisking gently to create a smooth mixture.
Chill the mixture while the tart base cools.

Photo of a smooth, creamy clafoutis custard mixture in a bowl, ready to be poured over the fruit.
Whisk the clafoutis custard until smooth and creamy.

3. Assemble and bake
Arrange the cherries evenly over the baked pastry base.
Carefully pour the clafoutis mixture over the cherries.
Bake at 170°C for 40 to 45 minutes, until golden and the custard is fully set.
Allow to cool at room temperature, then refrigerate for at least 2 hours before serving.

Photo of a freshly assembled tart with a smooth filling inside a golden crust, ready to be baked in the oven
Assemble the tart with care, then bake until golden and crisp.

4. Finish and serve
Dust lightly with icing sugar just before serving, using a fine sieve for a delicate finish.

A homemade tart, perfectly golden and ready to enjoy.

Chef’s Tip


For a truly traditional clafoutis, keep the cherry pits in. They enhance the flavor and help prevent excess moisture in the custard. Just be sure to let your guests know before serving:


Chef Tips & Tricks – Mastering the Art of Blind Baking

Blind baking is one of those fundamental pastry techniques that may seem simple, but when mastered, it elevates a tart from ordinary to exceptional. It’s the secret to a crisp, golden base that holds its structure, resists sogginess, and provides the perfect contrast to delicate fillings like custards, creams, or fruit mixtures.

Traditionally, pastry chefs use ceramic or metal baking weights to keep the dough from puffing up during baking. These weights conduct heat evenly, pressing the dough flat and ensuring even cooking. But in many professional kitchens, chefs turn to clever, cost-effective alternatives that work just as well — if not better.

Dried rice, lentils, beans, or even fruit pits (like cherry or apricot stones) can be used instead of commercial weights. Not only are these pantry staples easy to find, but they also offer excellent thermal mass and distribute heat efficiently across the tart base. Simply line the pastry shell with parchment paper before adding your chosen weight, making sure it presses into the edges for an even shape.

Fruit pits in particular have a distinct advantage:

their round shape and weight help stabilize the dough without scorching, and they can be stored in a dedicated jar and reused endlessly. It’s a sustainable, low-waste solution that many seasoned pastry chefs swear by.

One professional tip often overlooked is to remove the weights partway through baking — usually after 15 to 20 minutes — and return the shell to the oven for another 5 to 10 minutes. This crucial step allows the base to dry out and firm up, preventing any undercooked or doughy spots once filled.

Another essential trick? Always chill your lined tart shell before baking. The cold dough contracts less in the oven, helping to maintain its neat edges and preventing shrinkage or slumping. A properly chilled and blind-baked shell provides the clean, crisp canvas every beautiful tart deserves.

In the refined world of pâtisserie, it’s these quiet, thoughtful details that distinguish a competent baker from an exceptional one. A perfectly baked tart shell is not just a technical achievement — it’s the elegant foundation of a dessert meant to impress.

Conclusion

The cherry clafoutis stands as one of those timeless desserts that bridge the gap between rustic charm and refined indulgence. At once simple in composition and sophisticated in flavor, it captures the spirit of traditional French baking — a harmonious balance of texture, freshness, and technique.

Through its custard-like filling and bursts of juicy cherries, this dessert offers a delightful contrast between the silken creaminess of the batter and the gentle resistance of the fruit. Whether made with sweet shortcrust pastry for structure or simply baked au naturel, the clafoutis adapts gracefully to the rhythm of the seasons and the nuances of the home kitchen.

But as any seasoned chef will affirm,

it is not merely the ingredients that define success — it is the care and intention behind each step. The precision in blind baking the tart shell, the balance of the custard, the decision to leave the cherry pits intact for depth of flavor — these are not just technicalities, but quiet expressions of culinary respect. Every thoughtful detail contributes to a dessert that feels effortless yet deeply satisfying.

Whether served warm with a dusting of sugar, or chilled for a firmer bite, this clafoutis invites nostalgia and elegance in equal measure. It’s the kind of dessert that doesn’t shout but lingers — in memory, in conversation, and most of all, in the palate.

So take your time, enjoy the process, and allow this beautiful, understated tart to remind you that excellence in pastry lies not in complexity, but in mastering the essentials with intention and grace.History of Clafoutis – Larousse Cuisine (FR)

Questions & Answers: Everything You Need to Know About Cherry Clafoutis


Q: Can I use pitted cherries, or is it necessary to leave the pits in?
A: This is one of the most common questions — and a very good one. Traditionally, cherry clafoutis is made with whole cherries, pits included. While it might seem inconvenient at first glance, there are two important reasons behind this method. First, cherries baked with their pits hold their shape better and release less juice, helping the custard set properly. Second, and perhaps most importantly, the pits release subtle almond-like aromas when baked, adding a refined depth of flavor to the entire dish.
That said, if you’re serving children or prefer a more elegant eating experience, it is absolutely fine to pit the cherries ahead of time. Just know that the texture may be softer, and the flavor slightly less complex. For a balanced compromise, some chefs recommend leaving a few cherries with their pits in, to retain a touch of that aromatic charm.


Q: Do I have to use a tart crust? Can I make clafoutis without one?


A: Yes — you can absolutely make clafoutis without a crust. In fact, that’s the most traditional and rustic version: a baked custard poured directly into a buttered dish over fresh fruit. It’s quick, unfussy, and delicious.
However, adding a sweet shortcrust base (or even leftover puff pastry trimmings) transforms the dessert into something closer to a pâtisserie-style tart. The crispness of the baked shell contrasts beautifully with the soft custard and fruit, adding both structure and refinement to the final result. It’s not essential — but it does elevate the dish, especially for more formal occasions or when presentation matters.


Q: make the clafoutis ahead of time? Is it better warm or chilled?
A: Clafoutis is quite forgiving when it comes to timing. In fact, many chefs believe it improves after a short rest. Once baked and cooled, a few hours in the refrigerator allow the custard to set fully and the flavors to harmonize. This makes it easier to slice and serve — particularly when using a tart shell.
That said, clafoutis served slightly warm has its own appeal — soft, spoonable, and almost molten in texture. It depends on your preference: if you’re looking for something comforting and casual, serve it warm. If you’re aiming for elegance and neat presentation, chill it for a few hours or even overnight. Either way, a light dusting of powdered sugar just before serving brings everything together.


Q: I substitute the cherries with other fruits?


A: Definitely — clafoutis is wonderfully adaptable. While cherries are the classic choice, the custard base pairs beautifully with other fruits, allowing you to explore the seasons. Apricots, plums, figs, berries, apples (lightly caramelized), pears, or even rhubarb can all be used with slight adjustments.
Keep in mind that juicier fruits may release more liquid during baking, so you might need to increase the flour slightly or precook the fruit. Tart fruits often require a touch more sugar in the custard. The key is to taste as you go and adjust the balance to suit the fruit in question.Link to Tarte Bourdaloue vs. Clafoutis: Know the Difference”