Warning: These Brownies Will Change Your Life!

Close-up of rich, fudgy brownies cut into perfect squares, with a glossy, crackly top.

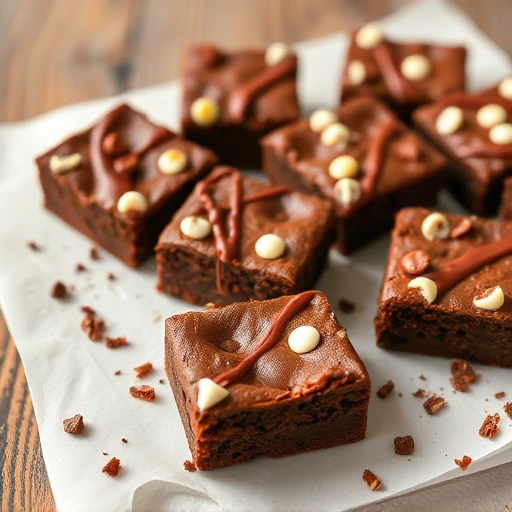
Opéra cake secret

Brownies are a legendary dessert, celebrated across the world for their rich texture and irresistible charm. With their luscious balance between soft, fudgy centers and slightly crisp edges, brownies offer an experience unlike any other. Every square promises pure comfort, an invitation to indulge in the simple yet profound pleasure of chocolate.

Beyond their deep, luxurious flavor, brownies carry a sense of nostalgia and warmth. They evoke memories of home kitchens filled with the sweet scent of baking, of laughter shared over plates stacked high with these golden-edged treasures. Brownies effortlessly bridge casual moments and special occasions, equally suited for an afternoon snack, an elegant dessert spread, or a heartfelt gift.

Versatile in their presentation, brownies adapt to every mood: plain for purists who savor the essence of chocolate, adorned with swirls and toppings for those seeking a little extra magic. Whether served warm with a whisper of cream, paired with fresh fruit, or enjoyed on their own, brownies never fail to satisfy the senses.

In every bite, brownies embody generosity, comfort, and the timeless joy that only true classics can offer. They are not merely a dessert—they are a beloved ritual, a moment of sweetness that lingers long after the last crumb has disappeared.

Brownies for 4 People

Preparation

Prep time: 30 minutes

Baking

Bake time: 25 to 30 minutes at 160°C (320°F / medium-low heat)

  • The brownie should remain soft and fudgy in the center, with slightly firmer edges.
  • Check doneness by inserting a knife into the center: it should come out with a few moist crumbs but no raw batter.
  • Be careful not to overbake to keep the texture rich and tender!

Storage

  • Keep for 3 to 4 days, well wrapped in plastic film.
  • Store in a dry and cool place (not refrigerated).

Equipment Needed

  • Stand mixer with whisk attachment
  • Cooking thermometer
  • Sifter
  • Rubber spatula (maryse)
  • 18 cm (7-inch) square baking pan

Ingredients

  • 100 g butter
  • 120 g dark chocolate
  • 100 g eggs (about 2 medium eggs)
  • 60 g sugar
  • 40 g flour
  • 30 g walnut halves (roughly chopped)

Preparation Steps

1. Melt the Chocolate

  • Gently melt the butter and chopped dark chocolate over a bain-marie (water bath) until smooth and fully combined.
Butter and dark chocolate melting smoothly over a bain-marie to create the rich base for homemade brownies."
The magic begins: melting butter and chocolate together for the richest, most decadent brownies

2. Whip the Eggs

  • In the bowl of a stand mixer fitted with the whisk, whip the eggs and sugar together for at least 7 minutes.
  • The mixture should become pale, thick, and triple in volume.

3. Incorporate the Chocolate

  • Gradually pour the melted chocolate-butter mixture in three additions over the whipped eggs, mixing at medium speed.
  • Be careful to preserve as much volume as possible for a light, fudgy texture.

4. Add the Dry Ingredients

  • Using a rubber spatula, gently fold in the sifted flour and chopped walnuts.
  • Mix carefully to avoid deflating the batter.
Pouring melted chocolate-butter mixture over whipped eggs to create a smooth, fudgy brownie batter
The secret to fudgy brownies: carefully incorporating the melted chocolate and butter mixture to maintain volume and texture.

5. Baking

  • Pour the batter into a square 18 cm (7-inch) pan lined with parchment paper.
  • Bake at 160°C (320°F) for 25 to 30 minutes.
  • The brownie should feel just set but still soft when pressed lightly.
"A perfectly baked brownie with a slightly firm outer edge and a soft, fudgy center, gently pressed to check its doneness."
The key to perfect brownies: firm on the edges, soft and fudgy in the center—press gently to test doneness.

6. Finishing

  • Let cool completely in the pan.
  • Unmold, then cut into even squares before serving.
Close-up of perfectly baked brownies with a rich, fudgy texture and glossy, crackly top, served in squares.
These homemade brownies are the perfect balance of fudgy, soft, and rich—ideal for any chocolate lover.

Conclusion

Brownies are much more than just a simple chocolate dessert—they are a timeless expression of comfort, warmth, and pure indulgence. Whether you enjoy them slightly warm, with their rich fudgy center, or prefer them cooled to reveal their dense, satisfying texture, brownies have an unparalleled ability to bring a moment of joy into any day.

By mastering this recipe, you open the door to endless variations and creative twists, from adding a sprinkle of sea salt to swirling in caramel, or folding in fruits and nuts. With just a few quality ingredients and a little care, you can create a treat that speaks to the heart as much as it delights the palate.

Take your time, respect the process, and savor each bite. A perfectly made brownie is not just a dessert—it’s an invitation to pause, to celebrate, and to share a little happiness with those around you.


Frequently Asked Questions (FAQ)

Q: Can I use milk chocolate instead of dark chocolate?

A: While you can use milk chocolate, keep in mind that it is much sweeter and less intense than dark chocolate. If you do, consider slightly reducing the amount of sugar in the recipe to balance the overall sweetness.


Q: How do I know when my brownies are perfectly baked?

A: The best indicator is the texture: the edges should be set, while the center remains slightly soft. Insert a knife or toothpick into the middle—if it comes out with moist crumbs (but no raw batter), the brownies are ready. Overbaking will make them dry, so it’s better to err on the side of slightly underdone!


Q: Can I freeze brownies?

A: Absolutely! Brownies freeze very well. Once completely cooled, cut them into squares, wrap them individually in plastic wrap, and place them in an airtight container. They can be frozen for up to 2 months. To enjoy, let them thaw at room temperature for about 1 hour.


Q: What can I add to customize my brownies?

A: You can personalize your brownies endlessly! Popular additions include:

  • Chopped nuts (pecans, almonds, hazelnuts)
  • Dried fruits (cranberries, cherries)
  • Caramel swirls
  • Peanut butter streaks
  • Chocolate chips
  • A sprinkle of sea salt on top before baking for a sophisticated touch

Q: Why is it important to whip the eggs and sugar for so long?

A: Whipping the eggs and sugar for a full 7 minutes incorporates air, creating a lighter, more tender brownie. It also helps the batter achieve that characteristic shiny, crinkled top that brownie lovers adore.


Q: My brownies sunk a little in the center after baking—is that normal?

A: Yes, it’s quite common! Slight sinking can happen because the structure of a fudgy brownie is more delicate than that of a cake. As long as the texture is moist and rich, a little sinking is not a flaw—it’s a sign of deliciousness! http://Classic Opéra Cake – Lenôtre Recipe Foundation . Link to https://briochechic.com/crispy-caramelized-bliss6-secret-to-perfect-palmiers-revealed/#more-390

7 Secrets to Perfect Homemade Pain au Chocolat You Need to Know!

Freshly baked golden pain au chocolat with rich chocolate filling, displayed on a baking tray.

perfect homemade pain au chocolat

Pain au chocolat is one of the most iconic pastries in French baking, perfectly embodying the delightful union of melt-in-your-mouth chocolate and light, golden, flaky dough. If you’ve ever had a pain au chocolat fresh from the oven, you know how the combination of airy pastry and melting chocolate can be pure bliss. But why settle for store-bought when you can easily make this delicious treat at home with a simple recipe that will rival those from your favorite bakeries?

In this post, I’ll walk you through the secret to making perfect homemade pain au chocolat that’s every bit as good as what you’ll find in the best pastry shops. Forget about long hours of waiting or complicated techniques—here, you’ll learn a straightforward and quick method to create golden, flaky, and, of course, incredibly tasty pain au chocolat.go to history : http://Pain au Chocolat History (Saveur)

Why Make Pain au Chocolat at Home?

Making pain au chocolat at home is a true indulgence. Not only do you get to control the quality of the ingredients, but you also have the flexibility to customize every aspect of the recipe. Whether you prefer a smooth, rich dark chocolate or a sweet milk chocolate filling, the choice is yours. Plus, there’s something incredibly satisfying about pulling a perfectly baked pain au chocolat out of the oven and filling your kitchen with its irresistible scent.

The Perfect Puff Pastry for an Exquisite Result

The secret to a great pain au chocolat lies in the puff pastry. In this recipe, I’ll guide you step-by-step in making your own pastry dough. However, if you’re in a rush, you can always use store-bought puff pastry, and it will still yield great results. We’ll cover how, by working with the dough, you can create those beautiful, flaky layers that, when baked, will give you that signature light and crisp texture we all love.

Key Ingredients for the Perfect Dough

To make homemade pain au chocolat, you’ll need a few essential ingredients: flour, butter, sugar, milk, yeast, and of course, high-quality chocolate. The chocolate is the star of the show here, so choose a bar of dark or milk chocolate that you particularly enjoy. You can also get creative by adding nuts like hazelnuts or almonds, or even a touch of candied orange peel for a delightful twist.ather recipes: Make It at Home: Make It at Home: The Ultimate Braided Brioche in Just 10 Minutes — Like the Pros

An Easy and Effective Method for a Perfect Result

While making puff pastry from scratch requires a bit of technique, don’t worry! I’ll share all the tips and tricks you need to make each step as simple as possible. From mixing the ingredients to letting the dough rest, and from shaping the pain au chocolat to baking them, you’ll be guided through the process to avoid common pitfalls and achieve that perfect pastry.

The most rewarding moment? When you pull your pain au chocolat from the oven, golden and crisp, with the chocolate inside still soft and melted. It’s a visual and gustatory treat that will impress everyone at the table

Chef’s Tips for Perfect Homemade Pain au Chocolat 1:

  • To ensure your pain au chocolat comes out just right, I’ll also share some professional tips. You’ll learn how to roll the dough to get the perfect shape, how to achieve that golden, shiny finish, and how to avoid issues like dough tearing or chocolate spilling over during baking.

Ingredients for Croissant Dough (for 6 pain au chocolat)

Ingredients for Egg Wash:
  • 50 g of whole egg
  • 50 g of egg yolks
  • 50 g of whole milk
Other Ingredients:
  • 400 g of croissant dough (you can make it from scratch using a specific croissant dough recipe or buy pre-made dough)

If you want to make the croissant dough yourself, here is a basic recipe:

Ingredients for the Croissant Dough (Base):

  • 500 g of all-purpose flour (type 55)
  • 10 g of salt
  • 40 g of sugar
  • 20 g of fresh yeast
  • 300 ml of whole milk
  • 30 g of melted butter
  • 200 g of cold butter (for laminating)

Steps:

  • Mix the Ingredients: In a stand mixer, combine the flour, salt, sugar, and crumbled yeast. Gradually add the warm milk and melted butter, and knead until the dough is smooth and homogeneous.
  • First Rise: Let the dough rest at room temperature for about 1 hour or until it doubles in size.
  • Incorporate the Butter for Laminating: Roll the dough into a rectangle, place the cold butter in the center, and fold the dough around it to enclose the butter. Perform several turns (fold and roll) while allowing the dough to rest between each turn (about 30 minutes). This process creates the flaky layers in the dough.
  • Rest and Final Rise: Let the dough rest between each turn and repeat the folding and rolling process 3 to 4 times.
  • 12 sticks of chocolate (or chocolate bars, depending on your preference)

Equipment Needed:

  • Stand mixer
  • Whisk
  • Dough scraper (for cutting and handling the dough)
  • Rolling pin
  • Pastry brush (for applying the egg wash)

Shaping and Baking the Pain au Chocolat

  • Roll out the dough to a thickness of 4 mm. Cut it into rectangles measuring 9 cm × 15 cm.
  • Place one stick of chocolate on each rectangle.
  • Roll the dough once over the chocolate, then place a second stick of chocolate on top.
  • Finish rolling the dough all the way up. Using the palm of your hand, gently press down on each pain au chocolat to seal the seam firmly in the center.
Hands gently pressing a rolled pain au chocolat to seal the seam before proofing.
Gently sealing the dough ensures perfect layers and a clean rise during baking.
  • Place the rolled pains au chocolat onto a non-stick baking tray.
  • Brush them lightly with the egg wash using a pastry brush.
  • Let them proof for about 2 hours in a proofing chamber (or in an off oven with a bowl of boiling water inside) at 26°C (78.8°F).
    • The pains au chocolat should double in volume.
  • Brush them again very gently with the egg wash.
Pastry brush gently applying egg wash to proofed pain au chocolat for a golden crust.
A delicate second egg wash gives your pain au chocolat that irresistible golden shine.
  • Bake in a ventilated (fan) oven at 165°C (329°F) for 14 to 16 minutes, until beautifully golden and flaky.
Golden and flaky homemade pain au chocolat with layers of buttery pastry and melted chocolate.
Buttery, flaky, and filled with rich chocolate — this homemade pain au chocolat is pure morning bliss.

Chef’s Tips and Tricks 2:

  • During proofing, make sure the temperature does not exceed 29–30°C (84–86°F), to prevent the butter from melting inside the dough.
  • Before baking, chill the pains au chocolat in the refrigerator for a few minutes. This will help the dough firm up and hold its shape beautifully during baking.

Conclusion

Making your own pain au chocolat at home is a rewarding experience that brings the authentic taste of French pastry right to your kitchen. By carefully preparing your croissant dough, respecting the resting and proofing times, and mastering the gentle baking techniques, you can create flaky, golden, melt-in-your-mouth pains au chocolat that rival the best bakery versions.

From the delicate layering of the dough to the perfect incorporation of rich, luscious chocolate, every step contributes to creating a pastry that is both a joy to make and a delight to eat. Whether for a cozy weekend breakfast, a brunch with friends, or simply to indulge your love for pastry, homemade pain au chocolat is always a brilliant idea.

Remember, the beauty of baking at home is that you can tweak the recipe to suit your preferences—experiment with different chocolates, add a hint of orange zest, or even try variations with hazelnut spreads for a delicious twist. With practice and passion, each batch will be better than the last!

Now that you have all the tools and tips in hand, it’s time to roll up your sleeves and get baking. Trust the process, enjoy the craft, and savor every flaky, chocolatey bite of your homemade pains au chocolat!


Frequently Asked Questions (FAQ)

Can I use store-bought puff pastry instead of homemade croissant dough?

Yes, you can! If you’re short on time, a good quality store-bought puff pastry can work. However, traditional croissant dough gives a much richer, more buttery flavor and a lighter, flakier texture that’s closer to authentic bakery pains au chocolat.

Why is it important not to proof above 30°C?

Because butter starts melting around 29–30°C. If the butter melts during proofing, the layers of the dough will collapse, and you’ll lose the beautiful flakiness that defines a perfect pain au chocolat.

How do I know when my dough is properly proofed?

After proofing, the pains au chocolat should be visibly puffed up and almost doubled in size. When you gently press a finger on the dough, the indentation should slowly bounce back. If it springs back too quickly, it needs a little more time.

Can I freeze the unbaked pains au chocolat?

Absolutely! After shaping but before proofing, you can freeze them on a baking sheet. Once frozen solid, transfer them to an airtight container or bag. When ready to bake, thaw them overnight in the fridge, let them proof, and then bake as usual.

What kind of chocolate is best for pain au chocolat?

Traditionally, batons of semi-sweet or dark chocolate (around 55–65% cacao) are used. You can also use milk chocolate if you prefer a sweeter pastry. Make sure to choose good-quality chocolate for the best flavor.

Why chill the pains au chocolat before baking?

Chilling helps the dough firm up, ensuring sharper, cleaner layers and preventing the butter from leaking out during baking. It also helps create an even, beautiful rise in the oven.

Can I add flavors or fillings to the traditional recipe?

Of course! While the classic version is simply chocolate, you can get creative by adding a bit of orange zest to the dough, sprinkling chopped nuts with the chocolate, or even using flavored chocolates for a fun twist

Unlock the Citrus Magic: Mastering Lemon Macarons at Home

Lemon macarons with a glossy yellow filling, elegantly arranged on a white plate.

There’s something truly magical about macarons — those delicate, dainty little cookies that melt in your mouth, with a crisp shell giving way to a soft, flavorful filling. And when it comes to a flavor that embodies both elegance and freshness, lemon macarons reign supreme. These light, citrus-infused treats bring together the perfect balance of tangy and sweet, making them a truly irresistible delight.

If you’ve ever wondered how to create macarons at home, you’ll be happy to know that it’s not as intimidating as it sounds. With the right techniques and a little bit of patience, you can achieve perfect lemon macarons that will impress your guests and leave them craving more. In this post, we’re diving into everything you need to know to make these zesty, vibrant sweets — from the process of creating the ideal macaron shells to the tangy lemon filling that will take your macarons to the next level.

The Art of Making Lemon Macarons: A Delicate Balance

Lemon macarons are made up of two essential parts: the crispy macaron shells and the luscious lemon curd filling. The shells require precision to achieve that perfect texture — crisp on the outside and chewy on the inside. But the real star of the show is the lemon filling. The rich, creamy lemon curd adds just the right amount of tang to balance the sweetness of the almond shells.

To start, it’s essential to get the macaronage (the process of folding the batter) just right. Overmixing or undermixing can lead to cracked shells or uneven texture. With the perfect mix, you’ll see your macarons rise beautifully in the oven and bake to a golden, smooth finish.

Why Lemon?

Lemon is a versatile, vibrant flavor that can be both refreshing and indulgent. Its natural citrusy sharpness cuts through the sweetness of the macaron shells and creates an exciting flavor contrast. Lemon pairs wonderfully with the delicate almond base of the macaron, and its bright yellow hue gives these treats a fresh, sun-kissed look that’s sure to brighten up any dessert table.

Whether it’s for a spring gathering, a tea party, or as a special treat to accompany your afternoon coffee, lemon macarons will add a touch of elegance and sunshine to any occasion. Plus, they make for a wonderful homemade gift — who wouldn’t love receiving a box of these delightful, bite-sized morsels?

Lemon Macaron Tips and Tricks

Making lemon macarons can be a bit of a delicate process, but don’t let that discourage you! Here are a few tips to ensure you achieve perfect macarons every time:

  1. Age your egg whites: This step is crucial for achieving the right consistency when whipping the egg whites. Let them sit at room temperature for 24-48 hours for the best results.
  2. Sift your dry ingredients: This helps to remove any lumps in the almond flour and powdered sugar, ensuring a smooth batter for your shells.
  3. Macaronage magic: The key to perfect macarons is the macaronage process. The batter should flow off the spatula like molten lava, not too thick or too runny.
  4. Rest the macarons before baking: Let the piped macarons sit for about 30 minutes to an hour until they form a skin on top. This helps the macaron shells hold their shape during baking.
  5. Fill them with homemade lemon curd: While store-bought lemon curd can be convenient, making your own from scratch adds an extra layer of freshness and flavor. Plus, you can adjust the tanginess to your liking!

The Perfect Lemon Filling

A macaron’s filling is just as important as the shell, and for lemon macarons, a smooth, tangy lemon curd is the ideal choice. Made with fresh lemon juice, zest, and butter, lemon curd is rich, smooth, and has that perfect zesty kick. Once you’ve made your curd, allow it to cool to room temperature before piping it into your macarons. The filling will firm up and create that luxurious contrast with the crunchy, chewy shells.

Why You’ll Love These Lemon Macarons

Lemon macarons are perfect for those who love a little zest in their desserts. The crisp texture, creamy lemon curd, and the balance of sweet and tart flavors make these macarons a standout treat that everyone will adore. They’re the perfect addition to your baking repertoire — and once you’ve mastered the art of making macarons, you’ll feel a sense of accomplishment with every batch you make.

Lemon Macarons: Recipe and Tips

For 12 macarons

Preparation time: 1 hour 45 minutes
Refrigeration: 3 hours
Storage: 3 to 4 days
Required equipment:
  • Fine sieve (chinois)
  • Thermometer
  • Immersion blender
  • Piping bag + plain nozzle (8 or 10 mm diameter)

Ingredients:

For the macaron shells

  • 0.6 g of water-soluble yellow powdered food coloring

For the lemon cream filling:

  • 60 g of heavy cream (35% fat)
  • 1 lemon (zest and juice)
  • 20 g of water
  • 25 g of lemon juice
  • 75 g of eggs (about 2 eggs)
  • 40 g of granulated sugar
  • 2 g of gelatin sheets

Preparing the macaron shells:

  1. Prepare the macaron shells according to the base recipe and add yellow food coloring for a lemony hue.

Preparing the lemon cream filling:

  1. In a saucepan, infuse the cream with lemon zest for about 20 minutes for a more intense flavor.
  2. In another saucepan, heat the water with lemon juice. Let it come to a light boil.
  3. Pour this mixture over the eggs, which have been whisked with the sugar, while stirring constantly.
  4. Strain the infused cream and add it to the egg mixture. Cook to 83°C while stirring.
  5. Remove from the heat and incorporate the pre-soaked and drained gelatin, then mix well to dissolve.
  6. On a tray lined with plastic wrap, pour the lemon cream and cover it with film, pressing it directly onto the cream. Chill in the fridge for at least 1 hour before using.

Assembling the macarons:

  1. Before filling the macaron shells, blend the lemon cream with an immersion blender until smooth.
  2. Fill a piping bag fitted with a plain nozzle (8 or 10 mm diameter) and pipe onto half of the macaron shells.
  3. Sandwich the macaron shells together and refrigerate for at least 2 hours before serving.

Tips from the chefs:

  • For the best aromatic result, let the lemon zest infuse in the cream at room temperature for at least 20 minutes.
  • You can replace the lemon with lime or bergamot for a different twist on the flavor.
Close-up of lemon macarons with a smooth yellow citrus filling, placed neatly on a textured plate.
Tangy lemon macarons with a silky cream filling, beautifully crafted for a perfect bite of citrus sweetness.

Conclusion:

Lemon macarons are a delightful treat that combine the delicate texture of macaron shells with the refreshing, tangy flavor of lemon cream. By following this detailed recipe, you can create macarons that are not only visually appealing with their bright yellow color but also bursting with a zesty citrus filling. The key to perfecting these macarons lies in careful attention to the preparation of both the shells and the lemon cream. The result is a sophisticated dessert that can elevate any occasion, from afternoon teas to special celebrations.

With some patience and attention to detail, these lemon macarons can be stored and enjoyed over several days, making them an excellent make-ahead treat for any gathering. Remember to refrigerate them for a couple of hours before serving to ensure the filling sets properly and the flavors meld together beautifully. Whether you’re a seasoned baker or a beginner, these macarons are sure to impress.

Question and Answer:

Q: What are the key challenges when making macarons, and how can I ensure success?

A: The primary challenges when making macarons are achieving the right texture for the shells and ensuring a perfect filling. For the shells, it’s crucial to get the meringue just right — not too soft or too stiff — and to fold in the almond meal and powdered sugar gently, ensuring the batter flows like lava but isn’t too runny. Overmixing or undermixing can lead to cracked or misshapen macarons.

To ensure success with the filling, it’s important to properly infuse the cream with lemon zest to extract the most flavor. Also, when cooking the lemon cream, use a thermometer to ensure the mixture reaches the correct temperature of 83°C. If it’s too hot, it can curdle, and if it’s too cool, the texture won’t be smooth enough.

Finally, patience is key. Letting the macaron shells rest before baking helps them form the characteristic “foot,” and refrigerating the completed macarons for at least two hours after assembly ensures the flavors are fully developed.Perfect Macaron Shells – http://Perfect Macaron Shells – Serious Eats.Link to :https://briochechic.com/crispy-caramelized-bliss6-secret-to-perfect-palmiers-revealed/#more-390

2 Secret Ingredient That Makes This Bacon & Potato Quiche Irresistible

A delicious, golden Bacon & Potato Quiche with a crispy crust, melted cheese, and a touch of truffle, ready to be served.

bacon & potato quiche

There’s something magical about the aroma of bacon sizzling in a pan on a quiet morning, the scent winding its way through the kitchen, filling every corner of the house with the promise of something good. Now imagine that irresistible fragrance, paired with the earthy comfort of tender potatoes, baked together in a buttery, flaky crust and held together by a silky, golden custard. That’s the heart of a Bacon & Potato Quiche — a dish that feels like a warm hug, no matter the season.

For me,

quiche has always been more than just food. It’s a tradition, a story passed down through family gatherings, rainy Sunday brunches, and simple dinners shared around a rustic table. There’s an ease to it — the way you can pour your creativity into the filling, using what you have on hand, and somehow always end up with something utterly satisfying. But when it comes to comfort, few combinations beat the classic duo of crispy bacon and creamy potatoes. It’s humble. It’s honest. And it’s exactly what you want when you need a meal that feels like home.

I love how versatile quiche can be. Serve it warm, and it’s rich and decadent. Serve it at room temperature, and it’s just as delicious — perfect for picnics, potlucks, or quick meals on busy days. Pair it with a crisp green salad or a handful of cherry tomatoes, and you have a complete meal that balances richness with freshness. It’s the kind of dish that fits effortlessly into your life, whether you’re hosting a leisurely brunch for friends or prepping lunches for the week ahead.

What I find most enchanting about a Bacon & Potato Quiche is how it brings together simple, everyday ingredients and turns them into something almost elegant. Each bite carries a balance of textures: the flakiness of the crust, the slight chew of the bacon, the softness of the potatoes, and the velvety smoothness of the custard. No ingredient overshadows the others; they all sing together in harmony.

There’s also a beautiful nostalgia wrapped into every slice.

Maybe it reminds you of café lunches in a small French village, where the quiche of the day is scribbled in chalk on a board outside. Maybe it brings back memories of a grandmother’s kitchen, where nothing fancy was needed to create something deeply nourishing. Or maybe, like me, it simply speaks to your love of food that is real — honest food, made with care and shared with joy.

In this article, I’ll take you step-by-step through how to create a Bacon & Potato Quiche that’s tender, flavorful, and utterly foolproof. You don’t need to be a pastry chef or a seasoned cook to pull it off — just a few techniques, a little patience, and a whole lot of love.

Ready to make your kitchen smell like heaven? Let’s dive into the magic of homemade quiche — because some moments deserve to be savored, one delicious bite at a time.

A rich, hearty quiche packed with crispy bacon, tender potatoes, broccoli, porcini mushrooms, and three types of cheese, all bound together by a silky custard and wrapped in a delicate pie crust. Finished with a drizzle of olive oil and shaved truffle for a touch of luxury.


Ingredients

Pie Crust

  • 57 g Pâte Brisée (classic pie dough)
    or
  • 61 g Gluten-Free Pie Dough
    (Both options are nut-free.)

Custard (Appareil)

  • 125 g Fresh Cream
  • 63 g Milk
  • 75 g Eggs
  • 2 g Salt
  • A pinch of Ground Black Pepper

Filling (Garniture)

  • Bacon, chopped
  • Onion, finely sliced
  • Garlic, minced
  • Potatoes, diced
  • Broccoli, small florets
  • Porcini Mushrooms (dried or fresh)
    (If dried, soak in water before use.)
  • Cheongyang Pepper (or another spicy chili), chopped
  • Cream Cheese, cut into 1 cm cubes
  • Cheddar Cheese, shredded
  • Gouda Cheese, shredded
  • Cherry Tomatoes, halved
  • Fresh Rosemary leaves
  • Olive Oil, for cooking and roasting
  • Salt, to taste
  • Ground Black Pepper, to taste

Decoration (Optional)

  • Fresh Truffle, thinly sliced
  • Olive Oil, for finishing

Method

1. Prepare the Custard

  • In a bowl, mix together the fresh cream, milk, eggs, salt, and a pinch of ground black pepper.
  • Set aside in the refrigerator.

2. Prepare the Garnishes

  1. Sauté Aromatics
    • Heat a little olive oil in a pan and sauté the minced garlic and sliced onion until fragrant and lightly golden.
  2. Cook the Vegetables
    • Dice the potatoes and blanch them in boiling water for 1 minute. Drain and set aside.
    • Blanch the broccoli florets briefly in boiling water, then cool under cold water.
  3. Prepare the Mushrooms
    • If using dried porcini mushrooms, soak them in water to rehydrate. Drain and stir-fry quickly with olive oil.
  4. Prepare the Bacon and Peppers
    • Chop the bacon and Cheongyang pepper into moderate pieces.
  5. Prepare the Cheese and Tomatoes
    • Cut the cream cheese into 1 cm cubes.
    • Halve the cherry tomatoes and spread them out on a baking tray.
    • Drizzle with olive oil, sprinkle with fresh rosemary leaves, salt, and pepper.
    • Roast the tomatoes at 200°C (392°F) for 10 minutes, then lower the temperature to 150°C (302°F) and roast for another 15 minutes until lightly caramelized.

3. Pre-Bake the Tart Shells

  • Blind bake the pie shells until about 80% cooked: lightly golden but still a little soft in the center.

4. Assemble the Quiche

  1. Fill the Shells
    • Spread the sautéed garlic, onion, blanched potatoes, broccoli, mushrooms, bacon, and cream cheese evenly inside the tart shells.
  2. Add the Cheese
    • Sprinkle a generous amount of shredded cheddar and gouda over the filling.
  3. Pour the Custard
    • Carefully pour the prepared custard (appareil) over the garniture, filling the tart shells without overflowing.

5. Final Bake

  • Bake the quiches at 175°C (347°F) for about 40 minutes, or until the custard is set and the surface is lightly golden.

6. Finish and Serve

  • After baking, drizzle a small amount of olive oil over the top.
  • Decorate with a few thin slices of fresh truffle for an elegant finish.

Serve slightly warm or at room temperature, ideally with a crisp green salad.


Chef’s Tips

  • Let the quiche cool slightly before unmolding to prevent cracking.
  • For a stronger flavor, you can use smoked bacon and aged gouda.
  • Adjust the amount of chili pepper based on your preferred spice level.
A golden, mouthwatering Bacon & Potato Quiche filled with creamy custard, crispy bacon, and a surprising twist of flavor.
This Bacon & Potato Quiche is packed with flavors, topped with melted cheese and a secret ingredient that makes it truly unforgettable. Ready to find out what makes it so special?

Conclusion

The Bacon & Potato Quiche truly represents the heart of comfort food, offering an indulgent mix of crispy bacon, creamy cheeses, and savory vegetables all wrapped in a golden, buttery pie crust. It’s one of those recipes that you can turn to for any occasion: whether you’re serving it for a cozy family brunch, bringing it to a gathering, or simply enjoying it as a meal in itself. The combination of the earthy porcini mushrooms, the spicy kick of Cheongyang pepper, and the smoothness of cream cheese provides a perfect balance of flavors. The touch of truffle elevates it into something truly luxurious, making it an ideal choice for when you want to impress your guests without complicating things too much in the kitchen.

Moreover, the flexibility of this dish makes it approachable for everyone. You can swap ingredients to suit your tastes or dietary needs — whether it’s using a gluten-free crust, eliminating the bacon for a vegetarian version, or even using a store-bought crust for simplicity. The beauty of this quiche lies in its ability to be both comforting and sophisticated, making it a go-to recipe for any season. It’s a dish that feels timeless and versatile, with the perfect balance of indulgence and simplicity.

So next time you’re looking for something that combines a rich and hearty flavor profile with a touch of elegance, this Bacon & Potato Quiche will never disappoint. Whether it’s for a holiday spread, a brunch, or an everyday meal, this quiche brings warmth and flavor to your table — and I guarantee it’ll be a hit every time!Link to your Perfect Shortcrust Pastry tutorial


Questions & Answers

Can I prepare this quiche ahead of time?
Yes, preparing this Bacon & Potato Quiche ahead of time is an excellent option. You can bake the quiche a day or two before serving. To do so, allow it to cool completely after baking, then cover it and store it in the refrigerator. Before serving, simply reheat it gently in the oven at 150°C (300°F) for about 10 to 15 minutes, or until heated through. This not only saves you time but also allows the flavors to meld even more.

Can this quiche be frozen?
Absolutely! If you’d like to freeze the quiche, I recommend letting it cool completely after baking. Wrap it tightly in plastic wrap or aluminum foil, then place it in an airtight container or freezer bag. It will keep for up to one month in the freezer. When you’re ready to enjoy it, let it thaw overnight in the refrigerator, then reheat in the oven at 150°C (300°F) for about 20-25 minutes until heated through. This makes it an easy make-ahead meal that you can enjoy on a busy day.

What if I can’t find fresh truffle or don’t want to use it?
While fresh truffle does add a wonderful, earthy finish to the quiche, it’s by no means essential. If you’re unable to find fresh truffle, you can substitute with a few drops of truffle oil to achieve a similar flavor profile. Alternatively, you can simply skip the truffle altogether. The quiche will still be delicious and flavorful without it!

Can I make a vegetarian version of this quiche?
Of course! Making a vegetarian version is quite easy. Simply omit the bacon and consider adding more vegetables to fill in the void. You could use sautéed mushrooms, spinach, roasted peppers, or even caramelized onions. The key is to balance out the flavors with the richness of the cheese and custard, so feel free to get creative with your veggie choices.

How do I make this recipe dairy-free or vegan?


To make this quiche dairy-free or vegan, you’ll need to make a few swaps. For the pie crust, use a dairy-free or vegan option, or prepare your own using plant-based butter. For the custard, you can substitute the eggs with a mixture of silken tofu and plant-based milk (like almond or oat milk) to create a creamy texture. Replace the cream cheese with a vegan cream cheese, and use plant-based cheeses like vegan cheddar or vegan gouda. Finally, skip the bacon and use sautéed mushrooms, tempeh bacon, or even smoked tofu to add flavor. This will give you a delicious dairy-free and vegan quiche!

Can I use a store-bought pie crust?
Absolutely! If you’re short on time or just want to make things easier, using a store-bought pie crust is perfectly fine. Many brands offer high-quality pie crusts that bake up beautifully. Just make sure to check if the crust is gluten-free if that’s a concern for you. If you prefer, you can also use a puff pastry for a flakier texture.

How do I know when the quiche is cooked properly?
You’ll know your quiche is done when the custard has set and no longer jiggles when you gently shake the pan. It should have a slightly golden, crisp top. If you have a thermometer, the internal temperature should reach around 75°C (165°F). If the quiche seems to be browning too much on top, cover it loosely with aluminum foil and continue baking until fully set.

Can I use other types of cheese?
Absolutely! While this recipe uses cheddar, gouda, and cream cheese for richness, feel free to experiment with other cheeses you love. Gruyère, Swiss cheese, or even a sharp blue cheese could work wonderfully. Just make sure to adjust the amount of salt since different cheeses have varying levels of saltiness.What is Crème Fraîche? – Bon Appétit

Title: Homemade Braided Brioche: 10 Minutes of Pure Delight

"Golden, fluffy homemade braided brioche, perfect for a quick and delightful treat.

braided brioche recipe
Braided brioche is more than just a pastry—it’s a true culinary tradition, a symbol of warmth, togetherness, and indulgence. Its soft, sweet flavor and light texture make it a beloved choice for breakfasts and afternoon snacks, but it’s also an elegant dish perfect for festive meals or brunches with friends. Braided brioche instantly evokes cozy memories of family gatherings, or lazy Sunday mornings when you indulge in a slice of brioche generously spread with butter.

However, despite its prestigious reputation, braided brioche shouldn’t be seen as an unattainable challenge. Contrary to what you might think, making it at home doesn’t require hours of work or advanced pastry skills! In fact, I’m here to show you a quick and efficient method that will allow you to create a beautiful braided brioche in just 10 minutes of active preparation. The secret lies in the right techniques and mastering the essential steps.

You don’t need professional baking equipment or rare ingredients to succeed with this recipe. All you need are a few simple ingredients you likely already have in your pantry and fridge, plus a little patience and attention. With this recipe, you’ll discover just how easy it is to make a golden, light, and airy brioche that smells divine and will surely delight your taste buds and those of your loved ones.

In this article, I will guide you step-by-step, providing you with all the tips and tricks necessary to make a braided brioche that’s worthy of a top-tier bakery. Whether you’re a beginner in baking or an experienced cook looking for simplicity, this braided brioche will become one of your go-to recipes to make at home, with minimal effort for maximum flavor.


Ingredients:

For this quick braided brioche, you will need the following ingredients, which can easily be found at your local grocery store:

  • 500 g of all-purpose flour (type 55)
  • 70 g of sugar (adjust based on your sweetness preference, but this amount is perfect for a balanced taste)
  • 10 g of salt
  • 10 g of dry yeast
  • 250 ml of lukewarm milk
  • 3 eggs
  • 120 g of unsalted butter, softened
  • 1 egg yolk (for glazing)
  • 1 tablespoon of milk (for glazing)

These quantities are for a generous-sized brioche that will feed the whole family or a few guests. You can adjust the sugar and butter according to your taste.


Step-by-Step Method:

1. Preparing the Dough

Start by activating the yeast. In a small bowl, pour the lukewarm milk (be careful not to overheat it, as too much heat can kill the yeast), then add the dry yeast and let it sit for about 10 minutes. You should see bubbles forming on the surface, indicating that the yeast is active.

In a large bowl, sift the flour, then add the sugar and salt. Mix the dry ingredients well. Create a well in the center and crack the eggs into it. Add the milk and yeast mixture once it’s ready.

Start mixing gently with a wooden spoon or by hand, then gradually incorporate the softened butter. You’ll end up with a sticky but smooth dough.

2. Kneading and First Rise

Transfer the dough to a lightly floured work surface. Knead it for about 10 minutes, until it becomes smooth and elastic. If the dough is too sticky, feel free to add a little more flour, but don’t add too much as it might make the brioche dense.

Once kneaded, form the dough into a ball and place it in a lightly oiled bowl. Cover it with a clean cloth and let it rise for 1 hour, or until it doubles in size.

3. Shaping the Brioche

Once the dough has risen, gently deflate it by pressing down with your hands to release any excess air. Divide the dough into three equal portions, then roll each portion into a long strand.

Take the three strands and braid them together gently, making sure to seal the ends well. It might seem tricky at first, but with a little patience, the braid will form easily. Place the braided dough on a baking sheet lined with parchment paper.

4. Second Rise and Glazing

Cover the braided dough with a clean cloth and let it rise again for 30 minutes. Meanwhile, preheat your oven to 180°C (350°F).

Before baking, prepare the egg wash by beating the egg yolk with a tablespoon of milk. Brush the mixture generously over the surface of the brioche to give it a beautiful golden color after baking.

5. Baking

Bake the braided brioche for 25 to 30 minutes, or until it’s golden brown. To check if it’s done, tap the bottom of the brioche gently—it should sound hollow. If not, leave it in the oven for a few more minutes.

6. Let it Cool and Enjoy

Once out of the oven, let the brioche cool on a wire rack for 10 minutes before slicing it. Patience is key, but you can already smell that delicious freshly baked brioche filling the room.

Golden, fluffy homemade braided brioche, perfect for a quick and delightful treat
“Whip up a soft and buttery braided brioche in just 10 minutes with this simple recipe.

Chef’s Tips:

  1. Butter Substitutes: If you prefer a lower-fat version, you can replace part of the butter with unsweetened applesauce. This will make the brioche even fluffier!
  2. Adding Flavors: For a more indulgent brioche, feel free to add chocolate chips, citrus zest, or even raisins to the dough before braiding it.
  3. The Secret to Perfect Texture: Don’t skimp on kneading. The more you knead the dough, the lighter and airier the brioche will be after baking.

Conclusion for “Homemade Braided Brioche: 10 Minutes of Pure Delight”

Making homemade braided brioche has never been easier or more rewarding. In just 10 minutes of preparation time, you can enjoy the irresistible aroma of freshly baked brioche wafting through your kitchen. This simple yet delightful recipe offers a shortcut to the traditional, buttery treat without compromising on flavor or texture. The braided design not only enhances the brioche’s visual appeal but also creates a wonderful layering of soft, fluffy dough that pulls apart beautifully with each bite.

While this recipe requires minimal time and effort, the result feels luxurious and indulgent, perfect for any occasion. Whether it’s a cozy weekend breakfast, a brunch gathering, or a sweet snack with tea or coffee, this homemade brioche will quickly become a beloved favorite in your baking repertoire.

Baking is all about joy, experimentation, and the satisfaction of seeing something so simple transform into something so extraordinary. With this quick brioche recipe, you’re not just baking—you’re creating a moment of delight for yourself and those you share it with. So, what are you waiting for? Grab your ingredients, braid that dough, and enjoy the magic of homemade brioche!Link to https://briochechic.com/why-professional-bakers-never-share-these-5-viennoiserie-success-secrets/#more-229

The Science Behind Enriched Dough – King Arthur Baking Blog


Question & Answer Section (Q&A)

Q1: Can I add fillings or toppings to this braided brioche recipe?
Absolutely! This braided brioche serves as a wonderful base for a variety of fillings or toppings. If you’re feeling adventurous, you can try adding chocolate chips, fruit preserves, or even a sprinkle of cinnamon sugar before braiding the dough. For a savory twist, think about adding grated cheese, herbs, or even ham to the center. The possibilities are endless! Just make sure to avoid overfilling, as it can affect the dough’s rise and texture.

Q2: Can I make this brioche ahead of time?
Yes, you can! While the recipe is designed to be made quickly, you can prepare the dough the night before and let it rise slowly in the fridge overnight. In the morning, you can shape, braid, and bake it as usual. This method works wonderfully for busy mornings or if you want to impress guests with a freshly baked brioche with minimal effort. Simply allow it to come to room temperature before baking if it’s been chilled overnight.

Q3: Is there a way to make the brioche even more indulgent?
If you want an extra indulgent brioche, you can enrich the dough by adding a bit more butter or even a touch of vanilla extract for a fragrant, sweet depth. You can also brush the finished brioche with a honey glaze or a light syrup after baking to give it a beautiful glossy finish and enhance the sweetness. For a truly decadent version, serve it with a dollop of whipped cream or a side of fruit compote.

Q4: Can I freeze the braided brioche?
Yes, you can! To freeze, simply bake the brioche as usual, let it cool completely, and then wrap it tightly in plastic wrap or foil before placing it in the freezer. When you’re ready to enjoy it, let it thaw at room temperature, or you can gently warm it in the oven for a few minutes to refresh the texture. This makes it perfect for preparing in advance and having it ready whenever you want a warm, homemade treat.

Q5: What’s the key to a fluffy, airy brioche?
The key to a light and fluffy brioche is a combination of good-quality ingredients and proper dough handling. Make sure your butter is soft enough to incorporate into the dough without being too melted, and allow the dough to rise properly before baking. Patience during the proofing process ensures that the dough has time to develop those airy, soft layers that make brioche so irresistible. A warm, humid environment for proofing also helps the dough rise to its fullest potential.

Bake Like a Pro: 8 Secret to a Perfect Homemade Fruitcake

Moist homemade fruitcake with candied fruits and rum glaze, topped with sliced almonds.

perfect homemade fruitcake

Moist, aromatic, and studded with colorful gems, fruitcake with candied fruits is a classic that has charmed generations. This iconic cake brings back childhood memories, cozy afternoon teas, and festive celebrations. Beneath its golden crust lies a tender, buttery crumb, lavishly packed with vibrant candied fruits that burst with flavor in every bite.

Elegant in its simplicity,

this cake marries the richness of a soft batter with the playful sweetness of preserved fruits,

for instance,offering a dessert that is both refined and heartwarming.

Whether sliced thickly for tea time, tucked into a picnic basket,

or served at a festive brunch, fruitcake has a rare magic: it gathers all generations around a moment of pure indulgence.

In this article, I invite you to rediscover this timeless delight — its perfect texture, the tips for a flawless bake, and everything that transforms a simple cake into an unforgettable treat.

Ready to let your taste buds sparkle? Come with me into the sweet and colorful world of fruitcake with candied fruits!

Classic Fruitcake with Candied Fruits

(For 4 to 6 people)

Preparation

  • Time: 30 minutes
  • Baking:
    • 45 minutes for a 500g cake
    • 1 hour for a 750g cake

Storage

  • Shelf life: 1 week well wrapped in a dry place
  • Freezer: Up to 3 months

Equipment Needed

  • Whisk
  • Sifter
  • Fine mesh strainer (chinois)
  • Piping bag (no nozzle needed)
  • Loaf pan (14 cm × 7.3 cm, height 7 cm)
  • Paper piping cone
  • Pastry brush

Ingredients

  • 50g candied fruits (mixed)
  • 20g red candied cherries (bigarreaux)
  • 20g raisins
  • 5g rum
  • 85g softened butter
  • 85g granulated sugar
  • 5g mild honey
  • 85g eggs
  • 1g liquid vanilla
  • 1g salt
  • 95g flour
  • 3g baking powder
  • Sliced almonds (as needed)
  • 2g softened butter (for the baking line)
  • 15g entremet syrup (for glazing)

Intended Use

  • Large loaf cake for slicing
  • Individual mini cakes

Method

1. Prepare the Fruits:
for instance,Drain the candied fruits and rinse them under clean water. Soak them in rum. Separately, plump the raisins by soaking them in boiling water.

Smooth, fluffy batter being prepared with softened butter, sugar, eggs, and vanilla for a homemade fruitcake.
Creating the perfect batter is key to a moist and flavorful fruitcake. Gently whisk together butter, sugar, eggs, and vanilla for the perfect consistency.

2. Make the Batter:


in addition,Using a whisk, cream the softened butter, granulated sugar, and honey together until smooth.

next ,Gradually incorporate the room-temperature eggs while whisking continuously to create a smooth emulsion. Add the liquid vanilla and the salt.

3. Drain the Fruits:
Drain the soaked candied fruits and raisins.

then,Reserve the rum; it will be used later to soak the cake after baking.

4. Prepare the Dry Ingredients:
Set aside 20g of flour to coat the candied fruits and raisins.

finally ,Sift the remaining flour together with the baking powder, then add the sifted dry ingredients to the batter and mix gently.

Sifting flour and baking powder together before folding them into the fruitcake batter for a smooth and fluffy texture.
Sifting the dry ingredients ensures a smooth, lump-free batter, helping your fruitcake rise beautifully and evenly.

5. Incorporate the Fruits:
furthermore,Toss the drained fruits with the reserved 20g of flour until lightly coated. Gently fold the floured fruits into the batter using a spatula.

6. Prepare the Mold:
as a result, Butter and flour the loaf pan. Neatly line the bottom and sides with sliced almonds.

A loaf pan buttered and floured, lined with sliced almonds, ready to be filled with fruitcake batter
Preparing the mold with butter, flour, and sliced almonds ensures an easy release and a beautiful finish to your fruitcake.

7. Fill the Pan:


for instance,Transfer the batter into a piping bag without a nozzle. Pipe the batter into the prepared pan, filling it up to three-quarters full.

8. Top and Bake the Cake:
moreover,Sprinkle additional sliced almonds over the surface of the batter before baking.
Using a piping bag or a paper piping cone, pipe a thin line (cordon) of softened butter along the top of the raw batter.

such as ,This will help the cake open nicely during baking.
Bake in a preheated oven at 180°C (350°F) for about 45 minutes.
Check for doneness by inserting a knife into the center of the cake — it should come out clean, with no batter clinging to the blade.

Fruitcake batter topped with a line of butter and sliced almonds, ready to bake in a loaf pan
Topping the batter with butter and almonds ensures a beautiful split and a deliciously crunchy finish on your fruitcake.

9. Finish the Cake:
so that, As soon as the cake comes out of the oven, brush it generously with the reserved rum and the entremet syrup while it is still hot.however, This will add flavor, shine, and keep the cake moist.

Freshly baked fruitcake being brushed with syrup and rum for a shiny, flavorful finish.
Brushing the fruitcake with syrup and rum right after baking gives it a beautiful gloss and seals in the delicious moisture.

Chef’s Tips perfect homemade fruitcake

  • Larger Batch for Better Results:
    For the best baking outcome, it’s recommended to prepare a larger batch of batter. This helps ensure a more even rise and a better texture.
  • Flour the Candied Fruits:
    Tossing the candied fruits in a little flour before adding them
  • in addition,to the batter helps prevent them from sinking to the bottom of the pan during baking. This keeps them evenly distributed throughout the cake for a perfect texture.

Conclusion perfect homemade fruitcake

The fruitcake with candied fruits is the perfect dessert for any occasion —

therefore,whether you’re looking for something to share with family at a cozy gathering or want to impress guests at a festive tea.

The moist texture, the vibrant pops of fruit, and the rich flavors from the rum syrup make each bite a truly indulgent experience.

as a result, With a few simple tricks and patience, you’ll be able to master this classic recipe and enjoy it fresh out of the oven or as a delightful treat for days to come.

meanwhile Don’t forget to wrap it up tightly and let the cake rest, as it often tastes even better the next day!

Try it out and make your own version of this beloved dessert — you’ll find that it’s well worth the effort.


FAQ: Everything You Need to Know About Fruitcake with Candied Fruits

Q: Can I use other fruits instead of the ones listed in the recipe?
A:

Absolutely! While the classic recipe calls for candied fruits, cherries, and raisins,

feel free to experiment with other dried fruits like apricots, cranberries, or even dried pineapple.

Just be sure to chop them into small pieces to maintain the balance of texture in the cake.

Q: How can I make this recipe alcohol-free?
A:

such as, If you’d prefer to skip the rum, you can replace it with fruit juice, such as orange or apple juice, to soak the candied fruits.

for example ;You can also omit the rum in the syrup, though it will slightly alter the flavor profile of the cake.

Q: Can I make mini cakes instead of one large one?
A: Yes! The recipe is perfectly adaptable for mini cakes. Just divide the batter evenly into smaller pans (about 10–12 cm in length) and adjust the baking time.

in addition,Mini cakes will likely bake faster, so be sure to check them around 30 minutes into baking.

Q: How can I store the fruitcake to keep it fresh?
A: Wrap the fruitcake tightly in plastic wrap and store it in a cool, dry place. It will keep for up to a week.

You can also freeze it for up to three months. To serve, let it thaw at room temperature and brush it with a little syrup or rum to refresh the flavor.

Q: My cake turned out a bit dense. What could I have done wrong?
A: also If the cake turns out dense, it could be due to overmixing the batter after adding the flour, which can make the cake heavy.

Be gentle when incorporating the flour and fruit mixture.

Also, make sure your baking powder is fresh, as expired leavening agents can affect the riseon ,

the other hand,http://Make It at Home: The Ultimate Braided Brioche in Just 10 Minutes.🔗 Guide to Proper Fruit Soaking Techniques – King Arthur Baking

Perfect Croissants at Home: 4 Secrets from the French Pastry Tradition

Perfect homemade croissants with golden layers and a buttery finish, inspired by French pastry traditions.

Perfect croissants at home

A true symbol of French baking tradition, the croissant is much more than just a pastry — it’s a masterpiece of craftsmanship, patience, and pure indulgence. Beneath its golden, flaky layers lies a soft, buttery heart that has captivated pastry lovers across the world.

In this article, we’ll unveil the secrets to making croissants at home, step by step. From preparing the delicate laminated dough to achieving that perfect, crisp bake, you’ll discover how to recreate the magic usually found only in the finest bakeries.
Each technique is carefully explained to guide you through the process, making what once seemed daunting an exciting and deeply satisfying experience.

Baking croissants at home

is a true adventure — one that requires a little time and care, but rewards you with the incomparable joy of a warm, homemade pastry.
Whether you’re looking to elevate a breakfast spread, impress at a brunch gathering, or simply enjoy the meditative pleasure of baking, mastering the croissant will soon become a cherished skill.

MORE RECIPE: Make It at Home: The Ultimate Braided Brioche in Just 10 Minutes — Like the Pros!

the croissant dough:

  • Fresh yeast: 12 gr, to ensure steady fermentation and develop rich flavors.
  • Whole milk: 144 gr, to add softness and richness to the dough.
  • T55 flour: 150 gr, for a supple, well-balanced dough.
  • Strong flour (high-protein flour): 150 gr, ideal for giving strength and structure to support the lamination process.
  • Fine salt: 6 gr, to enhance the flavor and control fermentation.
  • Sugar: 35 gr, for a subtle sweetness and to promote beautiful browning during baking.
  • Honey: 9 gr, adding a delicate aromatic note and improving freshness.
  • Butter: 60 gr, incorporated directly into the dough for a tender texture.

lamination:

  • Dry butter (or laminated butter): 150 gr, to achieve the light, airy, and melt-in-the-mouth layers typical of a perfect croissant.

egg wash:

  • Whole egg: 50 gr, to bring shine to the croissants.
  • Egg yolks: 50 gr, to deepen the golden color.
  • Whole milk: 50 gr, to slightly thin the mixture and ensure an even glaze.

Essential equipment:

  • Stand mixer: for kneading the dough efficiently and consistently.
  • Whisk: to blend the egg wash smoothly.
  • Bench scraper: to handle and cleanly move the dough without damaging it.
  • Rolling pin: for evenly rolling out the dough during the lamination process.
  • Pastry brush: for delicately applying the egg wash to the croissants

Homemade Croissants — Full Method

Work Time:

  • Preparation: 2 hours
  • First proof (pointing): 30 minutes
  • Freezing: 30–40 minutes
  • Chilling: 30 minutes
  • Final proof (rising): 2 hours
  • Baking: 14–16 minutes
  • Storage: up to 24 hours

Method – Step-by-Step

Using a whisk
dissolve the fresh yeast in the whole milk directly in the bowl of a stand mixer.

"Whisking fresh yeast into whole milk in a stand mixer bowl to start croissant dough.
Dissolving the fresh yeast in milk is the first crucial step for light, airy croissants

Add the remaining
ingredients (except the laminated butter) into the mixer bowl fitted with the dough hook. Knead for 4 minutes at low speed, then 6 minutes at medium speed.
At the end of kneading, the dough should be elastic and smooth.

"Adding ingredients to the stand mixer and kneading the croissant dough until smooth and elastic.
After combining all ingredients (except laminated butter), the dough is kneaded to develop strength and elasticity

.Shape the dough
into a ball, cover it with plastic wrap, and let it proof for 30 minutes (first rise).

Croissant dough shaped into a ball and covered with plastic wrap for the first proofing.
After kneading, the dough is shaped into a ball and left to rise gently for 30 minutes


Once proofed


gently flatten the dough to release any gas produced during fermentation.
Place it on a tray and freeze for 30 to 40 minutes to chill thoroughly.Meanwhile, roll out the 150 grams of laminated butter into a neat square.
After chilling, place the butter square onto the center of the dough.

Flattening the croissant dough after proofing and preparing the laminated butter square.
After the first rise, the dough is gently flattened to remove air bubbles and chilled to prepare for butter incorporation.”
"Placing the laminated butter square onto the center of the chilled croissant dough
The chilled butter square is carefully placed onto the center of the dough, ready for the first folds of lamination


Fold the dough over the butter and seal the edges carefully.
Roll the dough out into a rectangle approximately 60 cm long by 25 cm wide.
Give the dough a book fold (double fold) followed by a single fold.
Let the dough rest in the refrigerator for 30 minutes before proceeding.


Next Step: Shaping and Baking

Shaping the Croissants

  • Roll out the dough to 4 mm thickness, forming a rectangle of approximately 50 cm × 24 cm.
  • Using the tip of a knife, mark the edges of the dough every 8 cm along one side.
    Repeat on the opposite side, but offset the marks by 4 cm to create perfect triangle shapes.
  • Cut the dough along these marks to form even triangles.
    Each triangle should weigh approximately 50 to 55 grams.
"Cutting croissant dough into evenly sized triangles, each weighing 50 to 55 grams."
The dough is cut along pre-marked lines to create uniform triangles, the perfect base for rolling croissants.
  • Cut out the triangles neatly along the marks.
  • At the base of each triangle, make a small slit with the tip of a knife.Gently stretch each triangle slightly before rolling to shape the croissants.
Making a small slit at the base of each croissant triangle and gently stretching the dough before rolling.
A small slit at the base and a gentle stretch help create the classic curved shape of croissants.

Gently roll each triangle

  • from the base up toward the tip, without pressing or crushing the dough, to preserve the lamination.
  • Place the shaped croissants onto a baking tray lined with parchment paper.
  • Using a pastry brush, apply the first coat of egg wash evenly across the croissants.
  • Proof the croissants for 2 hours at 26°C (79°F).
    You can create a homemade proofing environment by placing the trays in an off oven with a bowl of steaming hot water inside to maintain humidity.

"Proofing shaped croissants on trays in a humid environment at 26°C (79°F)."
The croissants are left to proof for two hours, allowing them to rise gently and develop their light, airy structure

Chef’s Tips & Tricks

  • Be sure to separate the yeast from the salt and sugar at the beginning of the kneading process. This prevents the salt from deactivating the yeast, ensuring proper fermentation.
  • To check if the dough is kneaded enough, press your finger gently into the surface of the dough. If it returns to its original shape, the dough is ready and properly kneaded.
  • You can replace regular butter or laminated butter with an AOP butter (Appellation d’Origine Protégée). This gives your croissants an extra layer of flavor and a richer, more authentic taste

Conclusion

Making homemade croissants is as rewarding as it is delicious. While the process requires patience and attention, the result is undoubtedly worth it: golden, flaky croissants with impeccable layers, a rich buttery taste, and a melt-in-your-mouth texture. With each step, you can enjoy mastering an age-old French pastry technique. Whether for breakfast, brunch, or simply to impress your loved ones, these homemade croissants will delight your taste buds.

Through this recipe, you now have all the keys to preparing these little wonders at home, from preparing the dough to the final bake. It’s important to take your time, respect fermentation and resting times, and treat the dough with care. Croissants aren’t just a recipe; they are a unique baking experience, both technical and creative.

more techniques:http://French Pastry Techniques — Le Cordon Bleu


Long-Form Q&A

Q1: Why does the croissant dough need to rest multiple times, and what is the importance of each step?
The resting times between each step are crucial for several reasons. First, they allow the yeast to ferment properly, making the dough light and airy. The rests between each turn also let the gluten relax, which makes it easier to roll out the dough. Each resting period allows the butter to solidify, creating layers of dough and butter that give the croissant its signature flaky texture. In short, each rest is a “pause” for the dough, giving the ingredients time to develop and balance, ensuring perfect flakiness at the end.

Q2: Why is it important to work with specific temperatures for both the dough and butter?
Temperature plays a vital role in the success of croissants. If the dough gets too warm, the butter will melt and mix with the dough, ruining the formation of layers. On the other hand, if the dough is too cold, it will be difficult to roll out. That’s why it’s essential to follow the recommended temperatures. The dough should be cold enough to keep the butter firm during the lamination process but not too hard to prevent it from being stretched easily. It’s all about finding the right balance.

Q3: What’s the difference between homemade croissants and those bought at a bakery?


Homemade croissants stand out because of their freshness, rich flavor, and incredibly light and flaky texture. Homemade dough is often made with higher-quality ingredients and without preservatives, ensuring a pure, authentic taste. Plus, by making the croissants yourself, you have the ability to customize them to your liking, whether it’s with the type of butter or the egg wash. Finally, the satisfaction of enjoying a croissant you made with your own hands is unbeatable – every bite carries the story of your patience and craftsmanship.

Q4: Can you prepare croissants in advance and freeze them?
Yes, you can! Once the croissants are shaped and before the final proof, you can freeze them on a tray. Once frozen, transfer them into a freezer bag. When you’re ready to bake them, simply let them proof in the fridge overnight before brushing with egg wash and baking as usual. Freezing doesn’t compromise the texture or flavor if done correctly.

Q5: Any tips for successfully shaping croissants?
Shaping is a delicate but essential step. Here are a few tips to ensure it goes smoothly:

  • Don’t overload with butter: it should be evenly distributed but not excessive.
  • Avoid stretching the dough too much when rolling it to prevent losing the layers.
  • Mark the base of each triangle clearly to prevent tearing when rolling.
  • Finally, roll tightly but without pressing too much, so the croissant keeps its shape and layers.

7 Secrets Chefs Don’t Tell You: How to Master the Perfect Strawberry Tart

Close-up of a freshly made strawberry tart with a crisp golden crust, almond-pistachio cream filling, topped with vibrant red sliced strawberries, and a glossy strawberry glaze.

Perfect Strawberry Tart

The strawberry tart is one of those pastries that captures the very essence of summer. With its delicately golden crust and glossy top, it evokes the freshness of seasonal fruits and the sweetness of sunny days. This dessert is a true classic, pleasing both the eyes and the taste buds.

As soon as you set your eyes on this tart, the first thing that draws your attention is the beauty of the strawberries, carefully arranged in a shape, often in concentric circles or spirals. The bright red color of the fruit contrasts harmoniously with the light, golden pastry, creating a presentation that is as elegant as it is appetizing.

The texture is an invitation to indulge. The pastry, slightly crisp on the outside, gently melts in your mouth, revealing a delightful, tender sensation. The sweetness of the fresh strawberries blends perfectly with the subtlety of the crust, which adds just the right amount of sweetness to balance the natural slight acidity of the fruit.

Each bite is a festival of flavors and textures. The strawberry tart is both light and rich, sweet and tangy, while being extraordinarily refreshing. This dessert is ideal for hot summer days, but its popularity makes it a favored choice all year round.

Preparing

this tart is an art that requires patience and precision. It’s not just about assembling ingredients, but about creating a culinary masterpiece where every step counts. The carefully baked crust serves as the perfect backdrop for the juicy strawberries, which are the stars of the dessert. A light glaze, often applied to the fruit, gives them a brilliant shine while making them even more appetizing.

This simple yet refined dessert is perfect for any occasion—whether it’s an afternoon snack with family, a picnic lunch, or even a dinner with friends. The strawberry tart, with its sweetness and brilliance, is the perfect way to celebrate fresh produce and pay homage to the natural flavors of the season.

In short, the strawberry tart embodies the art of pastry in its purest form: a delicious simplicity, a neat presentation, and an unforgettable taste. A true moment of happiness with every bite.

A vibrant strawberry tart with a golden, flaky crust, topped with fresh strawberry halves arranged in a circular pattern and finished with a glossy strawberry glaze.
Indulge in a slice of perfection with this classic strawberry tart, where a buttery, flaky crust is filled with velvety cream and topped with fresh, sweet strawberries, all glazed to a beautiful finish.

Method: Strawberry Tart

Preparation: 1 hour
Refrigeration: 30 minutes
Freezing: 10 minutes
Cooking: 30 minutes
Storage: 24 hours in the refrigerator

Required Equipment:

  • Stand mixer
  • Rolling pin
  • 22 cm Ø tart ring
  • Piping bag + plain 15 mm Ø nozzle
  • Whisk
  • Sieve
  • Blender
  • Thermometer
  • Pastry brush

Ingredients:

For the filling:

  • 500 g fresh strawberries

shortcrust pastry:

  • 60 g butter
  • 100 g flour
  • 15 g almond powder
  • 40 g powdered sugar
  • 1 g fleur de sel
  • 20 g egg
  • 3 g vanilla extract

almond-pistachio cream:

  • 60 g butter
  • 60 g sugar
  • 60 g almond powder
  • 25 g pistachio paste
  • 50 g egg

pastry cream:

  • 125 g semi-skimmed milk
  • 25 g sugar
  • 25 g egg yolks
  • 12 g cornstarch
  • 20 g butter

strawberry jelly:

  • 60 g strawberry pulp
  • 30 g water
  • 30 g strawberry syrup
  • 30 g glucose
  • 4 g gelatin sheets

For the finish:

  • 20 g crushed pistachios

Preparation Steps:

  • shortcrust pastry
    • In a stand mixer fitted with a paddle attachment, combine the butter, flour, almond powder, powdered sugar, and salt.
    • Add the egg and vanilla, mixing until the dough begins to come together.
    • “Fraser” the dough (a technique where you use the palm of your hand to press and flatten the dough to add texture). Refrigerate for 30 minutes.
    • Once chilled, roll the dough into the 22 cm Ø tart ring see thecnique step by step; https://briochechic.com/mastering-crumbly-doughs-techniques-for-perfect-tarts-and-pastries/. Freeze for 10 minutes to make it easier to handle.
Golden-baked shortcrust pastry shell, crisp and flaky, ready to be filled with creamy tart fillings or fresh fruit.
This perfectly crisp and buttery shortcrust pastry forms the ideal base for any tart, offering a delicate crunch that complements a variety of sweet or savory fillings.
  • the almond-pistachio cream:
    • Cream the butter until soft and smooth. Add sugar, almond powder, pistachio paste, and egg.
    • Mix with a spatula until smooth and homogeneous.
    • Pipe the almond-pistachio cream into the cooled tart shell.
    • Bake at 170°C (350°F, gas mark 5/6) for 30 to 35 minutes. Let cool.
the pastry cream:
  • Prepare the pastry cream according to your favorite recipe
  • Ingredients:
  • 125 g whole milk
  • 25 g sugar
  • 25 g egg yolks
  • 12 g cornstarch (cornflour)
  • 20 g butter
  • 1 g vanilla extract (optional, or 1 vanilla bean)
  • Prepare the strawberry jelly:
    • In a saucepan, combine the strawberry pulp, water, strawberry syrup, and glucose. Heat until it reaches around 50°C.
    • Add the pre-hydrated gelatin and mix until fully dissolved
A close-up of vibrant strawberry jelly, shining on top of fresh strawberries in a tart, providing a glossy and sweet finish.
A luscious strawberry jelly adds the perfect glossy finish to your tart, enhancing the natural sweetness of the fresh fruit and creating a beautiful, shiny top

Assemble the tart:

  • Pipe the pastry cream evenly over the surface of the tart.
  • Arrange halved strawberries in rows on top of the cream, placing a whole strawberry in the center for a refined presentation.
  • Brush the strawberries with the strawberry jelly to give them a glossy finish.
  • Sprinkle with crushed pistachios to add a crunchy, flavorful touch.
Close-up of a mini strawberry tart with a golden, crisp crust, topped with a fresh strawberry and a shiny glaze.
These mini strawberry tarts are the perfect petite indulgence, with a crisp pastry shell, a creamy filling, and a fresh strawberry on top, all glazed to perfection for a delightful treat.

Tips:

  • You can customize this tart by adjusting the type of shortcrust pastry or adding other seasonal fruits to vary the flavors.
  • Make sure the pastry cream and almond-pistachio cream are well chilled before using them to prevent the crust from becoming too soft.
  • For a more impressive visual effect, you can dust the tart with a light veil of powdered sugar just before serving.

This strawberry tart combines the freshness of the fruit, the sweetness of the pastry cream, and the richness of the almond-pistachio cream, creating the perfect dessert for any occasion. A true invitation to savor summer in every bite!

Conclusion: Strawberry Tart

The Strawberry Tart is the epitome of seasonal indulgence, offering a delightful balance of textures and flavors that make every bite a true pleasure. From the buttery, crisp shortcrust pastry to the creamy almond-pistachio filling, all topped with the fresh, vibrant strawberries, this tart is a celebration of summer’s finest ingredients. The glossy strawberry jelly adds a beautiful sheen to the fruit, while the crushed pistachios bring a delightful crunch, elevating the overall experience.

This dessert is as much a treat for the eyes as it is for the taste buds. The thoughtful preparation and attention to detail in each step—whether it’s preparing the delicate pastry, creating the creamy filling, or arranging the fruit in a visually appealing way—ensure that this tart stands out as a stunning centerpiece for any occasion. Whether you’re celebrating a special event or simply enjoying a sweet moment with loved ones, this Strawberry Tart is sure to impress and satisfy.

As much as this tart is simple in concept, its intricate layers of flavor and texture are a testament to the artistry of pastry. It’s perfect for those who appreciate the beauty of a well-crafted dessert, where each element complements the other seamlessly.


Frequently Asked Questions

  • Can I make the tart ahead of time?
    Yes, you can prepare the tart in advance. The tart can be stored in the refrigerator for up to 24 hours. For the best presentation and texture, it’s recommended to assemble it the day you plan to serve it, but the individual components (such as the pastry, cream, and jelly) can be made ahead of time and stored separately.
  • substitute the pistachio paste in the almond-pistachio cream?
    Yes, if you’re not fond of pistachios, you can substitute the pistachio paste with another nut paste, such as hazelnut or almond paste. Keep in mind that the flavor will change, but it will still complement the strawberries nicely.
How do I prevent the tart shell from becoming soggy?

  • To prevent the tart shell from becoming soggy, make sure that the shortcrust pastry is fully chilled before baking, and bake it until golden and crisp. Also, allow the almond-pistachio cream and pastry cream to cool before filling the tart shell to prevent any excess moisture from making the crust soft.
  • Can I use frozen strawberries instead of fresh ones?
    Fresh strawberries are ideal for this recipe, as they have the best flavor and texture for presentation. However, if you must use frozen strawberries, make sure to thaw them completely and drain any excess moisture before using them in the tart.
  • What other fruits can I use in place of strawberries?
    You can easily switch out the strawberries for other fresh, seasonal fruits like raspberries, blueberries, or even sliced peaches. Just ensure that the fruits you choose are ripe and have a similar texture to strawberries for the best result.Pastry Cream Tips – King Arthur Baking.Bake Like a Pro: 8 Secret to a Perfect Homemade Fruitcake

5 Sweet Steps to Perfect Bichons: A Pastry Lover’s Journey

A close-up of three golden lemon bichons on a rustic baking tray, sugar-crusted and slightly glossy, with a creamy filling peeking out from the folds

How to make Bichons

There’s something uniquely charming about classic French pastries—the way they balance elegance and comfort, the precision of their folds, and above all, the burst of flavor you get in every bite. Among the lesser-known but utterly delightful members of the pâtisserie family is the bichon: a golden, sugar-dusted puff pastry filled with a luscious lemon cream. If you’ve ever strolled past a French bakery and caught the scent of caramelized pastry and citrus in the air, there’s a good chance a tray of bichons was just pulled from the oven.

These little pastries are crisp on the outside, soft and tangy on the inside, and finished with a shimmering glaze that catches the light like sugar crystals. They’re often overlooked in favor of croissants or chaussons aux pommes, but once you’ve had a freshly made bichon, warm from your own oven, it just might become your new favorite.

Baking bichons at home is surprisingly achievable—even if you’re not a professional pâtissier. The beauty lies in their simplicity: a good puff pastry (homemade or store-bought), a velvety lemon curd, and a few finishing touches are all you need. But like any good French recipe, it’s the technique and attention to detail that elevate this pastry from something good to something exceptional.

In this article, we’ll walk you through everything you need to know to make authentic lemon bichons at home—from preparing a smooth, bright lemon filling to achieving that perfect sugar-encrusted exterior. We’ll also share tips for folding the pastry so the filling stays intact, tricks for getting that bakery-style glaze, and even a few chef’s secrets to help your bichons shine (literally and figuratively!).

Whether you’re baking for a weekend treat, planning a chic dessert for guests, or simply want to bring a bit of French flair into your kitchen, these lemon bichons are a perfect choice. Light, fragrant, and visually irresistible, they’re the kind of pastry that makes people pause after the first bite—and then reach for a second.

Ready to bake? Let’s dive into the ingredients and start creating your own batch of lemony perfection.

Method

Step 1: Prepare the Inverted Puff Pastry (Feuilletage Inversé)

The Art of Flaky Pastry Dough

Inverted puff pastry may sound intimidating, but it’s well worth the effort for its superior flakiness. Unlike classic puff pastry, here the butter envelops the dough—reversing the usual process and yielding a more delicate texture.

Make the Beurre Manié
  1. In a mixing bowl, combine the cold butter (200 g, cut into cubes) and flour (100 g). Use your fingertips to gently incorporate the flour into the butter until you have a smooth but firm paste.
  2. Shape the mixture into a square about 2 cm thick, wrap it in plastic wrap, and place it in the fridge to firm up for at least 30 minutes.
Make the Détrempe
  1. In another bowl, mix the flour (150 g) and salt (5 g).
  2. Add the cold water (87 g) gradually, mixing just until a dough forms—do not overwork it.
  3. Shape the détrempe into a smaller square, wrap it well, and chill it for 30 minutes.
Assemble the Dough
  1. On a lightly floured surface, roll out the beurre manié into a square large enough to encase the détrempe.
  2. Place the détrempe in the center and fold the butter over it from all four sides, sealing it like an envelope.
  3. Gently roll the dough into a long rectangle.
  4. Perform a double fold (also known as a book fold): fold both short ends toward the center, then fold the dough in half.
  5. Wrap and chill for 30 minutes.
  6. Repeat this process two more times, with 30-minute rests in between each fold. After the final fold, chill the dough for at least 2 hours before using.

Tip: The colder your dough, the better the layering. Always chill between folds to avoid butter melting into the flour http://Puff Pastry Basics – King Arthur Bakingy

Step-by-step process of preparing inverted puff pastry: a square of beurre manié enveloping détrempe, rolled and folded on a floured surface
The classic technique behind perfect flakiness: inverted puff pastry in the making, ready for its first book fold.

Step 2: Make the Lemon Pastry Cream (Crème Bichon)

While the pastry dough is chilling, prepare the filling. This rich, lemon-scented cream will become the heart of your bichons.

  1. In a saucepan, pour the milk (500 ml) and add the lemon zest. Heat over medium-low until just simmering.
  2. In a bowl, whisk together the egg yolk (20 g), sugar (75 g), and cornstarch (40 g) until smooth and pale.
  3. Once the milk is warm, slowly pour about a third of it into the egg mixture to temper it, whisking constantly.
  4. Return everything to the saucepan and cook over medium heat, stirring constantly with a whisk or silicone spatula, until the cream thickens.
  5. Once thick and glossy, remove from heat, transfer to a shallow dish, cover with plastic wrap (touching the surface), and chill until completely cold—at least 2 hours.
A saucepan of lemon-infused milk being whisked into an egg yolk and sugar mixture to make
Bright and silky: the lemon pastry cream brings a fresh twist to the classic custard filling.

Chef’s Note: The lemon zest should be as fine as possible to infuse the cream evenly. You can strain the cream if you prefer a smoother texture.


Step 3: Roll and Slice the Dough

  1. Prepare the inverted puff pastry as described above .
  2. Generously sprinkle granulated sugar over the surface of the chilled pastry.
  3. Roll it out into a rectangle measuring 50 cm x 25 cm, about 5 mm thick.
  4. Starting from the long edge, roll the dough into a tight log, like a jelly roll.
  5. Wrap the roll in plastic wrap and refrigerate until firm—this makes slicing much easier.
  6. Once chilled, cut 12 rounds of dough, each about 2 cm thick.
The art of rolling and slicing the brioche dough is what gives the final loaf its signature layers and soft, fluffy texture
Achieve those beautiful, airy layers by gently rolling and slicing the dough. Here’s how to master this essential step.

Step 4: Flatten and Shape the Pastries

  1. Lightly dust your work surface with granulated sugar (instead of flour) to enhance caramelization during baking.
  2. Place one dough round (or “escargot”) on the sugar and use a rolling pin to flatten it into an oval, about 2 mm thick.
  3. Repeat with all the slices—you should have 12 thin, oval-shaped bases.
Flattening and shaping your turnovers is one of the most rewarding steps in the pastry-making process. It allows you to transform the dough into perfectly formed parcels that will hold their shape and crisp up beautifully during baking
Master the art of shaping your turnovers to create a delicious, golden finish.

Step 5: Fill and Fold

  1. Prepare the crème bichon.
  2. Transfer the cooled cream to a piping bag.
  3. Pipe a small amount of filling on half of each oval—leave space around the edge.
  4. Fold the pastry over to form a half-moon shape.
  5. Press the edges firmly to seal. You can gently crimp with your fingers or a fork for a more defined edge.
  6. Arrange the filled bichons on a baking tray lined with parchment paper.
The "Fill and Fold" step is where the magic of a turnover truly happens, transforming your dough into a pocket of deliciousness.
Stuff your dough with a delicious filling, then fold to seal in the flavor.
After filling and shaping your bichons, the final step before baking is arranging them on the tray. Take a baking tray and line it with parchment paper to prevent sticking and make cleanup a breeze.
Place your filled bichons on a lined baking tray, setting them up for a perfect bake.

Step 6: Bake

  1. Preheat your oven to 200°C (392°F / Gas Mark 6-7).
  2. Bake for 20 minutes, or until puffed, golden, and slightly caramelized at the edges.
It’s time to bake your bichons to perfection! Preheat your oven to the right temperature and place the tray of filled bichons inside, making sure there’s enough space around each pastry to allow for even puffing and browning.
Let the oven work its magic, transforming your filled bichons into golden, flaky delights.

The sugar on the outside creates a beautifully glossy and crisp crust—no extra glaze needed!

Conclusion

There’s something deeply satisfying about baking your own lemon bichons from scratch. From the buttery layers of puff pastry to the velvety citrus cream tucked inside, each step brings you closer to a pastry that feels—and tastes—like it came straight from a Parisian window display. Whether you go for the classic fold-over method or the charming spiral technique, these bichons are a celebration of texture, flavor, and French baking tradition.

Serve them warm with a cup of tea, or pack them up for a weekend brunch—they’re guaranteed to bring a little sunshine to your table.

And remember: once you’ve mastered the basics, you can start playing with variations. Think orange zest, passion fruit cream, or even a touch of ginger for something a little unexpected. The world of bichons is yours to explore MORE RECIPS ;

https://briochechic.com/crispy-caramelized-bliss6-secret-to-perfect-palmiers-revealed/#more-390


FAQ – Your Bichon Questions, Answered

Can I use store-bought puff pastry?
Absolutely! While homemade inverted puff pastry gives unbeatable flakiness, a high-quality all-butter store-bought version will still yield delicious results.

How do I keep the filling from leaking out?
Make sure your cream is fully chilled and thick before piping. When folding, press the edges firmly and avoid overfilling. Chilling the shaped bichons before baking also helps.

Why use sugar instead of flour when rolling?
Rolling the dough in sugar not only prevents sticking—it also caramelizes during baking, giving that signature glossy, crisp exterior.

Can I make them in advance?
Bichons are best enjoyed the same day, but you can prepare the dough and cream ahead of time. Assemble and bake the day you plan to serve them for the best texture.

How should I store leftovers?
Store in an airtight container at room temperature for up to 24 hours, or in the fridge for 48 hours max. Reheat gently in the oven to restore crispness.

Make It at Home: The Ultimate Braided Brioche in Just 10 Minutes — Like the Pros!

"A three-strand braided brioche loaf with a golden-brown crust and sugar crystals, placed on a light gray background with a linen cloth in the corner

braided brioche recipe

There’s a certain kind of magic woven into the strands of a braided brioche. Soft, rich, and golden, it’s more than a loaf — it’s a celebration of craftsmanship and comfort. From the first glance, its glossy, burnished surface and intricate braids promise something special. And once sliced, it delivers: featherlight texture, a tender crumb, and a taste that feels like home.

Braided brioche is where technical skill meets poetry. Each strand of dough is shaped with care, rolled to perfection, then woven in a dance of symmetry and softness. It’s a slow process, yes — one that demands patience and a gentle hand — but that time and intention are precisely what give the final result its signature beauty and flavor.

The loaf rises once, then again, and finally bakes into a golden masterpiece. When it emerges from the oven, it fills the kitchen with the unmistakable aroma of sweet butter and warmth. The crust glows with a delicate sheen, the result of a simple glaze brushed on just before baking. But its allure is not just in appearance — the first bite is pure delicacy. Slightly sweet, incredibly airy, and meltingly soft, each mouthful speaks of Sunday mornings, family gatherings, and timeless tradition.

Braided brioche is a chameleon, too. It pairs as effortlessly with a dollop of jam at breakfast as it does with a sliver of cheese or a touch of chocolate. It’s as fitting for a holiday table as it is for an everyday indulgence. It may look intricate, but at its heart, it is a bread of generosity — one that’s meant to be shared, enjoyed, and remembered.

Link to your classic brioche à tête recipe


Anchor text: Also learn how to master the classic brioche à tête like a pro
URL suggestion:
https://briochechic.com/classic-brioche-a-tete-recipe

This is not just baking. This is a quiet ritual. A moment of stillness. A tribute to the slow and the beautiful.

Braided Brioche

Serves: 4 to 6 people
Preparation Time: 45 minutes
First Rest (Bulk Fermentation): 30 minutes
Chilling Time: At least 2 hours
Final Proofing (Second Rise): 2 hours
Baking Time: 20–25 minutes, depending on weight
Storage: Keeps well for up to 48 hours at room temperature, ideally wrapped or under a dome


You Will Need:

Dough
– 300 g of brioche dough

Egg Wash
– 25 g whole egg
– 20 g egg yolk
– 25 g whole milk

Finishing Touch
– Pearl sugar, as needed, for garnish


Recommended Tools:

– Stand mixer
– Bowl scraper
– Dough cutter
– Pastry brush

Step-by-Step Braided Brioche Recipe

  • To begin, divide the chilled brioche dough into three equal portions using a dough cutter. The image captures a beautifully baked braided brioche loaf resting on a lightly textured surface. Its golden-brown crust glistens under soft, natural lighting, with sugar pearls delicately scattered over the top, adding a touch of sparkle and sweetness. Each strand of the braid is clearly defined, revealing the baker’s precision and technique..
Three portions of brioche dough evenly cut on a floured work surface with a metal dough cutter beside them.
Precision begins here: the chilled brioche dough is divided into three equal parts — the foundation of a flawless braid.
  • Lightly flour the brioche logs and place them side by side on your work surface. Braid the logs together by pinching the top ends to seal them and then alternating the strands: cross the right strand over the center, followed by the left strand over the new center, repeating this sequence until you reach the ends. Gently press the ends together and tuck them underneath to seal the braid.
Three floured strands of brioche dough being braided together on a clean work surface, ends tucked neatly underneath.
Floured and aligned, the brioche strands come together in a smooth, elegant braid — the signature of a baker’s finesse.
  • Brush the loaf with an egg wash, then proof it for about 2 hours at around 26°C (or in an off oven with a bowl of boiling water placed inside), allowing it to at least double in size. Once proofed, sprinkle the top with pearl sugar and bake the brioche at 170°C (350°F, gas mark 5/6) for about 20 minutes.Link to your
Braided brioche loaf brushed with egg wash, sprinkled with pearl sugar, resting on a tray before baking.
Brushed with egg wash and crowned with pearl sugar, the braided brioche is ready to rise and shine in the oven.
  • After baking, transfer the brioche to a cooling rack to let it rest and cool slightly before serving.
Freshly baked braided brioche resting on a cooling rack, with steam gently rising from its golden crust.
Fresh from the oven, the braided brioche cools gently on a wire rack, its golden crust settling into buttery softness.

Conclusion: The Art of Braided Brioche – A Rewarding Experience

Baking braided brioche is more than just following a recipe; it’s about immersing yourself in the process, allowing time to knead, rest, braid, and bake. The result isn’t just a loaf of bread — it’s a delicate masterpiece that fills your kitchen with the heavenly aroma of butter, sweetness, and freshly baked dough. The intricate braiding, the golden finish, and the soft, airy crumb come together in perfect harmony, offering not just a delicious treat, but also a sense of accomplishment.

While it may seem like a long process, each step is essential for creating that perfect, soft texture and a crisp golden crust. So, take your time, savor the moment, and enjoy the journey of creating something truly extraordinary. Whether you’re baking for a family gathering, a special occasion, or simply because you love the art of baking, a braided brioche will never disappoint

King Arthur Baking – Classic Brioche Recipe
Anchor text: See the traditional method at King Arthur Baking
URL:
https://www.kingarthurbaking.com/recipes/brioche-recipe

Now, as with any craft, there are always questions, and I’m here to help guide you through!


Q&A: Common Questions About Braided Brioche

Q: What should I do if my brioche dough is too sticky?
A: If your dough feels sticky and hard to handle, don’t worry! It’s important to let it rest for a little while as brioche dough needs time to absorb all the flour and butter properly. You can also lightly flour your hands and work surface to help with handling. If it’s still too sticky, add just a touch more flour, but be careful not to overdo it, as too much flour can make your brioche dense.

Q: Can I freeze braided brioche?
A: Yes! Braided brioche freezes beautifully. Once baked and cooled, wrap it tightly in plastic wrap or foil, and store it in an airtight bag or container. It can be frozen for up to 3 months. To reheat, simply thaw it at room temperature and warm it up in the oven for a few minutes for that fresh-baked taste.

Q: How do I know when my brioche is properly proofed?
A: Proper proofing is crucial to achieving that light, airy texture. You’ll know the dough is ready when it has roughly doubled in size and feels soft to the touch. You can perform the “poke test” by gently pressing your finger into the dough; if the indentation remains and doesn’t spring back, it’s ready for baking.

Q: Can I add different flavors to my brioche?
A: Absolutely! Brioche is a versatile dough that can be flavored in many ways. Try adding a bit of citrus zest for a refreshing twist, or fold in some cinnamon, vanilla, or chocolate for a more indulgent treat. The dough can also be enriched with fruits like raisins or chocolate chips for a fun variation.