Perfect Palmiers
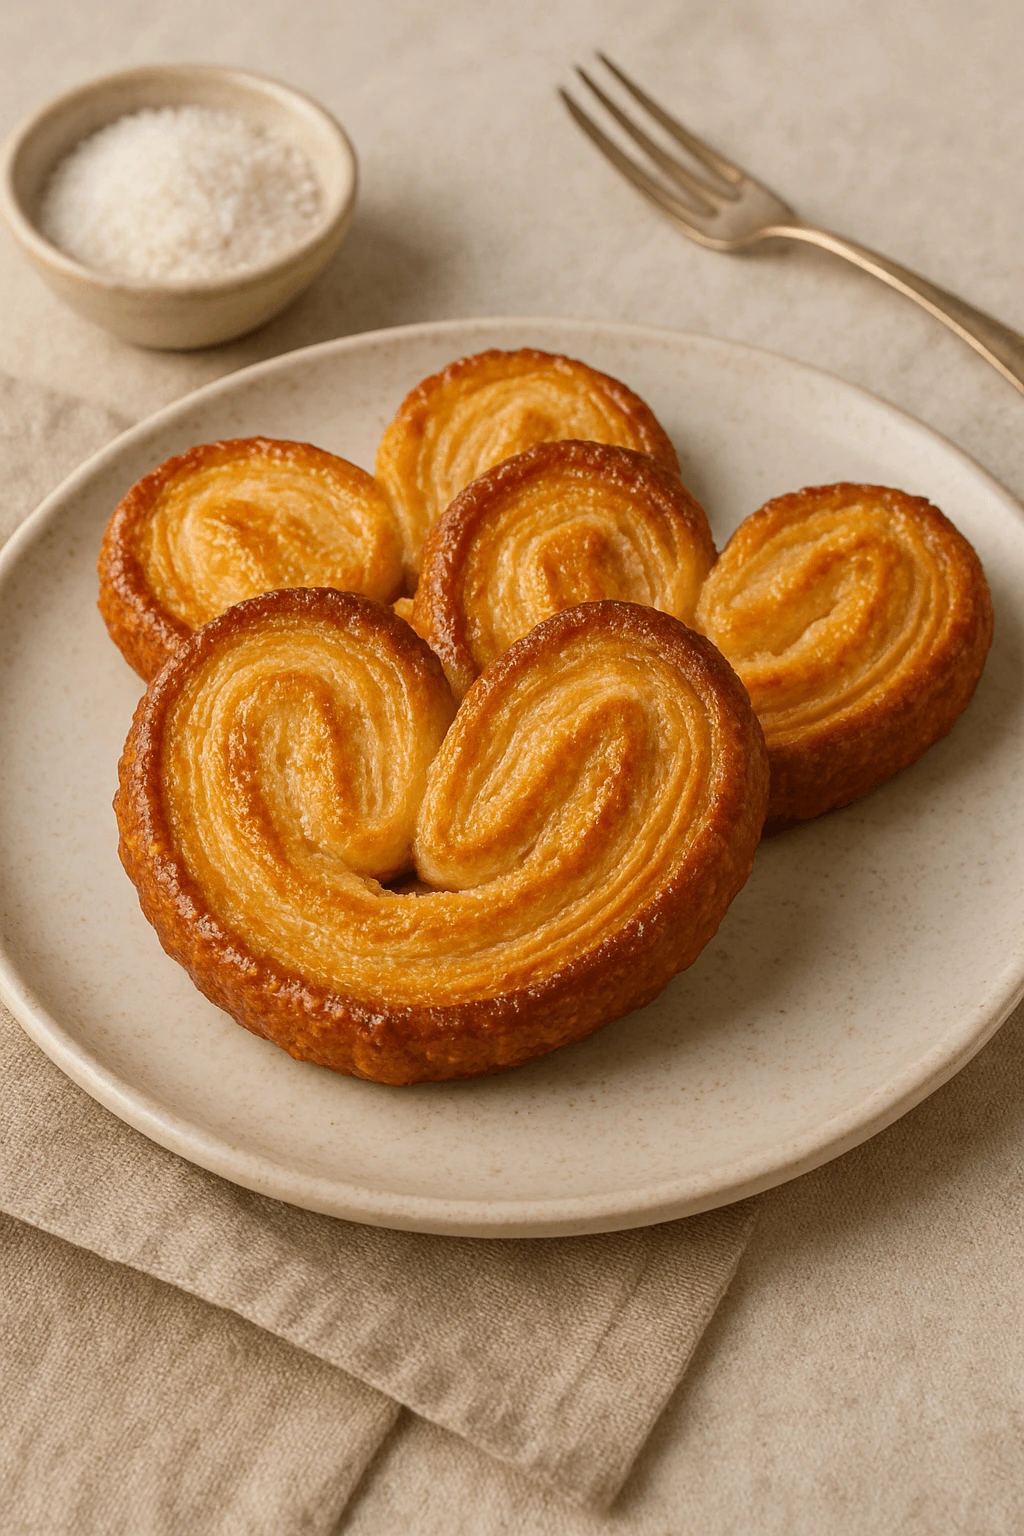
Crisp, caramelized, and irresistibly buttery, the Palmier is a classic emblem of French pâtisserie, instantly recognizable by its iconic heart or butterfly shape. Often called an “elephant ear” in English due to its wide, rounded form, the Palmier is a deceptively simple treat with deep roots in French baking heritage. It transforms just two basic ingredients—puff pastry and sugar—into something extraordinarily refined.
This pastry’s elegance lies in its technique. A sheet of puff pastry is sprinkled generously with sugar, then rolled inward from both sides until the coils meet in the center, creating the signature double-spiral. As it bakes, the sugar caramelizes on the outside, forming a crisp, golden crust while the layers of dough puff up into delicate, flaky folds. The result is a pastry that’s both light and crunchy, with a deeply satisfying caramelized finish.
While often served plain, Palmiers can be enhanced with touches of vanilla sugar, cinnamon, or even a brush of chocolate for a modern twist. Despite its simplicity, achieving the perfect Palmier requires an understanding of balance—not too thick, not too thin, and just the right amount of sugar to ensure a proper caramel glaze without burning.
In France, Palmiers are a staple of boulangeries and afternoon goûters, enjoyed with coffee or tea. They embody everything we love about French pastry: precision, minimalism, and indulgence. Whether bought fresh from the bakery or prepared at home, they’re a celebration of how a humble recipe can become a timeless delicacy when mastered with care.Origine des palmiers (source historique) :
👉 Palmiers, also known as elephant ears, have their roots in French patisserie. Read more on Wikipedia.
For 8 to 10 Palmiers
Preparation time: 2 hours 30 minutes
Chilling time: At least 2 hours
Freezing time: 30 minutes
Baking time: 20 minutes
Storage: Keeps for 3 days in an airtight container
Equipment
- Rolling pin
- Pastry brush
Ingredients
140 g granulated sugar
Inverted Puff Pastry
Beurrage (butter block):
- 200 g unsalted butter
- 100 g all-purpose flour
Détrempe (dough base):
- 150 g all-purpose flour
- 5 g salt
- 87 g water
Egg Wash (Dorure):
- 50 g whole egg
- 40 g egg yolks
- 50 g whole milk
Inverted Puff Pastry (Pâte Feuilletée Inversée)
This advanced version of puff pastry reverses the traditional method: instead of encasing the butter inside the dough, the dough is encased inside the butter. This results in a more tender and beautifully layered pastry — perfect for recipes like palmiers, mille-feuille, or galettes des rois.
Ingredients
Butter Block (Beurre Manié):
- 200 g unsalted butter (cold but pliable)
- 100 g all-purpose flour
Dough Base (Détrempe):
- 150 g all-purpose flour
- 5 g fine salt
- 87 g cold water
Method
- Prepare the butter block (beurre manié):
- Mix the butter and flour together until smooth but firm.
- Shape into a flat square about 2 cm thick.
- Wrap in plastic wrap and refrigerate for 30 minutes.
- Prepare the dough (détrempe):
- In a bowl, mix the flour and salt, then add cold water gradually.
- Knead briefly until a smooth dough forms — do not overwork.
- Shape into a small square, wrap, and chill for 30 minutes.
- Encasing the dough in the butter:
- Roll out the butter block into a large square.
- Place the détrempe in the center and fold the butter around it like an envelope.
- Gently seal the edges to encase the dough fully.
- Lamination – First Turn (Single Fold):
- Roll out the dough into a long rectangle.
- Fold it into thirds like a letter (single turn).
- Chill for 30 minutes.
- Repeat turns:
- Do 3 single folds in total, chilling for 30 minutes between each.
- Roll gently to avoid melting the butter into the dough.
- Rest and use:
- After the final turn, wrap the dough and refrigerate for at least 2 hours before using.
- For best results with palmiers, freeze for 30 minutes before slicing and baking.
Shaping and Baking the Palmiers
Prepare the puff pastry:
Sprinkle the surface of the dough with sugar and give it a fifth single turn (fold into thirds like a letter).
Roll the dough out to a 5 mm thickness into a 25 cm × 80 cm rectangle.
Folding the dough:
Fold each end inward to the 12 cm mark, so that the edges meet but do not overlap — this forms a double fold on each side.
Fold once more along the center line to bring both sides together. Gently press the top with a rolling pin to flatten slightly.
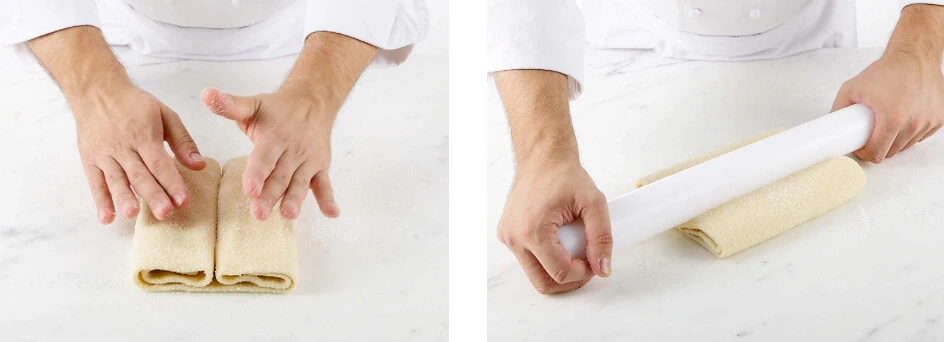
Final fold:
Fold the dough in half again. You should now have a log (pâton) approximately 10 cm wide and 3 cm thick.
Wrap and freeze for 30 minutes to firm it up.
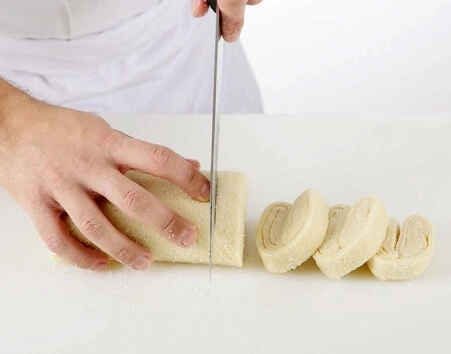
Shaping the palmiers:
Using a sharp knife, slice 1 cm thick pieces. Lay them flat on a lightly greased baking tray, leaving space between each.
Baking:
Brush with egg wash and bake in a preheated oven at 200°C (390°F / Gas mark 6–7) for 20 minutes.
Halfway through baking, flip each palmier so they become evenly caramelized and golden on both sides.
Finishing:
Remove immediately from the tray after baking to prevent sticking.

Chef’s Tips & Tricks
• For the fifth turn, swap flour for sugar — use 25% of the dough’s total weight to ensure optimal caramelization.
• The more sugar you use, the more intensely caramelized your palmiers will be — just take care not to burn the edges.
• Chill the dough well between folds to maintain sharp layers and prevent butter leakage.
• Use a sharp knife to slice the rolled dough cleanly and avoid crushing the delicate lamination.
• Flip the palmiers midway through baking for an even golden finish on both sides.
Conclusion: The Elegant Simplicity of the Palmier
Crisp, caramelized, and irresistibly buttery, the palmier stands as one of the most refined examples of what French pâtisserie does best — elevate the humble into the sublime. With nothing more than pâte feuilletée, sugar, and careful hands, you create a pastry that delights in both its flavor and its form.
Though deceptively simple in appearance, mastering the palmier is a true baker’s rite of passage. It demands precision in lamination, an intuitive understanding of caramelization, and patience with every fold and chill. Yet, the result is an elegant swirl of golden layers, kissed by heat and sugar, melting on the tongue with every bite.
This recipe offers not just a treat to enjoy, but an experience in craftsmanship. Whether you serve them with coffee, at the end of a sophisticated meal, or package them as edible gifts, palmiers have a way of stealing the spotlight through sheer elegance and texture
Vers un article sur les viennoiseries :
👉 If you love French classics, don’t miss our post on perfect raisin buns.
Your Palmier Questions — Answered by the Chef
Q: Can I use store-bought puff pastry instead of homemade inverse puff?
A: Yes, but results will differ. Store-bought puff pastry (especially if not made with pure butter) lacks the depth, flakiness, and layering of homemade inverted puff pastry (feuilletage inversé). If you’re short on time, opt for an all-butter version and chill it well before shaping.
Q: Why is sugar used for the fifth turn instead of flour?
A: Replacing flour with sugar in the final fold ensures even distribution of caramelization. As the pastry bakes, the sugar melts and coats the layers, creating the classic crisp, glossy shell unique to true palmiers.
Q: How do I prevent my palmiers from overcooking or burning?
A:
• Keep an eye on oven temperature: 200°C is ideal, but ovens vary. Use a thermometer if possible.
• Rotate your tray halfway through baking.
• Flip the palmiers as instructed to ensure even color and to prevent the bottom from overbaking in sugar.
• Remove immediately once golden — residual heat can keep cooking them.
Q: Can palmiers be frozen?
A: Yes. Once shaped and sliced, freeze them raw on a tray, then store in an airtight bag for up to one month. Bake straight from frozen — no thawing needed — and extend the baking time by a few minutes.
Q: Why is chilling so important?
A: Chilling between folds, before slicing, and before baking is crucial for structure. It ensures clean lamination, prevents butter from leaking, and helps the dough maintain its shape in the oven.
Q: What’s the ideal thickness for slicing palmiers?
A: Around 1 cm thick. Thicker slices may not crisp through, and thinner ones risk over-caramelizing or collapsing.