
How to make Bichons
There’s something uniquely charming about classic French pastries—the way they balance elegance and comfort, the precision of their folds, and above all, the burst of flavor you get in every bite. Among the lesser-known but utterly delightful members of the pâtisserie family is the bichon: a golden, sugar-dusted puff pastry filled with a luscious lemon cream. If you’ve ever strolled past a French bakery and caught the scent of caramelized pastry and citrus in the air, there’s a good chance a tray of bichons was just pulled from the oven.
These little pastries are crisp on the outside, soft and tangy on the inside, and finished with a shimmering glaze that catches the light like sugar crystals. They’re often overlooked in favor of croissants or chaussons aux pommes, but once you’ve had a freshly made bichon, warm from your own oven, it just might become your new favorite.
Baking bichons at home is surprisingly achievable—even if you’re not a professional pâtissier. The beauty lies in their simplicity: a good puff pastry (homemade or store-bought), a velvety lemon curd, and a few finishing touches are all you need. But like any good French recipe, it’s the technique and attention to detail that elevate this pastry from something good to something exceptional.
In this article, we’ll walk you through everything you need to know to make authentic lemon bichons at home—from preparing a smooth, bright lemon filling to achieving that perfect sugar-encrusted exterior. We’ll also share tips for folding the pastry so the filling stays intact, tricks for getting that bakery-style glaze, and even a few chef’s secrets to help your bichons shine (literally and figuratively!).
Whether you’re baking for a weekend treat, planning a chic dessert for guests, or simply want to bring a bit of French flair into your kitchen, these lemon bichons are a perfect choice. Light, fragrant, and visually irresistible, they’re the kind of pastry that makes people pause after the first bite—and then reach for a second.
Ready to bake? Let’s dive into the ingredients and start creating your own batch of lemony perfection.
Method
Step 1: Prepare the Inverted Puff Pastry (Feuilletage Inversé)
The Art of Flaky Pastry Dough
Inverted puff pastry may sound intimidating, but it’s well worth the effort for its superior flakiness. Unlike classic puff pastry, here the butter envelops the dough—reversing the usual process and yielding a more delicate texture.
Make the Beurre Manié
- In a mixing bowl, combine the cold butter (200 g, cut into cubes) and flour (100 g). Use your fingertips to gently incorporate the flour into the butter until you have a smooth but firm paste.
- Shape the mixture into a square about 2 cm thick, wrap it in plastic wrap, and place it in the fridge to firm up for at least 30 minutes.
Make the Détrempe
- In another bowl, mix the flour (150 g) and salt (5 g).
- Add the cold water (87 g) gradually, mixing just until a dough forms—do not overwork it.
- Shape the détrempe into a smaller square, wrap it well, and chill it for 30 minutes.
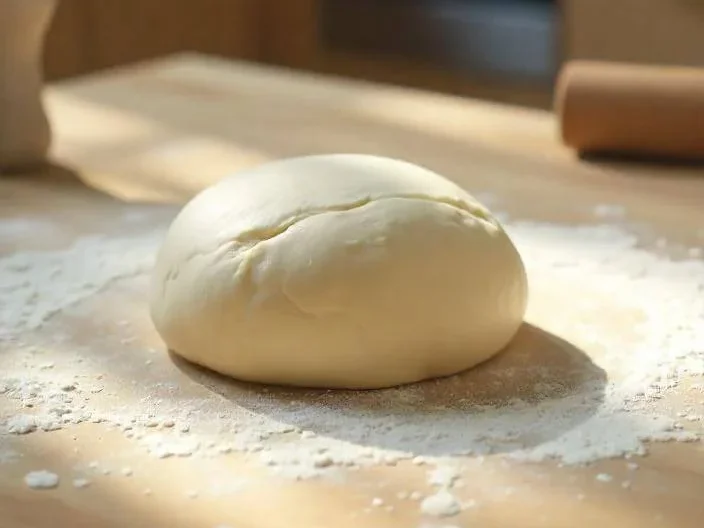
Assemble the Dough
- On a lightly floured surface, roll out the beurre manié into a square large enough to encase the détrempe.
- Place the détrempe in the center and fold the butter over it from all four sides, sealing it like an envelope.
- Gently roll the dough into a long rectangle.
- Perform a double fold (also known as a book fold): fold both short ends toward the center, then fold the dough in half.
- Wrap and chill for 30 minutes.
- Repeat this process two more times, with 30-minute rests in between each fold. After the final fold, chill the dough for at least 2 hours before using.
Tip: The colder your dough, the better the layering. Always chill between folds to avoid butter melting into the flour http://Puff Pastry Basics – King Arthur Bakingy
Step 2: Make the Lemon Pastry Cream (Crème Bichon)
While the pastry dough is chilling, prepare the filling. This rich, lemon-scented cream will become the heart of your bichons.
- In a saucepan, pour the milk (500 ml) and add the lemon zest. Heat over medium-low until just simmering.
- In a bowl, whisk together the egg yolk (20 g), sugar (75 g), and cornstarch (40 g) until smooth and pale.
- Once the milk is warm, slowly pour about a third of it into the egg mixture to temper it, whisking constantly.
- Return everything to the saucepan and cook over medium heat, stirring constantly with a whisk or silicone spatula, until the cream thickens.
- Once thick and glossy, remove from heat, transfer to a shallow dish, cover with plastic wrap (touching the surface), and chill until completely cold—at least 2 hours.

Chef’s Note: The lemon zest should be as fine as possible to infuse the cream evenly. You can strain the cream if you prefer a smoother texture.
Step 3: Roll and Slice the Dough
- Prepare the inverted puff pastry as described above .
- Generously sprinkle granulated sugar over the surface of the chilled pastry.
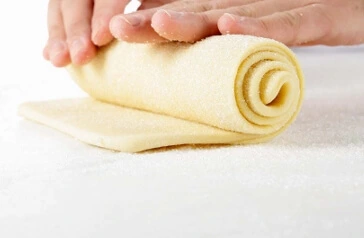
- Roll it out into a rectangle measuring 50 cm x 25 cm, about 5 mm thick.
- Starting from the long edge, roll the dough into a tight log, like a jelly roll.
- Wrap the roll in plastic wrap and refrigerate until firm—this makes slicing much easier.
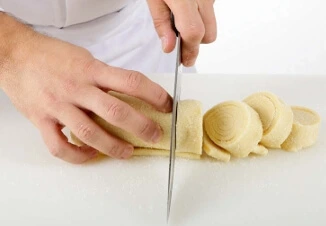
- Once chilled, cut 12 rounds of dough, each about 2 cm thick.
Step 4: Flatten and Shape the Pastries
- Lightly dust your work surface with granulated sugar (instead of flour) to enhance caramelization during baking.
- Place one dough round (or “escargot”) on the sugar and use a rolling pin to flatten it into an oval, about 2 mm thick.
- Repeat with all the slices—you should have 12 thin, oval-shaped bases.
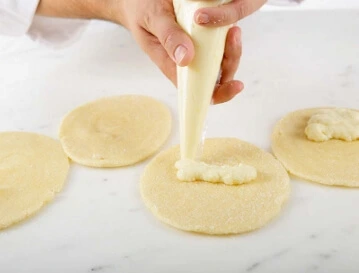
Step 5: Fill and Fold
- Prepare the crème bichon.
- Transfer the cooled cream to a piping bag.
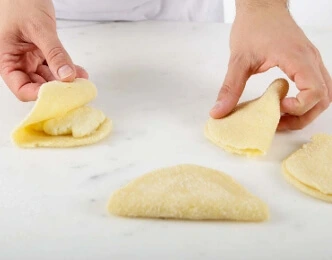
- Pipe a small amount of filling on half of each oval—leave space around the edge.
- Fold the pastry over to form a half-moon shape.
- Press the edges firmly to seal. You can gently crimp with your fingers or a fork for a more defined edge.
- Arrange the filled bichons on a baking tray lined with parchment paper.
Step 6: Bake
- Preheat your oven to 200°C (392°F / Gas Mark 6-7).
- Bake for 20 minutes, or until puffed, golden, and slightly caramelized at the edges.
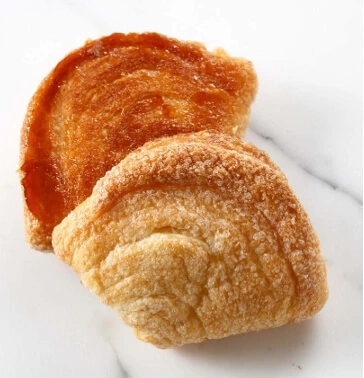
The sugar on the outside creates a beautifully glossy and crisp crust—no extra glaze needed!
Conclusion
There’s something deeply satisfying about baking your own lemon bichons from scratch. From the buttery layers of puff pastry to the velvety citrus cream tucked inside, each step brings you closer to a pastry that feels—and tastes—like it came straight from a Parisian window display. Whether you go for the classic fold-over method or the charming spiral technique, these bichons are a celebration of texture, flavor, and French baking tradition.
Serve them warm with a cup of tea, or pack them up for a weekend brunch—they’re guaranteed to bring a little sunshine to your table.
And remember: once you’ve mastered the basics, you can start playing with variations. Think orange zest, passion fruit cream, or even a touch of ginger for something a little unexpected. The world of bichons is yours to explore MORE RECIPS ;
https://briochechic.com/crispy-caramelized-bliss6-secret-to-perfect-palmiers-revealed/#more-390
FAQ – Your Bichon Questions, Answered
Can I use store-bought puff pastry?
Absolutely! While homemade inverted puff pastry gives unbeatable flakiness, a high-quality all-butter store-bought version will still yield delicious results.
How do I keep the filling from leaking out?
Make sure your cream is fully chilled and thick before piping. When folding, press the edges firmly and avoid overfilling. Chilling the shaped bichons before baking also helps.
Why use sugar instead of flour when rolling?
Rolling the dough in sugar not only prevents sticking—it also caramelizes during baking, giving that signature glossy, crisp exterior.
Can I make them in advance?
Bichons are best enjoyed the same day, but you can prepare the dough and cream ahead of time. Assemble and bake the day you plan to serve them for the best texture.
How should I store leftovers?
Store in an airtight container at room temperature for up to 24 hours, or in the fridge for 48 hours max. Reheat gently in the oven to restore crispness.